
Revolutionize Your Craft Room: The Ultimate DIY Cardboard Spool Organizer
Every crafter knows the struggle: a beautiful collection of ribbons, threads, and twines can quickly transform into a tangled mess, turning creative inspiration into frustration. You’ve likely searched high and low for the perfect storage solution, perhaps investing in various bins, boxes, and specialty organizers, only to find they never quite hit the mark. They might be too small, too rigid, too expensive, or simply not designed for easy access, leading to more clutter than clarity.
If your craft room resembles a colorful disaster zone, with spools rolling under tables and ribbons disappearing into mysterious voids, you’re not alone. The constant battle to keep things tidy while also ensuring your supplies are readily available for your next project can be a daunting task. Many store-bought solutions, while visually appealing, often fail to address the core need for both efficient organization and effortless accessibility. Once an item is put away, the effort required to retrieve and re-store it can be enough to deter its return to its designated spot, leading to an endless cycle of temporary tidiness followed by inevitable disarray.
Discovering the Ingenious (and Free!) Solution
Imagine being able to craft the perfect sewing room organizer for absolutely free, using materials you likely already have on hand. My friend recently stumbled upon an idea that sounded almost too good to be true: an ingenious DIY solution using leftover cardboard, a trusty glue gun, a bit of wrapping paper, and some inexpensive plastic straws. It might sound a little unconventional, perhaps even a tad “hokey,” but given its zero-cost and minimal time commitment, I decided to give it a try. What did I have to lose?
The results, I must confess, were nothing short of brilliant. This simple, upcycled creation has not only brought order to my chaotic collection of spools but has also made them incredibly easy to access and use. It’s the kind of clever hack that makes you wonder why craft stores haven’t caught on – perhaps they’re secretly hoping we’ll all lose track of our threads! Regardless, this easy DIY project has become a welcome, indispensable addition to my craft space, and I am confident it will transform yours too.
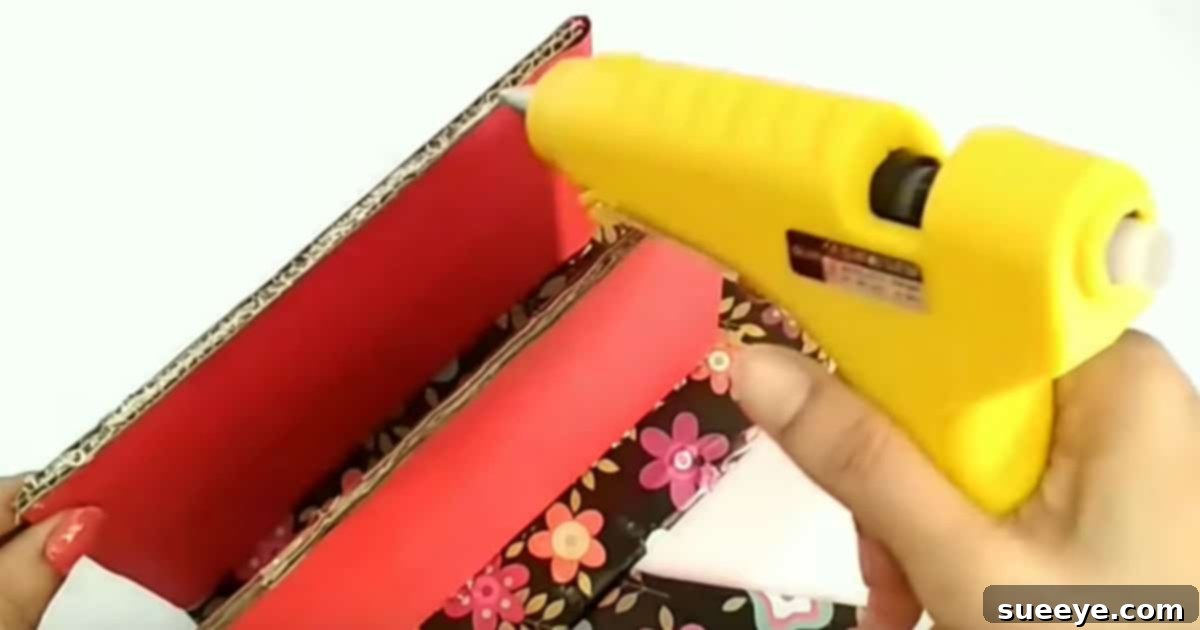
Crafting this organizer requires just a few basic materials: a glue gun, sturdy cardboard, and your choice of decorative wrapping paper. These everyday items are the foundation for creating a highly functional and personalized storage system.
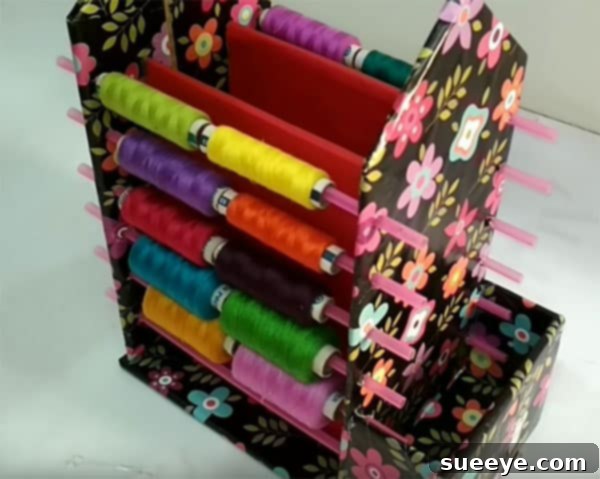
The tutorial reveals how to ingeniously incorporate plastic straws, creating individual compartments for spools of thread, ribbon, or twine. This innovative design allows you to both meticulously organize your supplies and effortlessly use them simultaneously, eliminating tangles and lost ends.
Cheap and Easy DIY Craft Room Organizer Tutorial: A Step-by-Step Guide
Materials You’ll Need: Building Your Perfect Organizer
One of the most appealing aspects of this project is its reliance on readily available and often discarded materials. Gather these simple items, and you’ll be well on your way to a beautifully organized craft space:
- Cardboard: Repurpose old shipping boxes, cereal boxes, or any sturdy cardboard you have around. The thicker the cardboard, the more durable your organizer will be.
- Hot Glue Gun and Glue Sticks: Essential for quick and strong assembly. Wood glue or strong craft glue can be alternatives, but hot glue offers instant adhesion.
- Wrapping Paper or Decorative Coverings: This is where you infuse your personality! Use leftover wrapping paper, fabric scraps, wallpaper samples, contact paper, or even paint to decorate your organizer.
- Plastic Straws: Standard drinking straws work perfectly. If you prefer a more eco-friendly option, consider sturdy paper straws, though plastic often offers better durability for repeated use.
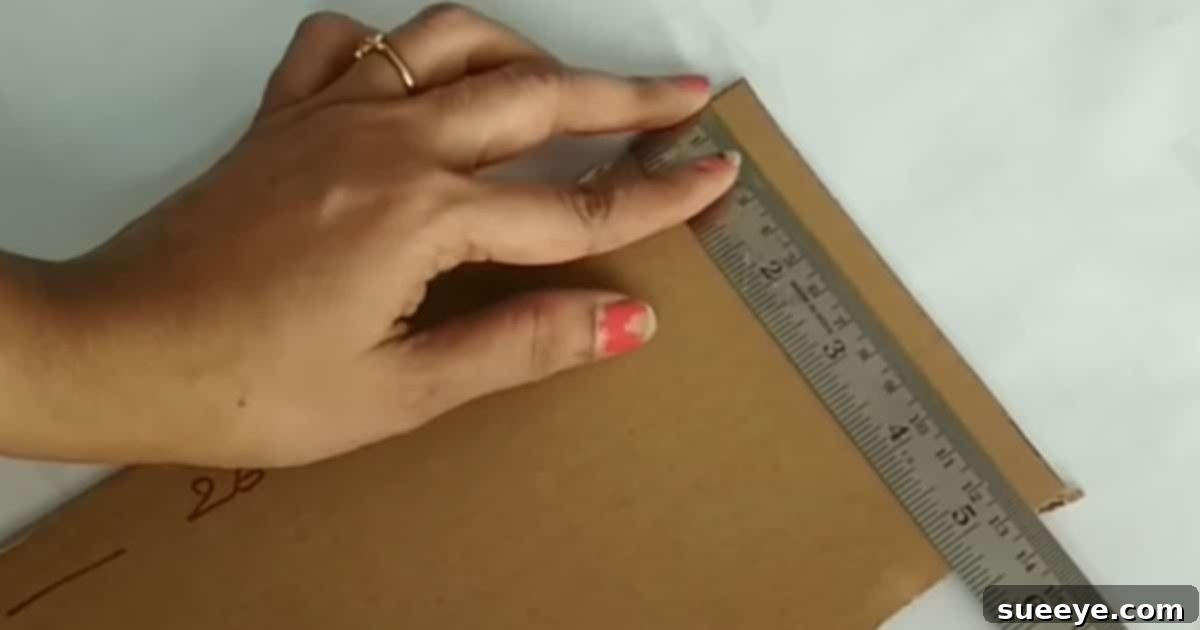
- Scissors or Utility Knife: For cutting cardboard and paper. A ruler and pencil will also be invaluable for accurate measurements.
Crafting Your Custom Spool Haven: Detailed Steps
Let’s dive into the creation process. Precision in measuring will lead to the most effective and aesthetically pleasing organizer.
Step 1: Planning and Measuring Your Organizer
- Assess Your Space and Spools: Before cutting, decide where your organizer will live (e.g., a drawer, shelf, countertop) and measure the available dimensions. Also, measure the average diameter and height of your spools of thread, ribbon, or twine. This will dictate the size of your compartments.
- Design the Layout: Sketch a simple plan. You’ll need a base, four sides, and several internal dividers. The height of your sides should be slightly taller than your tallest spool. The length and width will depend on how many spools you wish to store.
- Determine Straw Placement: Based on your spool diameter, decide how many straw “rods” you want to have across each section. Leave enough space between straws for spools to easily slide on and off without obstruction.
Step 2: Cutting the Cardboard Components
- Cut the Base: Using your measurements, cut one rectangular piece of cardboard for the bottom of your organizer.
- Cut the Side Walls: Cut four pieces for the perimeter walls. Two pieces will be the full length of the base, and two shorter pieces will fit between the long ones, forming a neat rectangle. Remember, the height of these walls should accommodate your spools.
- Prepare the Dividers (Optional but Recommended): If you want to create multiple sections (e.g., for different colors or types of spools), cut cardboard dividers that will run perpendicular or parallel to your straw rods. These should be notched if they intersect.
- Mark Straw Insertion Points: On the opposing long side walls (and any internal dividers that will hold straws), carefully mark points where the plastic straws will pass through. These marks should be aligned across the walls and evenly spaced. Use a pencil to poke a small hole, then gently widen it with the straw itself or a utility knife so the straw fits snugly.
Step 3: Assembling the Structure
- Attach the Side Walls: Using your hot glue gun, securely attach the side walls to the base. Apply a generous bead of glue along the bottom edge of each wall and press firmly onto the base. Then, glue the corners where the walls meet for added stability.
- Insert Internal Dividers (If Applicable): If you planned for internal dividers, glue them into place now. Ensure they are straight and sturdy.
Step 4: Integrating the Spool Rods (Plastic Straws)
- Cut and Insert Straws: Cut your plastic straws to the exact length needed to span across the interior of your organizer (from one marked hole to the opposing marked hole).
- Secure the Straws: Carefully thread each straw through the pre-cut holes in the opposing side walls (and any internal dividers). Apply a small dot of hot glue around the entry and exit points of each straw on the exterior of the cardboard walls to hold them firmly in place. This prevents them from shifting or pulling out when spools are added or removed.
Step 5: Decorating Your Organizer
- Cover with Wrapping Paper: Once the glue has dried and the structure is solid, it’s time to decorate! Measure and cut your chosen wrapping paper or fabric to fit each exterior surface (and interior surfaces if desired). Apply glue evenly to the cardboard and carefully smooth out the paper, ensuring no air bubbles. Trim any excess.
- Add Finishing Touches: Consider adding labels to different sections for specific types of thread or ribbon. You can also reinforce edges with tape or decorative trim for extra durability and a polished look.
The Unbeatable Advantages of Your DIY Spool Organizer
Beyond simply tidying your space, this handmade organizer offers a wealth of benefits that store-bought solutions often miss:
- Unrivaled Cost-Effectiveness: By repurposing cardboard and leftover wrapping paper, you are essentially creating a premium storage solution for free. This is a huge win for any budget-conscious crafter.
- Perfect Customization: Unlike mass-produced organizers, you have complete control over the dimensions, number of compartments, and aesthetic. Tailor it exactly to your spool sizes, the available space in your craft room, and your personal style.
- Effortless Accessibility: The straw rod system is a game-changer. Spools slide on and off with ease, allowing you to pull thread or ribbon directly from the organizer without removing the spool entirely. No more tangles, no more digging!
- Eco-Friendly Crafting: This project is a fantastic example of upcycling. Giving new life to cardboard that would otherwise be discarded contributes positively to environmental sustainability.
- Boosted Creativity and Productivity: A tidy and accessible craft space means less time searching and more time creating. Knowing exactly where everything is and being able to grab it instantly fuels your creative flow.
- Versatile Application: While perfect for thread and ribbon, this design can be adapted for other small cylindrical items like washi tape, thin ropes, or even small tubes of craft paint, making it a truly multi-functional organizational tool.
Tips for Success and Creative Variations
To maximize the longevity and functionality of your DIY organizer, consider these additional tips and ideas:
- Cardboard Quality Matters: For heavy spools or frequent use, opt for corrugated cardboard over thinner varieties like cereal boxes. This provides better structural integrity.
- Reinforce Stress Points: If you anticipate heavy use, add extra layers of cardboard or glue to the corners and where the straws connect to the walls.
- Alternative Decorations: Instead of wrapping paper, consider painting the cardboard with acrylic paints, decoupaging fabric scraps, or using contact paper for a more durable, wipeable surface.
- Modular Design: Create several smaller organizers that can be stacked or arranged side-by-side. This offers flexibility as your craft collection grows.
- Add Labels: For ultimate organization, label each section or even individual straw rods. Use handwritten labels, a label maker, or decorative tags.
- Incorporate Drawers or Compartments: If you have extra space, consider adding small cardboard drawers or open compartments at the bottom or sides for scissors, thimbles, or other small notions.
- Consider Clear Straws: Using clear plastic straws can make it even easier to visually identify the items on each rod.
Maintaining Your Organized Craft Haven
Creating this ingenious organizer is just the first step. To ensure your craft room remains a source of joy and inspiration, cultivate a few simple habits:
- “One In, One Out” Rule: When you purchase new spools, take a moment to integrate them into your organizer, or consider if an older spool can be discarded or consolidated.
- Daily Tidy-Up: At the end of each crafting session, take a few minutes to put away any items that have been used. This prevents clutter from accumulating.
- Regular Review: Every few months, quickly assess your organizer. Do you need more space? Are there spools you no longer use? Adjust and optimize as needed.
Your Journey to a Clutter-Free Craft Space Begins Now
This DIY cardboard spool organizer is more than just a storage solution; it’s a testament to the power of creativity, resourcefulness, and smart design. By transforming simple, everyday materials into a highly functional and personalized tool, you not only declutter your craft room but also empower your creative spirit. Say goodbye to tangled messes and wasted time searching for supplies. Embrace the simplicity, sustainability, and sheer genius of this project.
So, gather your cardboard, fire up your glue gun, and prepare to experience the profound satisfaction of crafting the perfect organization system for your beloved ribbons, threads, and twines. We are confident that once you try this ingenious hack, you’ll wonder how you ever managed without it. Happy crafting!