
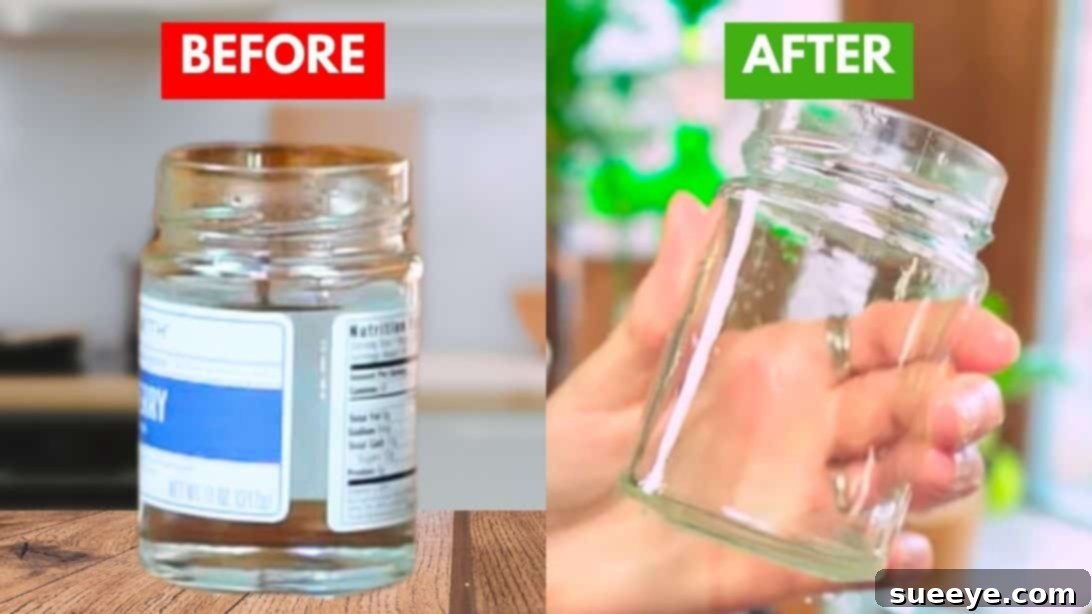
Are you an avid collector of glass jars, constantly looking for ways to give them a second life? Many of us strive to reduce waste and embrace sustainable practices by reusing items, and glass jars are perfect candidates for upcycling. However, the one persistent hurdle often lies in removing those stubborn labels and their sticky residue. It can be incredibly frustrating when a label doesn’t peel off cleanly, leaving behind a gummy mess that seems impossible to scrub away. But what if we told you there’s an incredibly simple, effective, and eco-friendly method to get your glass jars sparkling clean and ready for their next purpose? This comprehensive guide will walk you through the easiest way to remove labels from jars, ensuring a smooth process and perfectly clean glass every time. Say goodbye to sticky fingers and hello to beautifully prepped jars for all your DIY and storage needs.
RELATED: Transform Your Clean Glass Jars Into Charming Carnival Lanterns
The trick to effortlessly removing labels and avoiding any lingering stickiness isn’t a secret formula, but rather a clever combination of everyday household items: boiling water, baking soda, and dish soap. These ingredients work synergistically to break down the adhesive and lift away paper, leaving you with pristine glass. Once your jars are free from their original branding, the possibilities for their reuse are truly endless. From practical storage solutions to creative decorative pieces, these versatile vessels can be transformed in countless ways. Imagine turning a humble pickle jar into a chic desk organizer, a peanut butter jar into a unique candle holder, or a jam jar into a charming piggy bank. The next time you reach the bottom of a glass jar, think twice before tossing it. With our proven method, you’ll be able to unlock its full potential for sustainable living and creative expression.
Why Reusing Glass Jars Matters for Sustainable Living
In today’s world, sustainability is more important than ever. Every small action we take to reduce waste contributes to a healthier planet. Reusing glass jars is a fantastic example of a simple habit with a significant positive impact. When you choose to upcycle a glass jar instead of throwing it away, you’re not just decluttering; you’re actively participating in the circular economy. This means fewer resources are consumed to produce new containers, less energy is expended in manufacturing, and less waste ends up in landfills. Glass, while recyclable, still requires energy to process. By giving a jar a new life in your home, you extend its utility, saving energy and reducing your carbon footprint. It’s a tangible way to practice zero waste living, promoting mindful consumption and creativity.
Beyond the environmental benefits, reusing glass jars also offers economic advantages. Instead of buying new storage containers, decorative items, or craft supplies, you can repurpose what you already have. This saves money and encourages resourcefulness. Furthermore, there’s immense satisfaction in transforming an item destined for the trash into something beautiful and functional. It sparks creativity, allows for personalization, and adds a unique, handcrafted touch to your home decor or organizational system. From meal prepping to crafting, the journey of a glass jar from product packaging to a cherished household item is a testament to sustainable living.
Essential Supplies for Effortless Label Removal from Glass Jars
Gathering your materials before starting will make the process incredibly smooth and efficient. You’ll likely find that you already have these common household items on hand, making this method both accessible and budget-friendly. Each component plays a crucial role in breaking down adhesive and ensuring a clean finish. Here’s what you’ll need:
- Boiling Water: The heat from the water helps to soften and loosen the adhesive, making the initial peel much easier. It’s the first step in tackling even the toughest labels.
- Baking Soda: This versatile kitchen staple acts as a mild abrasive and a natural degreaser. When combined with dish soap, it creates a powerful paste that can effectively scrub away any remaining sticky residue.
- Dish Soap: A good quality dish soap is essential for breaking down grease and oil-based adhesives. It works with the baking soda to dissolve the sticky film, allowing for a thorough clean.
- Small Container (for paste): Any small bowl or container will do for mixing your baking soda and dish soap paste.
- Spoon or Stirring Tool: To ensure your paste is well-mixed and of the right consistency.
- Scrub Brush or Scouring Pad (optional, for stubborn residue): While often not needed, a brush can be a lifesaver for particularly persistent adhesive spots.
- Towel: For drying your freshly cleaned jars.
Step-by-Step Guide: How to Remove Labels from Glass Jars The Easy Way
Step 1: Prepare Jars with Boiling Water
Begin by removing any lids or caps from your glass jars. This ensures that the boiling water can fully contact the label and the adhesive beneath it. Carefully pour boiling water into each jar, filling it completely. The intense heat of the water is critical here; it penetrates through the glass and begins to warm the adhesive on the exterior label. This thermal action causes the glue to soften and expand, making it significantly easier to separate from the glass surface. Allow the jars to sit with the boiling water inside for a good 10 to 15 minutes. This soaking period is crucial for giving the heat enough time to work its magic on the adhesive. For very large or unusually stubborn labels, you might extend this soaking time slightly, perhaps up to 20 minutes. Ensure the jars are placed on a heat-safe surface during this step.
Step 2: Initial Label Removal and Assessment
After the soaking period, carefully drain the boiling water from the jars. Use caution as the jars will still be hot. Once the water is out, immediately try to peel off the label. You’ll likely find that a significant portion, if not all, of the label comes off with surprising ease, especially if the adhesive was primarily paper-based. Start from a corner and gently pull. For many standard labels, the hot water treatment alone is enough to loosen them completely. However, don’t be discouraged if some paper remnants or a sticky film remain. This is perfectly normal and where the next step comes into play. The goal of this stage is to remove as much of the visible label as possible, setting the stage for a thorough cleaning of any lingering residue.
Step 3: Apply the Baking Soda and Dish Soap Paste
Now, it’s time to tackle any stubborn adhesive. In a small container, combine a few tablespoons of baking soda with a squirt or two of dish soap. The exact ratio isn’t critical, but you’re aiming for a consistency similar to a thick paste – not too runny, not too crumbly. Mix everything thoroughly with a spoon until you achieve a homogeneous paste. This potent mixture is your secret weapon against sticky residue. The baking soda provides a gentle abrasive action that helps to scrub away the adhesive without scratching the glass, while the dish soap acts as a degreaser, breaking down the oily components of the glue. Once your paste is ready, spread a thin, even layer directly over any remaining adhesive or sticky spots on the jar. There’s no need for a thick application; a thin, consistent coating is sufficient. Let the paste sit and dry completely on the jars. This drying time, typically a few hours or even overnight, allows the ingredients to penetrate and work on dissolving the glue more effectively.
Step 4: Rinse and Scrub Away Residue
Once the baking soda and dish soap paste has completely dried on the jars, it’s time for the final cleaning stage. Take the jars to the sink and rinse them thoroughly under warm running water. As the water washes away the dried paste, you should notice that any remaining adhesive or sticky film comes right off with it. The paste, now hardened and then softened by water, lifts the stubborn glue from the glass surface. If you encounter any particularly persistent residue that doesn’t rinse away easily, don’t hesitate to use a scrub brush, a non-scratch scouring pad, or even an old toothbrush. A little gentle scrubbing with the brush will usually dislodge even the most stubborn bits. Continue rinsing until the glass feels perfectly smooth and clean, with no trace of stickiness or paste residue.
Step 5: Dry and Prepare for Reuse
With all labels and residue successfully removed, your glass jars are now sparkling clean and ready for their next adventure! Wipe them thoroughly dry with a clean towel to prevent water spots and ensure they are completely free of moisture before storage or reuse. You can also air dry them on a rack. Your jars are now transformed from discarded packaging into versatile, clean canvases ready for endless possibilities. You’ve successfully completed the process of giving them a new lease on life, demonstrating a commitment to reducing waste and embracing a more sustainable lifestyle. This simple yet effective method ensures your upcycling projects start with a perfectly clean foundation every time.
Creative Ways to Reuse Your Clean Glass Jars
Now that your glass jars are flawlessly clean and free of labels, the fun truly begins! These versatile containers offer an incredible array of possibilities for organization, decoration, and creative projects. Here are just some ideas to inspire your next upcycling adventure:
- Kitchen Storage: Perfect for bulk spices, dried goods like pasta, rice, lentils, or even homemade jams, sauces, and pickles. They keep food fresh and make your pantry look organized and aesthetic.
- Pantry Organization: Beyond food, use them for storing baking supplies like sprinkles, chocolate chips, or even homemade granola.
- Bathroom Organizers: Keep cotton balls, Q-tips, bath salts, hair ties, or makeup brushes neatly arranged on your vanity.
- Desk Organizers: Tame stationery clutter by using jars for pens, pencils, markers, paper clips, or craft supplies.
- Flower Vases: Simple and elegant, clean jars make charming impromptu vases for fresh flowers or dried botanicals.
- Candle Holders: Create beautiful ambient lighting by placing tealights or small pillar candles inside. For a DIY touch, you can even make your own candles directly in the jars.
- Piggy Banks: A classic use! Decorate a jar and cut a slot in the lid for a fun and visible way to save spare change.
- Gift Packaging: Fill jars with homemade cookies, candies, bath salts, or a DIY craft mix, then add a ribbon for a thoughtful, personal gift.
- Terrariums or Mini Gardens: Create a tiny ecosystem with small plants, moss, and pebbles for a touch of green indoors.
- Votive Lanterns: As mentioned in our related article, they can be transformed into beautiful lanterns for parties or everyday decor.
- Cocktail Glasses or Water Tumblers: For a rustic or casual vibe, larger jars can serve as unique drinking glasses.
- Meal Prep Containers: Ideal for overnight oats, salads in a jar, or individual portions of snacks.
- Craft Supply Storage: Organize buttons, beads, glitter, paintbrushes, or yarn scraps.
- Spice Jar Replacements: If you buy spices in bulk, small jars are perfect for creating your own uniform spice rack.
- DIY Beauty Product Containers: Store homemade lotions, scrubs, or body butters.
The key is to let your imagination run wild. A clean glass jar is a blank canvas, ready to be transformed into anything you can envision, adding both functionality and charm to your home while championing environmental responsibility.
Tips for Success and Tackling Tricky Labels
While the boiling water, baking soda, and dish soap method is highly effective, some labels can be particularly stubborn. Here are a few extra tips and considerations to ensure your label removal process is always a success:
- Adhesive Types Vary: Not all adhesives are created equal. Some labels use water-soluble glue, which will come off easily with just hot water. Others use stronger, synthetic adhesives that require the baking soda paste. Don’t be discouraged if the first step doesn’t remove everything; that’s what the paste is for!
- Pre-Soak Option: For extremely tough labels, especially those with plastic coatings, you might consider pre-soaking the entire jar in a tub of hot soapy water for an hour or two before attempting the boiling water method. This can help loosen the label slightly from the outside.
- Scrubbing Tools: While a regular scrub brush works well, for very fine or delicate glass, consider a plastic scraper or an old credit card to gently lift off residue without risking scratches. Steel wool should be avoided on glass unless you are absolutely sure it’s fine-grade and won’t scratch.
- Safety First: Always handle boiling water with extreme caution. Use oven mitts or tongs when handling hot jars. Ensure children are not present during this part of the process.
- Ventilation: While dish soap and baking soda are safe, if you’re ever using stronger solvents (though not recommended for this method unless absolutely necessary and with proper research), ensure good ventilation.
- Dealing with Paper Remains: If the label tears and leaves small pieces of paper, don’t worry. The baking soda paste is excellent at softening and lifting these fragments along with the glue.
- Preventing Water Spots: To ensure your jars are crystal clear after drying, you can add a splash of white vinegar to your rinse water or use a microfiber cloth for drying.
- Embrace Imperfection: Occasionally, a very tiny shadow of where the label once was might remain, especially on older or heavily sun-exposed jars. Often, this is barely noticeable and adds character to your upcycled item.
The Easiest Way to Remove Labels from Jars for Sustainable Living
In conclusion, removing labels from glass jars doesn’t have to be a frustrating chore. By following this simple yet highly effective method involving boiling water, baking soda, and dish soap, you can effortlessly transform used jars into pristine, reusable containers. This process not only saves you time and effort but also plays a vital role in promoting sustainability and reducing waste in your home. Each perfectly cleaned jar represents a small victory for the environment and an opportunity for creative expression.
Embrace the satisfaction of upcycling and unlock the full potential of every glass jar that comes into your life. Whether you’re organizing your pantry, creating charming home decor, or preparing thoughtful gifts, starting with a clean, label-free jar makes all the difference. So, next time you finish that pickle, jam, or sauce, remember this guide. You’re now equipped with the easiest and most eco-friendly way to remove labels, paving the way for endless possibilities and a more sustainable lifestyle.