
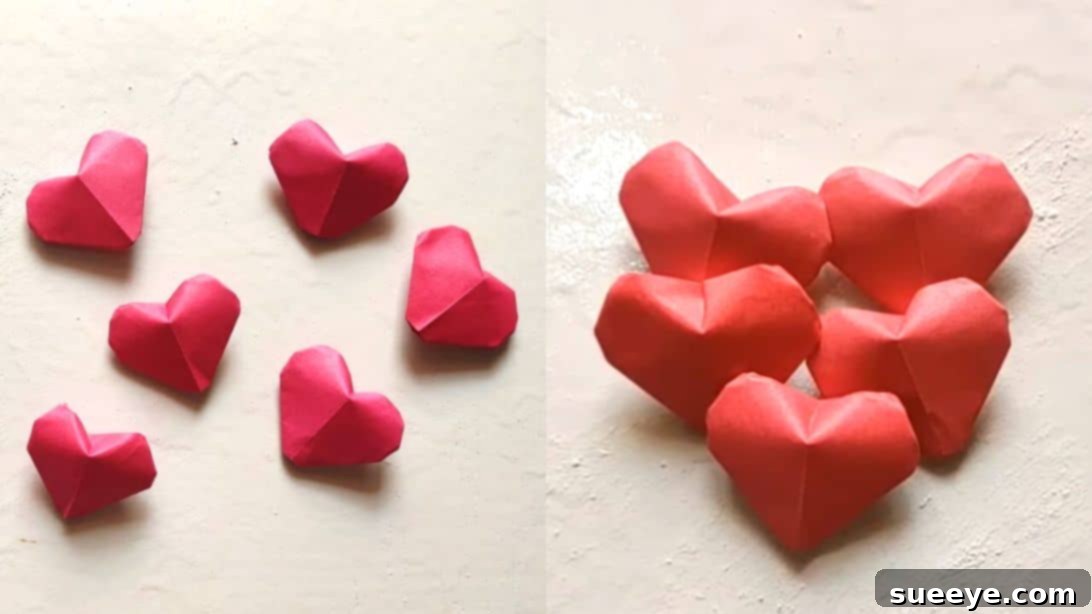
Mastering Easy 3D Heart Origami: Your Ultimate Valentine’s Day Craft Guide
As Valentine’s Day approaches, the desire to infuse our homes with warmth and affection grows stronger. What better way to celebrate love than with heartfelt, handmade decorations? This year, I found myself gazing at my collection of clear vases, envisioning them transformed into charming displays. My initial thought was to paint them in vibrant reds and adorn them with intricate designs, perhaps complementing them with elegant faux roses for a classic look. However, a discovery on YouTube soon captivated my attention and steered my creative project in an exciting new direction.
I stumbled upon an incredibly accessible tutorial by fingers360 for making easy 3D heart origami. The simplicity and elegance of these paper hearts were instantly appealing, promising a unique way to fill my vases. Imagine the visual delight of an assortment of red, white, and pink hearts overflowing from clear glass – a truly enchanting sight! Not only would these dimensional hearts add a whimsical touch, but they would also allow me to incorporate the flowers I originally intended, creating a multi-textured display of affection. If you’re eager to craft your own batch of these adorable 3D origami hearts, join me as we delve into this delightful project.
This comprehensive guide will walk you through each step of creating beautiful 3D paper hearts, perfect for Valentine’s Day decorations, thoughtful gifts, or simply a fun crafting session. Whether you’re a seasoned origami enthusiast or a complete beginner, you’ll find these instructions clear, concise, and incredibly rewarding. Let’s gather our supplies and unfold the magic of origami!
Essential Materials for Your 3D Origami Hearts
One of the most appealing aspects of origami is its minimalist material requirement. For this charming project, you’ll only need a couple of basic items that you likely already have on hand. The simplicity ensures that anyone can dive into this craft without extensive preparation or cost.
- Colored Paper: The heart of your project! Choose colors that evoke warmth and love, such as various shades of red, soft pinks, crisp whites, or even patterns for a more unique look. Standard origami paper (often 6×6 inches or 15×15 cm) works wonderfully due to its ideal weight and ability to hold creases sharply. If you don’t have origami paper, any thin, flexible paper like construction paper, printer paper, or scrapbook paper can also be used, though very thick cardstock might be challenging for precise folds. Experiment with different textures and finishes to see what you prefer!
- Scissors: A good pair of sharp scissors is crucial for achieving clean, precise cuts. While some origami projects rely solely on folding, this particular design starts with a specific paper size, making accurate initial cuts essential for symmetrical and well-proportioned hearts. If you have a craft knife and a cutting mat, these can provide even cleaner edges, especially for bulk cutting.
That’s it! With just these two items, you’re ready to embark on your 3D heart origami journey. The beauty of this craft lies in its accessibility and the stunning results you can achieve with minimal supplies.
Step-by-Step Guide to Crafting Your Easy 3D Heart Origami
Follow these detailed instructions to transform a simple square of paper into a charming, three-dimensional heart. Precision in each fold will lead to the most beautiful and well-formed results, but don’t be afraid to practice and enjoy the process!
Step 1: Preparing Your Paper Square
Begin by taking your chosen colored paper. For this specific design, you’ll need to cut it into a perfect square measuring 2.8 by 2.8 inches (approximately 7 x 7 cm). The exact dimensions are critical for the heart’s final proportions and how easily it inflates. To ensure accuracy, use a ruler and a pencil to mark your measurements before cutting. A sharp pair of scissors or a craft knife will help you achieve clean, straight edges, which are fundamental for symmetrical origami. If you’re making multiple hearts, consider pre-cutting several squares to streamline your crafting process.
Step 2: The Initial Horizontal Fold
Once you have your perfect square, lay it flat on a clean, hard surface with the colored side facing up (or the side you want to be visible on the outside of the heart). Carefully fold the square in half horizontally, bringing the top edge down to meet the bottom edge. Align the corners and edges meticulously before pressing firmly along the fold line with your finger. This creates a sharp, central crease, which will serve as a foundational guide for subsequent steps. The precision here sets the stage for the entire heart’s symmetry.
Step 3: Creating the Bottom Flap and Crosswise Fold
Gently unfold the paper from the previous step. You should now have a horizontal crease across the middle. Next, take the bottom edge of the paper and fold it upwards by approximately 1/8 inch (about 3-4 mm). This small fold provides a crucial structural base for the heart and contributes to its unique 3D shape. Press this crease firmly. After making this small bottom fold, take the entire paper and fold it in half crosswise, ensuring that the previously folded 1/8-inch strip is now at the bottom of your folded paper. Align all edges perfectly and press firmly to create another strong crease down the middle of the paper.
Step 4: Forming the Upper Triangles
With the paper folded in half crosswise (and the small 1/8-inch strip at the bottom), locate the top right corner. Carefully take this corner and fold it downwards towards the bottom center line, creating a precise triangle. The point of this fold should align with the bottom edge of the paper and the central vertical crease. Ensure the edges meet cleanly. Repeat this exact action on the top left corner, folding it down to mirror the right side. You should now have two symmetrical triangles forming the upper portion of your paper, with their tips meeting at the bottom center.
Step 5: Refining the Inner Triangle Flaps
Now, direct your attention to the inner triangle flaps you just created in Step 4. Take the right inner triangle flap and fold it in half towards the center. This will create a smaller, more acute triangle pointing inwards. The goal is to refine the shape that will eventually form the rounded top lobes of the heart. Press the crease firmly. Duplicate this action on the left inner triangle flap, ensuring both sides are perfectly symmetrical. These small folds are crucial for giving the heart its characteristic curved appearance.
Step 6: Opening and Shaping the Diamond
After creating the smaller inner triangles, gently open each of these smaller triangles. As you open them, you’ll see a small pocket. Carefully take the tip of each triangle and fold it inwards towards the center, essentially flattening the opened pocket. This action will transform the shape into a more defined diamond. Ensure that the new folds are crisp and that the resulting diamond shape is symmetrical on both sides. This step is a critical part of building the internal structure that allows the heart to become three-dimensional.
Step 7: Locking the Bottom Corners
Turn your attention to the bottom portion of your paper, specifically the corners created by the diamond shape. You’ll notice small flaps at these corners. Carefully take the corner of the bottom fold on the right side and gently insert it into the folded tip of the diamond shape you just created. This action effectively “locks” a part of the structure into place, adding stability and starting to define the heart’s bottom point. Repeat this exact same procedure on the left side, ensuring both bottom corners are securely tucked into their respective folded tips. This provides a clean finish and reinforces the structure.
Step 8: Sculpting the Heart Shape
With the bottom corners secured, it’s time to truly define the iconic heart shape. Focus on the top right corner of your paper, which now represents a part of what will become the upper lobe of the heart. Fold this corner inward and slightly downwards, creating a gentle curve. Simultaneously, adjust the middle right corner, folding it inwards to round out the side of the heart. The goal is to smooth out any sharp angles and create a pleasing, organic curve. Repeat this precise process on the entire left side, mirroring your folds to maintain symmetry. Take your time to shape these curves carefully, as they are crucial for the aesthetic appeal of your 3D heart.
Step 9: Inflating and Finalizing Your 3D Heart
This is where the magic happens and your origami heart truly comes to life in three dimensions! Locate the small opening at the bottom tip of your folded paper heart. Gently place your lips to this opening and blow air into it. As you blow, you’ll notice the paper slowly expanding and puffing up. To assist in shaping and create a beautifully rounded heart, use your hands strategically. With your left hand, gently cover the bottom opening with your thumb to prevent air from escaping, while your index finger lightly presses down on the top corner to help define the upper curve. Simultaneously, with your right hand, use your thumb to support the bottom portion, and your index finger to gently press down on the top center of the heart. This careful manipulation of blowing and gentle pressing will help mold the paper into a perfectly rounded, plump, and charming 3D heart. Practice this a few times to get the desired inflation and shape.
Why Choose 3D Origami Hearts? The Allure of Dimension
While flat paper hearts are undoubtedly lovely, the 3D origami heart offers a unique charm and versatility that truly sets it apart. Opting for a three-dimensional design brings several advantages to your crafting and decorating endeavors:
- Enhanced Visual Appeal: A 3D heart instantly adds depth and texture to any display. Unlike flat cut-outs, these hearts cast subtle shadows and reflect light in captivating ways, making them more dynamic and engaging to the eye. They simply pop!
- Versatile Decor Element: Their plump form allows them to be used in various creative ways. They can stand on their own, be strung together to create garlands, or artfully arranged in bowls and vases, as I’ve planned for my Valentine’s Day decor. Their volumetric nature means they fill space more effectively and appealingly.
- A Tactile Experience: The act of folding and then inflating the heart is incredibly satisfying. Holding a finished 3D heart, feeling its gentle curves and inflated body, adds a sensory dimension to the craft that flat designs lack.
- Impressive Yet Simple: Despite their sophisticated appearance, these 3D hearts are surprisingly easy to make. The ‘wow’ factor they possess belies the straightforward folding process, making them a perfect project for crafters of all skill levels.
- Unique Gift Embellishments: Attach a 3D heart to a gift, use it as a card insert, or even as a unique bookmark. Its three-dimensional nature makes it feel more substantial and special than a flat decoration.
Tips for Perfecting Your 3D Origami Hearts
Achieving beautifully crisp and perfectly inflated 3D origami hearts is a delightful skill that improves with practice. Here are some expert tips to help you refine your technique and produce stunning results every time:
- Paper Quality Matters: While most papers can work, the right paper makes a significant difference. Traditional origami paper (kami) is designed for clean folds and holding creases, making it ideal. Thinner papers are easier to fold and inflate, but may be more prone to tearing. Thicker papers offer more durability but require more effort for sharp creases. Experiment with different weights to find your preference.
- Precision is Key: Origami is all about accuracy. Take your time with each fold. Align edges and corners perfectly before pressing down. Even slight misalignments in early steps can compound, leading to a lopsided or less defined final heart. Using a ruler for initial cuts and a bone folder (or even your fingernail) for sharp creases can elevate your results.
- Crease Firmly: For the heart to hold its shape, especially when inflated, strong creases are essential. After making each fold, press along the crease line firmly with your finger or a bone folder. This “sets” the paper and gives structure to the finished piece.
- Gentle Inflation: When it comes to the final inflation step, don’t overdo it with too much force, as this can tear the paper. Blow gently and consistently, allowing the air to gradually expand the heart. Combine blowing with the gentle finger pressing as described in Step 9 to guide the paper into its desired rounded form.
- Practice Makes Perfect: Don’t be discouraged if your first few hearts aren’t perfectly symmetrical or inflated. Origami is a skill that improves with repetition. Each heart you make will teach you something new about the paper, the folds, and your technique.
- Good Lighting and Surface: Work in a well-lit area on a clean, flat surface. This ensures you can clearly see your folds and maintain precision.
Creative Ways to Use Your Charming 3D Hearts
Once you’ve mastered the art of creating these delightful 3D origami hearts, the possibilities for their use are endless! Their charming, dimensional form makes them perfect for a wide array of decorative and gifting purposes:
- Valentine’s Day Decorations: Fill clear vases or decorative bowls, as initially planned, for a whimsical centerpiece. String them together with fishing line or delicate ribbon to create beautiful garlands for windows, doorways, or mantelpieces. Attach them to branches arranged in a vase for a stunning “love tree.”
- Gift Embellishments: Elevate your gift wrapping by taping or tying a 3D heart to the top of a present. Tuck a few into a gift basket or a box of chocolates for an extra touch of handmade affection.
- Greeting Cards and Scrapbooking: These hearts make fantastic pop-up elements for homemade cards. Glue just one side of the heart to allow it to stand away from the page, adding dimension to your greetings. They’re also wonderful additions to scrapbook layouts, creating visual interest.
- Bookmarks: Fold a few in different colors to create unique and personal bookmarks for your favorite books.
- Party Favors: If you’re hosting a Valentine’s Day party or a celebration of love, these hearts make adorable and cost-effective party favors that guests can take home.
- Mobile Decorations: Create a charming mobile by hanging several hearts at varying lengths from a simple hanger or hoop. Perfect for a nursery or a festive corner.
- Table Scatter: Sprinkle a handful of these hearts across a dining table or coffee table for an instant festive touch.
- Classroom or Office Decor: Brighten up a workspace or classroom with these cheerful symbols of love and positivity.
The versatility of these easy 3D origami hearts means they can bring joy and a handmade touch to almost any setting. Let your imagination guide you!
Unfolding the Joy of Handmade Love
Crafting these easy 3D heart origami pieces is more than just a simple paper folding exercise; it’s an act of creating something beautiful and meaningful with your own hands. As we’ve explored, the process is straightforward, requiring only a few basic materials, yet the outcome is a delightful, three-dimensional symbol of love and affection.
Whether you’re decorating your home for Valentine’s Day, preparing a thoughtful handmade gift, or simply looking for a relaxing and rewarding craft project, these origami hearts are an excellent choice. Their charming form and the satisfaction of watching them transform from a flat piece of paper into a plump, expressive heart are truly captivating. Remember that precision and patience are your best friends in origami, but don’t shy away from imperfections – each handmade piece carries a unique story.
So, gather your colorful papers, follow these steps with care, and let your creativity unfold. Fill your vases, adorn your gifts, or simply scatter these adorable hearts to spread love and joy. We hope this guide inspires you to create a bounty of beautiful 3D origami hearts. Happy folding, and may your creations bring warmth and cheer to your world!