
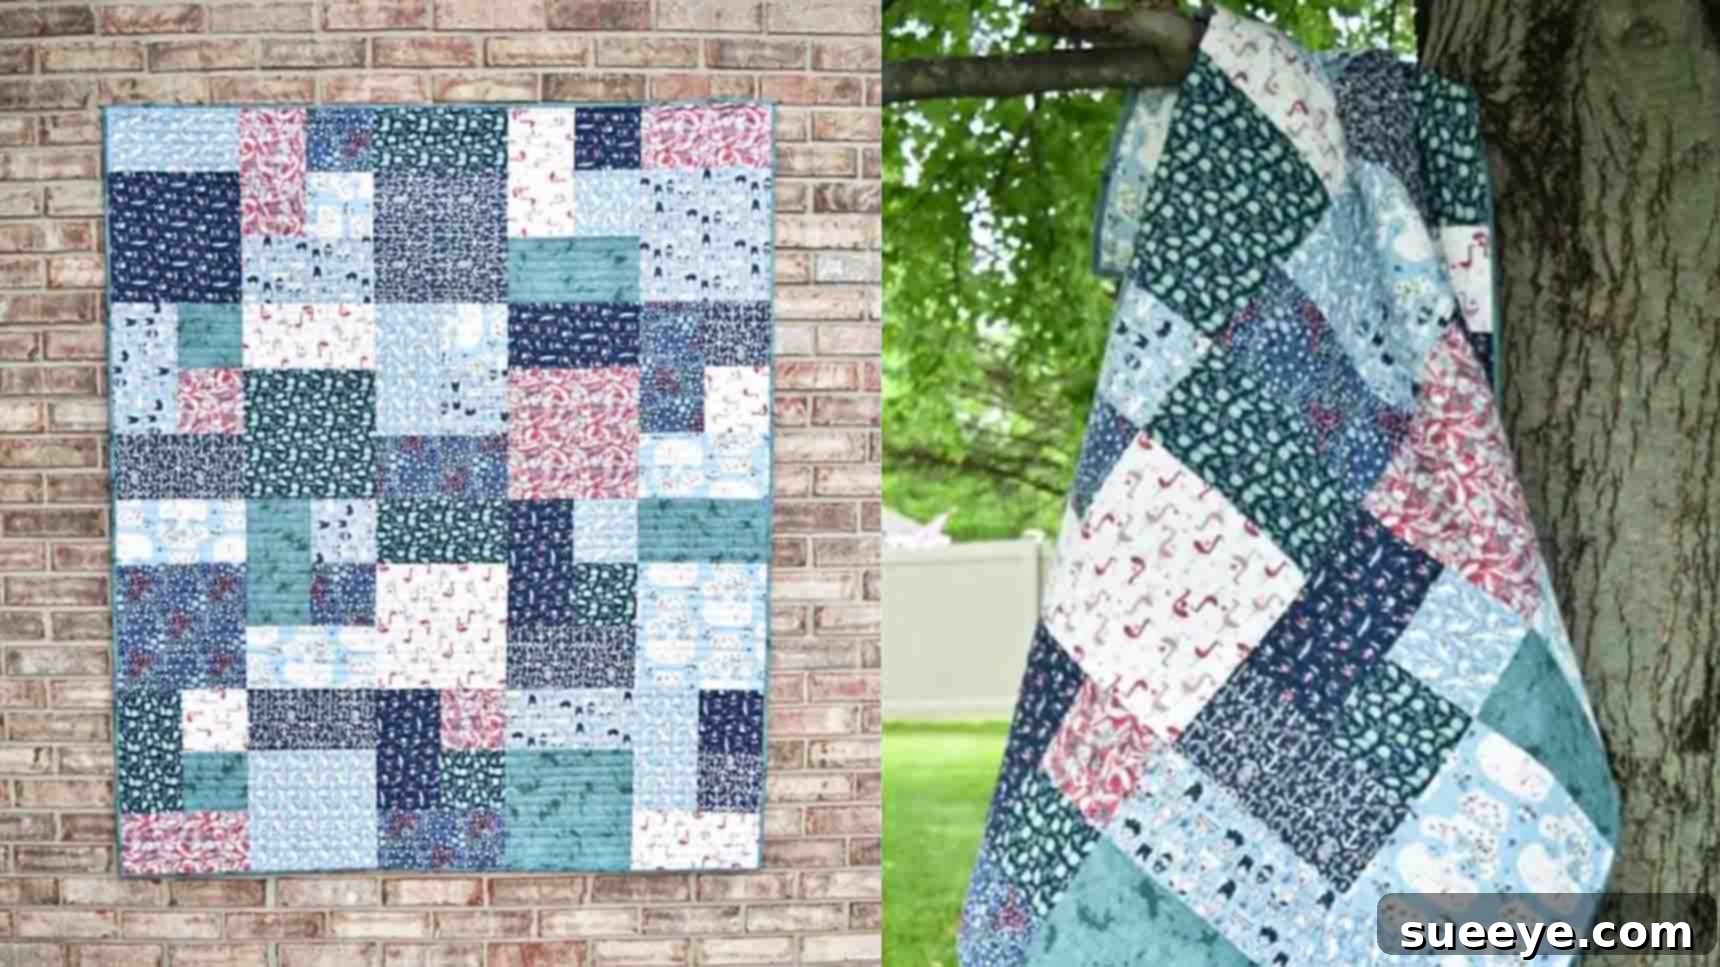
Master the Easy Fat Quarter Mixer Quilt: A Beginner-Friendly Tutorial
Are you looking for a delightful and achievable quilting project that brings your favorite fat quarter bundles to life? Look no further! This comprehensive tutorial for the Fat Quarter Mixer Quilt, inspired by the brilliant insights from Material Girl Quilts on YouTube, is tailor-made for you. Whether you’re a complete novice venturing into the world of quilting or a seasoned enthusiast seeking a swift and satisfying weekend endeavor, this project promises both simplicity and stunning results. It’s an ideal way to transform your treasured fabric collection into a cozy, custom-made quilt that will be cherished for years. Dive into this guide to learn every essential step, from initial cuts to the final stitch, ensuring a beautiful, handmade masterpiece.
Why Choose the Fat Quarter Mixer Quilt?
The Fat Quarter Mixer Quilt stands out for several compelling reasons, making it a favorite among quilters. Firstly, its design is incredibly forgiving and visually appealing, creating a dynamic interplay of colors and patterns without requiring intricate piecing. This makes it a fantastic starting point for beginners to grasp fundamental quilting techniques, such as accurate cutting, precise seam allowances, and efficient block construction. Secondly, it’s a brilliant project for utilizing those beautiful fat quarter bundles you’ve collected, allowing you to incorporate a variety of coordinated fabrics effortlessly. Thirdly, its structured yet flexible design means you can easily adapt it to different sizes or play with fabric placement to create a truly unique quilt. Prepare to be amazed at how quickly this gorgeous quilt comes together, offering a sense of accomplishment with every seam sewn.
Materials You’ll Need
Before you begin your quilting journey, gather all the necessary supplies. Precision in preparation will ensure a smoother and more enjoyable crafting experience. This project is specifically designed to make the most of your fat quarter stash, minimizing waste and maximizing beauty.
For a 50″ x 60″ Lap Quilt:
- 10 Fat Quarters: These are pre-cut fabric pieces, typically 18 inches by 22 inches, offering a diverse palette for your quilt.
- 3 ¼ Yards Backing Fabric: This will form the underside of your quilt, providing stability and a soft finish. Choose a fabric that complements your fat quarters.
- ½ Yard Binding Fabric: Used for the protective and decorative edge of your quilt. A contrasting or coordinating fabric can make a big impact.
- Quilting Batting (approx. 54″ x 64″): The essential middle layer that provides warmth, loft, and dimension to your quilt.
- Basic Quilting Tools:
- Rotary Cutter, Mat, and Ruler for precise cuts.
- Sewing Machine with a ¼-inch presser foot.
- Thread (matching or neutral).
- Fabric Scissors.
- Pins or Fabric Clips.
- Iron and Ironing Board.
Step-by-Step Directions for Your Fat Quarter Mixer Quilt
Step 1: Prepare Your Fabrics for Success
The foundation of any beautiful quilt lies in proper fabric preparation. While often overlooked, this crucial step ensures your quilt remains pristine after washing and that your cuts are accurate. Start by gently pre-washing and pressing all your fat quarters, backing fabric, and binding fabric. Pre-washing helps to pre-shrink the fabric, preventing any distortion or color bleeding once your quilt is finished. After drying, carefully press each piece flat to remove any wrinkles or creases. This smooth surface is essential for achieving precise cuts in the next step, which in turn leads to perfectly aligned quilt blocks.
Step 2: Precision Cutting of Fat Quarters
Accurate cutting is the cornerstone of successful quilting. Take your time with this step, ensuring every measurement is exact. Each of your 10 fat quarters will be cut into several specific pieces that will then be assembled into your quilt blocks.
Cutting Guide for Each Fat Quarter:
- Verify Usable Fabric: Begin by ensuring each fat quarter measures at least 21.5 inches in length. This extra allowance ensures you have enough fabric even if the edges aren’t perfectly straight.
- First Strip Cut: Lay your fabric flat. From one end, cut a 5 ½-inch wide strip across the entire width (typically 21.5 or 22 inches). Set this strip aside.
- Sub-cutting the First Strip: Take the 5 ½-inch strip you just cut. From this strip, cut one 10 ½-inch x 5 ½-inch rectangle. The remaining portion of this strip will not be used for this specific block, but can be saved for future projects.
- Main Fabric Cuts: Now, return to your larger piece of the fat quarter.
- 10 ½-inch Square: Starting from a bottom corner, align your ruler at the 10 ½-inch mark on both sides and cut one perfect 10 ½-inch square. This will be the centerpiece of one of your quilt blocks.
- Remaining Rectangle: From the fabric remaining after cutting the large square, cut another 10 ½-inch x 5 ½-inch rectangle.
- Small Squares: With the final remaining fabric, you should be able to cut two 5 ½-inch squares.
Repeat this precise cutting process for all 10 fat quarters. Once all fabrics are cut, you should have a grand total of:
- 10 large 10 ½-inch squares
- 30 10 ½-inch x 5 ½-inch rectangles
- 20 small 5 ½-inch squares
Organize your cut pieces by size and type to make the next step of block assembly more efficient.
Step 3: Constructing Your Quilt Blocks (Block A and Block B)
This quilt design utilizes two distinct block types, Block A and Block B, which are then alternated to create the dynamic “mixer” effect. Consistency in your ¼-inch seam allowance is paramount here for blocks that fit together perfectly.
Assembling Block A:
Each Block A requires:
- One 10 ½-inch square
- One 10 ½-inch x 5 ½-inch rectangle
To assemble:
- Take one 10 ½-inch square and one 10 ½-inch x 5 ½-inch rectangle.
- Place them right sides together, aligning one 10 ½-inch edge of the rectangle with one 10 ½-inch edge of the square.
- Sew along this aligned edge using a precise ¼-inch seam allowance.
- Press the seam open. Pressing seams open helps to reduce bulk and creates a flatter, more professional-looking block.
You will need to create a total of 10 Block A units.
Assembling Block B:
Each Block B requires:
- Two different 10 ½-inch x 5 ½-inch rectangles (from different fat quarters for a varied look)
- Two different 5 ½-inch squares (also from different fat quarters)
To assemble:
- Combine Small Squares: Take two 5 ½-inch squares. Place them right sides together and sew along one edge with a ¼-inch seam allowance. Press the seam open. You now have a small rectangle made from two squares.
- Attach First Rectangle: Take one 10 ½-inch x 5 ½-inch rectangle. Place it right sides together with the unit you just created (the two sewn 5 ½-inch squares), aligning the 10 ½-inch edge of the rectangle with the combined 10 ½-inch edge of the square unit. Sew with a ¼-inch seam allowance. Press the seam open.
- Attach Second Rectangle: Take the second 10 ½-inch x 5 ½-inch rectangle. Place it right sides together with the bottom edge of your partially assembled Block B unit. Sew with a ¼-inch seam allowance. Press this final seam open.
You will also need to create a total of 10 Block B units. For a truly “mixed” look, try to use different fat quarters for the components of each Block B.
Step 4: Laying Out Your Quilt Top
Once all 20 blocks (10 Block A and 10 Block B) are meticulously assembled, it’s time for the exciting visualization stage: laying out your quilt top. Find a large flat surface – your floor, a design wall, or a large table – and arrange your blocks. The design calls for a total of four rows, with five blocks per row. The key to the “mixer” effect is to alternate Block A and Block B within each row, and then also alternate the starting block for each subsequent row. For example:
- Row 1: A-B-A-B-A
- Row 2: B-A-B-A-B
- Row 3: A-B-A-B-A
- Row 4: B-A-B-A-B
This alternating pattern creates a dynamic, interlocking design. Stand back and admire your layout, making any adjustments to color or pattern distribution until you are completely satisfied with the aesthetic.
Step 5: Assembling the Quilt Top Rows
With your layout finalized, you can begin sewing the blocks together to form rows, and then sewing the rows together to complete the quilt top.
- Sew Blocks into Rows: Working with one row at a time, pick up the blocks in order. Place the first two blocks right sides together, aligning their edges. Sew with a precise ¼-inch seam. Continue adding blocks to the row in the same manner until all five blocks for that row are joined.
- Press Row Seams: After each row is sewn, press the seams. For adjacent rows, it’s often helpful to press the seams of one row in one direction (e.g., to the left) and the seams of the next row in the opposite direction (e.g., to the right). This technique, known as “nesting seams,” helps the seams align perfectly when you join the rows, reducing bulk and ensuring flat intersections.
- Join Rows: Once all four rows are sewn and pressed, place the first row and the second row right sides together. Carefully align the seams where the blocks meet, using pins to secure them if necessary. Sew with a ¼-inch seam allowance. Repeat this process, attaching the third and then the fourth rows until your entire quilt top is complete.
- Final Press: Give your finished quilt top a final, thorough press to ensure all seams are flat and the fabric is smooth.
Step 6: Creating the Quilt Sandwich
Now that your quilt top is complete, it’s time to assemble the “quilt sandwich,” which consists of the backing, batting, and quilt top. This step is crucial for giving your quilt its warmth, texture, and stability.
- Prepare Batting and Backing: Trim your batting to be approximately 2-4 inches larger than your quilt top on all sides. Do the same for your backing fabric. This extra margin is important because fabrics can shift during the quilting process. If your backing fabric isn’t wide enough, you might need to seam two pieces together.
- Layering:
- On a large, clean, flat surface (like your floor), lay down your backing fabric wrong side up. Smooth it out completely, ensuring there are no wrinkles or puckers. You can use painter’s tape to secure the edges to the floor if needed.
- Next, carefully lay the batting evenly over the backing. Again, smooth it out completely.
- Finally, center your quilt top (right side up) on top of the batting. Smooth it out meticulously, working from the center outwards to eliminate any wrinkles or air bubbles.
- Basting: To hold these three layers together during quilting, you need to baste them. Common basting methods include:
- Safety Pins: Use curved safety pins (specifically designed for quilting) and place them about a fist-width apart across the entire quilt, starting from the center and working outwards.
- Basting Spray: A temporary fabric adhesive spray can be used to hold the layers together. Follow the manufacturer’s instructions carefully.
- Long Stitches: You can hand-baste with long running stitches, though this is more time-consuming.
Make sure your basting secures all three layers without puckering or shifting.
Step 7: The Quilting Process
Quilting is where you stitch through all three layers (top, batting, and backing) to give your quilt its finished texture and durability. For a beginner-friendly project like the Fat Quarter Mixer Quilt, simple straight-line quilting is often the most effective and easiest option.
- Choose Your Design:
- Stitch-in-the-Ditch: This involves stitching precisely in the “ditch” (the seam line) where your blocks meet. It’s a subtle way to highlight your piecing.
- Straight-Line Quilting: You can quilt straight lines across the quilt, either horizontally, vertically, or diagonally. Using a walking foot on your sewing machine is highly recommended for straight-line quilting as it helps feed all three layers evenly, preventing puckering. You can use painter’s tape or a washable fabric marker as a guide for evenly spaced lines.
- Simple Grid: Quilt a grid pattern across your entire quilt top.
- Start Quilting: Begin quilting from the center of your quilt and work outwards. This helps to prevent fabric distortion. If doing straight lines, alternate directions (e.g., quilt one line, then the next parallel line on the opposite side of the center) to balance tension.
- Remove Basting: As you quilt, remove basting pins or spray. Do not quilt over pins.
Step 8: Adding the Binding for a Professional Finish
The binding is the final edge treatment that protects the raw edges of your quilt and adds a beautiful frame to your work. This step brings your quilt to a polished completion.
- Prepare Binding Strips:
- From your ½ yard of binding fabric, cut 2 ½-inch wide strips across the width of the fabric (typically 42-44 inches). You’ll need enough strips to go around the entire perimeter of your quilt, plus about 10-12 inches extra for joining. For a 50″ x 60″ quilt, you’ll need approximately 4-5 strips.
- Join these strips together end-to-end using a diagonal seam (this reduces bulk at the seam). Press the seams open.
- Fold the entire long strip in half lengthwise, wrong sides together, and press well.
- Attach Binding to Quilt Top:
- Align the raw edge of your folded binding strip with the raw edge of your quilt top, starting on one side (not a corner). Leave a tail of about 8-10 inches unbound at the beginning.
- Using a ¼-inch seam allowance, sew the binding to the quilt edge. When you reach a corner, stop ¼-inch from the corner, backstitch, and remove the quilt from your machine.
- To create a mitered corner, fold the binding strip straight up (at a 45-degree angle), then fold it back down so the raw edge of the binding aligns with the next raw edge of the quilt. Start sewing ¼-inch from the new edge.
- Continue sewing around all four sides. When you get back to your starting point, stop about 10-12 inches from where you began, leaving another unbound tail.
- Join the two binding tails together with a diagonal seam so they form a continuous loop that perfectly fits the quilt. Trim excess, press seam open, and finish sewing the remaining binding to the quilt.
- Finish Binding:
- Flip the folded binding over to the back of the quilt. You can either hand-stitch the binding down for a nearly invisible, traditional finish or machine-stitch it for a quicker, durable result.
- If machine stitching, you can topstitch from the front, catching the binding fabric on the back.
And just like that, your beautiful Fat Quarter Mixer Quilt is complete!
Tips for a Flawless Fat Quarter Mixer Quilt
Achieving a professional-looking quilt is within reach, even for beginners, with a few helpful tips:
- Use a ¼-inch Seam Foot: Investing in a specialized presser foot for a perfect ¼-inch seam allowance will dramatically improve the accuracy and consistency of your piecing.
- Press, Don’t Iron: When joining fabric pieces, press your seams rather than ironing. Pressing involves lifting and setting the iron down, which prevents stretching and distorting your fabric.
- Chain Piecing: To save time and thread, use chain piecing when sewing multiple identical units (like your Block A or Block B components). Sew one seam, then immediately feed the next unit under the needle without cutting the thread in between.
- Stay Organized: Keep your cut fabric pieces and assembled blocks organized. Labeling or using design boards can prevent confusion, especially with the two different block types.
- Check for Squareness: Periodically check your blocks and rows for squareness using your quilting ruler. If a block is slightly off, a gentle trim can often fix it before it affects the entire quilt.
- Don’t Rush Pressing: Pressing is as important as sewing. Proper pressing ensures flat seams and blocks that lay smoothly, which translates to a quilt that hangs beautifully.
- Watch the Video: The original Material Girl Quilts tutorial provides excellent visual guidance, complementing these written instructions.
Customizing Your Mixer Quilt
While this tutorial guides you through making a stunning 50″ x 60″ lap quilt, the beauty of quilting lies in its adaptability. Don’t hesitate to personalize your Fat Quarter Mixer Quilt:
- Size Variations: To make a larger or smaller quilt, simply adjust the number of fat quarters and subsequently the number of blocks. A baby quilt might use 6 fat quarters, while a twin-size quilt could use 18-20. Remember to scale your backing and batting accordingly.
- Fabric Play: Experiment with different fabric collections. A bundle of vibrant batiks will create a very different feel than a collection of soft pastels or patriotic prints. Consider using solids to make your patterned fat quarters pop.
- Border Options: While this design is simple and borderless, you could add one or more borders around your finished quilt top to increase its size or add another design element.
- Quilting Designs: Once you’ve mastered straight-line quilting, try more intricate free-motion quilting designs to add texture and depth.
Conclusion: Your Beautiful Fat Quarter Mixer Quilt
Congratulations! You’ve just completed a gorgeous Fat Quarter Mixer Quilt, a testament to your creativity and growing quilting skills. This project not only produces a beautiful and functional item for your home or as a heartfelt gift, but it also solidifies your understanding of fundamental quilting techniques. From selecting your cherished fat quarters to the satisfying final stitch of the binding, each step builds confidence and skill. The simplicity and visual appeal of the mixer block design make it a rewarding project, proving that stunning results can be achieved even with straightforward methods. Enjoy the warmth and beauty of your handmade quilt, and let it inspire your next quilting adventure!