
Crafting the Perfect Pillowcase: An Easy Guide to Sewing an Elegant Accent Strip
There’s nothing quite as satisfying as a handmade item that brings both beauty and comfort to your home. When it comes to sewing, my absolute go-to for inspiration and clear, accessible instruction is Liz from Making It With Liz on YouTube. Liz has a remarkable talent for breaking down complex sewing techniques into manageable, enjoyable steps, making every project feel achievable, regardless of your skill level. Her down-to-earth approach and genuine passion for sewing shine through in every video, transforming the learning process into a delightful experience.
As an avid sewer, I’m constantly on the hunt for fresh ideas to invigorate my creative projects. So, when I stumbled upon Liz’s video tutorial for a phenomenal pillowcase featuring a chic accent strip, I knew instantly that this was my next must-make item. And true to form, Liz did not disappoint. Her tutorial is packed with invaluable tips and expert advice, guiding you effortlessly through the process of creating this beautiful design. The beauty of this project lies in its simplicity combined with a sophisticated finish, making it a perfect addition to any bedroom or a thoughtful, personalized gift.
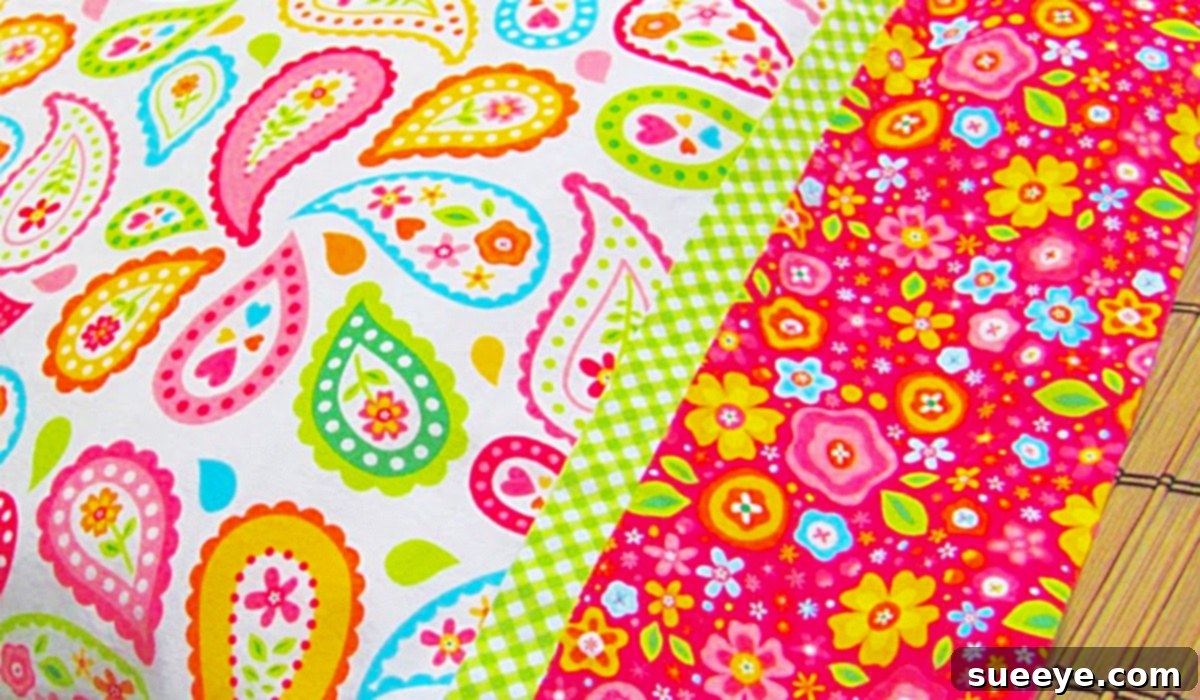
For me, sewing is a year-round joy, a constant thread connecting my creativity to tangible results. However, the arrival of spring always sparks a particular excitement. It’s my favorite time of year, a season of renewal and vibrant colors. I love nothing more than incorporating a delightful mix of bright hues into all my spring art projects, and this pillowcase project perfectly aligns with that sentiment. Imagining these bright, cheerful pillowcases adorning beds, becoming cherished family heirlooms over time, adds an extra layer of meaning to each stitch. Inspired by the season, I meticulously selected a fat quarter bundle featuring a stunning array of brightly colored floral patterns. The goal? To infuse every pillowcase with the fresh, invigorating spirit of spring. This accent strip design is an ideal canvas for showcasing beautiful fabrics and adding that personalized touch to your home decor.
Why Choose an Accent Strip Pillowcase? Elevating Your Home Decor with Handmade Elegance
Beyond the personal satisfaction of creating something by hand, a pillowcase with an accent strip offers numerous benefits. It’s a fantastic way to introduce a pop of color, texture, or pattern into a room without overwhelming the existing decor. The accent strip itself acts as a design element, allowing you to combine complementary or contrasting fabrics to create a truly unique look. Imagine a crisp white pillowcase brought to life with a vibrant floral strip, or a subtle linen fabric enhanced by a sophisticated geometric pattern. This versatility makes it suitable for various interior design styles, from modern minimalist to cozy farmhouse.
Furthermore, handmade pillowcases make exceptional gifts. They are practical, beautiful, and carry the sentimental value of being crafted with care. For special occasions like weddings, housewarmings, or birthdays, a set of custom-sewn pillowcases can be a truly memorable present. This project is not just about sewing; it’s about creating functional art that adds a personal touch to everyday living.
Essential Materials for Your Accent Strip Pillowcase Project
Before diving into the sewing process, gathering all your materials is crucial for a smooth and enjoyable experience. Liz always emphasizes the importance of good quality tools and fabrics, and for this project, her advice holds true. Here’s what you’ll need to create your beautiful accent strip pillowcase:
- Fabric: The heart of your pillowcase! For a standard size pillow (approx. 20×26 inches), you will typically need three pieces of fabric:
- Main Pillowcase Body: Approximately 27 inches by 42 inches. Quilting cotton is an excellent choice for beginners due to its ease of handling and wide variety of prints. Flannel offers a softer, cozier feel, while linen can provide a more sophisticated, textured look.
- Accent Strip: Approximately 2.5 to 4 inches by 42 inches (depending on your desired width). This is where you can introduce a contrasting color or pattern to make your pillowcase truly stand out.
- Cuff Fabric: Approximately 9 inches by 42 inches. This fabric typically forms the opening of the pillowcase and can match the main body or the accent strip, or be a third coordinating fabric.
Pro Tip: Always pre-wash and dry your fabrics before cutting. This prevents any potential shrinkage after your pillowcase is made and helps remove excess dyes that could bleed onto other fabrics.
- Bias Tape: While the original tutorial might refer to bias tape for a specific technique, in a broader sense for accent strips, it could be for finishing an edge or as the accent itself. For this particular method focusing on a fabric accent strip, you will primarily be joining fabric pieces directly. If you choose to add decorative piping or a truly finished bias-bound edge to your accent, then a package of pre-made bias tape (or making your own) will be necessary. For this style, we’re likely using simple fabric strips, so the “bias tape” might be metaphorical for the binding effect of the accent strip itself.
- A Sewing Machine: Any standard home sewing machine will work perfectly for this project. Ensure it’s threaded properly with a fresh needle appropriate for your fabric type.
- Thread: All-purpose polyester thread is a reliable choice. Select a color that either matches your main fabric or blends well with all your fabric choices for a seamless look.
- A Sharp Pair of Fabric Scissors: Essential for precise, clean cuts. Remember, fabric scissors should only be used for fabric to maintain their sharpness.
- An Iron: A cornerstone tool in sewing! Pressing at each step makes a significant difference in the final appearance of your pillowcase.
- An Ironing Board: Provides a stable, heat-resistant surface for pressing.
- Other Useful Tools:
- Rotary Cutter, Mat, and Ruler: For exceptionally straight and quick cuts, especially useful when working with larger pieces of fabric.
- Pins or Fabric Clips: To hold fabric pieces together securely before sewing.
- Seam Ripper: For those inevitable “oops” moments. Even experienced sewers keep one handy!
- Tailor’s Chalk or Fabric Marker: For marking cutting lines or sewing guides.
Step-by-Step Directions: How to Sew Your Elegant Accent Strip Pillowcase
Liz’s tutorials are renowned for their clarity, and this pillowcase project is no exception. It truly comes together in just a few straightforward steps, making it an excellent project for both beginners and experienced sewers looking for a quick and satisfying make.
Preparation is Key: Washing, Pressing, and Cutting Your Fabrics
Before you even think about stitching, proper preparation ensures a professional finish. Start by pre-washing and drying all your chosen fabrics according to their care instructions. This crucial step prevents shrinkage later and tests for any potential dye bleeding. Once dry, press all your fabrics thoroughly to remove any wrinkles and create crisp edges, making them much easier to cut and sew accurately.
Now, let’s get to cutting your fabric pieces for a standard 20×26 inch pillowcase (measurements include seam allowances, typically 1/2 inch):
- Main Pillowcase Body: Cut one piece measuring 27 inches wide by 42 inches long. This will form the bulk of your pillowcase.
- Accent Strip: Cut one piece measuring 4 inches wide by 42 inches long. This will be the decorative element.
- Cuff Fabric: Cut one piece measuring 9 inches wide by 42 inches long. This forms the opening where the pillow slides in.
Creating the Accent Strip Panel
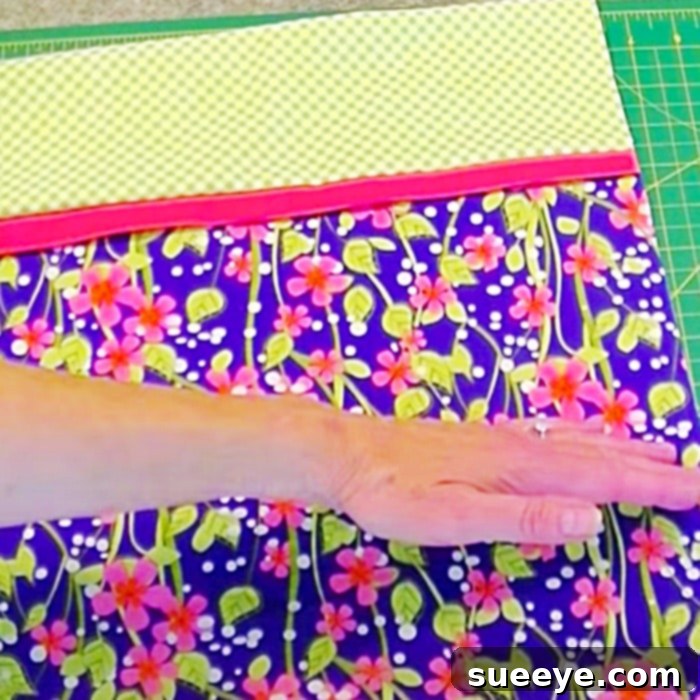
The accent strip is the focal point of this pillowcase, and attaching it precisely is key to a polished look. Begin by taking your main pillowcase body fabric and your accent strip fabric. Lay the main pillowcase body fabric right side up, oriented so the 42-inch length runs horizontally. Place the accent strip fabric on top of one of the 42-inch edges of the main body fabric, with right sides together. Align the raw edges carefully. Pin generously along this seam, ensuring the fabrics don’t shift.
Using your sewing machine, stitch along the pinned edge with a 1/2-inch seam allowance. Once sewn, press the seam open flat. Alternatively, you can press the seam allowance towards the darker fabric to minimize show-through. This step creates a unified piece where your accent strip is now integrated into the main body fabric. Repeat this process to attach the cuff fabric to the other 42-inch edge of your accent strip, right sides together, stitching with a 1/2-inch seam allowance, and pressing the seam open. You now have one long piece of fabric composed of your cuff, accent strip, and main pillowcase body, all connected horizontally.
Assembling the Pillowcase Body
With your combined fabric panel ready, it’s time to form the pillowcase shape. Lay your newly created fabric panel flat, with the right side facing up. Fold the panel in half lengthwise, bringing the two 42-inch raw edges together. Ensure that the main body fabric, the accent strip, and the cuff fabric all align perfectly. Pin along the bottom raw edge and the side raw edge, forming an “L” shape. Make sure to match any seams (where the accent strip joins the main body, and where the cuff joins the accent strip) precisely to ensure a continuous look.
Stitch along the pinned bottom edge and then up the side edge, using a 1/2-inch seam allowance. Remember to backstitch at the beginning and end of each seam to secure the stitches. This step effectively closes the raw sides and bottom of your pillowcase, bringing it into its recognizable form. Once sewn, for a durable and neat finish, you can either serge the raw edges of these two seams or use a zigzag stitch on your sewing machine to prevent fraying. This step is crucial for the longevity and professional appearance of your handmade pillowcase.
The Finishing Touches: Creating the Cuff
The final step is to create a clean, finished opening for your pillowcase. Take the unstitched raw edge of your cuff fabric at the pillowcase opening. Fold this raw edge towards the wrong side by 1/4 inch and press firmly. Then, fold it over again by another 1/2 inch (or your desired cuff width) and press once more. This creates a double-folded hem that encases the raw edge, providing a neat and durable finish. Pin this hem in place all around the opening.
Finally, topstitch close to the inner folded edge, securing the hem in place. Again, remember to backstitch at the beginning and end of your stitching line. Carefully clip any loose threads. Turn your pillowcase right side out, gently push out the corners, and give the entire pillowcase a final press to ensure all seams are crisp and flat. This final press truly makes all the difference, giving your handmade creation a professional, polished appearance.
Expert Tips for a Flawless Finish
- Press, Press, Press: This cannot be stressed enough! Pressing your seams after every sewing step ensures accuracy and a professional finish. It helps your fabric lay flat and prevents puckering.
- Use Quality Thread: A good quality all-purpose polyester thread is strong and less prone to breaking or tangling during sewing.
- Match Your Needle to Your Fabric: Using the correct sewing machine needle size and type for your fabric will prevent skipped stitches, fabric damage, and thread breaks. For quilting cotton, a universal needle (size 80/12 or 90/14) is generally suitable.
- Trim Your Seams: After sewing, if your seam allowances are wider than 1/2 inch, you can trim them down to reduce bulk, especially in corners.
- Patience is a Virtue: Don’t rush! Take your time with pinning and stitching. If something isn’t quite right, use your seam ripper. It’s better to unpick and redo than to live with a crooked seam.
- Get Creative with Fabrics: Don’t be afraid to experiment with different fabric combinations for your accent strip. Consider contrasting colors, complementary patterns, or even adding a personal touch with an embroidered strip.
- Consider French Seams: For an even more professional and durable finish, especially if you dislike visible raw edges, consider using French seams for the side and bottom of your pillowcase. This encloses all raw edges within the seam itself.
Beyond the Basics: Caring for Your Handmade Pillowcases
To ensure your beautiful handmade accent strip pillowcases last for years, proper care is essential. Always follow the care instructions for your specific fabric types. Generally, most quilting cottons can be machine washed in cold water on a gentle cycle with similar colors. Tumble dry on low heat or line dry to prevent excessive shrinkage and maintain fabric integrity. Iron as needed. Avoiding harsh chemicals or excessive heat will help preserve the vibrant colors and prevent premature wear.
Embrace Your Creativity with This Wonderful Pillowcase Project!
This accent strip pillowcase design truly is as cool as it gets! It’s a wonderful project that offers a perfect blend of simplicity and style, making it incredibly rewarding to create. Following Liz’s guidance, you’ll not only end up with a beautiful and functional item for your home but also gain confidence in your sewing skills. The joy of seeing your chosen fabrics come together to form a unique, personalized pillowcase is unparalleled.
Whether you’re looking to refresh your bedroom decor, create a thoughtful gift, or simply indulge in the therapeutic art of sewing, this accent strip pillowcase tutorial is an excellent choice. So gather your beautiful spring-themed florals, or whatever fabrics inspire you, and embark on this delightful sewing journey. You’ll be amazed at what you can create with a little fabric, a sewing machine, and the fantastic guidance from Making It With Liz!