
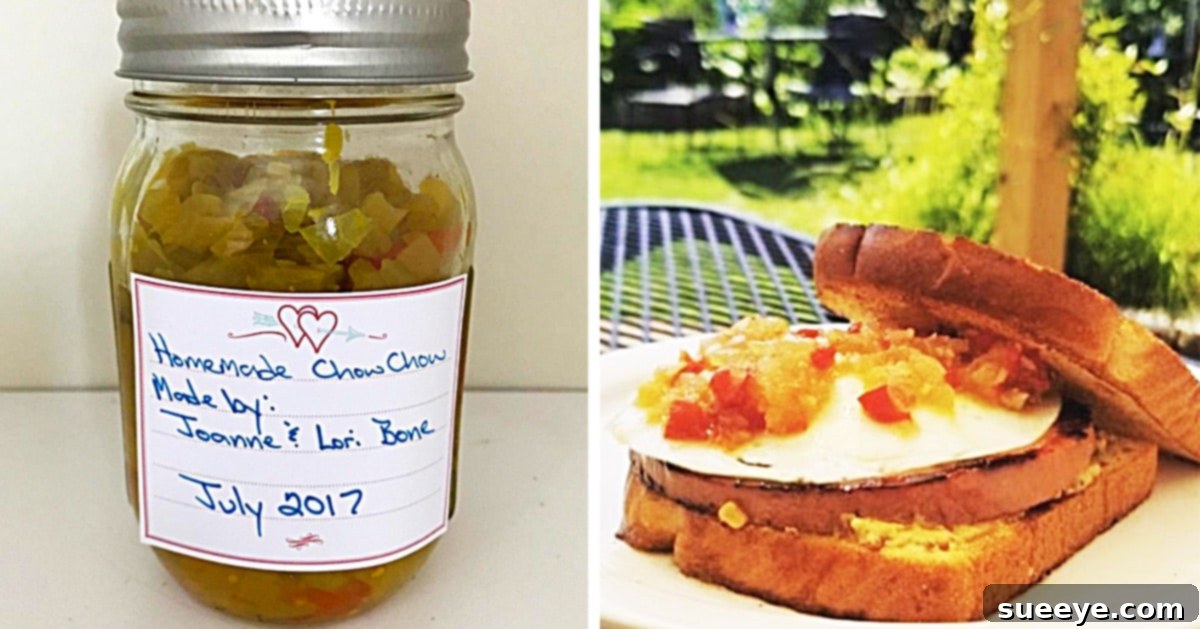
There’s something truly special about a homemade relish, and Southern Chow Chow holds a coveted spot in the pantheon of classic condiments. This vibrant, tangy, and subtly sweet relish, brimming with crisp vegetables, is more than just a topping; it’s a taste of tradition, a versatile accompaniment that elevates everything from humble sandwiches to hearty meat dishes. For those embarking on the rewarding journey of home canning, or simply seeking a delicious new recipe to master, Southern Chow Chow offers an incredibly satisfying experience.
Recently, I stumbled upon a fantastic chow chow video tutorial recipe by Whippoorwill Holler on YouTube, and it immediately reignited my desire to make this beloved relish. Having always wanted to craft my own batch, this detailed guide provided the perfect inspiration. Canning has quickly become a cherished hobby of mine, and while I’ve explored various pickling adventures, the idea of preserving pickled vegetables like those found in chow chow felt like the natural next step. This recipe promised to be a wonderful start to a new chapter in my canning endeavors.
Southern Chow Chow is not just a relish; it’s a celebration of garden-fresh produce, transformed through a simple yet magical process into a condiment that can brighten any meal. Its distinctive flavor profile, balancing a medley of vegetables with a sweet and tangy brine, makes it an indispensable addition to any pantry. Whether you’re serving it alongside barbecued ribs, mixing it into a potato salad, or simply spreading it on a biscuit, the homemade version far surpasses anything you’ll find in a store. It’s a taste of comfort, nostalgia, and authentic Southern hospitality, all captured in a jar.
How To Can Southern Chow Chow
Canning your own chow chow is a truly rewarding experience, offering not just a delicious condiment but also the satisfaction of preserving the bounty of the harvest. This comprehensive guide will walk you through everything you need to know to create a vibrant, flavorful Southern Chow Chow that will become a staple in your kitchen. From selecting the freshest ingredients to mastering the water bath canning process, we’ll ensure your homemade relish is a resounding success.
What is Southern Chow Chow? A Culinary Tradition
At its heart, Southern Chow Chow is a pickled vegetable relish, celebrated for its unique blend of sweet, sour, and savory notes, often with a hint of spice. Originating from the American South, it’s a testament to the region’s resourceful culinary traditions, where preserving seasonal vegetables was a vital practice. Typically, it features a base of cabbage, green tomatoes, bell peppers, and onions, all finely chopped and suspended in a flavorful brine made from vinegar, sugar, and an aromatic blend of spices.
While the exact origins are debated, many believe Chow Chow was influenced by Chinese immigrants or perhaps French pickling techniques. Over generations, it evolved into a distinctly Southern staple, with recipes varying widely from family to family and region to region. Some versions are sweeter, others spicier, and the combination of vegetables can also differ. However, the core essence remains: a delightful, crunchy relish that complements a wide array of dishes. It’s not fermented, but rather a quick pickle, relying on the vinegar and sugar for preservation and flavor development.
Why Make Your Own Homemade Chow Chow?
While store-bought chow chow exists, making your own offers several undeniable advantages:
- Unmatched Freshness and Flavor: Homemade relish uses fresh, quality ingredients, resulting in a vibrant flavor profile that commercial versions simply can’t replicate. You control the ripeness of the vegetables and the potency of the spices.
- Control Over Ingredients: You can choose organic vegetables, adjust sugar and salt levels to your preference, and avoid artificial preservatives or colorings often found in mass-produced products.
- Customization: Want it spicier? Add more red pepper flakes. Prefer it less sweet? Reduce the sugar slightly. Homemade allows for perfect personalization to suit your taste buds.
- Cost-Effectiveness: Especially if you have a garden or access to farmers’ markets, making your own relish can be significantly more economical than buying multiple jars from the store.
- The Joy of Canning: There’s immense satisfaction in opening a jar of something you’ve preserved yourself. It connects you to culinary traditions and the simple pleasure of homemade goodness.
Ingredients For Chow Chow:
The beauty of Southern Chow Chow lies in its simple, garden-fresh ingredients, transformed by a well-balanced brine and a thoughtful blend of spices. Here’s what you’ll need to gather:
- 10 cups of cabbage (shredded): A cornerstone of the relish, providing a crisp texture and a mild, earthy base. Green cabbage is traditional, but a mix with a bit of red cabbage can add visual appeal.
- 2 large green tomatoes (chopped): Unripe green tomatoes add a crucial tartness and firm texture that holds up well during canning. Choose firm, blemish-free tomatoes.
- 1 large onion (chopped): Adds a pungent aromatic foundation, complementing the sweetness and tang of the other ingredients. A yellow or white onion works best.
- 4 bell peppers (chopped): Use a mix of colors (green, red, yellow, orange) for visual appeal and a slightly varied sweetness. Green bell peppers are traditional for their slightly bitter note.
- 1 1/2 tablespoons of canning salt or Kosher salt: Essential for drawing out excess moisture from the vegetables, which helps maintain their crispness and prevents diluting the brine. Canning salt is recommended as it’s pure and free of anti-caking agents that can cloud the brine.
- 1 tablespoon mustard seed: Provides a distinct pungent and slightly spicy kick, a classic relish spice.
- 2 teaspoons of celery seed: Offers an earthy, slightly bitter, and aromatic note that is characteristic of many pickled relishes.
- 3 cups distilled white vinegar: The primary acidic component for the brine, crucial for flavor and safe canning. Ensure it’s at least 5% acidity.
- 3 cups of sugar: Balances the acidity of the vinegar and the tartness of the green tomatoes, creating the signature sweet and sour profile. You can slightly adjust this to taste.
- 1 tablespoon yellow mustard: Adds depth, color, and a classic mustard tang to the brine.
- 1 teaspoon turmeric: Primarily for its beautiful golden color, it also contributes a subtle earthy and slightly bitter flavor.
- 1 teaspoon allspice: A complex spice offering notes of cloves, cinnamon, and nutmeg, providing warmth and depth to the relish.
- 1/2 teaspoon ginger: Adds a gentle warmth and a hint of zing, elevating the overall spice profile. Use ground ginger.
- 2 cloves of garlic (minced, or 1 teaspoon garlic powder): Provides an aromatic base. Freshly minced garlic offers the best flavor, but garlic powder is a convenient alternative.
Directions:
Crafting delicious Southern Chow Chow is a straightforward process when you follow these steps carefully. This recipe, inspired by the excellent chow chow video tutorial by Whippoorwill Holler on YouTube, guides you through preparation, cooking, and canning to ensure a perfect batch every time.
Step 1: Preparing the Vegetables
Begin by meticulously chopping all your vegetables. Shred the cabbage finely. Dice the green tomatoes, onion, and bell peppers into small, uniform pieces, about 1/4 to 1/2 inch in size. Consistency in chopping ensures even cooking and a pleasant texture in the final relish. Once chopped, combine all the vegetables in a large mixing bowl. Sprinkle the 1 1/2 tablespoons of canning salt evenly over the vegetables. Toss thoroughly to ensure the salt is well distributed. The salt will draw out excess moisture from the vegetables, which is crucial for preventing a watery relish and maintaining crispness. Cover the bowl and let the salted vegetables rest for at least 3-4 hours, or preferably overnight, in the refrigerator. This brining step is essential for both texture and flavor.
Step 2: Draining and Rinsing the Vegetables
After the resting period, you’ll notice a significant amount of liquid at the bottom of the bowl. This is exactly what you want! Transfer the salted vegetables to a colander and rinse them thoroughly under cold running water. Rinsing removes excess salt, preventing your chow chow from being overly salty. After rinsing, gently press down on the vegetables to remove as much residual water as possible. You can also place them between layers of clean kitchen towels and press firmly. This step is vital for a crisp relish and a concentrated brine flavor.
Step 3: Preparing the Brine
While the vegetables are draining, prepare your flavorful brine. In a large, non-reactive pot (stainless steel or enamel are ideal), combine the distilled white vinegar, sugar, yellow mustard, turmeric, allspice, ginger, minced garlic (or garlic powder), mustard seed, and celery seed. Bring the mixture to a simmer over medium heat, stirring occasionally to dissolve the sugar completely. Once the sugar has dissolved and the brine is gently simmering, reduce the heat and let it continue to simmer for about 5-10 minutes to allow the flavors to meld.
Step 4: Combining and Cooking the Chow Chow
Add the well-drained vegetables to the simmering brine in the pot. Stir to ensure all the vegetables are fully submerged and coated with the brine. Bring the mixture back to a gentle simmer. Do not boil vigorously; a gentle simmer is sufficient. Cook for about 10-15 minutes, or until the vegetables are heated through and slightly tender-crisp. You want them to retain some crunch, not become mushy. This light cooking step allows the flavors to infuse and helps prepare the vegetables for canning.
Step 5: Preparing Jars and Water Bath Canner
While the chow chow is simmering, sterilize your canning jars (pint or half-pint sizes are common). Wash jars and lids in hot soapy water, then rinse thoroughly. Place jars in a large water bath canner filled with water, ensuring they are covered by at least an inch of water. Bring the water to a simmer (180°F/82°C) and keep the jars hot until ready to fill. Set new canning lids aside; they do not need to be sterilized, just kept warm in hot (not boiling) water.
Step 6: Filling the Jars
Carefully remove one hot jar at a time from the canner. Using a canning funnel, ladle the hot chow chow mixture into the hot jars, leaving 1/2 inch of headspace (the space between the food and the rim of the jar). Use a non-metallic utensil (like a plastic spatula or chopstick) to remove any air bubbles by gently running it around the inside of the jar. Add more chow chow and brine if necessary to maintain the 1/2-inch headspace. Wipe the rims of the jars clean with a damp cloth to ensure a proper seal. Center a warm lid on each jar, and then apply the screw band finger-tight (just until you feel resistance, do not overtighten).
Step 7: Processing in a Water Bath Canner
Carefully place the filled, lidded jars back into the hot water bath canner, ensuring they are fully submerged under at least 1-2 inches of water. Place the lid on the canner. Bring the water to a rolling boil. Once boiling, process pint jars for 10 minutes and half-pint jars for 5 minutes. (Adjust processing time if you are at a high altitude; consult a reliable canning guide for specific adjustments). After the processing time is complete, turn off the heat and let the jars rest in the canner for 5 minutes before carefully removing them.
Step 8: Cooling and Checking Seals
Using a jar lifter, carefully remove the hot jars from the canner and place them on a clean towel or cooling rack, ensuring they are not touching each other. Allow the jars to cool undisturbed for 12-24 hours. As they cool, you should hear a “ping” sound as the lids seal. After 12-24 hours, check the seals: press down on the center of each lid. If it doesn’t flex, the jar is sealed. If a jar hasn’t sealed, refrigerate it and consume within a few weeks, or re-process with a new lid (after checking for any flaws in the jar or filling process).
Step 9: Storage
Once sealed, remove the screw bands (they can cause rust if left on and make it harder to check seals later). Label the jars with the contents and date. Store your homemade Southern Chow Chow in a cool, dark place for up to one year. Once opened, refrigerate and consume within 2-3 weeks.
Tips for a Perfect Batch of Southern Chow Chow
- Quality Ingredients: Start with the freshest vegetables possible. This makes a huge difference in the final taste and texture.
- Don’t Skip the Salting Step: This is crucial for drawing out water and ensuring a crisp, flavorful relish.
- Uniform Chopping: Chopping all vegetables to roughly the same size ensures even cooking and a more aesthetically pleasing relish.
- Taste and Adjust: Before canning, taste the cooked chow chow and adjust sweetness or spice if desired. Remember, flavors can mellow slightly during canning.
- Cleanliness is Key: Always follow proper canning hygiene to ensure safety and prevent spoilage.
- Headspace Matters: Maintaining the correct headspace (1/2 inch) is critical for a proper seal. Too little and the jar might overflow; too much and it might not seal.
- Altitude Adjustments: If you live at a high altitude, you will need to increase your canning processing time. Refer to a trusted canning guide for specific adjustments.
Serving Suggestions: Enjoying Your Homemade Chow Chow
The beauty of Southern Chow Chow lies in its versatility. Here are just a few ways to enjoy your delicious homemade relish:
- With Meats: It’s a classic accompaniment to grilled pork chops, barbecued chicken, pulled pork sandwiches, hot dogs, and hamburgers. Its tangy sweetness cuts through rich flavors beautifully.
- On Sandwiches & Wraps: Add a dollop to your deli sandwiches, especially those with roasted turkey or ham, for an extra burst of flavor and crunch.
- Alongside Southern Staples: Perfect with collard greens, black-eyed peas, cornbread, or fried chicken.
- Mixed into Salads: Stir it into potato salad, chicken salad, or tuna salad for a zesty upgrade.
- As a Side Dish: Simply serve a spoonful alongside any meal for a bright, flavorful component.
- With Eggs: A surprising but delicious addition to scrambled eggs or omelets.
Frequently Asked Questions (FAQs)
Q: Can I use ripe tomatoes instead of green tomatoes?
A: While you can, green tomatoes are preferred for their firm texture and tartness, which are characteristic of traditional chow chow. Ripe tomatoes will break down more during cooking and have a different flavor profile.
Q: Can I adjust the spice level?
A: Absolutely! For a spicier chow chow, add a pinch of red pepper flakes or a dash of cayenne pepper to the brine. For a milder version, you can reduce the ginger or mustard seed slightly, though these contribute significantly to the overall flavor.
Q: What if my jars don’t seal?
A: First, check the jar rim for any nicks or food particles that might have prevented a seal. Also, ensure the lid was properly centered and the screw band was finger-tight. If a jar doesn’t seal after 24 hours, refrigerate its contents and consume within a few weeks, or you can re-process it with a new lid, ensuring all steps are followed precisely.
Q: Is this chow chow fermented?
A: No, this Southern Chow Chow recipe is a quick pickle, not a fermented product. It relies on the acidity of the vinegar and the heat of the canning process for preservation, not beneficial bacteria.
Q: What’s the difference between chow chow and piccalilli?
A: Both are pickled relishes, but piccalilli is typically a British relish characterized by a brighter yellow color (often from mustard powder and turmeric) and a more pungent, mustardy flavor, usually featuring cauliflower, gherkins, and onions. Chow chow, particularly Southern American versions, tends to be sweeter, tangier, and features a base of cabbage, green tomatoes, and bell peppers.
Making your own Southern Chow Chow is a rewarding culinary adventure that connects you to generations of home cooks. This delicious relish, with its vibrant colors and complex flavors, is a testament to the simple joy of preserving fresh produce. By following this detailed guide, you’ll create a batch of homemade chow chow that will delight your taste buds and impress your family and friends. So gather your ingredients, fire up your canner, and get ready to enjoy the timeless taste of the South in every spoonful!