
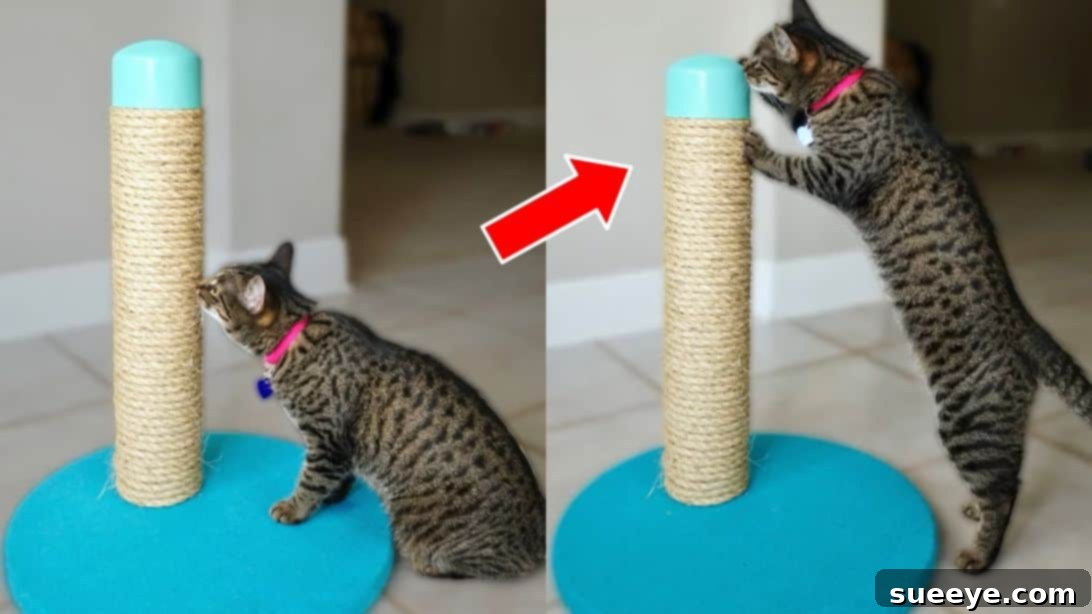
As devoted cat parents, we all understand the inherent need for our feline companions to scratch. It’s more than just a habit; it’s a fundamental instinct crucial for their physical and mental well-being. A high-quality scratching post provides an essential outlet for this natural behavior, helping them to maintain healthy claws, stretch their entire bodies, release pent-up energy, and ultimately stay stress-free. While stores offer a wide array of options, they often come with a hefty price tag and may not perfectly suit your cat’s unique preferences or your home’s aesthetic.
The good news is that you don’t have to break the bank for a functional and stylish solution. Building your own DIY cat scratching post is not only cost-effective but also incredibly rewarding. It allows for complete customization, ensuring it meets your cat’s specific needs and seamlessly blends with your home decor. In this comprehensive guide, inspired by the innovative tutorial from Mother Daughter Projects DIY, we’ll walk you through the process of creating a durable and engaging scratching post using a simple PVC pipe. This project is surprisingly easy, quick to assemble, and promises years of enjoyment for your beloved feline friend.
Why Cats Need to Scratch: More Than Just a Habit
Before diving into the construction, it’s worth understanding the profound reasons why scratching is so vital for cats. Firstly, it’s a primary method for maintaining claw health. Cats regularly shed the outer layers of their claws, revealing new, sharper ones underneath. Scratching helps them remove these old, dead sheaths. Secondly, it’s an excellent form of exercise, allowing them to stretch their back, shoulder, and leg muscles, promoting flexibility and overall physical fitness. Thirdly, scratching serves as a territorial marker. Cats have scent glands in their paws, and when they scratch, they deposit their unique scent, effectively communicating their presence to other felines. Lastly, and perhaps most importantly for indoor cats, scratching is a significant stress reliever. It provides an outlet for energy, frustration, and boredom, which can otherwise manifest in destructive behaviors like furniture scratching.
The Benefits of a DIY PVC Pipe Scratching Post
Opting for a DIY approach, especially with PVC pipe, offers several distinct advantages:
- Cost-Effective: PVC pipes are inexpensive and readily available, making this a budget-friendly project compared to many store-bought alternatives.
- Customization: You have complete control over the height, base size, material wrapping, and even the overall aesthetic. This means you can design a post that perfectly fits your cat’s size and scratching style, as well as your living space.
- Durability: PVC is a robust and long-lasting material, ensuring your scratching post will withstand years of vigorous scratching.
- Stability: With proper construction, a PVC pipe scratching post can be incredibly stable, preventing tipping during enthusiastic use.
- Satisfaction: There’s immense satisfaction in creating something functional and beneficial for your pet with your own hands.
Designing Your Ultimate Cat Scratcher: Customization Options
The beauty of this project lies in its adaptability. While the core design uses a single pipe, you can easily expand upon it to create a multi-functional cat haven. For example, you can center the PVC pipe on a larger, more stable wooden round for a classic, balanced look. Alternatively, positioning the pipe towards one edge allows for the addition of other elements, like a smaller perch or toy hook.
If your cat enjoys climbing or you have multiple felines, consider adding more layers. This can be achieved by using larger wooden rounds for the intermediate platforms and incorporating additional, shorter PVC pipe segments to create multiple scratching levels or perches. Ensure that any added layers or extensions prioritize stability; a wider base and securely fastened components are key to preventing wobbling or tipping. You might also consider:
- Varying Textures: Instead of just rope, you could experiment with carpet scraps, corrugated cardboard, or even sisal fabric on different sections to provide varied scratching experiences.
- Adding Toys: Attach dangling toys, feathers, or bells to the top or sides of the post to encourage interaction and play.
- Integrated Beds or Perches: By creating larger platforms, you can transform your scratching post into a small cat tree, offering a cozy spot for naps or an elevated vantage point.
- Aesthetic Finishes: Paint the PVC cap and base to match your home decor, or use decorative rope winding patterns for an artistic touch.
This project is not just a scratching post; it’s a blank canvas for your creativity and a testament to your love for your cat. Your cats will undoubtedly appreciate a durable, engaging, and personalized scratching solution for many years to come!
For more innovative uses of PVC pipes around your home, be sure to check out these 15 DIY PVC Pipe Ideas For Your Home. If you know other cat enthusiasts, share this rewarding DIY pet project with them!
And if you’re looking for another delightful cat-themed craft, here’s a charming project: Easy Crochet Cat Coaster For Beginners.
Essential Materials for Your DIY Cat Scratching Post
Gathering your materials before you begin will make the construction process smooth and efficient. Here’s what you’ll need:
- 3-inch PVC Pipe: The core of your scratching post. Ensure it’s long enough for your cat to fully stretch when scratching. A good rule of thumb is at least 24-30 inches for an average adult cat, but larger cats may require more.
- 3-inch PVC Cap: To provide a neat, finished top to your pipe and prevent the rope from unraveling.
- 50 Feet of Rope: Sisal rope is highly recommended due to its rough texture, which cats adore for scratching. Jute rope is another natural alternative. Ensure it’s thick enough to provide good grip for your cat’s claws.
- Wood Round: This will serve as the stable base of your scratching post. Choose a diameter that provides good stability for the height of your pipe. For a 30-inch pipe, a 12-16 inch diameter base is often adequate, but a larger base offers superior stability.
- Carpet/Felt: A durable piece of carpet or felt to cover your wooden base, providing a soft surface and preventing scratches on your floors.
- Scrap Piece of Wood: A small, sturdy piece of wood (e.g., plywood or a wooden disc) that will fit snugly inside the PVC pipe, acting as an anchor point to attach the pipe to the base.
- Spray Adhesive: For securely attaching the carpet or felt to your wooden base.
- Acetone: To easily remove any unsightly barcodes or labels from the PVC cap.
- Paint: A pet-safe paint in your desired color to finish the PVC cap and potentially the base.
- Stapler (and Staples): A heavy-duty stapler (like a staple gun) is crucial for securing the carpet to the wooden base and for the rope if needed.
- Hot Glue Gun (and Glue Sticks): For attaching the rope to the PVC pipe and securing various components.
- Jigsaw: For cutting the scrap wood piece precisely.
- Drill (and Screws): For securely attaching the PVC pipe to the wooden base.
- Gloves: Essential for protecting your hands when using hot glue or spray adhesive.
Note: The PVC pipe length is critical. It must be long enough to allow your cat to stretch fully while scratching. Observe your cat’s natural stretching habits to determine the ideal height.
Step-by-Step Guide: Crafting Your PVC Cat Scratching Post
Follow these detailed instructions to construct a sturdy and enticing scratching post for your feline companion.
Step 1: Preparing the Pipe Anchor
Begin by taking your 3-inch PVC pipe. Carefully trace the inside circumference of the pipe onto your scrap piece of wood. This traced circle will become the crucial anchor that fits snugly within the pipe, allowing it to be securely screwed to the base. Set this marked scrap piece aside for the next cutting step.
Step 2: Preparing the Base Covering
Lay out your chosen carpet or felt material flat. Place the large wooden round base on top of it. Using a marker, trace around the wooden round, but make your cut line approximately one inch wider than the actual round. This extra inch will provide enough material to wrap around the edges of the wood and secure it neatly underneath. Carefully cut out this larger circle of carpet/felt.
Step 3: Covering the Wooden Base
With your gloves on, apply spray adhesive evenly to one side of the wooden round. Carefully center your cut carpet/felt piece onto the glued side, smoothing it out thoroughly to prevent any bubbles or wrinkles. Flip the wooden base over. Apply hot glue along the edges of the carpet on the underside and fold the excess fabric firmly over the edges, pressing it down. To ensure a long-lasting and secure attachment, use a stapler around the perimeter, stapling the carpet to the underside of the wood. This double-layer of adhesive and staples will prevent the carpet from peeling off, even with vigorous use. Always wear gloves during this step to protect your hands from hot glue burns.
Step 4: Cutting the Pipe Anchor
Now, take your scrap piece of wood with the traced circle from Step 1. Using a jigsaw, carefully cut along the traced line. The goal is to create a wooden disc that fits precisely inside the 3-inch PVC pipe. Take your time to make a clean cut for a snug fit.
Step 5: Attaching the Pipe to the Base
Place your now carpet-covered wooden base on a stable surface. Decide where you want your PVC pipe to sit on the base – typically centered for balanced stability, or offset for a unique design. Position the small wooden disc (cut in Step 4) where the pipe will go. Drill two pilot holes through this small wooden disc and into the large wooden base. Secure the disc firmly to the base using two screws. For enhanced support and to prevent the carpet from bunching, you can cut out the carpet directly below where the small wooden disc will be placed, exposing the bare wood, and then glue the disc down before drilling the screws. Once the disc is secure, place the PVC pipe over it, ensuring the pipe sits flush on the base and around the small disc. Mark the sides of the pipe where you intend to drive screws through the pipe and into the small wooden disc. Be extremely careful to avoid drilling into the screws that you previously used to attach the disc to the base.
Step 6: Securing the Pipe
Remove the PVC pipe from the base. Using your drill, create pilot holes at the marks you made on the pipe in the previous step. These holes will guide your screws and prevent the PVC from cracking. Place the pipe back onto the small wooden disc on the base, aligning the holes. Drive screws through the PVC pipe and into the wooden disc, ensuring a secure and stable connection between the pipe and the base. The pipe should now stand firmly upright.
Step 7: Finishing the PVC Cap
Take your 3-inch PVC cap. Use acetone on a cloth to carefully wipe away any barcodes or manufacturer labels, ensuring a clean surface. Once the cap is clean and dry, paint it the same color as the felt or carpet you used for the base, or any color that complements your home decor. Allow the paint to dry completely before proceeding.
Step 8: Wrapping the Rope
This is where your scratching post truly comes to life! Apply a generous dab of hot glue to the bottom back of the PVC pipe, near the base. Secure the very end of your rope onto this glue. Begin tightly wrapping the rope around the pipe, working your way upwards. The key is to wrap it as tightly as possible, ensuring there are no gaps between the rope coils. Apply a thin line of hot glue every few inches, or at least at the beginning and end of each section, to ensure the rope stays firmly in place and doesn’t unravel with use. Continue this process until you reach the top of the pipe. Once wrapped, carefully place the painted PVC cap onto the top of the pipe. You can secure it with a bit of hot glue if desired, but a snug fit should suffice.
Introducing Your Cat to Their New Scratching Post
Once your DIY PVC pipe scratching post is complete and the glue has fully dried, it’s time to introduce it to your cat! Place it in a prominent area where your cat often scratches or where they spend a lot of time. If your cat doesn’t immediately take to it, try gently rubbing some catnip on the rope. You can also physically guide their paws to the post in a scratching motion (gently, of course) or dangle a toy near it to encourage interaction. Consistency is key; reward them with praise or a treat when they use it correctly. With a bit of encouragement, your cat will soon discover the joys of their new, custom-made scratching paradise.
Maintaining Your Homemade Scratching Post
To ensure your scratching post lasts for years, periodically inspect the rope for fraying or significant wear. If sections become heavily worn, you can easily replace the rope or re-wrap those areas. Keep the base clean with a damp cloth if needed. With proper care, this DIY project will provide endless entertainment and satisfy your cat’s natural instincts, saving your furniture in the process!
DIY Cat Scratching Post Using PVC Pipe: A Rewarding Project for Happy Felines
Creating this DIY cat scratching post using a PVC pipe is a straightforward and highly rewarding project. It empowers you to provide a perfect outlet for your cat’s natural instincts while saving money and adding a personal touch to your pet’s accessories. Enjoy watching your cat stretch, scratch, and play with their very own custom-built scratching post!