
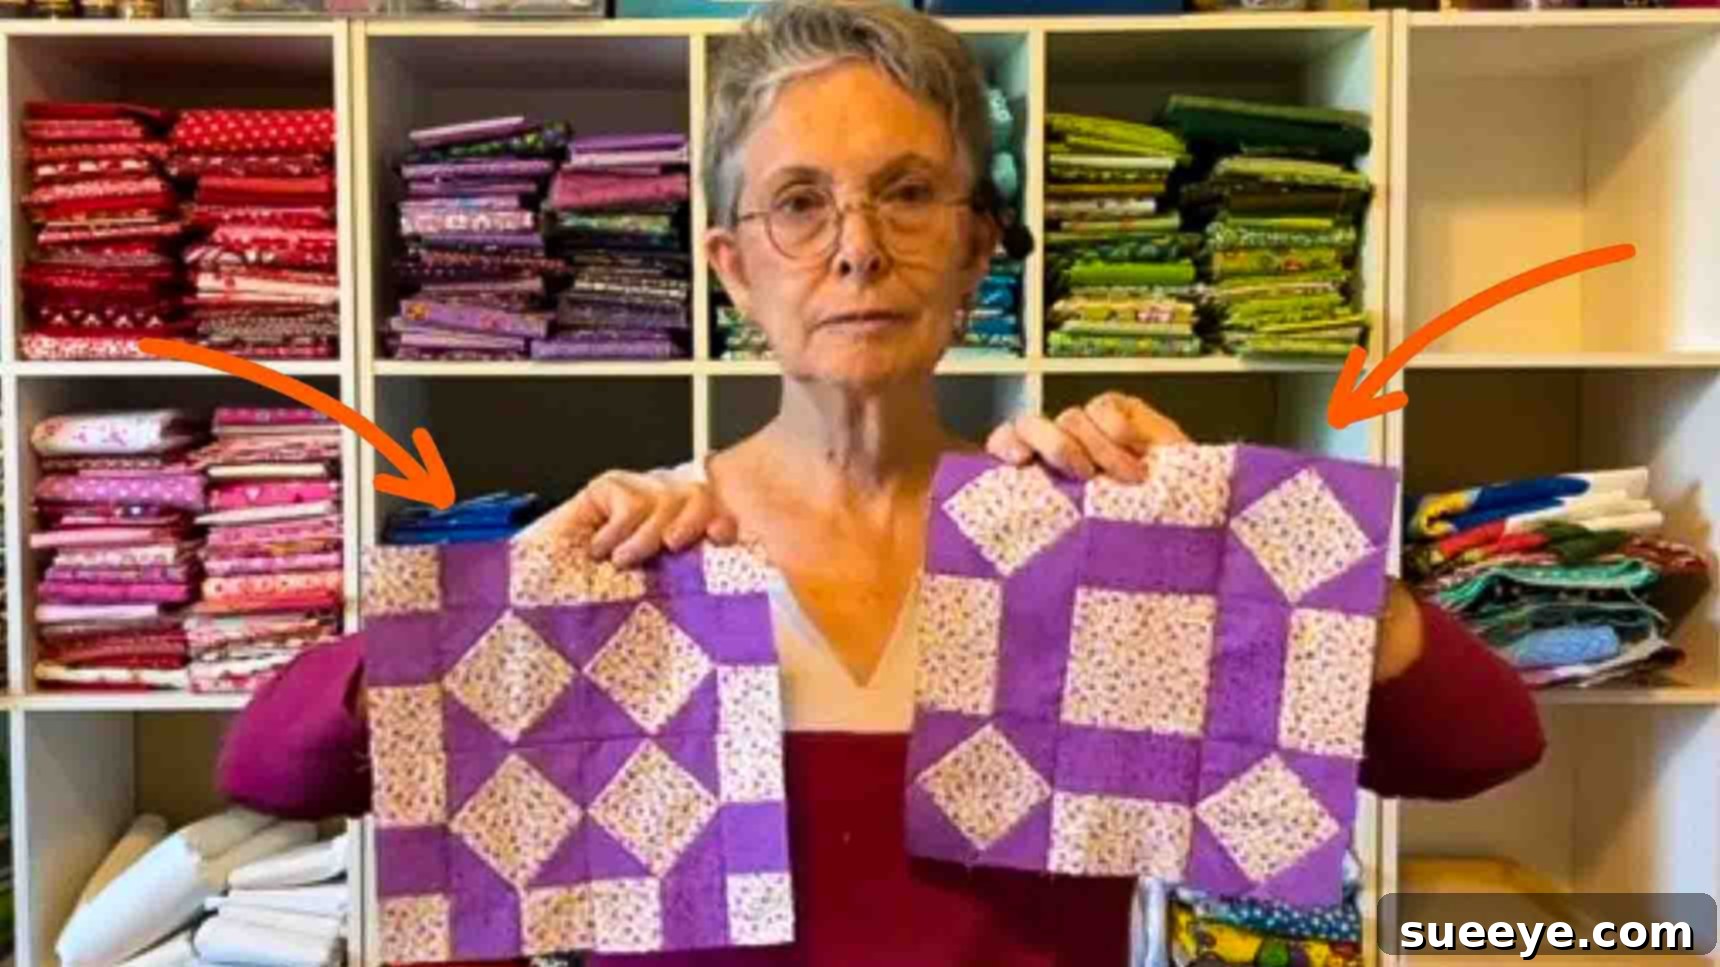
Embarking on a new quilting project is always an exciting endeavor, especially when you’re creating a thoughtful, handmade gift for a loved one. Recently, I found myself searching for that perfect quilt pattern—something unique, beautiful, and manageable enough for a special birthday present. My quest led me to an absolutely adorable design from Tulip Square: the Kitchen Tile Quilt Block. The moment I saw it, I knew it was the one for my mom!
What immediately drew me to this particular quilt block pattern was its charming aesthetic and surprisingly straightforward construction. As someone who appreciates both beauty and simplicity in crafting, I was delighted to find that this design is not only visually appealing but also incredibly beginner-friendly. I tried making it the very next day, and I can confidently say that even novice quilters will find success with this project. The clear, step-by-step instructions make the process enjoyable and stress-free, ensuring a rewarding outcome.
Beyond its ease of creation, the Kitchen Tile Quilt Block truly shines in its versatility. The design offers numerous variations, each capable of transforming the block’s overall look. You might even find yourself struggling to pick a favorite because they are all so captivating! For my mom’s gift, I ultimately chose the first variation, which struck me as particularly unique and elegant. Best of all, this fantastic tutorial comes with a free quilt pattern, making it accessible for everyone to try. Follow along with our detailed guide and the accompanying video tutorial to master this charming quilt block.
Why the Kitchen Tile Quilt Block is Perfect for Your Next Project
The Kitchen Tile Quilt Block is a hidden gem in the world of quilting, offering a blend of classic appeal and contemporary versatility. Its distinctive geometric design, reminiscent of intricate tile work, makes it a fantastic choice for a wide array of projects, from cozy full-sized quilts to smaller, impactful accent pieces. For beginners, this pattern serves as an excellent entry point into the art of quilting, teaching fundamental techniques without overwhelming complexity.
One of the primary reasons this block is so highly recommended for those new to quilting is its reliance on basic shapes and repetitive sewing. You’ll primarily be working with squares and rectangles, mastering precise cutting and consistent seam allowances—skills that are foundational to all quilting. The relatively small number of distinct units in each block means you quickly grasp the assembly process, building confidence with every successful stitch. This pattern allows you to focus on developing good habits, such as accurate cutting with a rotary cutter and ruler, precise piecing on your sewing machine, and effective pressing techniques.
Experienced quilters will also appreciate the Kitchen Tile Quilt Block for its potential for creative expression. By simply altering your fabric choices—playing with high contrast darks and lights, or experimenting with complementary prints and solids—you can achieve vastly different looks. The block’s inherent structure lends itself beautifully to creating captivating secondary patterns when multiple blocks are joined together. Whether you aim for a modern minimalist aesthetic or a vibrant, eclectic masterpiece, this block provides a perfect canvas. Plus, the satisfaction of completing a stunning handmade item, especially one that carries such personal meaning as a gift, is truly unparalleled.
Gathering Your Quilting Essentials: Materials and Tools
Before diving into the exciting world of fabric and stitches, it’s crucial to gather all your necessary materials and tools. Preparation is key to a smooth and enjoyable quilting experience, especially when working on a project like the Kitchen Tile Quilt Block. Choosing good quality fabric is always recommended, as it will hold its shape better, resist fraying, and generally be easier to work with. Consider pre-washing your fabrics to prevent any potential shrinking or dye bleeding issues later on.
For this specific quilt block, you’ll need two distinct fabric prints: one designated as ‘light’ and the other as ‘dark.’ The contrast between these two fabrics is what will make the “tile” effect truly pop, so select colors and patterns that complement each other well and provide clear differentiation. Beyond the fabric, ensure you have your standard quilting tools ready. A sharp rotary cutter, a self-healing cutting mat, and a clear acrylic ruler are indispensable for achieving precise cuts. Your sewing machine, loaded with a good quality thread that matches or blends with your fabrics, will be your primary tool. An iron and ironing board are also essential for pressing seams, which contributes significantly to the flatness and accuracy of your finished block. Don’t forget pins for holding fabric pieces together and a seam ripper – every quilter’s best friend!
Specific Fabric Cuts for One Kitchen Tile Quilt Block:
For the Light Print Fabric:
- Cut 5 pieces of 3 1/2″ squares
- Cut 4 pieces of 2″ x 3 1/2″ rectangles
For the Dark Print Fabric:
- Cut 16 pieces of 2″ squares
- Cut 4 pieces of 2″ x 3 1/2″ rectangles
For a visual guide and additional insights, remember to click here to access the free pattern. This invaluable resource provides diagrams and further details that will greatly assist you throughout the construction process.
Step-by-Step Guide: Crafting Your Kitchen Tile Quilt Block
With your materials prepped and tools at the ready, it’s time to bring your Kitchen Tile Quilt Block to life. Precision is paramount in quilting, so take your time with each step, ensuring accurate cuts and consistent 1/4″ seam allowances. These instructions are designed to guide you through creating a single block, but the process is easily repeatable for making multiple blocks for a larger project.
Phase 1: Preparing Your Fabric Units
The first phase involves creating the individual components, or “units,” that will later be assembled into the complete quilt block. This systematic approach breaks down the complexity and makes the process much more manageable.
- Constructing the Rectangle Units: Begin by taking one 2″ x 3 1/2″ rectangle of your light print and one 2″ x 3 1/2″ rectangle of your dark print. Align them with right sides together along one of the long 3 1/2″ edges. Sew them together with a precise 1/4″ seam allowance. Repeat this process for all four pairs of light and dark rectangles. Once sewn, carefully press these units. For best results and to reduce bulk, it’s generally advisable to press the seam allowance towards the darker fabric. Set these four combined rectangle units aside; they will form part of your outer block structure.
- Creating Corner Square Triangle (CST) Units – Initial Batch: Next, take four of your 3 1/2″ light print squares. For each of these squares, you will attach two 2″ dark print squares. Position a 2″ dark square on one corner of the 3 1/2″ light square, right sides together. Draw a diagonal line from one corner to the opposite corner of the 2″ square. Stitch directly along this drawn line. Repeat this on the diagonally opposite corner with another 2″ dark square. You will now have a 3 1/2″ light square with two 2″ dark squares sewn diagonally to opposite corners. Do this for all four of the 3 1/2″ light squares, leaving the fifth 3 1/2″ light square plain for now.
- Trimming and Pressing the Initial CST Units: After stitching the 2″ squares to the corners, carefully cut off the excess fabric triangle on both sides, leaving a 1/4″ seam allowance. This step removes bulk and creates neat corner square triangles. Once trimmed, press these seams open or towards the darker fabric (your preference, but consistency is key) to create flat, crisp units. These units will have dark triangles on two opposite corners and light fabric in the center.
- Completing the Central CST Unit: Now, take the remaining 3 1/2″ plain light print square. You will attach the remaining 2″ dark print squares to its corners diagonally, similar to the previous step. Place a 2″ dark square on one corner, draw a diagonal line, and stitch. Repeat this for the other three corners. After sewing all four 2″ squares diagonally to the corners, cut off the excess triangles on all four sides, leaving a 1/4″ seam allowance. Then, press these seams open. This central unit will feature dark triangles on all four corners, framing a light square in the middle.
By the end of Phase 1, you should have four combined rectangle units, four corner square triangle units with two dark corners, and one corner square triangle unit with four dark corners. These are the building blocks of your Kitchen Tile Quilt Block.
Phase 2: Assembling Your Quilt Block
Now that all your individual units are prepared, the exciting part begins: arranging and assembling them into the complete Kitchen Tile Quilt Block. This phase brings all your carefully constructed pieces together to reveal the charming design.
- Arranging Your Units: Lay out all your sewn units on a flat surface, such as a design wall or a clean floor. This is where the magic of the Kitchen Tile design truly comes to life. Refer to the free pattern for the precise placement of each unit to achieve the classic Kitchen Tile look. You’ll typically arrange them in a 3×3 grid. The central unit with four dark corners will go in the middle, surrounded by the units with two dark corners and the combined light/dark rectangle units. Take a moment to ensure all units are oriented correctly according to the pattern’s diagram. This visual step is crucial for catching any potential errors before sewing.
- Sewing Rows Together: Once you are satisfied with your layout, begin sewing the units together to form three distinct rows. Start with the top row, stitching the three units together with a consistent 1/4″ seam allowance. Use pins to align your pieces accurately, especially at seam intersections, to ensure a neat finish. Repeat this for the middle row and the bottom row. Press the seams of your rows. A common practice is to press the seams of the first and third rows in one direction (e.g., to the left or right) and the seams of the middle row in the opposite direction. This technique, known as “nesting seams,” helps to reduce bulk where the rows join and creates flatter, more precise blocks.
- Joining Rows to Form the Block: With your three rows neatly pressed, it’s time to join them. Place the top row and the middle row right sides together, carefully aligning the seam intersections. Pin generously to hold everything in place. Sew along the long edge with a 1/4″ seam allowance. Repeat this process to attach the bottom row to the newly joined top and middle rows. Once all three rows are sewn together, give your finished block a final press. You can choose to press these final seams open or to one side, whichever results in a flatter block and suits your preference. Remember that the free pattern also showcases different variations of this quilt block, offering alternative arrangements and design possibilities for future projects.
Congratulations! You have now successfully completed a Kitchen Tile Quilt Block. Take pride in your craftsmanship and admire the intricate pattern you’ve created. This block is a testament to the beauty that can be achieved with simple shapes and careful execution.
Unleashing Creativity: Variations and Project Ideas
The true beauty of the Kitchen Tile Quilt Block lies not just in its foundational design but also in its incredible adaptability. Once you’ve mastered the basic block, a world of creative possibilities opens up. The slightest change in fabric color, print, or even the rotational placement of identical blocks can dramatically alter the overall aesthetic of your finished project. Imagine a vibrant array of colors for a playful look, or a sophisticated palette of solids for a modern minimalist feel. The free pattern provides excellent examples of how these variations can transform the block, inspiring you to experiment and infuse your personal style into every stitch.
This versatility makes the Kitchen Tile Quilt Block suitable for a diverse range of quilting projects, both large and small. Here are just a few ideas to spark your imagination:
- Full Quilts: Combine multiple blocks to create stunning lap, throw, or even bed-sized quilts. The repetitive nature of the block creates intricate secondary patterns when joined, adding depth and visual interest to a larger piece.
- Table Runners: A smaller number of blocks sewn end-to-end can create a beautiful and functional table runner, perfect for adding a touch of handmade charm to your dining space.
- Placemats: A single block, or two joined together, can form a charming set of placemats. These are quick to make and wonderful for practicing your piecing skills.
- Pillow Covers: Transform one or more blocks into unique pillow covers. This is an excellent way to add a custom, handcrafted element to your home decor.
- Tote Bags: Incorporate a Kitchen Tile Quilt Block into the design of a fabric tote bag for a personalized and stylish accessory.
- Wall Hangings: A single, well-executed block or a small grouping can become a decorative wall hanging, showcasing your quilting skills as a piece of art.
Don’t be afraid to play with your fabric stash, mixing and matching prints, solids, and textures. The Kitchen Tile Quilt Block is a fantastic opportunity to let your creativity shine and produce truly unique handmade items.
Expert Tips for Quilting Success
Even with the most straightforward patterns, a few seasoned quilting tips can make all the difference in achieving professional-looking results and enjoying the process. Whether you’re a beginner or looking to refine your skills, these insights will help you navigate your Kitchen Tile Quilt Block project with confidence.
- Accuracy is Your Best Friend: This cannot be stressed enough in quilting. Precise cutting and consistent 1/4″ seam allowances are the foundation of a beautiful quilt block. Invest in a good quality rotary cutter, ruler, and mat. Always double-check your measurements before cutting, and use a seam gauge or specialized presser foot on your sewing machine to maintain that perfect 1/4″ seam. Small discrepancies can compound quickly, leading to crooked blocks.
- Pressing vs. Ironing: There’s a subtle but significant difference. When quilting, “pressing” involves lifting and placing the iron down, holding it briefly, and then lifting it again. “Ironing,” which involves sliding the iron back and forth, can distort your fabric and stretch your seams. Always press your seams open or to one side (consistently!) after each major sewing step to ensure your block lies flat and square.
- Chain Piecing: To save time and thread, especially when making multiple identical units, try chain piecing. Sew several pieces together in a continuous string without lifting the presser foot or cutting the thread between them. Once all are sewn, you can snip them apart. This method also helps maintain consistent seam allowances.
- Pre-wash Your Fabrics: While some quilters skip this step, pre-washing your fabrics before cutting helps to prevent potential shrinking, dye bleeding, and removes any manufacturing chemicals. If you choose not to pre-wash, be sure that all your fabrics are from the same type (e.g., all cotton) and brand if possible, to minimize uneven shrinkage after the quilt is finished and washed.
- The Seam Ripper is Your Pal: Every quilter, no matter how experienced, makes mistakes. Don’t view your seam ripper as a sign of failure; instead, see it as a tool that allows you to achieve perfection. It’s always better to unpick a wonky seam and redo it than to live with a crooked block in your finished quilt.
- Stay Organized: As you cut various pieces for your quilt block, especially for multiple blocks, keep them organized. Use small bins, trays, or even Ziploc bags to group cuts for each block or unit. This prevents confusion and saves time when you’re ready to assemble.
- Enjoy the Process: Quilting should be a relaxing and enjoyable hobby. Don’t rush through steps, and celebrate each small victory, from a perfectly matched seam to a beautifully pressed block. The joy of creation is as important as the finished product.
Access Your Free Pattern and Video Tutorial
Ready to get started on your own Kitchen Tile Quilt Block? To ensure you have all the resources you need for a successful and enjoyable quilting experience, we encourage you to utilize the excellent tools provided by Tulip Square. The free quilt pattern is an invaluable resource, offering detailed diagrams and measurements that complement these written instructions perfectly. Having a visual guide alongside the steps can significantly enhance clarity and precision.
Additionally, for those who prefer visual learning, the comprehensive video tutorial on YouTube is a must-watch. It walks you through each stage of the Kitchen Tile Quilt Block creation, demonstrating techniques like accurate cutting, precise piecing, and effective pressing. Seeing the steps in action can clarify any ambiguities and provide practical tips that are harder to convey through text alone. Combine this guide with the free pattern and video tutorial, and you’ll be well-equipped to create a stunning Kitchen Tile Quilt Block that you’ll be proud to display or gift. Happy quilting!