
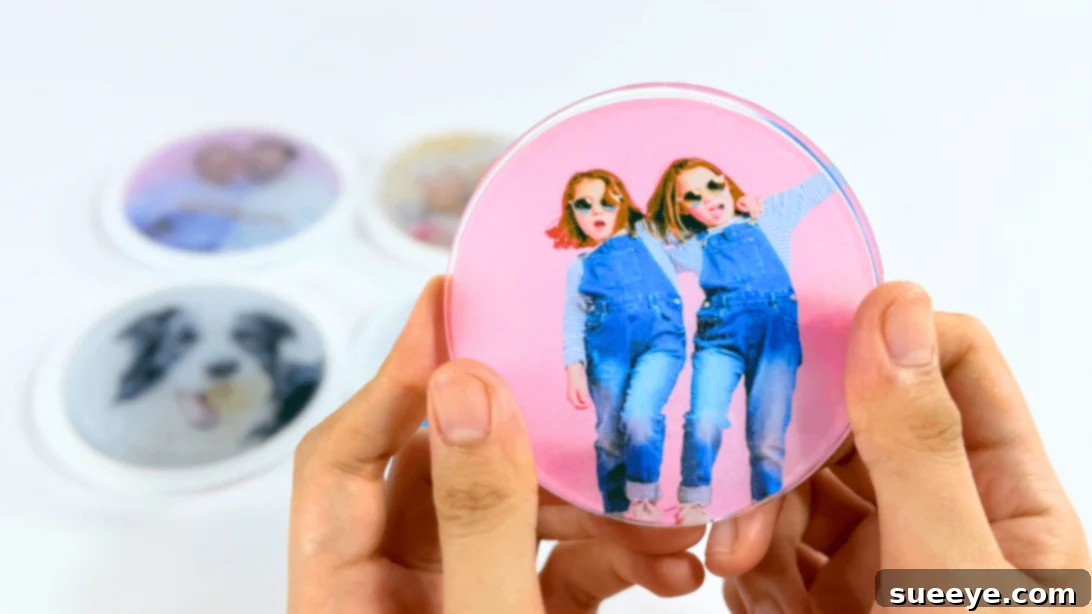
Create Stunning Custom Photo Resin Coasters: Your Ultimate DIY Guide
Tired of ordinary coasters that lack personality? Imagine transforming your most cherished memories into practical, beautiful pieces of functional art. This comprehensive DIY project empowers you to create custom photo resin coasters that are not only durable and protective for your surfaces but also deeply personal and meaningful. Whether you envision a personalized photo coaster collection for your own living space or seek truly unique gift ideas for special occasions, this craft is an ideal choice. It’s a rewarding endeavor that allows you to elevate simple materials into lasting, sentimental keepsakes, capturing moments in a beautiful, glossy finish.
With just a few essential supplies like high-quality epoxy resin and your favorite printed pictures, you can craft clear resin photo coasters that beautifully encapsulate moments. The result is a glossy, crystal-clear finish that protects the image beneath, ensuring your memories are preserved for years to come. These custom coasters make perfect housewarming gifts, heartfelt birthday presents, or anniversary tokens. They’re also an excellent way to infuse your home decor with a bespoke, custom touch that truly reflects your style and story. Dive into this detailed, step-by-step guide and learn precisely how to create your very own DIY resin coasters, using any picture you adore. Get ready to enjoy a handmade piece that perfectly marries creativity with profound personal meaning.
This project offers such a charming and enduring way to immortalize a specific moment, ensuring it remains a vibrant memory in your daily life. Imagine sipping your morning coffee while gazing at a beloved snapshot of a loved one, a dear friend, or even your cherished pet. The beauty of this craft lies in its simplicity and the high probability of achieving professional-looking results even on your first attempt. Seriously, you don’t need extensive prior experience with resin or complex crafting skills. By diligently following the clear instructions outlined below, we guarantee you’ll be able to create a flawless photo resin coaster in no time, showcasing your creativity with ease and confidence.
Essential Materials for Your DIY Photo Resin Coaster Project
Before embarking on this creative journey, gathering all your materials is key to a smooth and enjoyable crafting experience. Here’s a comprehensive list of what you’ll need to make your very own personalized resin coasters, suitable for beginners and experienced crafters alike:
- Silicone Mold: Choose a high-quality, non-stick silicone mold in your desired coaster shape (round, square, hexagon, etc.).
- Epoxy Resin: A two-part epoxy resin system (resin and hardener). Ensure it’s a clear casting resin for best results with photos.
- Hardener: The second component of your epoxy resin, essential for curing.
- Scissors: A sharp pair of scissors for precise cutting of your photos.
- Round Object (or template): Something sturdy and round, slightly smaller than your mold, to use as a template for tracing photos.
- Pictures: Your chosen photos, printed on quality photo paper. Ensure they are completely dry.
- Pencil: For tracing the shape onto your photos.
- Mixing Cups: Disposable plastic or silicone cups for mixing resin.
- Stirring Sticks: Craft sticks or silicone stirrers.
- Nitrile Gloves: Absolutely essential for protecting your hands from resin.
- Protective Mat/Cover: To safeguard your work surface.
- Ventilation: Work in a well-ventilated area or wear a respirator.
- UV Resin and a UV Lamp: Optional, for quickly sealing photos if you’re concerned about resin bleed or want extra protection.
- Glue (e.g., Mod Podge, clear craft glue): Optional, to seal photos if not using UV resin, or to temporarily adhere them to the first resin layer.
- Heat Gun or Torch: Optional, for removing bubbles from the resin surface.
Step-by-Step Guide: Crafting Your Own Photo Resin Coasters
Creating your custom photo resin coaster is a straightforward and enjoyable process. Follow these detailed steps carefully to achieve a beautiful, professional-looking result.
-
Step 1: Prepare Your Workspace and Mix the Resin

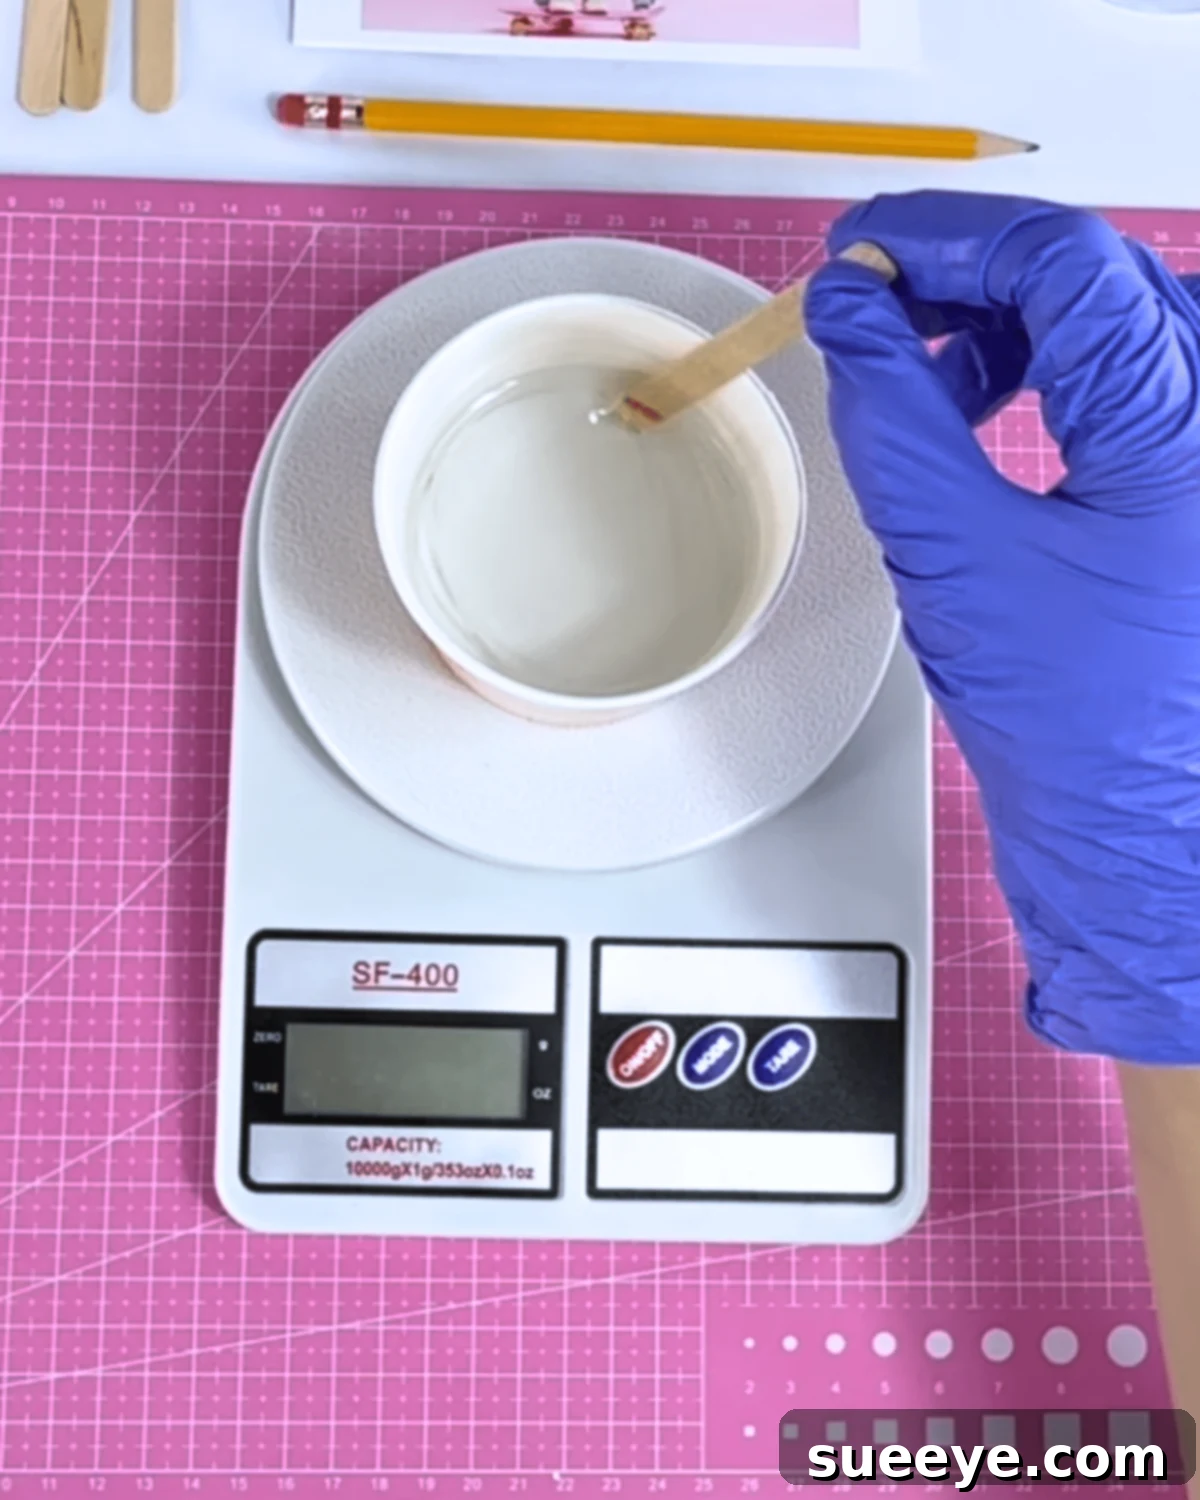
Begin by preparing your workspace. Ensure it’s clean, well-ventilated, and covered with a protective mat. Don your nitrile gloves. Now, carefully measure your epoxy resin and hardener according to the manufacturer’s instructions, typically by weight or volume. For this project, a common ratio is 3:1 (resin to hardener). For example, pour approximately 36 grams of epoxy resin into a clean mixing cup, then add about 12 grams of hardener. It is absolutely crucial to measure precisely to ensure proper curing. Once measured, stir the mixture slowly and consistently for 5-10 minutes. The goal is to achieve a perfectly clear, streak-free consistency.Note: Slow stirring is vital. Rapid stirring introduces air bubbles into the mixture, which can be challenging to remove and may cloud your final coaster. Patience during this step will yield a clearer, more professional-looking result.
-
Step 2: Pour the First Layer of Resin into the Mold
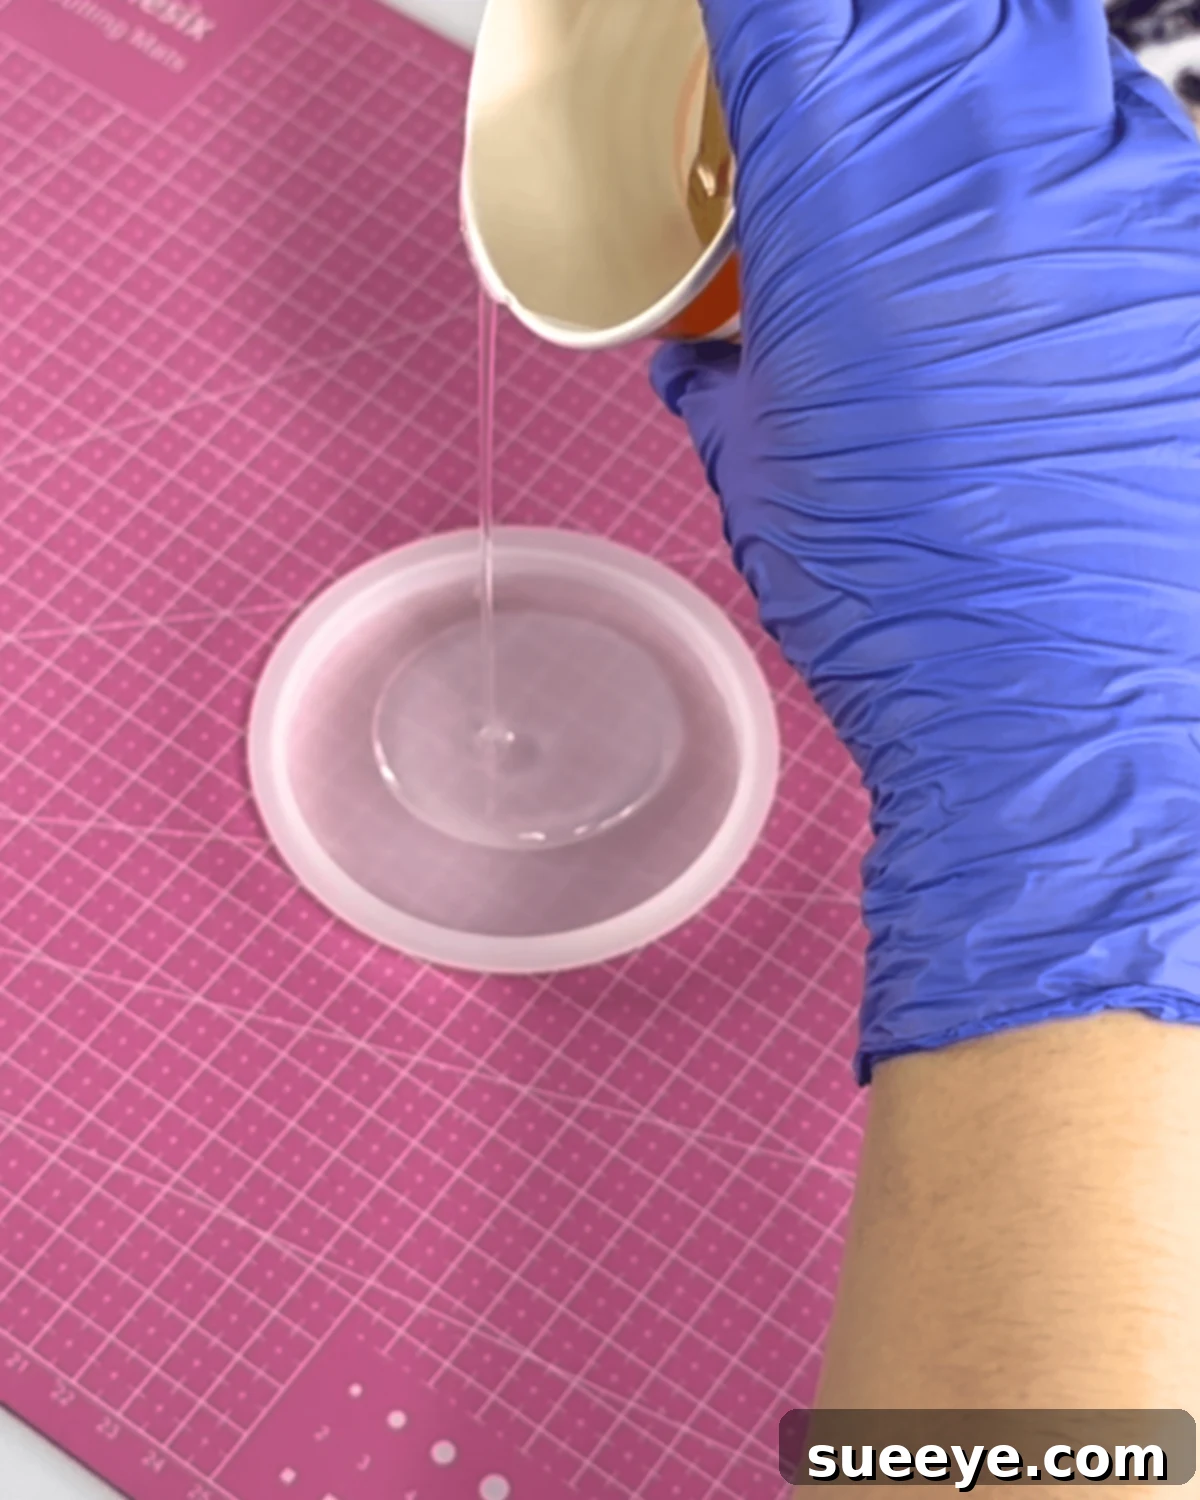
Once your resin mixture is perfectly clear and ready, slowly pour a thin layer into your silicone mold. Do not fill the mold completely at this stage. You only need enough resin to create a thin base layer, which will serve as a bed for your photo, ensuring it sits securely and doesn’t directly touch the bottom of the mold. This also prevents potential “floating” of the photo when the final layer is poured. Allow any surface bubbles to rise, and gently remove them using a heat gun or by exhaling lightly over the surface.Note: Always wear Nitrile Gloves when working with resin to protect your skin from irritation.
-
Step 3: Prepare Your Photo by Tracing the Shape
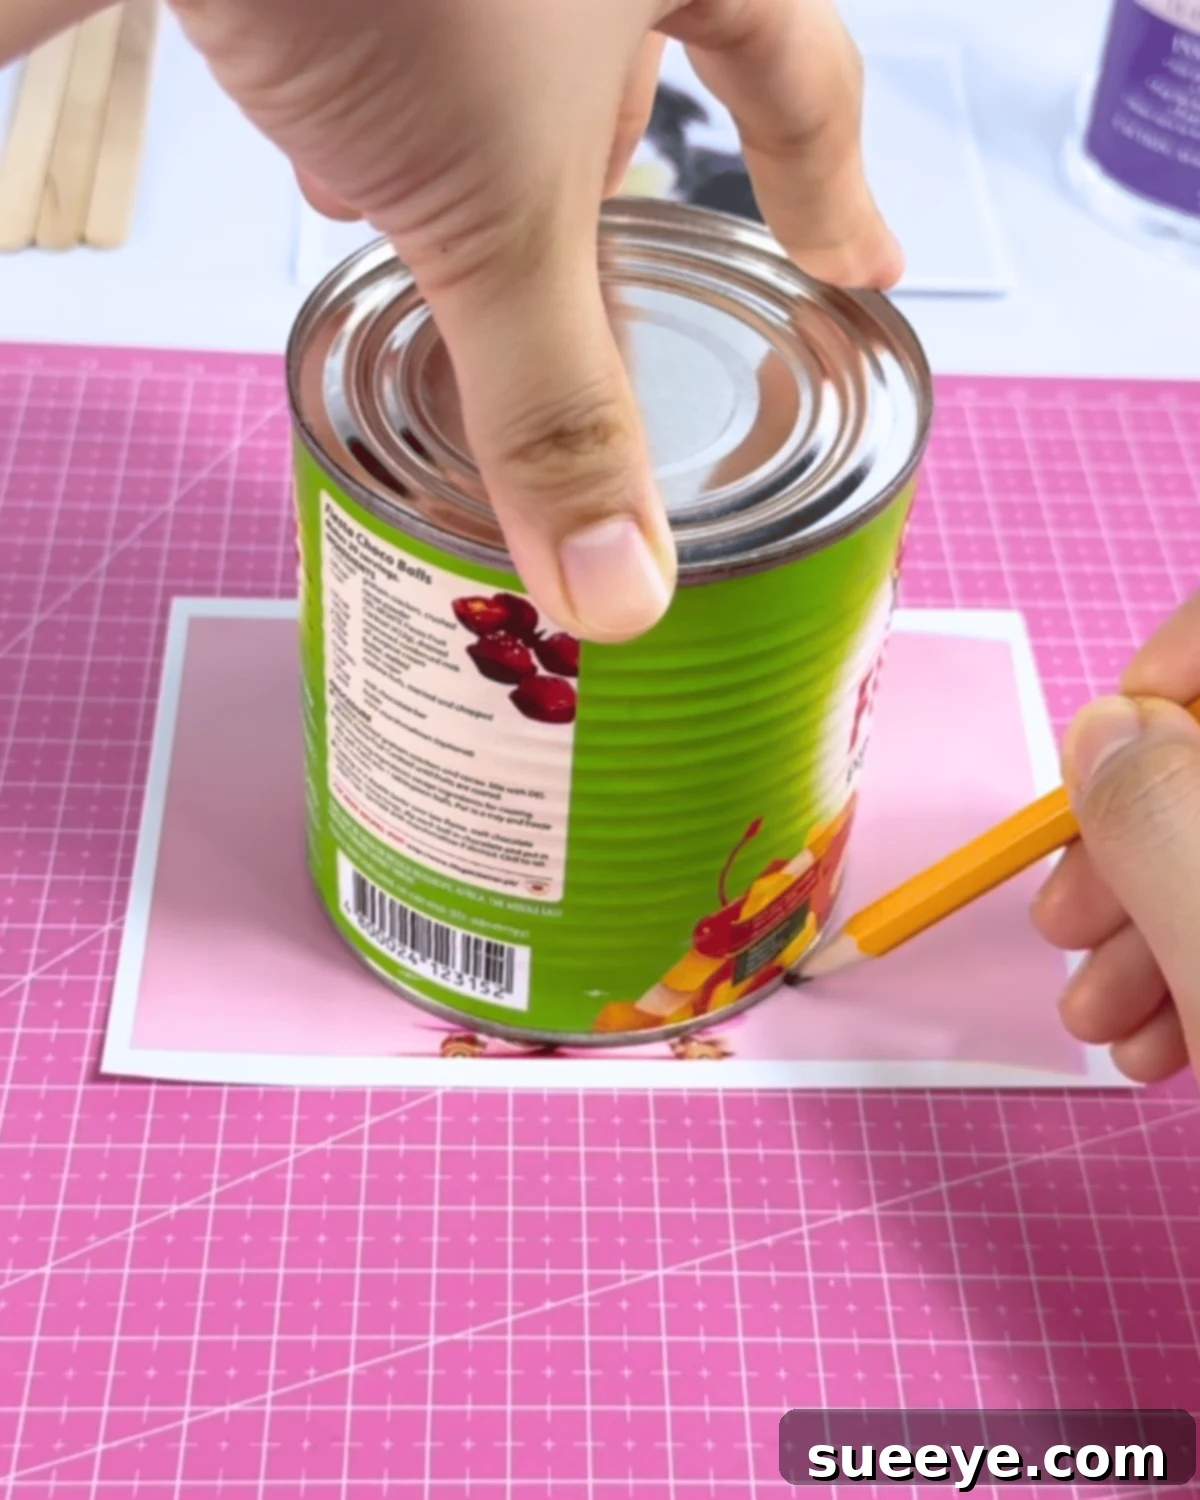
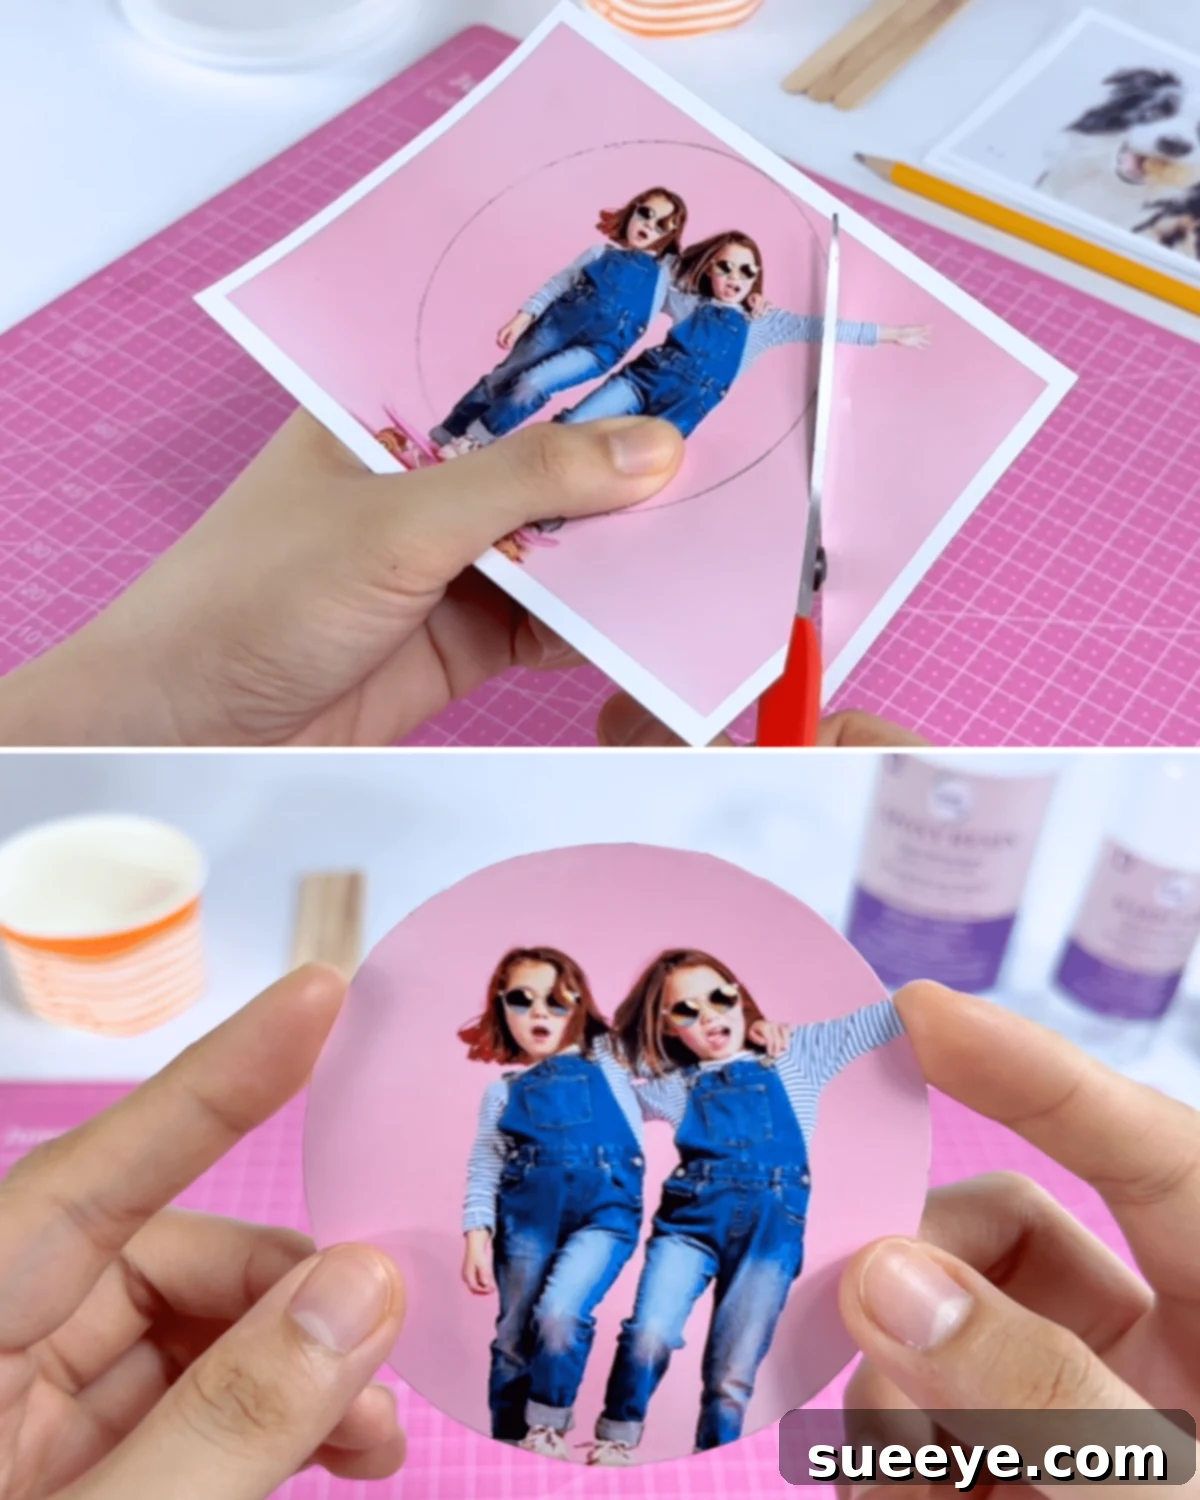
Select the photo you wish to embed. Take a round object – ideally, one that is slightly smaller than your silicone mold to allow for a resin border around the image. Carefully position this object on top of your photo, ensuring that the most important part of the image you want to feature in your coaster is perfectly centered within the object’s circumference. Using a pencil, gently trace the shape of the object onto your photo. This will be your cutting guideline.
-
Step 4: Precisely Cut Out Your Photo
With the traced line as your guide, take a sharp pair of scissors and carefully cut out the photo. Precision is important here to ensure a neat finish. Aim for smooth, continuous cuts. If desired, you can use a small amount of clear craft glue or Mod Podge to seal the edges of the photo at this stage, particularly if your photo paper is very thin or porous, to prevent any potential resin seepage or discoloration. Allow any glue to dry completely before proceeding. -
Step 5: Carefully Place the Photo into the Mold
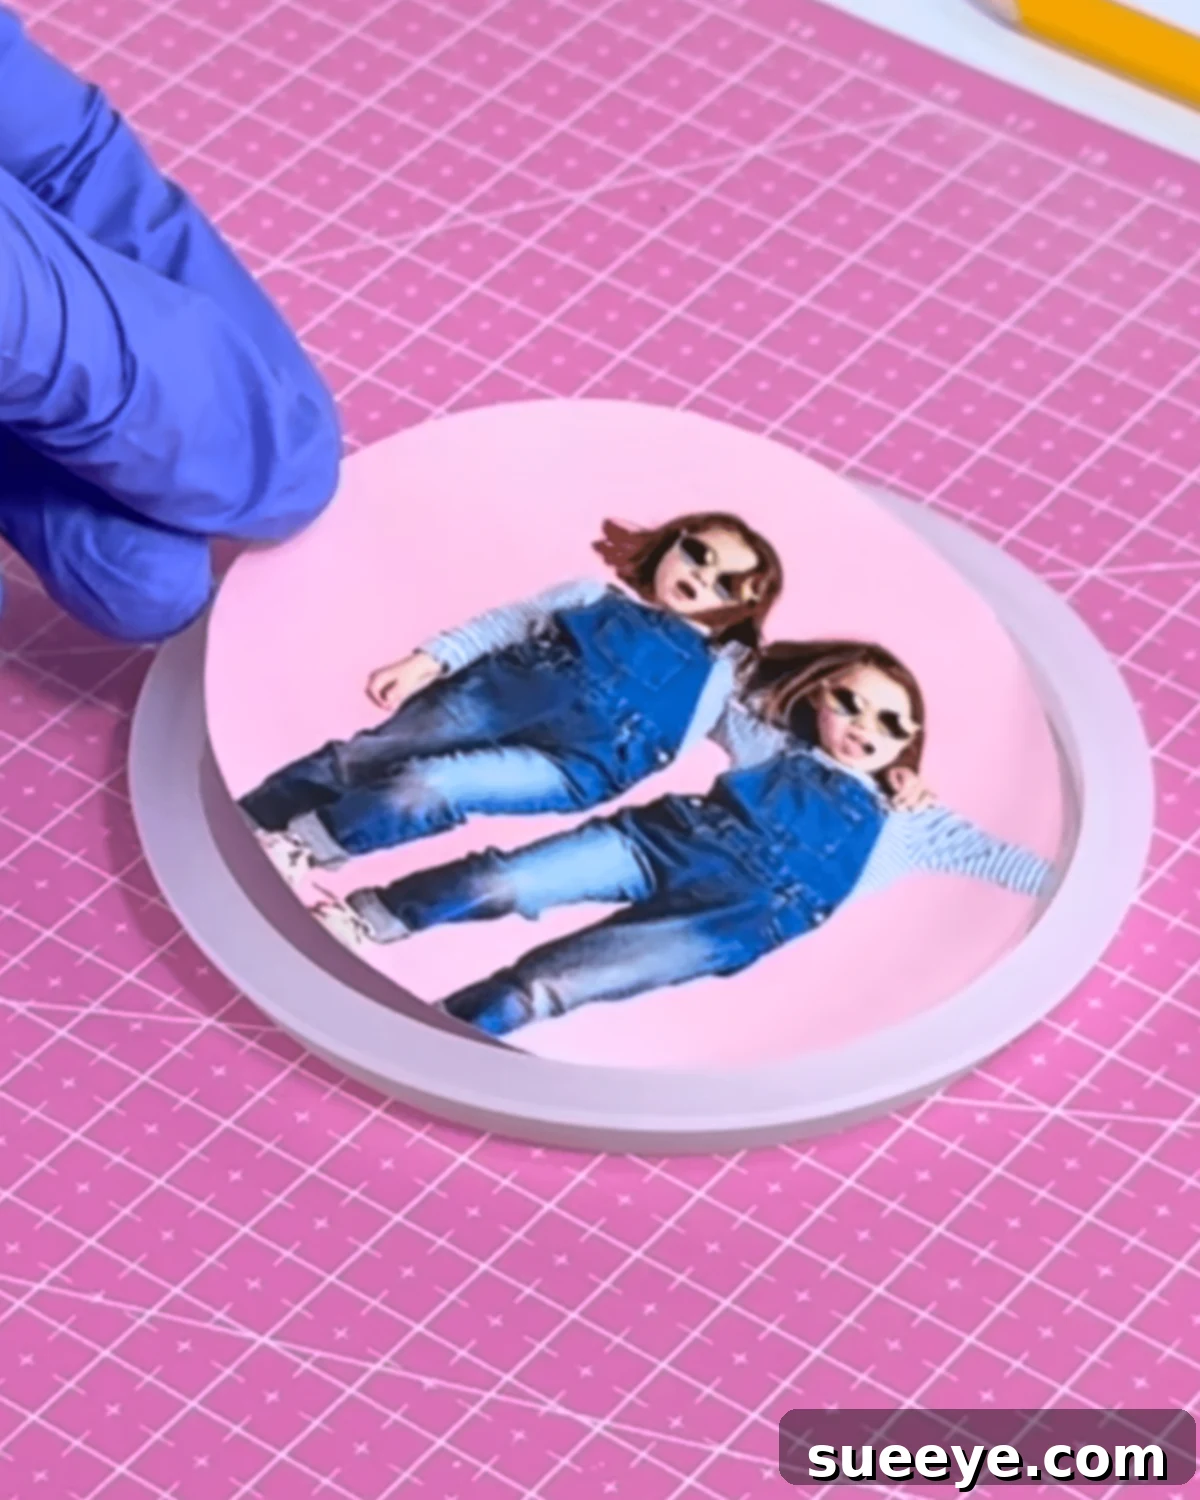
Now, gently place your perfectly cut-out photo into the mold, on top of the initial layer of resin you poured in Step 2. Take your time to center the photo precisely within the mold. You can use a toothpick or a crafting stick to nudge it into the perfect position. Ensure there are no air bubbles trapped underneath the photo; lightly press down on the photo’s surface with a clean gloved finger or tool to expel any trapped air, making sure the entire surface of the photo is in contact with the resin. -
Step 6: Pour the Remaining Resin and Cure
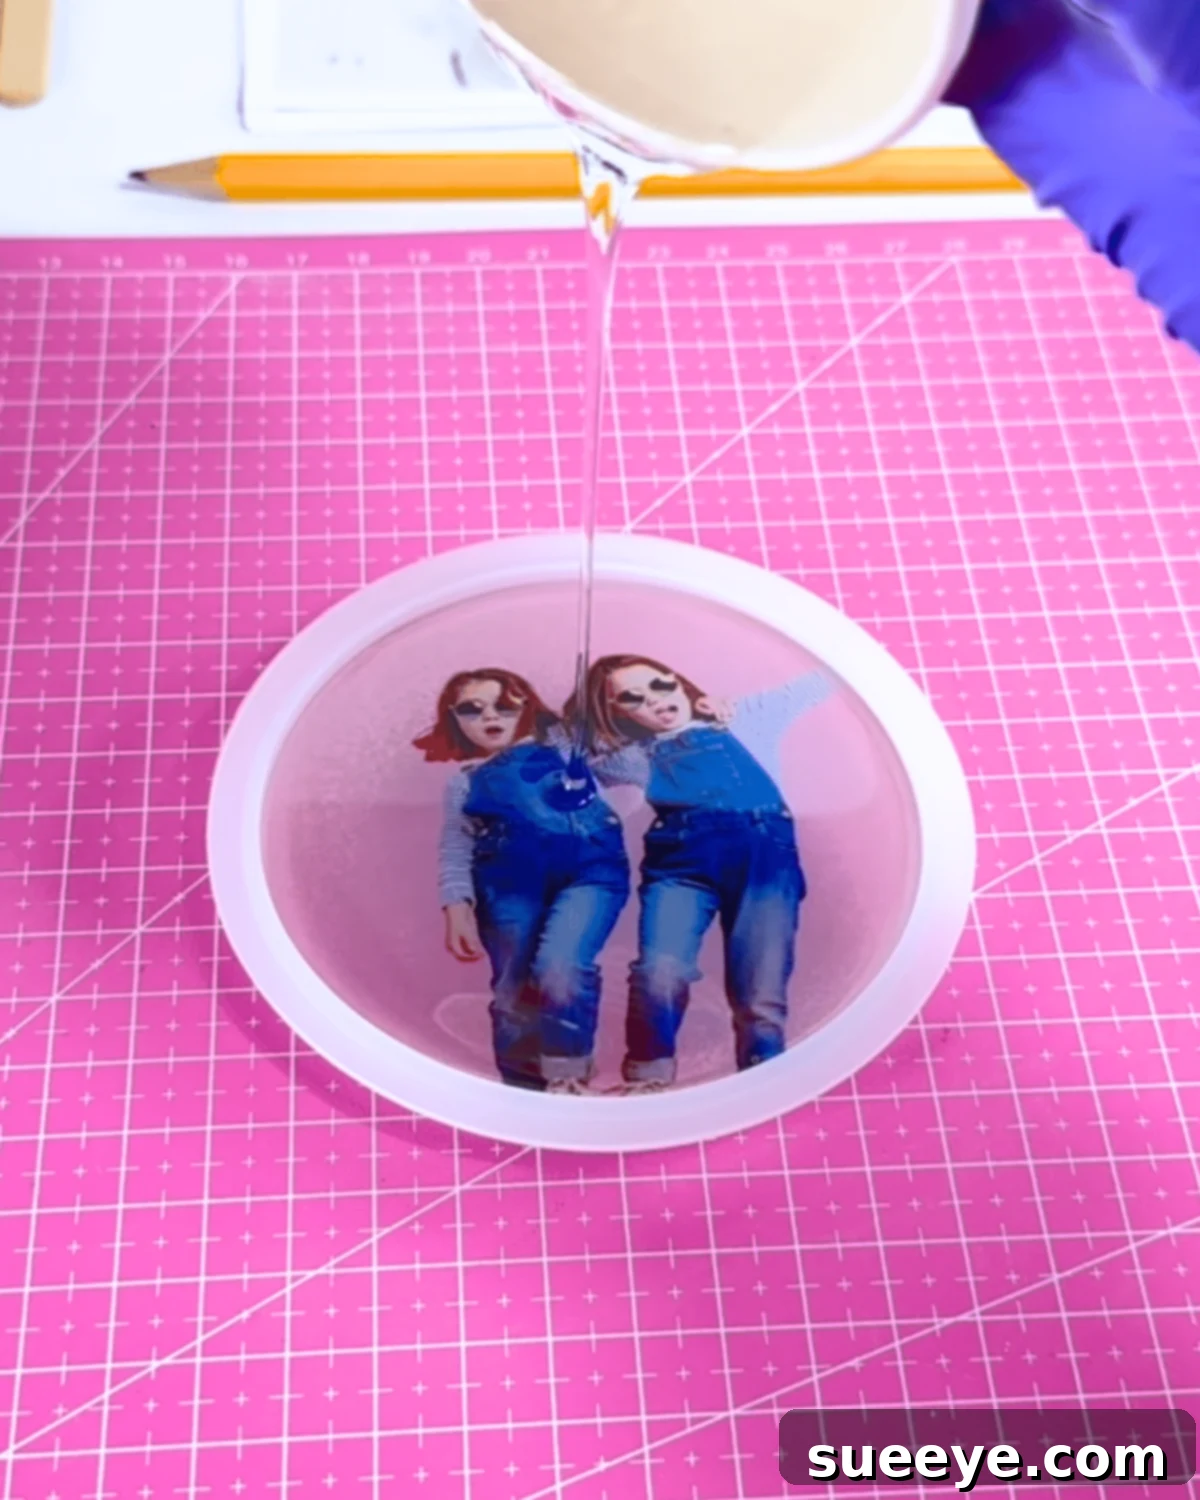
Once the photo is perfectly positioned, carefully pour the remaining resin mixture directly over the photo, filling the mold completely to your desired thickness. Pour slowly to avoid displacing the photo or creating new bubbles. After pouring, carefully inspect the surface for any new air bubbles that may have risen. Use a heat gun (on a low setting, moving quickly) or a lighter (briefly passed over the surface) to pop these bubbles. Do not overheat the resin. Now, set your mold aside in a level, dust-free area and allow it to cure overnight, or for the full curing time recommended by your resin manufacturer (typically 12-24 hours) until it is completely hardened and non-tacky. -
Step 7: Demold Your Beautiful Custom Coaster
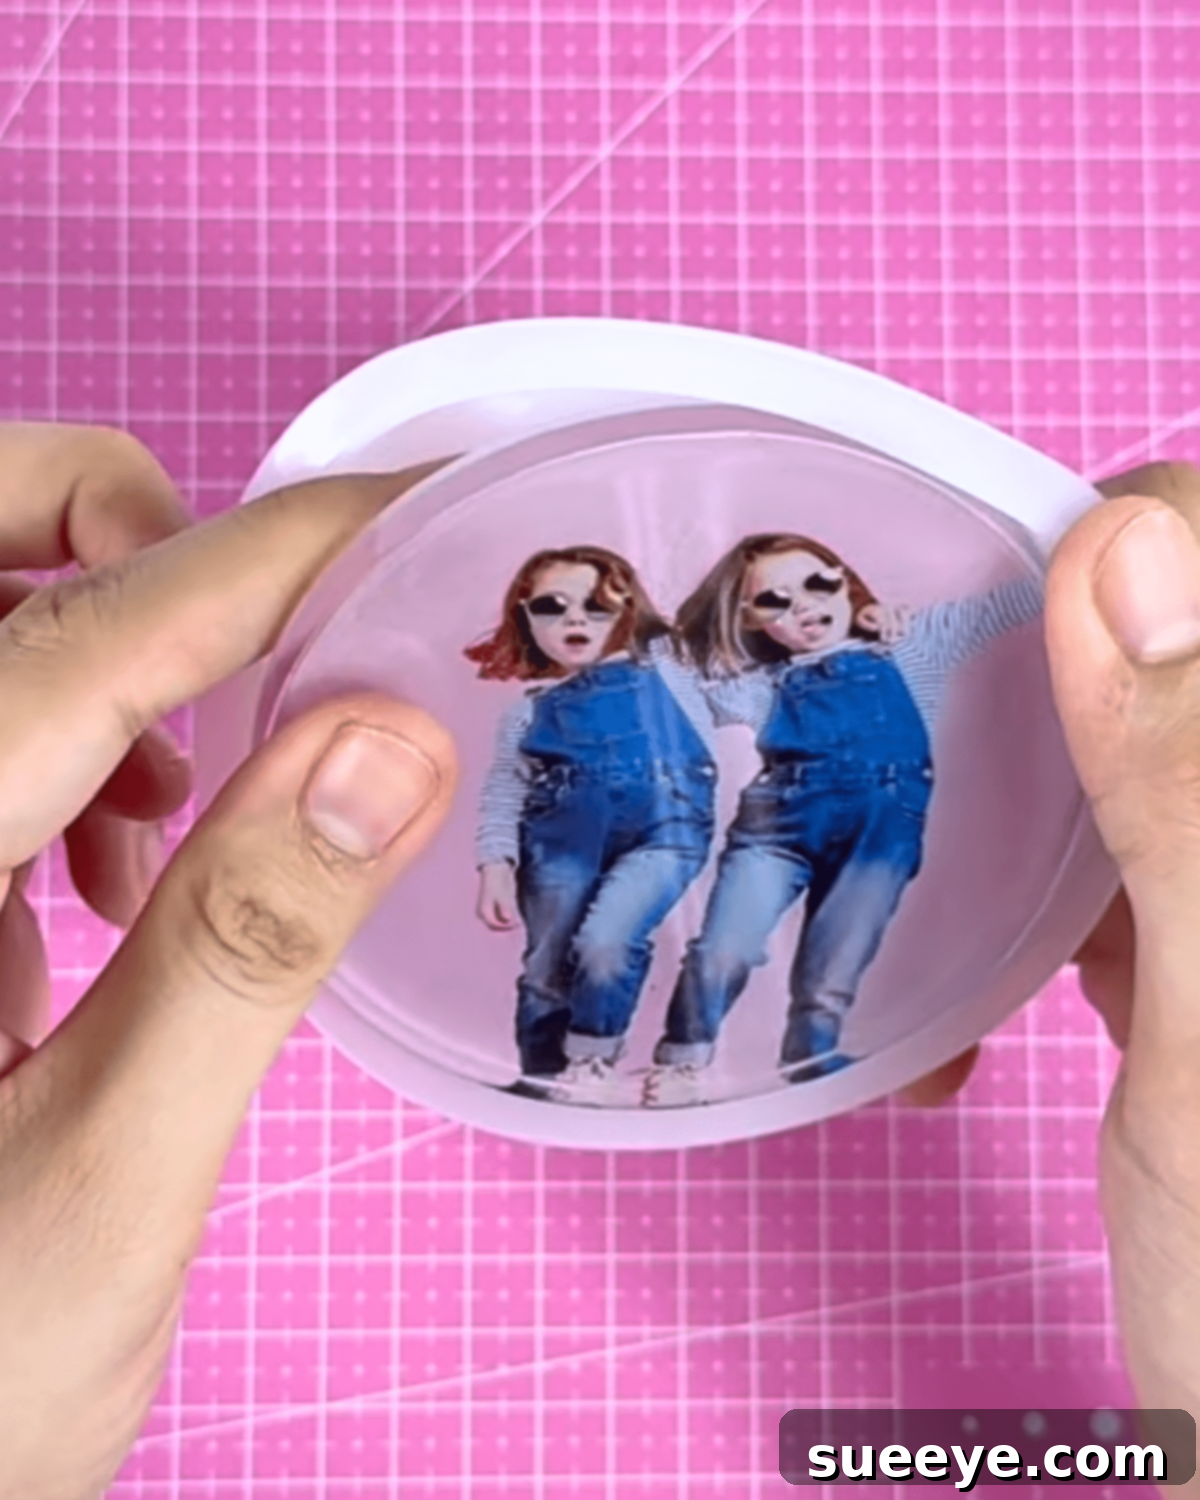
After the recommended curing time, typically 24 hours, your resin should be fully cured and hard to the touch. Carefully flex the silicone mold to release the edges of your new photo resin coaster. Gently push the coaster out from the bottom of the mold. Admire your creation! Your personalized photo resin coaster is now complete and ready to use or gift. For optimal durability and hardness, some resins may require a full 72 hours to achieve their ultimate strength, so check your product’s specific instructions.
Materials
- Silicone mold
- Epoxy Resin
- Hardener
- Scissors
- Round object
- Pictures
- Pencil
- UV resin and a UV lamp, optional
- Glue, optional

Why You’ll Absolutely Adore Making These Photo Resin Coasters
This DIY photo resin coaster project isn’t just about crafting; it’s about creating lasting memories and thoughtful gifts. Here’s why you’ll fall in love with it:
Multi-Purpose Use: More Than Just a Coaster! – While these creations are excellent for protecting surfaces, their potential extends far beyond that. Imagine transforming your beautiful photo coaster into a personalized hanging ornament for your Christmas tree, a unique holiday decoration, or even a custom magnet. This versatility makes each piece extra special and meaningful, allowing your cherished memories to adorn your home in various delightful ways throughout the year.
Limitless Customization & Deep Personalization: Tell Your Story – The true magic of this project lies in its endless customization possibilities. You have the freedom to showcase any photo you adore – from heartwarming family moments and candid shots of friends to adorable pet pictures, scenic travel snapshots, or even artistic designs. Each coaster becomes a one-of-a-kind keepsake or a deeply heartfelt gift that tells a unique story, making it far more impactful than anything store-bought.
Effortless and Beginner-Friendly: Craft with Confidence – Don’t let the idea of working with resin intimidate you! This project is designed to be incredibly simple and accessible, requiring only basic resin materials and straightforward steps. It’s perfect for crafters of all skill levels, from complete novices to seasoned DIY enthusiasts, who wish to create something beautiful, functional, and deeply personal without complex techniques or specialized tools. You’ll be amazed at the professional results you can achieve with minimal effort.
Durable & Long-Lasting: Memories Protected – Epoxy resin provides a hard, clear, and waterproof finish that protects your photos from spills, heat, and wear. These coasters are built to last, ensuring your precious memories remain vibrant and intact for years, serving as a constant reminder of special moments.
Cost-Effective Gifting: Thoughtful & Budget-Friendly – Creating gifts by hand often comes with a higher sentimental value and can be significantly more budget-friendly than purchasing custom items. This project allows you to craft multiple personalized gifts without breaking the bank, making it perfect for holiday seasons, party favors, or small tokens of appreciation.
Discover More Viral DIY Projects from Our Community
Seasonal
DIY Honeycomb Paper Christmas Tree Ornament
Crafts
3D Origami Christmas Tree Tutorial
Sewing Ideas
Easy Christmas Sweater Embroidery Hack
Seasonal
DIY Christmas Tree With Pipe Cleaners
Creating your own custom photo resin coasters is a wonderfully fulfilling project that combines practicality with profound personal sentiment. Not only do these coasters protect your surfaces, but they also serve as constant, beautiful reminders of cherished moments and loved ones. Whether you’re crafting them for your home or as a thoughtful gift, the process is rewarding, and the end product is truly unique. So gather your supplies, pick your favorite photos, and start creating these incredible keepsakes today!
*If you loved learning this craft and are inspired to explore more creative DIY ideas, we invite you to visit our official website for a wealth of tutorials and inspiration. Be sure to follow our Facebook page to stay updated on our latest projects, and subscribe to our YouTube channel for engaging video guides and crafting tips! Happy crafting!