
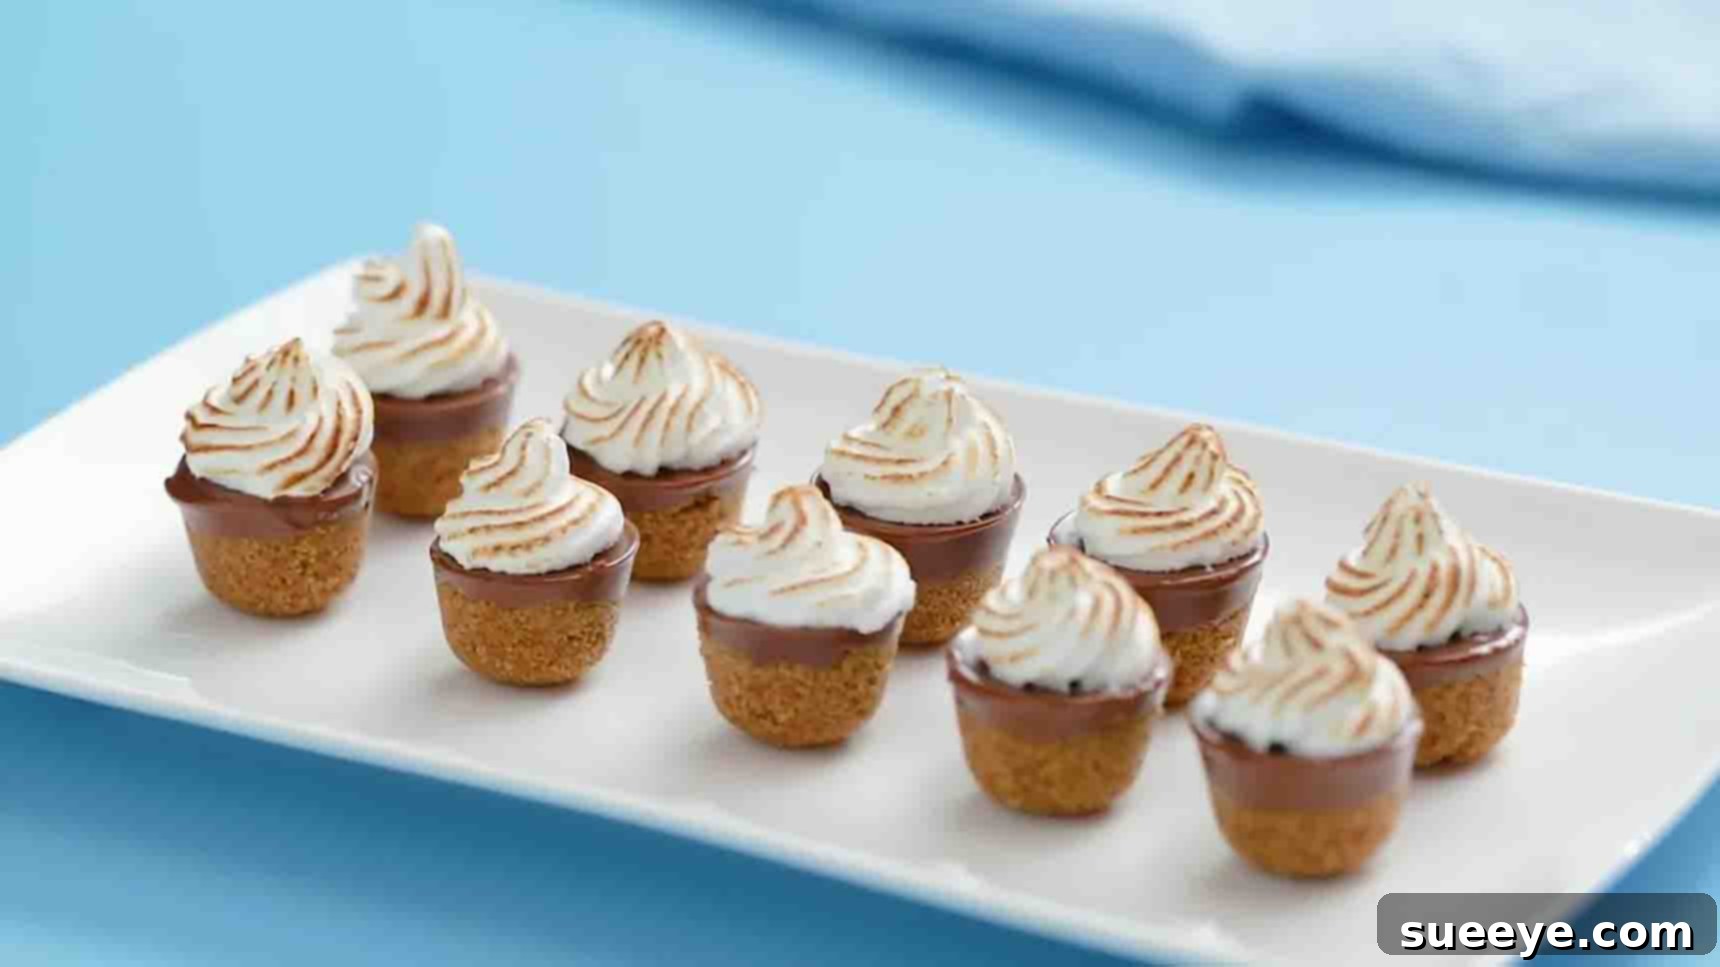
Easy Bite-Size S’mores Recipe: No-Bake Mini Delights with Italian Meringue
There’s an undeniable charm and nostalgic delight associated with s’mores. The classic combination of crispy graham crackers, gooey melted chocolate, and perfectly toasted marshmallow is a quintessential campfire treat. However, bringing that rustic experience indoors, especially for a gathering, can often lead to a sticky mess and logistical challenges. What if you could capture all the beloved flavors and textures of a s’more in an elegant, mess-free, and incredibly easy-to-make bite-sized format? This recipe for Bite-Size S’mores with Italian Meringue offers precisely that: a sophisticated and convenient twist on a timeless favorite.
Inspired by the creative culinary vision of Tastemade on YouTube, these mini s’mores elevate the traditional concept. Instead of a simple toasted marshmallow, we’ll be crafting a light, airy, and stable Italian meringue topping, which adds a refined touch and a delightful melt-in-your-mouth texture. This dessert is not only a fantastic conversation starter but also a guaranteed crowd-pleaser, perfect for any occasion – from casual get-togethers to elegant dinner parties. The best part? It’s a completely no-bake recipe, simplifying the process and making it accessible for home bakers of all skill levels. Prepare to impress your guests and satisfy your sweet tooth with these irresistible mini s’mores!
Why This Bite-Size S’mores Recipe Is a Must-Try
Beyond their undeniable cuteness, these mini s’mores offer numerous advantages that make them a standout dessert choice. Firstly, their convenient bite-size format makes them exceptionally easy to serve and enjoy. Guests can simply pick one up and indulge without the need for plates, forks, or dealing with the usual sticky aftermath of traditional s’mores. This makes them ideal for dessert buffets, parties, or even as a thoughtful homemade gift.
Secondly, the fact that this is a no-bake dessert cannot be overstated. You won’t need to turn on your oven, saving energy and keeping your kitchen cool, especially during warmer months. The assembly primarily involves chilling, making it a stress-free option for busy schedules. The innovative use of a smooth, rich chocolate layer, specifically from high-quality Lindt balls (or similar truffles), provides a luxurious feel that sets these apart from standard chocolate squares.
Finally, the inclusion of Italian meringue is truly the star of this recipe. Unlike regular marshmallows, Italian meringue is created by whipping egg whites with a hot sugar syrup, resulting in a stable, glossy, and incredibly delicate topping. It’s less sweet than traditional marshmallows and offers a cloud-like texture that beautifully complements the crunchy graham cracker base and decadent chocolate. This meringue can even be lightly torched for that authentic toasted flavor and appearance, without the need for a campfire! These mini s’mores are a testament to how simple ingredients, combined with a touch of culinary creativity, can result in a truly gourmet experience.
Gather Your Ingredients: What You’ll Need
Crafting these delectable bite-size s’mores requires a selection of common ingredients, carefully chosen to achieve that perfect balance of crunch, creamy chocolate, and airy sweetness. Opting for good quality ingredients can significantly enhance the final taste and texture of your homemade treats.
- Graham Crackers: Approximately 1 ½ cups of finely crushed graham cracker crumbs. This forms the essential crunchy and slightly sweet base of your s’mores. You can achieve fine crumbs using a food processor for speed and consistency, or by placing the crackers in a sturdy freezer bag and crushing them with a rolling pin until uniformly fine.
- Melted Butter: 7 tablespoons of unsalted butter, melted. The butter acts as the binding agent for the graham cracker crumbs, creating a firm, cohesive, and flavorful crust that holds its shape beautifully once chilled.
- Milk Chocolate Balls: 12 pieces of high-quality milk chocolate, such as Lindt truffles. These provide a wonderfully rich, creamy, and smooth chocolate layer that melts exquisitely. If Lindt balls aren’t available, you can substitute with other premium milk chocolate bars, finely chopped, or good quality milk chocolate chips, ensuring you have enough to create a substantial layer.
For the Italian Meringue Topping:
The Italian meringue is the elegant crown of these mini s’mores, offering a light, pillowy, and sophisticated alternative to traditional marshmallows.
- Egg Whites: 2 large egg whites. For best results and maximum volume when whipping, ensure your egg whites are at room temperature. Carefully separate them from the yolks, as even a tiny amount of yolk can prevent the whites from whipping properly.
- Granulated Sugar: ½ cup granulated white sugar. This sugar is crucial for making the hot sugar syrup, which cooks and stabilizes the egg whites, resulting in a firm and glossy meringue.
- Water: 50 ml water. Used in conjunction with the granulated sugar to create the essential sugar syrup.
Essential Equipment for Seamless S’mores Preparation
Having the right kitchen tools at hand will make the process of assembling your bite-size s’mores enjoyable and efficient. Here’s a checklist of what you’ll need:
- Silicone Ice Tray: A standard silicone ice cube tray with approximately 12 uniform cavities is ideal. The flexibility of silicone allows for incredibly easy and damage-free unmolding of your s’mores.
- Food Processor (Optional): Highly recommended for quickly and evenly pulverizing graham crackers into fine crumbs. If you don’t have one, a sturdy plastic bag and a rolling pin will work just fine.
- Heatproof Glass Bowl & Saucepan (for Double Boiler): Necessary for gently melting the chocolate without risking scorching. The glass bowl should fit snugly over the saucepan, ensuring it doesn’t touch the simmering water.
- Mixing Bowls: You’ll need at least two: one for combining the graham cracker base and another, preferably a stand mixer bowl, for whipping the egg whites for the meringue.
- Electric Mixer (Handheld or Stand): Absolutely essential for achieving the perfect consistency for your Italian meringue. Whipping egg whites manually to stiff peaks is a significant workout!
- Small Saucepan: For carefully preparing the sugar syrup for the meringue.
- Candy Thermometer (Highly Recommended): While not strictly mandatory, a candy thermometer takes the guesswork out of making the sugar syrup, ensuring it reaches the precise temperature (soft-ball stage) needed for a stable Italian meringue.
- Piping Bag & Star Tip: For elegantly piping the meringue onto each s’more. A star tip creates beautiful, professional-looking swirls, but any decorative tip will do.
- Rubber Spatula & Spoon: For mixing ingredients, scraping bowls, and distributing mixtures.
- Measuring Cups & Spoons: For accurate ingredient measurements.
Directions: Crafting Your Gourmet Mini S’mores
Follow these detailed steps carefully to create stunning and utterly delicious bite-size s’mores that will be an instant hit at any gathering.
Step 1: The Graham Cracker Base and Decadent Chocolate Layer
This foundational step lays the groundwork for your mini masterpieces, ensuring a firm, flavorful crust and a smooth, rich chocolate filling that will delight your taste buds.
- Prepare the Graham Cracker Base: Start by preparing your graham cracker crumbs. For the finest, most consistent texture, use a food processor to blitz the graham crackers until they are finely ground. Alternatively, place them in a heavy-duty plastic bag and crush them with a rolling pin. In a medium-sized mixing bowl, combine the finely crushed graham crackers with the 7 tablespoons of melted unsalted butter. Mix thoroughly with a spoon or spatula until all the crumbs are evenly moistened and resemble wet sand.
- Form the Bases: Carefully distribute the buttered graham cracker mixture into each individual cavity of your silicone ice tray. Use the back of a small spoon or your fingertips to firmly press the mixture down into the bottom of each cavity. It’s crucial to compress the crumbs tightly to create a stable, compact base that won’t crumble when you unmold your s’mores.
- Initial Chill: Once all the bases are formed and pressed firmly, transfer the silicone tray to the refrigerator to chill for at least 15 minutes. This initial chilling period allows the butter to solidify, effectively binding the graham cracker crumbs together and creating a sturdy foundation for the subsequent layers.
- Melt the Chocolate: While the graham cracker bases are chilling, prepare your luscious chocolate layer. Place the 12 pieces of milk chocolate Lindt balls (or your chosen chocolate) in a heatproof glass bowl. Set this bowl over a small saucepan containing about an inch or two of simmering water, ensuring that the bottom of the glass bowl does not touch the water. This double-boiler method provides gentle, even heat, preventing the chocolate from seizing or burning. Stir the chocolate occasionally with a rubber spatula until it is completely melted and wonderfully smooth and glossy.
- Add the Chocolate Layer: Once the chocolate is perfectly melted, remove the glass bowl from the heat. Retrieve the chilled graham cracker bases from the refrigerator. Carefully and evenly pour the melted chocolate over each chilled graham cracker base in the silicone tray. To help the chocolate settle and create a perfectly smooth, level surface, gently tap the tray a few times on your kitchen counter.
- Final Chill for Layers: Return the silicone tray to the refrigerator and allow it to chill for an additional 30 minutes, or until the chocolate layer is completely set and firm to the touch. This step is absolutely vital for ensuring easy unmolding and preventing the chocolate and graham cracker layers from merging. Patience here ensures perfect individual mini s’mores.
Step 2: The Fluffy Italian Meringue Topping and Finishing Touches
The elegant Italian meringue is the defining feature that truly sets these bite-size s’mores apart, offering a light, airy, and remarkably stable topping that’s a joy to behold and taste.
- Prepare the Sugar Syrup: In a small, clean saucepan, combine 50 ml of water with ½ cup of granulated white sugar. Place the saucepan over low heat and stir gently until the sugar has completely dissolved. Once dissolved, increase the heat to medium-low and allow the syrup to simmer without further stirring. If you are using a candy thermometer (highly recommended for precision), cook the syrup until it reaches approximately 240°F (115°C), which is known as the “soft-ball stage.” This precise temperature is crucial as the hot syrup will cook the egg whites and provide stability to your meringue.
- Whip the Egg Whites: While the sugar syrup is cooking, place the 2 room-temperature egg whites into a very clean, dry glass or metal mixing bowl (preferably the bowl of a stand mixer). Begin whisking them on medium speed. Continue whisking until soft peaks form. Soft peaks will hold their shape when the whisk is lifted, but the very tip will curl over slightly. Avoid over-whipping at this stage, as the egg whites need to be receptive to the hot sugar syrup.
- Create the Italian Meringue: Once the sugar syrup reaches the correct temperature (240°F/115°C), immediately and very carefully remove it from the heat. With the electric mixer running on medium-high speed, gradually pour the hot sugar syrup into the whipping egg whites in a slow, steady stream. Be sure to pour the syrup down the side of the bowl, avoiding the whisk itself, to prevent it from splattering. Continue whipping the meringue on medium-high speed until it becomes very thick, gloriously glossy, and forms stiff, firm peaks. The meringue should also feel cool to the touch (this indicates it has cooled down sufficiently). This process cooks the egg whites, making the meringue safe to consume and incredibly stable.
- Pipe the Meringue: Once your Italian meringue is beautifully firm and cool, transfer the mixture into a piping bag fitted with your desired star tip (or any other decorative tip you prefer). Gently unmold the chilled graham cracker and chocolate squares from the silicone tray. The flexibility of the silicone should make this very easy.
- Decorate and Serve: Pipe a beautiful swirl, a delicate dollop, or an elegant peak of meringue on top of each chocolate-covered graham cracker base. For that authentic toasted marshmallow look and an extra layer of flavor, you can gently torch the meringue with a kitchen torch until the peaks are beautifully golden brown. This step is optional but highly recommended. Serve these exquisite bite-size s’mores immediately and delight in your gourmet creations!
Pro Tips for Achieving Perfect Bite-Size S’mores
To ensure your mini s’mores turn out flawlessly every time, keep these expert tips in mind:
- Room Temperature Egg Whites are Key: Always use egg whites that are at room temperature. They have less surface tension and will whip up to a much greater volume and stability compared to cold egg whites.
- Spotless Equipment for Meringue: Any trace of grease or fat in your mixing bowl or on your whisk can prevent egg whites from whipping properly. Use a very clean glass or metal bowl, and if in doubt, wipe it with a little lemon juice or white vinegar before use.
- Patience with Chilling: The chilling steps are non-negotiable. They are crucial for ensuring the graham cracker base and chocolate layer set firmly, which prevents crumbling when unmolding and guarantees distinct, beautiful layers. Don’t rush this process!
- Invest in a Candy Thermometer: While skilled bakers can often eyeball the “soft-ball stage” of sugar syrup, a candy thermometer provides precise temperature control, making Italian meringue much more approachable and ensuring consistent results.
- Gentle Unmolding Technique: Thanks to the silicone tray, unmolding should be straightforward. Gently push up from the bottom of each cavity while carefully supporting the sides to release your s’mores.
- Torch for Authenticity: If you own a kitchen torch, don’t hesitate to use it! A quick, gentle pass over the meringue will give it a beautiful golden-brown color and a smoky, toasted flavor reminiscent of real campfire marshmallows. This enhances both the visual appeal and the taste.
Serving and Presentation Ideas for Your Mini S’mores
These bite-size s’mores are elegant enough to impress on their own, but a thoughtful presentation can elevate them even further:
- Elegant Platter Display: Arrange your mini s’mores neatly on a decorative serving platter or a tiered stand for a sophisticated dessert presentation.
- Mini Dessert Bar: Create an impressive spread by combining them with other mini desserts such as fruit tarts, mini cheesecakes, or small cookies.
- Gourmet Garnishes: A light dusting of cocoa powder, a sprinkle of mini chocolate chips, a tiny fresh mint leaf, or even some edible glitter can add an extra touch of flair and color.
- Perfect Pairings: Serve these delightful treats alongside freshly brewed coffee, a rich espresso, a comforting hot chocolate, or a classic glass of cold milk.
- Individual Servings: For a more personalized touch, consider placing each s’more in a mini paper cupcake liner or a small individual serving cup.
Storage and Make-Ahead Instructions for Convenience
One of the many benefits of this recipe is its flexibility, allowing you to prepare certain components in advance and streamline your dessert preparation.
- Base and Chocolate Layer: The graham cracker base and chocolate layer are quite stable and can be prepared up to 1-2 days in advance. Once fully chilled and set, gently unmold them from the silicone tray and store them in a single layer in an airtight container in the refrigerator. Bring them out just before you’re ready to pipe the meringue.
- Italian Meringue: While Italian meringue is more stable than other meringues, it is generally best piped and served on the same day it’s made for optimal freshness, volume, and texture. If you need to make it a few hours ahead, keep it in the piping bag at room temperature, but be aware it might lose a very slight amount of its initial stiffness over an extended period.
- Assembled S’mores: Once the meringue has been piped onto the s’mores, they are best enjoyed fresh. However, if you have leftovers, store them carefully in an airtight container in the refrigerator for up to 1-2 days. The meringue may soften slightly and lose some of its crispness, but the s’mores will still be incredibly delicious. Allow them to come to room temperature for about 10-15 minutes before serving for the best texture.
Creative Variations to Customize Your Bite-Size S’mores
While this recipe is truly perfect as is, don’t hesitate to unleash your creativity and customize your bite-size s’mores to suit your personal taste or specific dietary preferences (where possible):
- Explore Different Chocolates: Instead of milk chocolate, experiment with dark chocolate for a richer, more intense flavor, or white chocolate for a sweeter, creamier profile. You could even create a beautiful swirl with two different types of melted chocolate.
- Flavored Graham Crackers: Swap out traditional graham crackers for cinnamon graham crackers to add a warm, spiced kick to the base, or use chocolate graham crackers for an indulgent double-chocolate treat.
- Base Add-ins: Elevate the graham cracker base by mixing in a pinch of ground cinnamon, a dash of espresso powder for depth, or finely chopped toasted nuts (like pecans or walnuts) for added texture and flavor.
- Meringue Flavor Enhancements: A tiny drop of pure vanilla extract, almond extract, or a hint of citrus zest (lemon or orange) can be gently folded into the Italian meringue at the end of the whipping process for a subtle flavor boost.
- Caramel Drizzle: For an extra layer of sweetness and richness, drizzle a thin layer of salted caramel sauce over the chocolate layer before it sets in the refrigerator.
- Mini Peanut Butter Surprise: For an irresistible combination, press a mini peanut butter cup or a small dollop of peanut butter into the center of the graham cracker base before pouring over the melted chocolate.
- Seasonal Sprinkles: Add festive flair by decorating the meringue with colorful sprinkles, especially for holidays or themed parties.
Indulge in Homemade Bite-Size S’mores: A Gourmet Treat for Every Occasion!
These delightful bite-size s’mores are truly more than just a dessert; they are an experience. They brilliantly combine the cherished, comforting flavors of a classic campfire treat with the sophistication and convenience of a gourmet dessert. Perfect for entertaining guests, a special family treat, or simply satisfying your spontaneous sweet cravings, this recipe is remarkably versatile, incredibly rewarding to make, and guaranteed to impress.
The harmonious contrast between the sturdy, crunchy graham cracker base, the smooth and rich melted chocolate layer, and the airy, delicately sweet Italian meringue creates an unforgettable flavor profile that will have everyone reaching for more. Each miniature s’more offers a perfect balance of textures and tastes, making it an ideal indulgence. So, gather your ingredients, follow these straightforward steps, and get ready to create a truly impressive and utterly delicious treat that proves you don’t need an open flame to conjure s’mores magic. Embrace the joy of homemade desserts and savor every single bite of these exquisite mini s’mores!