
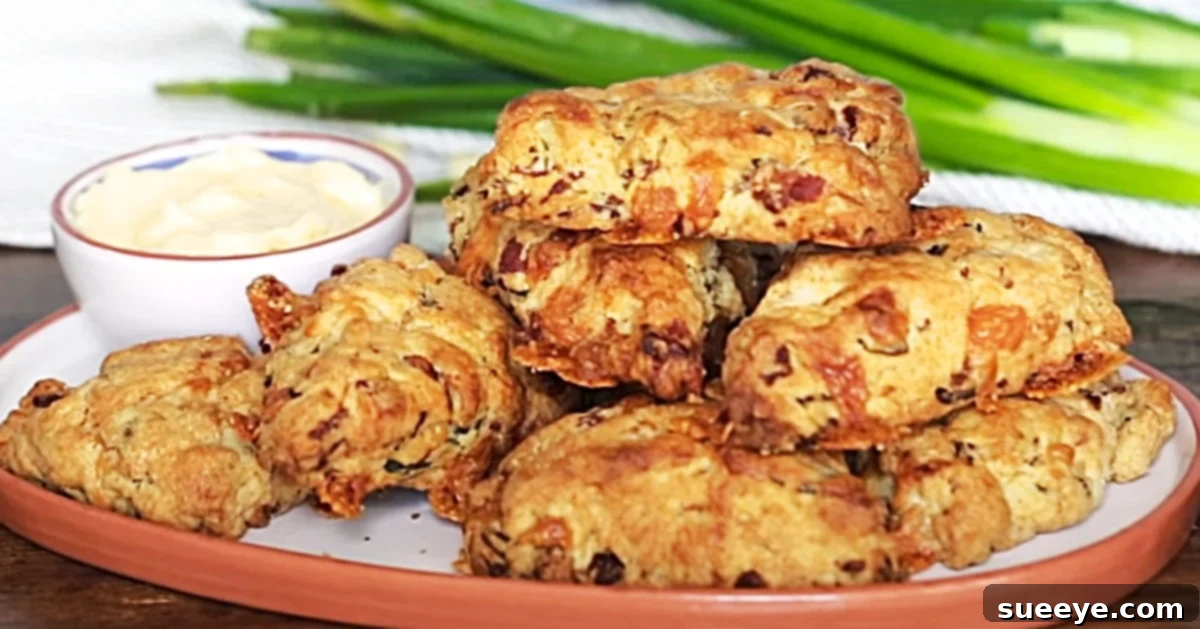
Irresistible Cheesy Bacon Biscuits: Your Ultimate Savory-Sweet Breakfast Delight
There’s truly nothing quite like the comforting aroma and delightful taste of freshly baked biscuits to kickstart your morning, especially when paired with a steaming cup of coffee. While traditional biscuits are a classic for a reason, the culinary world constantly offers exciting twists to elevate beloved recipes. We recently stumbled upon a truly remarkable Cheesy Bacon Biscuit recipe tutorial by Twisted, on YouTube, and it promised a delicious departure from the ordinary. This particular rendition introduces a harmonious blend of savory bacon, rich cheese, and a secret ingredient – a touch of maple syrup – that transforms these into an unforgettable treat. This recipe isn’t just easy; it’s an experience, delivering a complex flavor profile that will have your taste buds singing. Get ready to bake a batch of homemade bliss that’s perfect for any occasion, from a leisurely Sunday brunch to a quick, satisfying weekday bite.
Why These Cheesy Bacon Biscuits Are a Must-Try
These aren’t just any biscuits; they’re a revelation. The combination of crispy, salty bacon with gooey, melted cheese is a match made in heaven, further enhanced by the subtle sweetness of maple syrup. This unique savory-sweet dynamic sets them apart from typical breakfast pastries. Beyond their incredible flavor, these biscuits boast a wonderfully flaky texture that melts in your mouth, thanks to the buttermilk and proper technique. They’re incredibly versatile, serving as a standout breakfast item, a hearty snack, or even a unique side dish for dinner. Best of all, despite their gourmet taste, the recipe is surprisingly straightforward, making it accessible for bakers of all skill levels. Prepare to impress your family and friends with a creation that’s both comforting and extraordinary.
Essential Ingredients for Your Cheesy Bacon Biscuits
Crafting the perfect Cheesy Bacon Biscuits starts with a selection of fresh, high-quality ingredients. Each component plays a crucial role in achieving that sought-after texture and exquisite flavor blend. Here’s what you’ll need:
- 2 cups of all-purpose flour: The foundation of our biscuits, providing structure.
- 1 teaspoon of baking powder: The primary leavening agent, ensuring a light and airy texture.
- 1/2 teaspoon of salt: Enhances all the flavors and balances the sweetness.
- 1 teaspoon of paprika: Adds a warm, slightly peppery depth and beautiful color.
- 1/2 teaspoon of garlic powder: Infuses a subtle aromatic richness, complementing the savory elements.
- 1/2 teaspoon of freshly ground black pepper: Offers a gentle kick and enhances the overall seasoning.
- 1 cup of cold butter (cubed): Crucial for flaky layers; cold butter creates pockets of steam during baking.
- 1/2 cup of chopped green onions: Provides a fresh, mild onion flavor and vibrant color.
- 1 1/2 cups of cooked bacon, crumbled: The star savory ingredient, offering crispy texture and smoky flavor.
- 1 cup of cheese (cubed or grated): Choose your favorite! Sharp cheddar, Monterey Jack, or a blend works wonderfully for melty pockets of goodness.
- 1 tablespoon of maple syrup: The secret ingredient that introduces a delightful hint of sweetness, balancing the savory elements beautifully.
- 1 cup of buttermilk (or half and half/double cream as alternatives): Contributes to a tender crumb and a slightly tangy flavor.
Step-by-Step Directions for Baking Your Cheesy Bacon Biscuits
Making these savory-sweet biscuits is a rewarding experience, and following these detailed steps will ensure a perfect batch every time. This recipe, inspired by the wonderful tutorial by Twisted on YouTube, breaks down the process into easy-to-follow instructions.
Step 1: Prepare Your Dry Ingredients
Begin by preheating your oven to 350°F (175°C). In a large mixing bowl, combine the all-purpose flour, baking powder, salt, paprika, garlic powder, and freshly ground black pepper. Whisk these dry ingredients together thoroughly to ensure they are well combined and evenly distributed. This step is crucial for consistent leavening and flavor throughout your biscuits.
Step 2: Incorporate the Cold Butter
Add the cubed cold butter to your dry ingredient mixture. Using a pastry blender, your fingertips, or two knives, cut the butter into the flour until the mixture resembles coarse crumbs with some pea-sized pieces of butter still visible. The key here is to keep the butter as cold as possible; these small pockets of butter will create the flaky layers that are characteristic of truly great biscuits.
Step 3: Mix in the Savory Goodness
Next, gently fold in your chopped green onions, crumbled cooked bacon, and cubed or grated cheese into the flour and butter mixture. Distribute them evenly throughout the mixture. Ensure you don’t overwork the dough at this stage; a light touch is always best when making biscuits.
Step 4: Add Wet Ingredients to Form the Dough
In a separate small bowl, combine the maple syrup and buttermilk. Gradually pour this wet mixture into the dry ingredients. Stir with a spoon or a rubber spatula just until the dough comes together. Be careful not to overmix; overworking the dough develops gluten, which can lead to tough biscuits. A slightly shaggy, sticky dough is perfectly normal and desired.
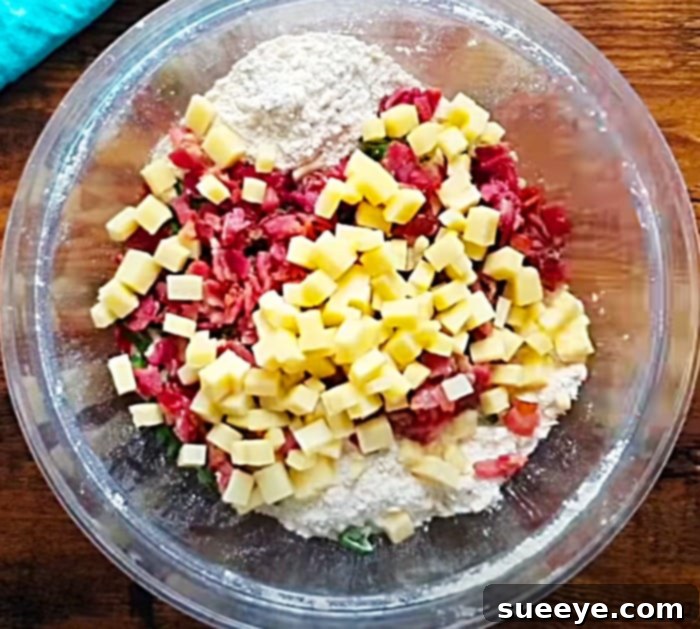
Step 5: Shape and Cut Your Biscuits
Lightly flour a clean work surface. Turn the biscuit dough out onto the floured surface. Gently knead the dough a few times, just enough to bring it fully together, then pat it into a circular shape, about 1-inch thick. Using a sharp knife or a pizza cutter, cut the dough into wedges, similar to how you’d cut a pizza. Alternatively, you can use a round biscuit cutter for more traditional shapes. For a classic look, dip your cutter in flour between each cut to prevent sticking.
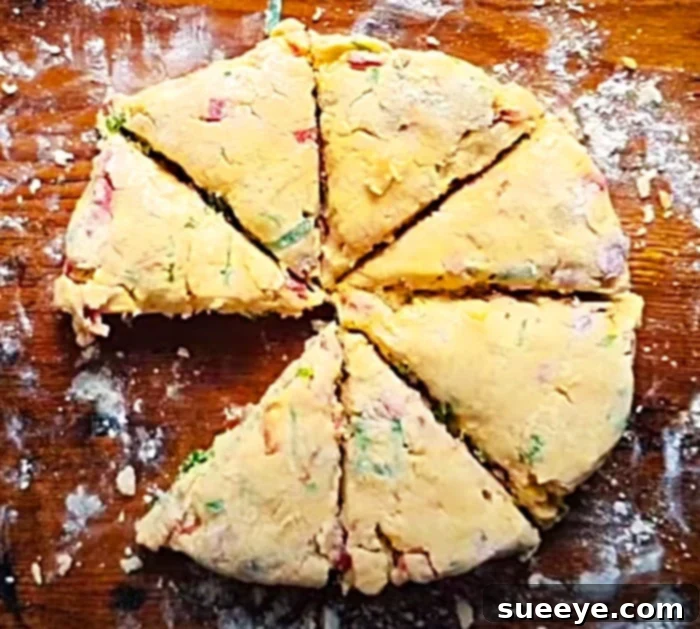
Step 6: Bake to Golden Perfection
Carefully transfer the cut biscuit wedges onto a baking sheet lined with parchment paper. Place them about an inch apart to allow for even baking. Bake in the preheated oven for 25-30 minutes, or until the biscuits are golden brown on top and cooked through. The exact baking time may vary depending on your oven, so keep an eye on them. Once baked, remove them from the oven and let them cool slightly on the baking sheet before serving. They are truly best enjoyed warm!
Expert Tips for Achieving Perfect Flaky Biscuits
Baking biscuits can be incredibly satisfying, and a few simple tricks can elevate your results from good to absolutely fantastic:
- Keep Ingredients Cold: This is arguably the most crucial tip. Ensure your butter and buttermilk are very cold. Cold butter melts slowly in the oven, releasing steam that creates those coveted flaky layers.
- Don’t Overmix the Dough: Overworking the dough develops gluten, which leads to tough, chewy biscuits instead of tender, flaky ones. Mix just until the ingredients are combined. A slightly shaggy dough is ideal.
- Handle Gently: When shaping and cutting, handle the dough as little as possible. The warmth from your hands can melt the butter, compromising the texture.
- Flour Your Surface Lightly: Too much flour can dry out the dough, resulting in dense biscuits. Just enough to prevent sticking is all you need.
- Don’t Twist the Cutter: If using a round biscuit cutter, press straight down and lift straight up. Twisting the cutter can seal the edges of the biscuit, preventing it from rising properly and creating fewer layers.
- Bake Immediately: Once the biscuits are shaped, try to bake them right away. This helps maintain the coldness of the butter.
- Even Thickness: Ensure your dough is rolled or patted out to a consistent thickness for uniform baking.
- Space Them Correctly: For softer sides, place biscuits closer together on the baking sheet. For crispier edges, give them more space.
- Use Fresh Leavening: Baking powder loses its potency over time. Always check the expiration date to ensure your biscuits rise beautifully.
Creative Variations and Serving Suggestions
While the Cheesy Bacon Biscuit recipe is a masterpiece on its own, feel free to customize it to your liking. The beauty of homemade biscuits is their adaptability:
- Cheese Swaps: Experiment with different cheeses! Smoked Gouda, sharp white cheddar, pepper jack for a kick, or a Monterey Jack blend can all add distinct flavors.
- Herb Infusion: Add fresh or dried herbs like chives, rosemary, thyme, or a blend of Italian herbs to the dough for an aromatic twist.
- Spice It Up: A pinch of cayenne pepper or a dash of hot sauce (mixed with the buttermilk) can add a delightful warmth for those who enjoy a little spice.
- Alternative Meats: Instead of bacon, consider finely diced cooked ham, sausage crumbles, or even sun-dried tomatoes for a vegetarian option.
- Sweetness Adjustment: If you prefer less sweetness, reduce the maple syrup slightly, or omit it for a purely savory biscuit. You can also drizzle more maple syrup on top after baking for an extra sweet kick.
- Gluten-Free Option: For those with dietary restrictions, a 1:1 gluten-free baking flour blend can often be substituted successfully.
When it comes to serving, these Cheesy Bacon Biscuits are incredibly versatile:
- Classic Breakfast: Serve them warm with extra butter, honey, or more maple syrup for a truly decadent breakfast. They pair perfectly with scrambled eggs, fried eggs, or a side of fresh fruit.
- Brunch Star: A fantastic addition to any brunch spread, alongside quiches, pancakes, or a savory frittata.
- Savory Side: Don’t limit them to breakfast! These biscuits make an excellent side dish for soups, stews, chili, or even a comforting pot roast.
- Mini Sandwiches: Slice them horizontally and fill with a fried egg, a slice of ham, or even some avocado for a quick and satisfying mini sandwich.
- With Gravy: For the ultimate comfort food, serve them smothered in a creamy sausage gravy.
Storage and Reheating Tips for Freshness
To keep your Cheesy Bacon Biscuits tasting their best, proper storage and reheating are key:
- At Room Temperature: Store cooled biscuits in an airtight container for up to 2-3 days. The texture might soften slightly, but they will still be delicious.
- Refrigeration: For longer storage, place them in an airtight container in the refrigerator for up to a week.
- Freezing: For extended freshness, individual biscuits can be frozen. Wrap each cooled biscuit tightly in plastic wrap, then place them in a freezer-safe bag or container. They will keep well for up to 2-3 months.
- Reheating:
- From Room Temperature/Refrigerated: The best way to reheat is in an oven or toaster oven preheated to 300-350°F (150-175°C) for about 5-10 minutes, or until warmed through and slightly crisp.
- From Frozen: Reheat frozen biscuits in a preheated oven at 300-350°F (150-175°C) for 15-20 minutes, or until thoroughly heated. You can also thaw them first and then reheat as above.
- Microwave (Not Recommended for Texture): While convenient, microwaving can make biscuits chewy and less flaky. If you must use a microwave, heat for short bursts (15-30 seconds) and serve immediately.
There you have it – a comprehensive guide to making and enjoying the most divine Cheesy Bacon Biscuits. This recipe isn’t just about combining ingredients; it’s about crafting an experience, a moment of pure culinary delight that brightens any morning. We encourage you to try this fantastic recipe, experiment with the variations, and share the joy with your loved ones. Once you taste the savory-sweet perfection, these homemade biscuits are sure to become a beloved staple in your kitchen. Happy baking!