
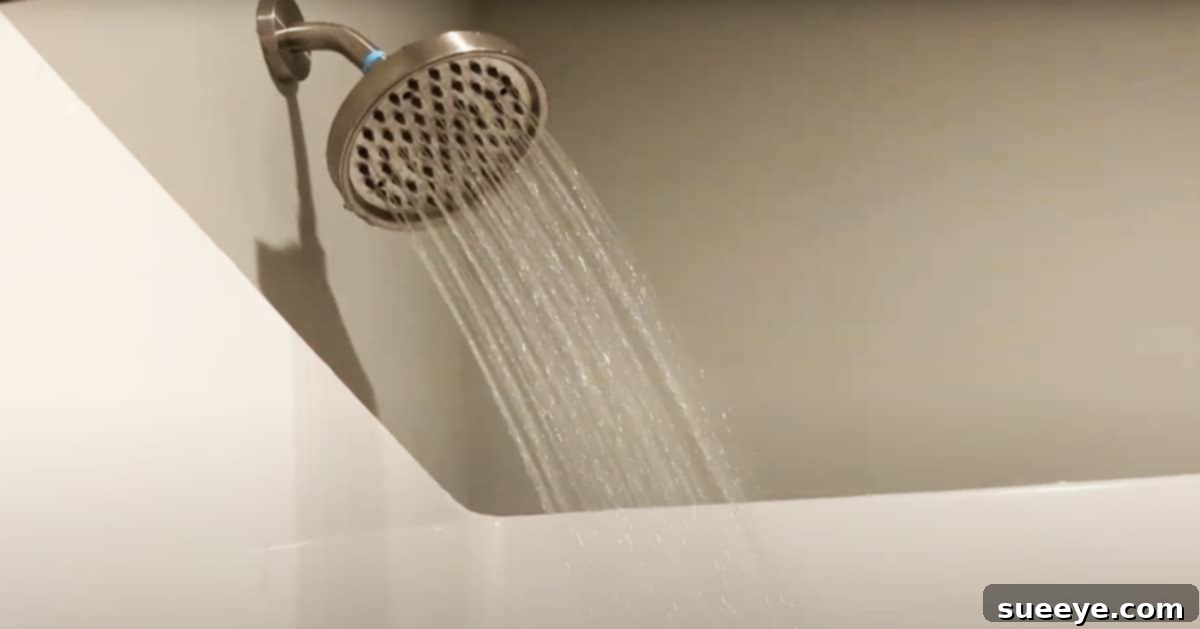
Transform Your Shower: Simple DIY Fixes for Low Water Pressure
There are few things more frustrating than stepping into the shower, expecting a refreshing cascade of water, only to be met with a disappointing dribble. Low water pressure in your shower can turn a simple daily ritual into a prolonged and unsatisfactory chore. Whether you’re trying to rinse shampoo from your hair or just enjoy a invigorating start to your day, inadequate water flow can significantly dampen the experience. The good news is that many instances of low shower pressure aren’t indicative of a major plumbing catastrophe. Often, the solution is surprisingly simple, requiring only a few minutes and minimal tools. This guide will walk you through a common, easy-to-implement DIY fix that can dramatically improve your shower’s performance, helping you reclaim the powerful stream you deserve.
We’ll delve into a practical method, popularized by insightful DIY tutorials such as the one by Bear Reality on YouTube, that focuses directly on your showerhead. This particular technique addresses one of the most frequent culprits behind diminished water pressure – blockages or flow restrictors within the showerhead itself. By understanding how your showerhead works and where potential issues arise, you can empower yourself to troubleshoot and resolve this common household annoyance without the immediate need for a professional plumber. Let’s get started on turning that trickle into a torrent.
Understanding Low Shower Water Pressure: Common Causes and Their Impact
Before diving into the fix, it’s helpful to understand why low water pressure occurs in the first place. The sensation of weak water flow isn’t just an inconvenience; it can mean longer showers, increased water usage trying to get clean, and a general dissatisfaction with your bathroom experience. Identifying the root cause is the first step toward a lasting solution.
What Causes That Annoying Dribble?
Low shower pressure can stem from a variety of sources, ranging from minor local issues to more complex plumbing challenges. While our primary focus here is on a common showerhead-related fix, it’s important to be aware of other potential culprits:
- Mineral Buildup: Over time, hard water deposits (limescale, calcium, magnesium) can accumulate inside your showerhead, pipes, and fixtures. These deposits restrict the flow of water, leading to reduced pressure. This is a very common issue, especially in areas with hard water.
- Faulty Pressure Regulator: Many homes have a water pressure regulator valve, usually located near the main water shut-off. If this valve malfunctions, it can restrict the overall water flow to your entire house, affecting all fixtures, not just the shower.
- Clogged Pipes: Similar to showerheads, older pipes can accumulate sediment, rust, or mineral deposits internally, narrowing the pathway for water. In severe cases, this might require professional plumbing intervention.
- Kinked or Damaged Pipes/Hoses: If your shower has a flexible hose (like a handheld showerhead), it might be kinked, restricting flow. Damage to pipes within walls can also lead to pressure drops.
- Shared Water Supply: If multiple appliances (dishwasher, washing machine, other showers/faucets) are running simultaneously, they might be drawing water from the same supply, causing a temporary drop in pressure in your shower.
- Water Heater Issues: Sediment can build up in your water heater, affecting water flow. A partially closed water heater shut-off valve can also reduce pressure.
- Municipal Water Supply Problems: Occasionally, the issue might be outside your home, related to city water main work, leaks in the municipal supply lines, or overall low pressure from the utility.
- Flow Restrictors: Modern showerheads are often equipped with flow restrictors designed to conserve water. While beneficial for the environment and your water bill, these can sometimes be overly aggressive or become clogged, further reducing pressure.
Understanding these potential causes helps you approach the problem systematically. For many, the most immediate and common issue lies directly within the showerhead itself, which is where our quick DIY solution comes into play.
The Quick Fix: Targeting Your Showerhead for Improved Pressure
When battling low shower pressure, the showerhead is often the first and easiest place to investigate. Many times, the problem isn’t a complex plumbing issue but simply a matter of a clogged or overly restrictive showerhead. Our focus here is on a highly effective, low-effort technique that can bring significant relief.
Mineral Buildup and Flow Restrictors: The Usual Suspects
The internal components of your showerhead are susceptible to two primary culprits that hinder water flow: mineral deposits and intentional flow restrictors. Hard water, prevalent in many regions, contains dissolved minerals like calcium and magnesium. As water evaporates from the tiny nozzles of your showerhead, these minerals are left behind, gradually accumulating. This limescale buildup physically blocks the spray holes, reducing the volume and force of water that can pass through. Over time, what was once a powerful spray can devolve into a weak, inconsistent stream.
Beyond mineral deposits, most modern showerheads incorporate a small, often rubber or plastic, component known as a flow restrictor. These devices are mandated in many regions to ensure water conservation by limiting the maximum flow rate (typically measured in gallons per minute, or GPM). While they serve an important ecological purpose, sometimes these restrictors can become partially blocked themselves, or in older models, might be more restrictive than desired for your personal showering experience. The method we’re about to describe tackles both these issues by allowing for thorough cleaning and, in some cases, the optional removal of a component that might be excessively hindering your water flow.
Step-by-Step Guide: Restoring Your Showerhead’s Pressure (Inspired by Bear Reality)
This simple, yet effective, method for improving your shower water pressure can often be completed in a matter of minutes. It’s a fantastic starting point before considering more complex or costly solutions. You’ll be surprised at the difference a small adjustment can make.
What You’ll Need:
- Tweezers: Essential for carefully removing the small rubber ring or flow restrictor.
- Adjustable Wrench or Pliers (Optional): Useful if your showerhead is tightly screwed on and can’t be loosened by hand. Make sure to wrap the jaws with a cloth to prevent scratching the finish.
- Old Toothbrush and White Vinegar (Optional but Recommended): For cleaning mineral buildup from the showerhead nozzles.
- Clean Cloth or Towel: For drying and protecting surfaces.
Safety First!
Always exercise caution when working with household fixtures. While this is a relatively low-risk DIY project, it’s wise to ensure the water supply to the shower is turned off if you’re concerned about accidental leaks. Place a towel on the shower floor to catch any drips and prevent slips.
Detailed Directions for a Powerful Shower:
Step 1: Prepare the Area and Detach the Showerhead
Before you begin, place a towel on the shower floor or in the tub to protect it from any falling tools or components, and to absorb any residual water. Now, it’s time to remove your showerhead. Most showerheads simply unscrew counter-clockwise by hand. If yours is particularly stubborn or has been in place for a long time, you might need to use an adjustable wrench or pliers. Remember to wrap the showerhead’s base with a cloth first to prevent scratching the finish when using tools. Twist gently but firmly until it loosens and can be fully detached.
Step 2: Locate the Rubber Ring or Flow Restrictor
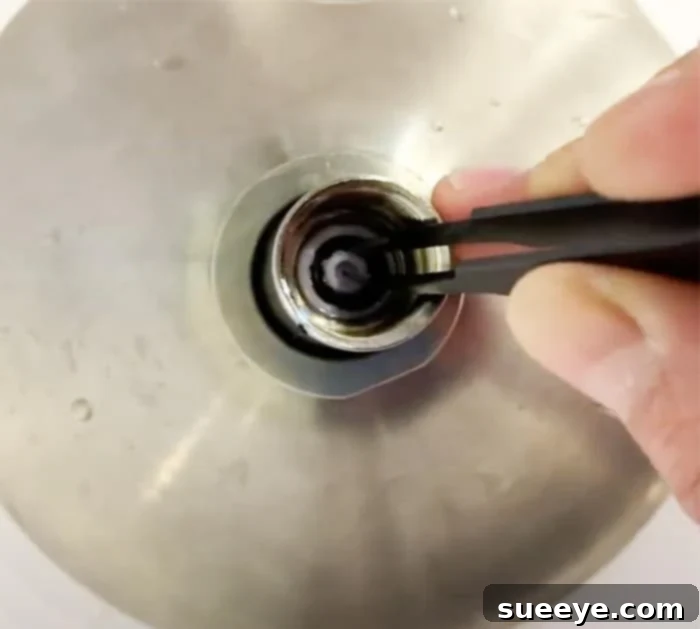
Once the showerhead is off, turn it over and look into the opening where it connects to the shower arm. You should see a small black rubber ring or gasket. This component serves various purposes: it acts as a seal to prevent leaks and often functions as a flow restrictor. Depending on your showerhead model, the flow restrictor might be a separate plastic disc located just behind this rubber ring. It’s usually a small, brightly colored (e.g., green, red, or white) disc with a small hole in the center.
Step 3: Gently Remove the Flow Restrictor/Rubber Ring
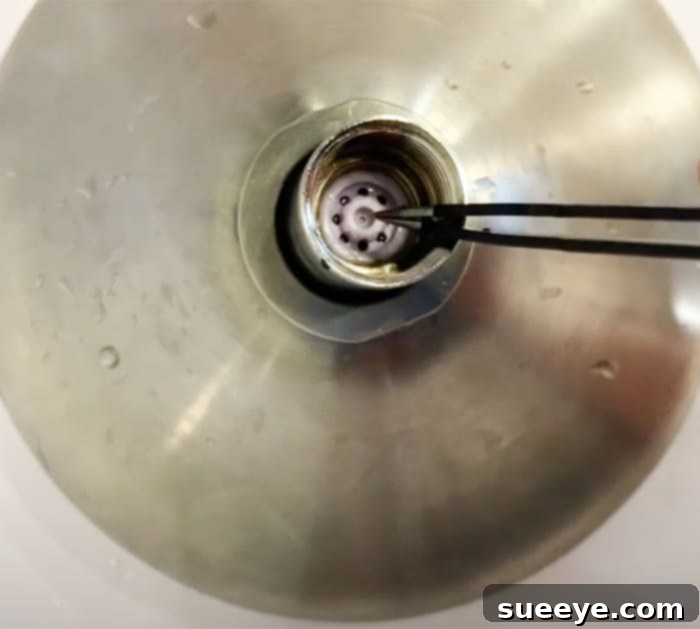
Using your tweezers, carefully grip the edge of the black rubber ring or the distinct flow restrictor disc. With a steady hand, gently pull it out. It might require a bit of wiggling. Be careful not to damage the ring, especially if you intend to put it back later. Some showerheads might have multiple screens or washers; the goal here is to remove the primary flow-restricting component. You’ll notice that once this ring is removed, there are often more openings or a significantly wider passageway for water inside the showerhead. This additional space is key to increasing water flow.
Step 4: Clean the Showerhead (Highly Recommended)
While you have the showerhead disassembled, it’s the perfect opportunity for a quick clean. Mineral buildup on the nozzles is a very common cause of reduced pressure and erratic spray patterns. Submerge the showerhead (or just the faceplate) in a bowl of white vinegar for 30 minutes to an hour. The vinegar will dissolve limescale and other mineral deposits. After soaking, use an old toothbrush to scrub away any remaining residue from the spray holes. You can also use a small pin or paperclip to poke into individual holes if they are still blocked. Rinse thoroughly with clean water.
Step 5: Reassemble and Test
Once you’ve removed the restrictor (and cleaned if desired), carefully screw the showerhead back onto the shower arm. Hand-tighten it clockwise until it’s snug; avoid overtightening, as this can damage the threading or the showerhead itself. Turn the water supply back on (if you had turned it off) and test the water pressure. You should immediately notice a significant increase in flow and force. Enjoy your newly invigorated shower experience!
Beyond the Quick Fix: When More Is Needed
While the simple showerhead modification is a powerful first step, it’s important to acknowledge that not all low water pressure issues can be resolved this easily. If you’ve tried the method above and your shower pressure remains unsatisfactory, or if you suspect the problem extends beyond just the showerhead, it’s time to explore other avenues.
Other Potential Solutions for Persistent Low Pressure:
- Check for Kinked Hoses or Pipes: If you have a handheld showerhead, ensure its hose isn’t kinked or twisted. Inspect visible pipes for any obvious damage or tight bends.
- Inspect Your Main Water Shut-Off Valve: Sometimes, the main water valve to your house isn’t fully open, restricting flow. Check its position and ensure it’s completely open.
- Assess Your Water Pressure Regulator: If your home has a pressure regulator valve (usually near your water meter or main shut-off), it might be faulty or set too low. Adjusting or replacing this valve is often best left to a professional plumber.
- Flush Your Water Heater: Sediment buildup in your water heater can impede flow. Regularly flushing your water heater can help maintain good pressure and efficiency. Consult your water heater’s manual for instructions or hire a professional.
- Look for Leaks: Even small, undetected leaks in your plumbing system can lead to a noticeable drop in water pressure throughout your home. Keep an eye out for damp spots, unexplained high water bills, or the sound of running water when all fixtures are off.
- Upgrade Your Showerhead: If your current showerhead is old, heavily calcified, or simply not designed for strong pressure, investing in a new, high-efficiency or high-pressure showerhead can make a world of difference. Many modern showerheads are designed to deliver a powerful spray even with lower flow rates.
- Consult a Professional Plumber: For persistent low pressure issues that seem to affect multiple fixtures, or if you suspect a problem with your main water line, internal piping, or pressure regulator, calling a licensed plumber is the most prudent course of action. They have the tools and expertise to accurately diagnose and resolve complex plumbing problems.
Maintaining Optimal Shower Pressure for the Long Haul
Once you’ve restored your shower’s glorious water pressure, you’ll want to keep it that way. Regular maintenance can prevent the recurrence of common issues and ensure your showering experience remains consistently enjoyable.
- Regular Cleaning: Make it a habit to clean your showerhead every few months. A quick soak in white vinegar will prevent mineral buildup from becoming a significant problem again. An old toothbrush can work wonders on the nozzles.
- Consider a Water Softener: If you live in an area with hard water, investing in a whole-house water softener can dramatically reduce mineral buildup in all your plumbing fixtures, including your showerhead, extending their lifespan and maintaining pressure.
- Monitor for Changes: Pay attention to any gradual decrease in water pressure or changes in spray patterns. Addressing these issues early can prevent them from escalating into more significant problems.
- Proper Installation: When replacing showerheads or other fixtures, ensure they are installed correctly to prevent leaks and ensure optimal performance.
Conclusion: Enjoy Your Revitalized Shower!
Low shower water pressure doesn’t have to be a permanent fixture in your daily life. As demonstrated, often the most effective solution is a simple, DIY fix targeting the very device from which the water flows – your showerhead. By taking a few minutes to detach, inspect, and potentially modify or clean your showerhead, you can often restore a powerful, invigorating stream that transforms your entire showering experience.
This quick and easy method, inspired by practical guides like the one from Bear Reality on YouTube, proves that you don’t always need professional help for common household annoyances. Empowering yourself with these simple steps not only saves you time and money but also gives you a deeper understanding of your home’s plumbing. So, gather your tweezers, follow our straightforward guide, and prepare to say goodbye to frustrating drizzles and hello to a truly refreshing and efficient shower. You deserve a shower that cleans, revitalizes, and puts a spring in your step – and now you know how to get it!