
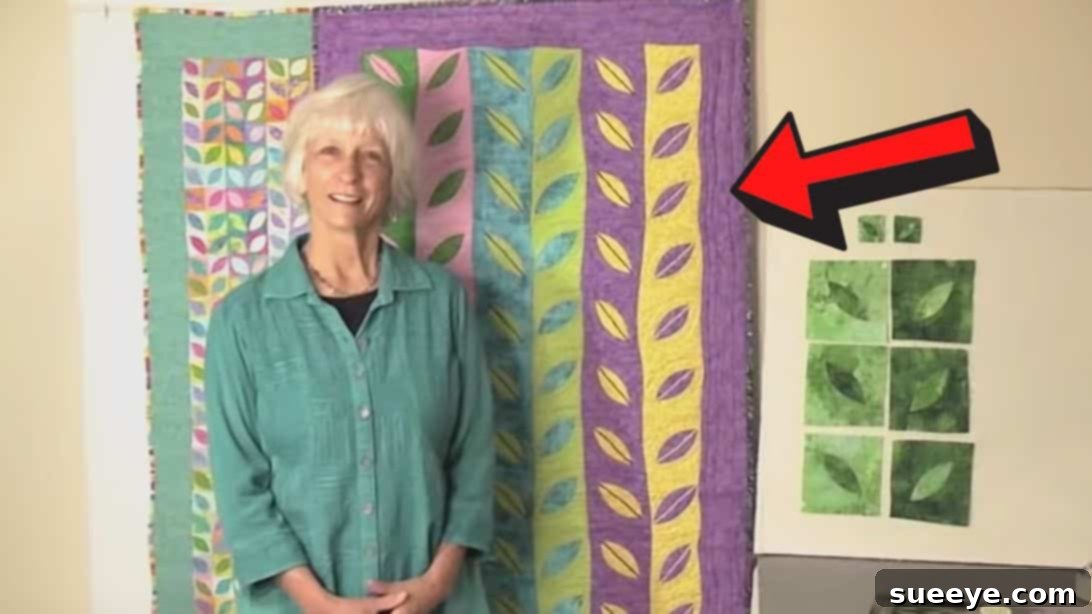
Transform your fabric stash into stunning works of art with the captivating “Layered Leaves Quilt Block” tutorial. This project, conceived by the talented Karen Eckmeier, offers a refreshing approach to nature-themed quilting, resulting in beautiful leaf patterns that are both unique and easy to achieve. Unlike many quilting methods that leave you with a pile of discarded scraps, this ingenious technique is designed to minimize fabric waste, making it an eco-friendly and satisfying endeavor for quilters of all levels.
The beauty of this layered leaf design lies in its versatility and free-form nature. Each block you create will possess its own distinct character, ensuring that no two leaves are exactly alike. This allows for immense creative freedom, inviting you to experiment with a diverse palette of colors, sizes, and fabric designs. Imagine a vibrant autumn scene brought to life with rich reds, oranges, and yellows, or a serene spring forest with various shades of green and delicate floral prints. The potential for personalization is truly limitless.
Combining these individually crafted, free-form leaf blocks into a larger quilt or project creates a dynamic and charming visual tapestry. The interplay of different sizes and hues adds depth and organic movement, mimicking the natural variation found in nature itself. Whether you’re a seasoned quilter looking for an inspiring new challenge or a beginner eager to dive into the world of fabric artistry, this Layered Leaves Quilt Block tutorial provides clear, step-by-step guidance to help you craft something truly special. Get ready to breathe life into your fabrics and create a quilt that tells its own unique story.
Mastering the Layered Leaves Quilt Block: A Free-Form Quilting Tutorial
Essential Materials for Your Layered Leaves Quilt Block:
- Fabric Squares: You’ll need two pieces of 6 1/2″ squares. For optimal visual contrast and to highlight the layered effect, choose one fabric in a dark hue and the other in a lighter, complementary shade or pattern. Consider how these colors will interact to define the leaf shape.
- Rotary Cutter: An indispensable tool for precise and clean fabric cuts, especially when dealing with curves.
- Self-Healing Cutting Mat: To protect your work surface and prolong the life of your rotary cutter blade.
- Quilting Ruler: A clear, acrylic ruler for accurate measuring and marking.
- Fabric Marking Tool: Chalk, a fabric pencil, or an air/water erasable marker for making temporary marks on your fabric.
- Iron and Ironing Board: Essential for pressing seams and shaping fabric, ensuring a professional finish.
- Sewing Machine: Equipped with a standard presser foot and a needle suitable for your chosen fabric.
- Matching Thread: High-quality polyester or cotton thread that blends or contrasts subtly with your fabric, depending on your desired aesthetic.
- Fabric Pins: To hold fabric layers securely in place during cutting and sewing.
- Fabric Scissors: For any small snips or trimming.
Step-by-Step Instructions for Your Layered Leaves Quilt Block:
Step 1: Preparing and Marking Your Fabric Squares
Begin by carefully aligning your two 6 1/2″ fabric squares. Place one square directly on top of the other, ensuring that all edges are perfectly matched. For the best results, place the darker fabric on the bottom and the lighter fabric on top, or vice-versa, depending on which color you want to form the initial “top” leaf. Precision in this initial alignment is crucial for the subsequent steps.
Now, using your fabric marking tool, you’ll create two key points on your stacked fabrics. First, measure 1 1/2″ inward from the bottom right corner along the bottom edge, then mark this point. This mark sets the starting point for your first curve. Next, move to the top left corner. Measure 1 1/2″ inward from this corner along the top edge, and make your second mark. These two marks will guide your initial free-form cut, defining the unique organic shape of your layered leaves. Accuracy here will ensure your subsequent pieces fit together seamlessly.
Step 2: Cutting the Initial Free-Form Concave Curve
With your two fabric squares stacked and marked, it’s time to bring your leaf shape to life. Take your rotary cutter and, starting from the first mark you made (1 1/2″ from the bottom right corner), cut a smooth, free-form concave curve that sweeps up towards the second mark (1 1/2″ from the top left corner). The beauty of a “free-form” cut is that you don’t need to worry about absolute perfection; instead, embrace the organic flow. Aim for a graceful, natural-looking curve, much like the gentle arc of a leaf’s edge. This step is where the unique character of your leaf block truly begins to emerge. Ensure your rotary cutter blade is sharp for a clean cut through both layers of fabric.
Step 3: Creating Multiple Leaf Shapes and Arcs
After making your initial concave cut, carefully separate the two upper portions of fabric from the lower sections. You will now work with the bottom section first. On this bottom piece, measure 1 1/2″ from the upper left corner towards the right edge and mark. Then, measure 1 1/2″ from the bottom right corner towards the top edge and mark. These new marks will guide your next cut.
Next, take the top part you removed earlier and place it right side down. Position this piece over the bottom part, carefully aligning its original curved edge with the new marks you just made. Using your fabric marking tool, trace along this curve. This ensures your subsequent cuts will mirror the initial organic shape. With precision, use your rotary cutter to cut along this traced curve. Once this second cut is complete, you will have successfully transformed your initial two squares into a total of six distinct fabric shapes. These pieces, including two primary leaf shapes and four smaller arc-like sections, are the building blocks for your layered design.
Step 4: Preparing the Concave Arc Pieces
Now that you have your six shapes, set aside the larger leaf-like pieces for a moment. Focus on the four concave arc shapes. Take one of these arcs and place it right side down on your ironing board. Carefully fold over the curved edge by approximately 1/4″. This precise fold creates a neat, finished edge that will be prominent in your final design. Using a hot iron, firmly press this fold to create a crisp crease. The act of pressing is vital in quilting as it sets the fabric, ensuring that your seams and edges lie flat and neat. Repeat this folding and pressing process for the remaining three concave arc shapes. This preparation step is key to achieving a professional and polished appearance for your layered leaves.
Step 5: Assembling and Topstitching the Layered Leaves
This step brings your leaf components together. Begin by taking a light-colored leaf shape. Select one of the small dark arcs you prepared in the previous step. Position the small dark arc along the edge of the light leaf, overlapping them slightly by about a quarter-inch seam allowance. This overlap is where your stitching will occur. Secure the arc to the leaf with pins to prevent any shifting during sewing. Carefully topstitch along the folded edge of the arc, attaching it firmly to the light leaf. Topstitching not only secures the pieces but also adds a decorative element and defines the layered look.
Next, take the larger arcs. On the opposite side of the same light leaf, place a larger dark arc, again overlapping with a quarter-inch seam allowance. Pin it securely. Repeat the topstitching process, attaching the larger arc to the leaf. Follow the same procedure for the dark leaf, pairing it with the small light arc and then the larger light arc. The contrasting colors of the leaves and arcs will create a striking visual effect, highlighting the unique layered design. Pay attention to consistent seam allowances and smooth topstitching for the best results.
Step 6: Final Trimming for a Clean Finish
Once all your arcs are securely topstitched to their respective leaves, the final step involves trimming for a clean and professional finish. You may notice small “tabs” or excess fabric extending beyond the edges of the bigger arcs, particularly where they meet the leaf. Carefully trim off these small tabs, ensuring the edges are flush with the main leaf shape. Additionally, inspect all the outer edges of your newly formed layered leaf blocks. Use your rotary cutter and quilting ruler to square up any uneven edges, creating a crisp, defined outline for each block. This trimming ensures that your blocks are consistently sized and will fit together seamlessly when you begin to assemble them into a larger quilt or project. With these steps complete, you’ve successfully created your first unique Layered Leaves Quilt Block!
Congratulations on completing your first Layered Leaves Quilt Block! Karen Eckmeier’s innovative technique allows for endless possibilities. Imagine combining these blocks to form a vibrant table runner, a unique wall hanging, or even a full-sized quilt. Don’t hesitate to experiment with different fabric textures, such as batiks, solids, or even subtly patterned prints, to add even more dimension to your creations. The free-form nature of this pattern means every leaf is a testament to your personal touch, ensuring that each quilting project you embark on will be a one-of-a-kind masterpiece. Happy quilting!