
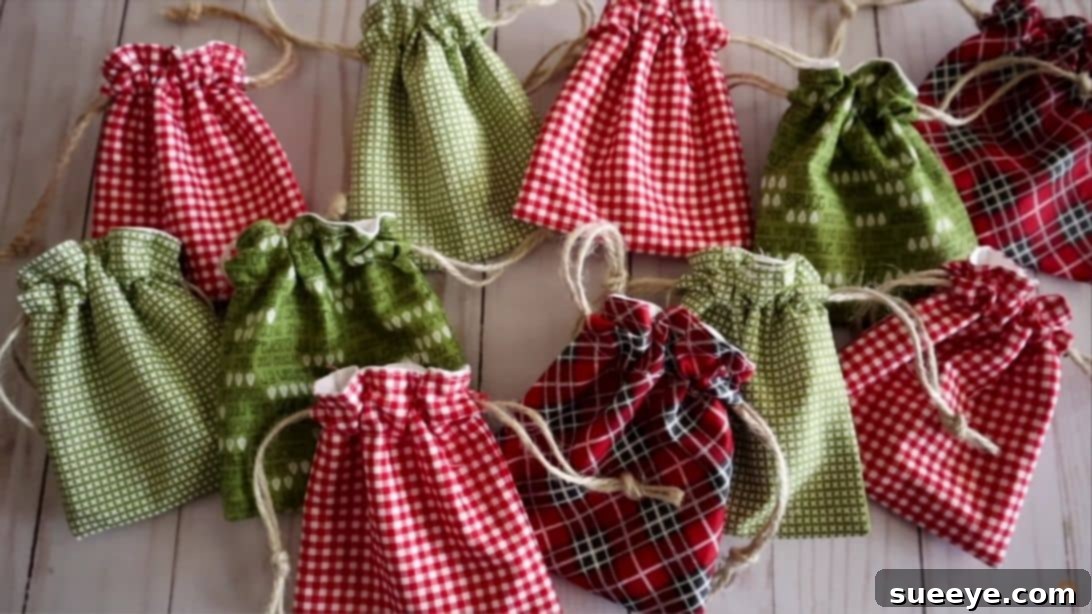
DIY Reusable Fabric Gift Bags: An Eco-Friendly & Easy Sewing Tutorial
The festive season, holidays, birthdays, and special occasions are synonymous with the joy of giving and receiving. There’s a unique thrill in selecting the perfect present, and an even greater delight in watching a loved one unwrap it. For many, the act of gifting is a cherished tradition, a tangible expression of affection and thoughtfulness. While the gift itself is paramount, the presentation often enhances the experience, making the moment even more memorable.
However, traditional gift wrapping methods, involving rolls of paper, plastic tape, and cardboard boxes, often result in a significant amount of waste that ends up in landfills. This year, why not embrace a more sustainable, creative, and personalized approach? Instead of single-use wrapping, consider crafting charming, reusable fabric gift bags. Not only do these handmade bags reduce environmental impact, but they also add a unique, heartfelt touch to every present. Imagine the recipient’s delight when they realize the ‘wrapping’ is a gift in itself, something they can cherish and reuse!
This tutorial, inspired by the talented Erica Arndt on YouTube, simplifies the process of creating beautiful drawstring fabric gift bags. It’s an incredibly budget-friendly project, requiring minimal materials, and is designed to be completed swiftly – in as little as 5 minutes per bag once you get the hang of it! Perfect for beginners, this sewing project allows you to craft personalized, eco-conscious gift solutions for all your family and friends.
Why Choose DIY Reusable Fabric Gift Bags?
Opting for handmade fabric gift bags offers a multitude of benefits that extend far beyond aesthetics:
- Environmental Responsibility: Traditional wrapping paper often contains non-recyclable elements like glitter, foil, and plastic coatings. Fabric bags are washable, durable, and can be used repeatedly for years, significantly reducing waste. This simple switch contributes positively to a more sustainable lifestyle.
- Personalized Touch: A store-bought gift bag can’t compete with the warmth and sincerity of a handmade item. By selecting fabrics, patterns, and even adding embellishments, you infuse a part of yourself into the gift presentation, making the gesture truly unique and special.
- Cost-Effective in the Long Run: While there’s an initial investment in fabric, these bags quickly pay for themselves. You’ll save money on wrapping paper, tape, and ribbons for future occasions. Plus, you can often use fabric scraps or upcycled materials, further cutting costs.
- Versatility for Any Occasion: These bags aren’t just for Christmas! They are perfect for birthdays, baby showers, weddings, anniversaries, graduations, or any event where you want to present a gift with style and conscience. The choice of fabric can easily adapt to the theme of the celebration.
- A Gift Within a Gift: The bag itself becomes part of the present, offering additional value to the recipient. They can reuse it for their own gifting, for storage, or as a decorative item, extending its lifecycle and utility.
Materials You’ll Need for Your Eco-Friendly Gift Bags
One of the beauties of this project is its simplicity, requiring just a few basic sewing supplies. Gather these items, and you’ll be ready to create:
- Two pieces of fabric, each 5 x 10½ inches:
- One piece for the outer shell of the bag (your main design).
- One piece for the lining (can be a complementary color or pattern).
- Tip: Opt for lightweight to medium-weight cotton fabrics for ease of sewing and a crisp finish. Quilting cottons, calico, or even repurposed cotton shirts work wonderfully.
- A sharp pair of scissors: Essential for precise fabric cuts.
- Sewing pins: To hold fabric layers securely in place during sewing, ensuring accuracy.
- Fabric marker or tailor’s chalk: For marking stitch lines or measurements on your fabric.
- 15 inches long jute twine or any suitable string/ribbon: This will form the drawstring closure.
- Alternatives: Satin ribbon, cotton cording, baker’s twine, or even strips of matching fabric can be used.
- A ruler or measuring tape: Crucial for accurate cutting and marking, ensuring your bag is perfectly sized and symmetrical.
- Sewing machine and thread: Matching thread color to your fabric is usually preferred, but a contrasting color can add a fun design element.
- Iron and ironing board: While not strictly listed, these are invaluable for pressing seams open and crisping folds, leading to a professional-looking finish.
- Seam ripper: Every sewist’s best friend for correcting mistakes!
Step-by-Step Directions to Sew Your Drawstring Gift Bag
Follow these detailed instructions to create your beautiful reusable gift bag. Take your time, especially if you’re a beginner, and remember that practice makes perfect!
Step 1: Preparing Your Fabric & Initial Seams
- Cut Your Fabric Pieces: Begin by precisely cutting two pieces of fabric, each measuring 5 inches wide by 10½ inches long. One piece will serve as the decorative outer layer of your gift bag, and the other will be the inner lining. Accuracy here is key for a well-proportioned finished bag.
- Fold and Prepare the Lining Fabric: Take your lining fabric piece and fold it in half lengthwise, ensuring that the ‘right sides’ (the side you want to see when finished) are facing each other, and the ‘wrong side’ (the less attractive side) is on the outside. Align the raw edges carefully.
- Sew the Lining: Using a sewing machine, sew along the two raw long edges and one short raw edge of the folded lining fabric with a ¼ inch seam allowance. As you sew, remember to leave an approximately 2-inch opening unstitched along one of the long edges. This gap will be crucial later for turning the bag right-side out. Secure your stitches at the start and end of this opening with a backstitch for added durability.
- Fold and Prepare the Outer Fabric: Now, take your outer fabric piece and fold it in half lengthwise, right sides together, just as you did with the lining.
- Marking the Outer Fabric for Drawstring Casing: With your fabric marker or tailor’s chalk, make a small mark ¾ inch down from the top raw edge along both long sides of the folded outer fabric. Then, make another mark approximately ¾ inch directly below the first mark on each side. These two sets of marks will guide where your drawstring casing will be, ensuring openings for the string to pass through.
- Sew the Outer Fabric: Stitch along both long raw edges and one short raw edge of the folded outer fabric using a ¼ inch seam allowance. When you reach the marks you made for the drawstring casing, backstitch strongly at these points (both the ¾ inch mark and the 1½ inch mark) to reinforce the fabric. This prevents the seams from unraveling when the drawstring is inserted and pulled. Do not sew across the top opening.
Step 2: Assembling the Bag & Adding the Drawstring
This stage brings both fabric pieces together and introduces the crucial drawstring mechanism.
- Press Seams of Outer Fabric: Carefully open up the outer fabric bag you just sewed. Using an iron, press the side seams open and flat. This creates a crisp, professional finish and helps the bag lie flatter. Turning the fabric right side out might make this easier for some, or you can press from the wrong side.
- Insert Outer Bag into Lining Bag: Now, turn the outer fabric bag inside out so the right sides are facing inward. Take your lining fabric bag (which should still be wrong sides out, with the 2-inch opening) and insert the outer bag into it. The right sides of both fabrics should now be facing each other. Align the top raw edges of both bags perfectly. Pin them together all around the top opening to secure them.
- Mark for Top Stitching: From the top raw edge where both fabrics are pinned, measure and mark ¾ inch down. Then, measure and mark another ¾ inch directly below that first mark. These marks will define the channels for your drawstring casing.
- Sew the Top Edge: Stitch around the entire top edge of the pinned bags with a ¼ inch seam allowance. However, it’s crucial to leave a small opening (about 1.5 to 2 inches) unstitched along one side of this top seam. This opening is where you will eventually turn the entire bag right side out. Remember to backstitch at the beginning and end of this opening.
- Turn the Bag Right Side Out: Gently reach into the unstitched opening you left along the top edge. Carefully pull all the fabric through this opening until the entire bag is turned right side out. Both the outer fabric and the lining should now be showing their right sides. Take your time to push out all corners to achieve a neat shape.
- Close the Lining Opening: Locate the 2-inch opening you left in the lining fabric. Either hand-stitch this opening closed using a ladder stitch for an invisible finish, or carefully machine stitch it very close to the edge. Tuck the lining fabric inside the outer bag, ensuring it sits neatly.
- Press the Top Edge and Topstitch: Press the entire top edge of the bag flat with an iron, ensuring the seam is crisp and the lining doesn’t peek out. Then, stitch around the top edge of the bag with a ¼ inch seam allowance. This stitch will secure the lining inside and provide a polished finish.
- Create the Drawstring Casing: Now, sew along the marks you made earlier for the drawstring casing. Stitch two parallel lines horizontally around the top of the bag. The first stitch line should be ¾ inch from the very top finished edge, and the second stitch line should be another ¾ inch below the first one. IMPORTANT: When sewing these two lines, remember to leave small openings on both sides of the bag (between the beginning and end of your stitching on each line) where the jute twine will pass through. These openings should align with the side seams.
- Insert the Drawstring: Using a safety pin or a bodkin attached to one end of your 15-inch jute twine, thread the twine through one of the openings you left in the casing. Guide it all the way around the casing until it emerges from the same opening. Then, take the other end of the twine and thread it through the *other* opening in the casing, guiding it around until it also emerges from that same opening. You should now have two ends of the twine coming out of different sides of the bag.
- Knot the Ends: Bring the two ends of the twine together on each side of the bag and tie them into neat knots. This creates a loop on each side, allowing you to pull the bag closed. Your beautiful, reusable fabric gift bag is now complete!
Tips for Success & Creative Customization
- Fabric Selection: Don’t be afraid to mix and match patterns or use contrasting fabrics for the outer and lining layers. Think about the recipient’s favorite colors or the theme of the occasion. Upcycle old bedsheets, tablecloths, or clothing for an even more eco-friendly approach.
- Sizing Your Bags: The dimensions provided (5 x 10½ inches) create a small to medium-sized bag perfect for jewelry, small books, or gift cards. To make larger bags, simply increase the initial fabric dimensions proportionally. Remember that the finished width will be roughly half of your fabric width after folding and sewing.
- Embellishments: Elevate your bags with personal touches! Consider adding:
- Fabric paint or markers for custom designs.
- Appliqués or embroidered initials.
- Decorative buttons or beads sewn onto the outside.
- A small handmade tag with a handwritten message.
- Drawstring Alternatives: Experiment with different types of cording or ribbons. Silk ribbons add a luxurious feel, while grosgrain ribbons offer a classic look.
- Batch Sewing: If you plan to make multiple bags, consider “batch sewing” – completing all of one step (e.g., cutting all fabric pieces) before moving to the next. This can significantly speed up the process.
Beyond Gifting: Other Uses for Your Handmade Fabric Bags
These versatile drawstring bags aren’t just for presents! Once the gifts are unwrapped, their utility continues:
- Travel Organizers: Perfect for sorting toiletries, chargers, socks, or delicate items in your luggage.
- Home Storage: Use them to organize small toys, craft supplies, jewelry, or makeup.
- Party Favors: Fill them with treats or small trinkets as charming party favor bags.
- Produce Bags: A sustainable alternative to plastic bags for small produce items at the grocery store (ensure you use a breathable fabric for this).
- Sachet Bags: Fill with dried lavender or potpourri for a fragrant addition to drawers and closets.
Conclusion: Embrace Thoughtful, Sustainable Gifting with DIY Fabric Bags
In a world increasingly focused on sustainability and mindful consumption, handmade reusable fabric gift bags offer a refreshing alternative to conventional wrapping. This simple sewing project empowers you to create beautiful, personalized, and eco-friendly solutions for all your gifting needs. Not only will you reduce waste and save money in the long run, but you’ll also infuse each present with a unique touch of care and creativity.
Whether you’re a seasoned sewist or picking up a needle and thread for the first time, this 5-minute gift bag tutorial is a rewarding endeavor. It’s a fantastic way to practice basic sewing skills while producing something practical and charming. So, gather your materials, follow Erica Arndt’s inspiring tutorial, and start stitching your way to a more sustainable and heartfelt gifting experience. Your recipients – and the planet – will thank you!
*All image credits belong to Erica Arndt via YouTube. Visit her channel and follow her for more wonderful sewing tutorials!