
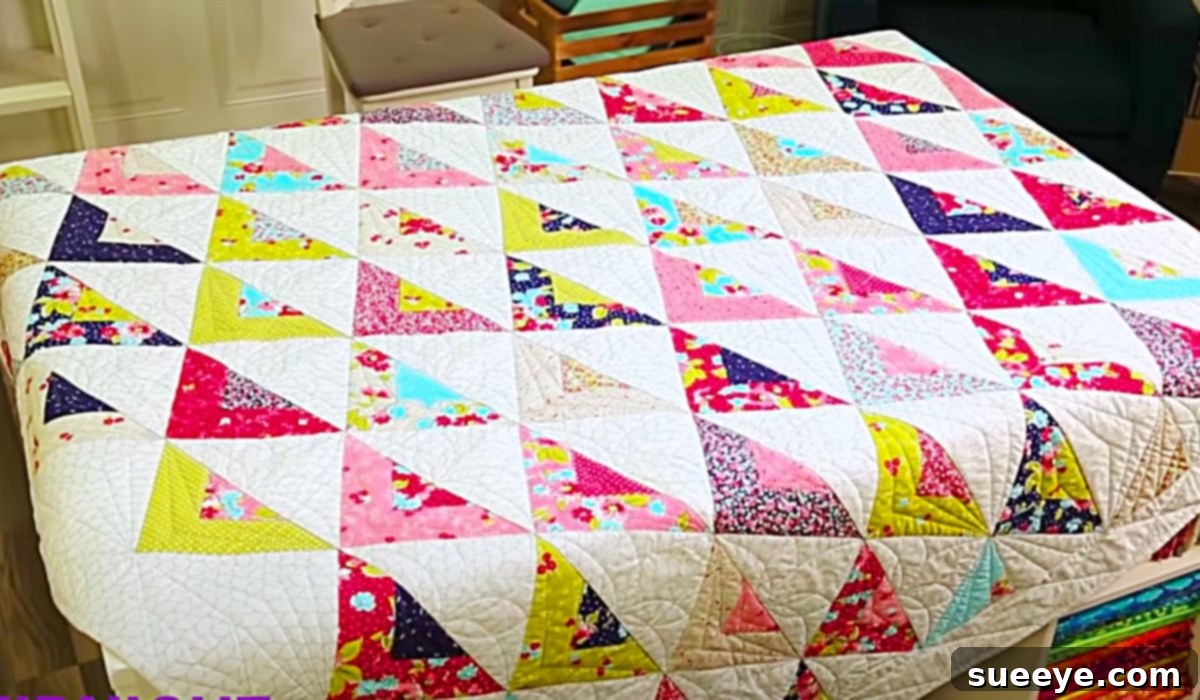
Scrappy Triangle Quilt Pattern: A Comprehensive Guide to Crafting Stunning Creations
Embarking on a quilting journey can be incredibly rewarding, and for many, the very first steps are guided by inspiring online communities. One of the most influential voices for aspiring quilters has consistently been Craftsy. Their instructional videos have been instrumental for countless enthusiasts, guiding them through their initial projects with clarity and encouragement. It was under their expert tutelage that I personally crafted one of my foundational quilting pieces, building confidence and honing essential skills.
My excitement was palpable when I discovered this exceptional Scrappy Triangle Quilt video tutorial by Craftsy on YouTube. As a long-time admirer of their creative approach to using fabric scraps, this project immediately captured my attention. What truly sets Craftsy’s tutorials apart, and makes them an invaluable resource for quilters of all levels, is their unique presentation style. At the conclusion of each block tutorial, they don’t just show one final arrangement. Instead, they meticulously demonstrate numerous ways the patterns can be combined, showcasing how simple changes can result in dramatically different aesthetic outcomes. This might seem like a minor detail, but the impact on a quilter’s creative vision is profound. While many online quilters present a block pattern and offer a single example of its assembly, Craftsy empowers you with a versatile understanding of design, allowing you to personalize your quilt far beyond the initial instructions.
The Allure of the Scrappy Triangle Quilt Pattern: Effortless Growth and Endless Possibilities
This particular Scrappy Triangle Quilt pattern is a testament to ingenious design, distinguishing itself through its remarkably simple yet effective construction method. Unlike quilts assembled from multiple individual blocks, this project forms one expansive, continuous piece, essentially a single gigantic square. The journey begins with a modest scrappy square at its heart. From this central point, you progressively add fabric strips to the outer edges, allowing your quilt to organically expand in size. This continuous growth method is not only straightforward but also incredibly satisfying, as you watch your creation flourish with each added strip. It’s a fantastic technique for both seasoned quilters looking for a relaxing project and beginners eager to see quick, tangible progress.
The beauty of a “scrappy” quilt lies in its ability to transform an assortment of fabric remnants into a cohesive and visually rich masterpiece. This pattern is a perfect stash-buster, inviting you to delve into your collection of leftover fabrics, jelly roll strips, or even pre-cut bundles. Each triangle, born from a strip added to the expanding square, contributes to a dynamic interplay of color, texture, and pattern. The result is a vibrant, unique quilt that tells a story through its diverse fabric choices. The triangle motif, a classic in quilting, takes on a fresh, modern appeal when combined in this ever-expanding format, creating a mesmerizing visual flow that is both complex in appearance and surprisingly simple to achieve.
Why Craftsy’s Tutorials Stand Out: A Foundation for Quilting Success
Craftsy has built a reputation for delivering high-quality, accessible quilting education. Their approach goes beyond just showing you how to cut and sew; they instill a deeper understanding of design principles and offer practical tips that enhance your overall quilting experience. The Scrappy Triangle Quilt tutorial exemplifies this commitment. By illustrating multiple ways to arrange block patterns, they don’t just teach a pattern; they teach you how to think like a designer. This empowers quilters to move beyond exact replication and start experimenting with their own creative interpretations. This depth of instruction is particularly beneficial for those looking to develop their skills and confidence in creating personalized, unique quilts.
Furthermore, the clarity of instruction provided by Craftsy ensures that every step is easy to follow, even for those new to quilting terminology or techniques. Their videos are typically well-lit, professionally edited, and feature close-up shots that leave no room for guesswork. This attention to detail significantly reduces frustration, allowing learners to focus on the joy of creation rather than struggling with ambiguous instructions. For a project like the Scrappy Triangle Quilt, which builds incrementally, clear guidance on adding strips, pressing seams, and trimming accurately is paramount. Craftsy delivers this with precision, making complex tasks feel manageable and ensuring a satisfying outcome for every quilter.
Essential Materials For Your Scrappy Triangle Quilt Adventure
Gathering your materials is the exciting first step in any quilting project. For this Scrappy Triangle Quilt, the beauty lies in its adaptability, allowing you to use a variety of fabrics from your stash or easily source new ones. Here’s what you’ll need to begin:
- A jelly roll: These pre-cut fabric strips (typically 2.5 inches wide by 44 inches long) are an excellent starting point. They offer a coordinated collection of fabrics, saving you time on cutting and ensuring a harmonious color palette for your quilt. Jelly rolls are perfect for the strip-piecing method of this quilt.
- Additional Fabric: (as called for in the video tutorial) Beyond the jelly roll, you might need extra fabric for a central square, borders, or to expand your quilt to a larger size. This is where you can truly embrace the “scrappy” aspect, pulling from your fabric stash to add unique personality and depth to your project.
- A sewing machine: Your primary tool for stitching all the fabric pieces together. A reliable machine with a good quarter-inch foot will make the process smooth and accurate, which is crucial for quilting.
- A cutting mat: An indispensable tool for protecting your work surface and providing a self-healing base for precise fabric cuts. Choose one large enough to accommodate your fabric pieces comfortably.
- A rotary cutter: A quilter’s best friend for quickly and accurately cutting fabric strips and shapes. Available in various sizes, a 45mm or 60mm cutter is ideal for most quilting tasks. Always use with a cutting mat and a ruler for safety and precision.
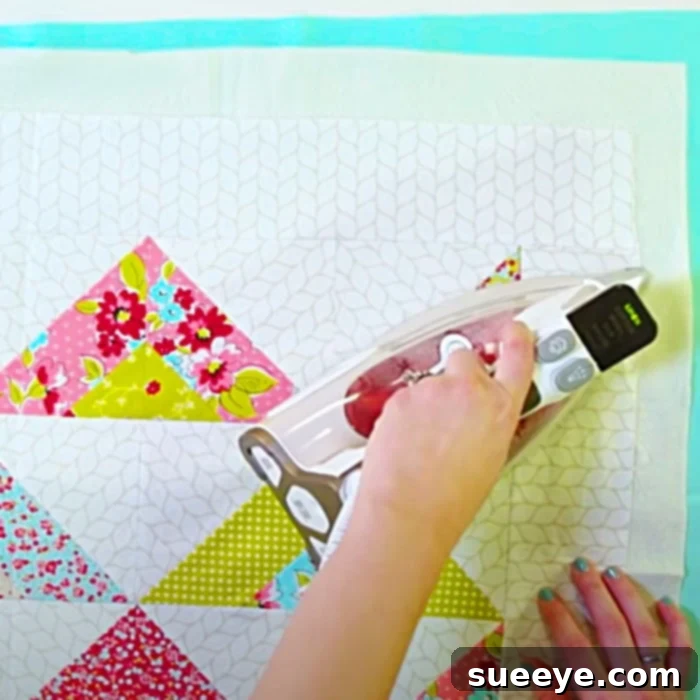
- An iron: Essential for pressing seams throughout the quilting process. Proper pressing ensures your blocks lie flat, your points match up, and your finished quilt has a professional appearance.
- An ironing board: A stable and heat-resistant surface for efficient and effective pressing. A good ironing setup makes a significant difference in the quality of your finished quilt.
- A pair of scissors: Useful for trimming threads, snipping small fabric pieces, and making any necessary adjustments that a rotary cutter might not be suitable for. Keep them sharp and dedicated to fabric only.
Embarking on Your Scrappy Triangle Quilt Journey: Step-by-Step Directions
The beauty of this Scrappy Triangle Quilt lies in its deceptively simple construction, making it an ideal project for quilters of all skill levels. The core concept is wonderfully straightforward: starting with a central square, you continuously add fabric strips to its perimeter, expanding the quilt piece by piece. For a truly detailed and visual guide, the excellent Scrappy Triangle Quilt video tutorial by Craftsy on YouTube is your ultimate resource. It will walk you through each step with clarity and precision, ensuring you master this awesome quilt pattern in just a few easy steps.
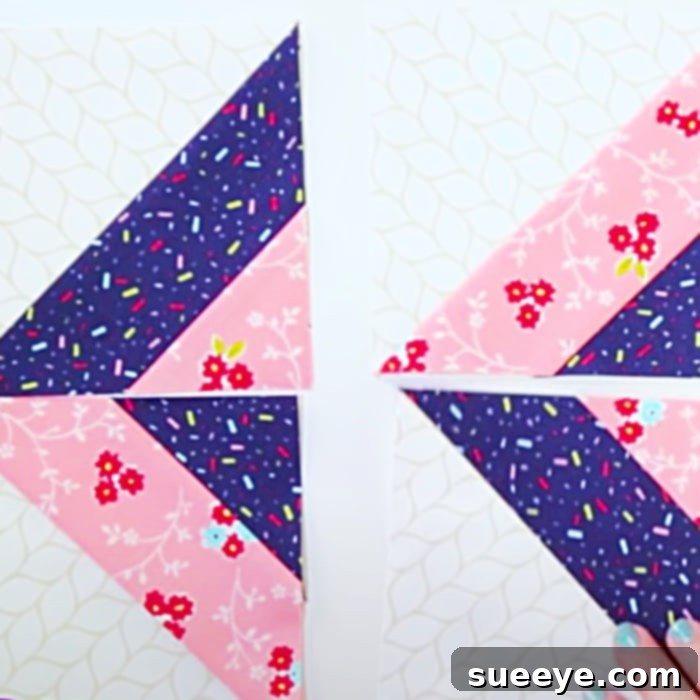
The process generally begins with selecting a small fabric square to serve as the foundation of your quilt. This initial square sets the stage for the entire project. From there, you’ll begin to attach fabric strips, typically from your jelly roll or chosen scraps, to the sides of this central square. Each strip is sewn, pressed open or to one side, and then trimmed to create new edges. As you continuously add strips, the square expands, and the magic of the triangle design begins to emerge. The key is consistent seam allowances and careful pressing, which contribute significantly to the overall flatness and professional finish of your quilt.
The Iterative Process: Building Your Quilt with Continuous Strips
Imagine your central square growing organically, much like a crystal forming. You sew a strip along one side, press the seam, and then trim off any excess fabric, creating a new, larger square. You then repeat this process on the adjacent sides, gradually expanding your quilt. This continuous method means you’re not dealing with multiple small blocks that need to be pieced together at the end. Instead, your quilt is a single, growing unit. The Craftsy tutorial excels at demonstrating how to maintain the geometric integrity of the design as it expands, guiding you on how to position and attach each strip to form those striking triangle patterns. This technique is incredibly forgiving and allows for great flexibility in design, as you can decide to change fabric combinations or even the direction of your strips as your quilt grows.
The beauty of this scrappy method is that it encourages improvisation. While a jelly roll provides a great starting point with pre-coordinated fabrics, feel free to incorporate strips from your stash to add personal touches and unique character. The tutorial will likely cover specific cutting dimensions for your initial square and subsequent strips, as well as precise instructions for sewing and pressing. Paying close attention to these details will ensure your quilt remains square and lies flat. One of the greatest advantages of this method is the immediate gratification; you see your quilt growing larger and larger with each completed round, keeping your motivation high throughout the project.
Beyond the Tutorial: Customizing Your Scrappy Triangle Quilt
Once you’ve grasped the fundamental technique from Craftsy’s tutorial, the possibilities for customization are truly endless. The “scrappy” nature of this quilt invites creativity. Consider playing with different color families for each round of strips to create a gradient effect, or alternate between vibrant prints and solid fabrics for added contrast. You can control the overall size of your quilt by simply continuing to add strips until it reaches your desired dimensions, whether it’s a small baby quilt, a cozy lap quilt, or a grand bedspread. Experiment with the width of your strips to alter the visual impact of the triangles – wider strips will create a bolder, more pronounced triangle, while narrower strips will result in a more intricate, delicate pattern.
Don’t be afraid to think outside the “jelly roll” box. While pre-cut strips are convenient, this pattern is an excellent way to use up larger fabric scraps you might have. Cut your own 2.5-inch strips from fat quarters or yardage in your stash, mixing and matching to create a truly unique and personal narrative within your quilt. The more varied your fabric choices, the richer and more dynamic your finished Scrappy Triangle Quilt will appear. Remember, each fabric choice adds a layer of your personality to the project, making it a truly one-of-a-kind creation.
Finishing Your Masterpiece: The Joy of Quilting
Once you are happy with the size of your quilt top, the next steps involve turning your pieced top into a complete quilt. This typically includes layering your quilt top with batting (for warmth and loft) and a backing fabric, then quilting these layers together. Quilting can be done by hand or machine, adding texture and durability to your project. Finally, the raw edges of your quilt are enclosed with a binding, providing a clean and professional finish. The sense of accomplishment upon completing a quilt, especially one as visually striking and satisfying to make as the Scrappy Triangle Quilt, is immense. It’s a tangible testament to your dedication, creativity, and the joy of crafting.
Why This Scrappy Triangle Quilt Pattern is Perfect for Every Quilter
In summary, the Scrappy Triangle Quilt pattern, expertly presented by Craftsy, offers an unparalleled quilting experience. Its ingenious “gigantic square” method simplifies the construction process, making it incredibly accessible for beginners while still providing ample creative scope for experienced quilters. It’s a fantastic way to utilize your fabric stash, turning remnants into a cohesive and stunning piece of textile art. The clear, detailed instruction from Craftsy ensures that every step is manageable, fostering confidence and encouraging exploration. Whether you’re looking for a quick and satisfying project or a larger heirloom to cherish, this pattern delivers on all fronts.
So, gather your materials, clear your workspace, and prepare to be inspired. This Scrappy Triangle Quilt isn’t just a project; it’s an opportunity to create something truly beautiful and personal, guided by one of the best online quilting instructors. Dive into the Craftsy tutorial today and discover the immense satisfaction of watching your own unique Scrappy Triangle Quilt come to life, one strip at a time.