
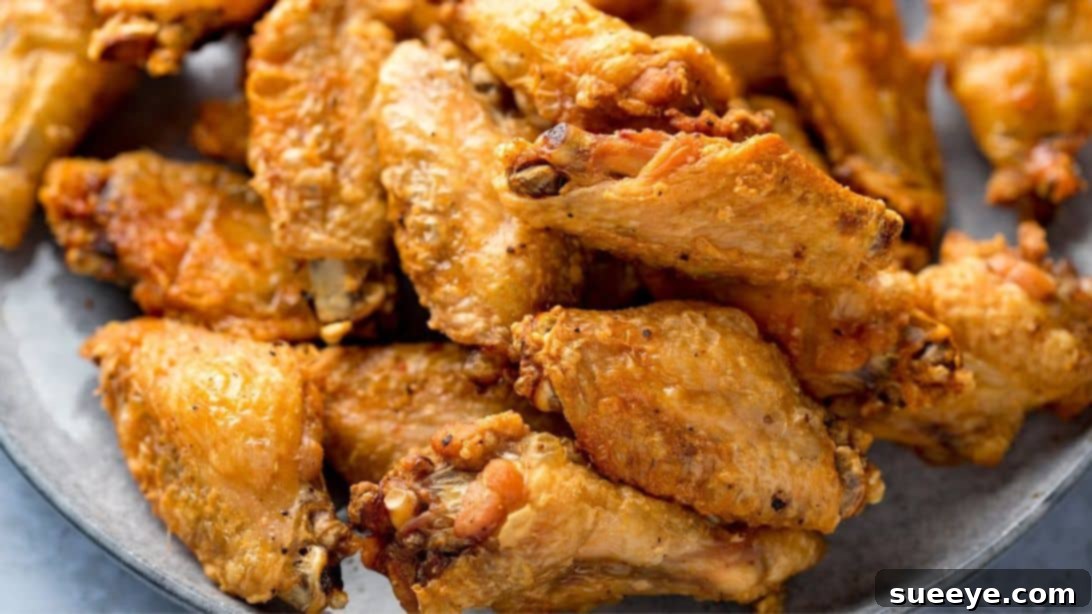
Craving the ultimate crispy chicken wings but want to avoid the mess and oiliness of deep-frying? Look no further! This incredible recipe by Kitchen Sanctuary transforms ordinary chicken wings into an extraordinary culinary delight, all within the comfort of your own oven. Prepare to discover the best crispy oven-baked chicken wings you’ll ever create at home – a dish that masterfully balances a profoundly crunchy, perfectly seasoned skin with unbelievably tender and juicy meat. Forget the guilt associated with greasy takeout; this healthier alternative proves that deliciousness doesn’t have to come at a cost.
Whether you’re hosting a game day party, planning a casual get-together, or simply treating your family to a fantastic weeknight meal, these baked wings are an absolute crowd-pleaser. Kids and adults alike will adore their irresistible texture and flavor. The versatility of these wings is another major highlight; they serve as a perfect canvas for your favorite sauces. Drench them in tangy BBQ, spicy buffalo, creamy ranch, or experiment with a homemade glaze – the possibilities are endless, and you simply cannot go wrong with this foolproof method. Get ready to elevate your chicken wing game without a deep fryer in sight. Read on for the detailed instructions and prepare to impress everyone with your culinary prowess!
Essential Ingredients for Crispy Oven-Baked Wings:
Achieving perfectly crispy, tender chicken wings requires a few simple, yet specific ingredients. Each component plays a crucial role in delivering that highly sought-after texture and flavor.
- 2.2 lbs of Chicken Wings: Opt for fresh, good quality wings. You can buy them whole or already separated into “flats” (wingettes) and “drumettes.” If they’re whole, you’ll need to cut them at the joint.
- 2 Level Tablespoons of Aluminum-Free Baking Powder: This is the secret weapon! Crucially, ensure it’s *baking powder*, not baking soda. Baking powder contains an acid that reacts with moisture to create tiny air bubbles, which helps to crisp the skin, and its alkalinity also assists in browning. Aluminum-free varieties can prevent any metallic aftertaste.
- 1/2 Teaspoon of Salt: Regular table salt works perfectly. It enhances the flavor of the chicken and helps draw out moisture, contributing to crispiness. Adjust to your personal preference.
- 1/2 Teaspoon of Pepper: Freshly ground black pepper adds a subtle kick and aromatic depth. Feel free to use white pepper for a less visible seasoning.
These foundational ingredients are all you need for a truly fantastic base. From here, you can customize with additional spices or flavorings if desired, but these four are non-negotiable for the ultimate crispy baked wings.
Step-by-Step Guide to Crispy Perfection:
Follow these instructions meticulously to ensure your oven-baked chicken wings achieve maximum crispiness and flavor without deep-frying. Precision at each step is key to success!
Step 1: Prepare Your Oven and Baking Setup
Begin by preheating your oven to 250 degrees Fahrenheit (120 degrees Celsius). This initial low temperature is vital for slowly rendering the fat from the chicken skin, paving the way for superior crispiness later. While the oven preheats, place an oven-safe wire rack on a large baking tray. The rack is crucial as it allows air to circulate entirely around each wing, preventing the bottom from becoming soggy and ensuring even crisping.
Step 2: Prepare the Chicken Wings
If your chicken wings are still whole, you’ll need to separate them. Locate the joint connecting the drumette, flat (wingette), and the wingtip. Using a sharp knife or kitchen shears, carefully slice through the joint to separate each wing into a mini wing (flat) and a drumette. You can discard the wingtips or save them for making chicken stock. Separating the wings ensures more even cooking and makes them easier to handle and eat.
Step 3: Dry and Coat the Wings – The Secret to Crispiness
This is arguably the most critical step for achieving truly crispy skin. Thoroughly dry each wing piece with paper towels. The drier the chicken skin, the crispier it will become. Any residual moisture will steam rather than crisp. Once dry, place the wings in a large mixing bowl. Add the 2 leveled tablespoons of aluminum-free baking powder, 1/2 teaspoon of salt, and 1/2 teaspoon of pepper. Toss everything vigorously until each wing piece is lightly and evenly coated with the mixture. The baking powder creates a myriad of tiny air pockets on the chicken skin’s surface, which expand during baking, contributing significantly to that desirable crunchy texture. It also helps to raise the pH of the skin, promoting better browning.
Step 4: Arrange Wings on the Rack
Carefully arrange the coated chicken wings in a single layer on the wire rack you prepared on the baking tray. Ensure that each piece has enough space around it, ideally not touching, to allow for optimal air circulation. If they are slightly touching, it’s generally okay, but avoid overcrowding the tray. A single layer is essential for even cooking and crisping. Discard any remaining baking powder mixture in the bowl once all wings are placed on the rack.
Step 5: Initial Low-Temperature Bake
Place the baking tray with the arranged wings into your preheated 250-degree F (120-degree C) oven, ideally on the lower-middle shelf. Bake for approximately 30 minutes. This initial low-temperature bake is a critical slow-cooking phase. It allows the fat under the chicken skin to slowly render out, effectively “drying” the skin and making it more receptive to crisping in the subsequent high-temperature phase. This step also ensures the chicken cooks through without burning the exterior.
Step 6: High-Temperature Crisp and Finish
After the initial 30 minutes, it’s time to ramp up the heat for the ultimate crisp. Increase your oven temperature to 425 degrees Fahrenheit (220 degrees Celsius). Before continuing to cook, rotate the baking tray 180 degrees to ensure even exposure to the oven’s heat. Continue baking for another 45 to 50 minutes, or until the chicken wings are beautifully golden brown, visibly crispy, and cooked through. The higher temperature rapidly crisps the rendered skin to a delightful crunch. For best results, you might even flip the wings halfway through this high-temp stage (around 20-25 minutes in) to ensure all sides are evenly browned and crispy, though it’s not strictly necessary if air circulation is good. Once they reach your desired level of crispiness, remove them from the oven and let them cool on the rack for a few minutes. This brief resting period helps redistribute juices and allows the skin to firm up even further.
Achieving the Best Crispy Oven-Baked Chicken Wings Every Time
Now that you have the core recipe, let’s explore some additional tips, variations, and why this method consistently delivers unparalleled results, making it the best crispy oven-baked chicken wings recipe you’ll ever need.
Why This Recipe Works: The Science of Crispiness
The magic behind these incredibly crispy wings lies in a few key scientific principles. First, thoroughly drying the chicken skin removes surface moisture, which is the enemy of crispiness. Secondly, the baking powder is a game-changer. Its alkaline nature helps to break down proteins in the chicken skin, allowing it to become more brittle and brown more effectively. As it heats, the baking powder also produces tiny gas bubbles, which expand and create a multitude of micro-blisters on the skin’s surface, leading to that coveted crunch. Finally, the two-stage cooking process—starting low to render fat and then finishing high to crisp—is crucial. The low temperature allows fat to slowly melt away, preventing a greasy result, while the high temperature provides the intense heat needed for that final, shatteringly crisp texture.
Tips for Success: Ensuring Perfect Wings Every Time
- Don’t Overcrowd the Pan: While the recipe states it’s okay if they’re touching slightly, ideally, each wing should have a little breathing room. Overcrowding can lead to steaming rather than crisping. If necessary, use two baking sheets.
- Parchment Paper vs. Foil: For easier cleanup, you can line your baking sheet with parchment paper, but ensure the wire rack is still directly on top of the parchment paper, not under it. Avoid aluminum foil directly on the rack as it can hinder air circulation.
- Internal Temperature: For food safety, chicken wings should reach an internal temperature of 165°F (74°C). Use a meat thermometer inserted into the thickest part of a drumette to verify doneness.
- Seasoning Variations: While salt and pepper are the base, feel free to add garlic powder, onion powder, paprika, cayenne pepper, or your favorite dry rub to the baking powder mixture for enhanced flavor.
Serving Suggestions and Flavor Variations
Once your perfectly crispy oven-baked chicken wings are out of the oven, the real fun begins! You can serve them plain, allowing their natural flavor and incredible texture to shine, or toss them in a variety of sauces to suit any palate.
- Classic Sauce Options: Toss immediately after baking with warm buffalo sauce (melted butter and hot sauce), sticky BBQ sauce, sweet and savory teriyaki, or a zesty lemon-pepper glaze.
- Creamy Dips: Always a hit! Serve alongside cool ranch dressing, creamy blue cheese dip, or a vibrant cilantro-lime crema.
- Dry Rubs: Instead of or in addition to wet sauces, consider finishing with a sprinkle of your favorite dry rub after baking. Think garlic parmesan, spicy cajun, or a smoky chipotle blend.
- Pairing Sides: These wings make a fantastic centerpiece. Serve them with crisp celery and carrot sticks, a fresh green salad, homemade coleslaw, or even some seasoned potato wedges for a complete meal. They are also ideal for game day spreads, holiday appetizers, or just a fun family dinner.
This recipe provides a healthier, less messy, and undeniably delicious alternative to deep-fried wings. By following these straightforward steps, you’ll consistently achieve restaurant-quality crispy chicken wings right in your own kitchen. Say goodbye to soggy skin and hello to an irresistible crunch and juicy interior. Give this recipe a try, and prepare to make it your go-to for the best oven-baked chicken wings!