
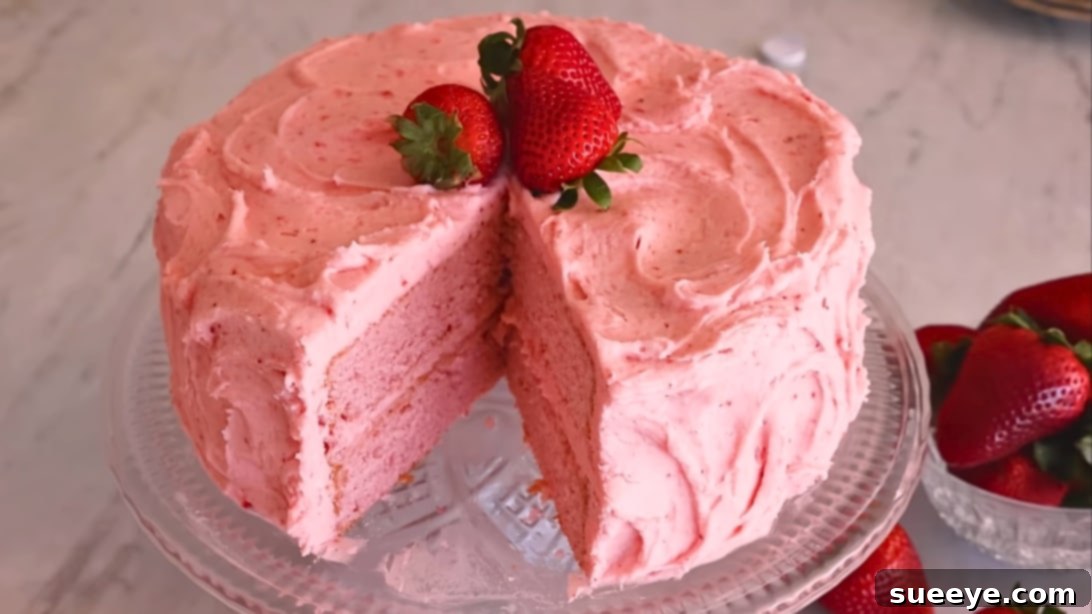
Delight your senses and impress your loved ones with this absolutely irresistible strawberry cake recipe, inspired by the culinary genius of Preppy Kitchen. This isn’t just any dessert; it’s a celebration of fresh, vibrant flavors and a testament to the simple joy of baking. Boasting a perfect harmony of sweet, creamy, and distinctively fruity notes, this cake offers a light, soft, and unbelievably fluffy texture that truly melts in your mouth. From the tender crumb of the cake to the luxurious swirl of homemade strawberry cream cheese frosting, every bite is a journey to pure bliss. Whether you’re planning for a special occasion, a family gathering, or simply craving a homemade treat, this recipe promises to deliver a dessert experience that will be cherished and remembered. Prepare to make this your go-to strawberry cake, as it’s guaranteed to be a hit with everyone who tastes it, leaving them asking for more.
Baking a cake from scratch can feel like a grand undertaking, but with clear steps and a focus on quality ingredients, you’ll find the process incredibly rewarding. This particular strawberry cake recipe is designed to guide you through each stage, ensuring a successful and delicious outcome. The secret lies in a few key techniques: achieving the perfect light and airy cake batter, and whipping up a rich, yet balanced, cream cheese frosting infused with real strawberries. We’ll delve into the ‘why’ behind each instruction, offering tips that will elevate your baking skills and help you create a show-stopping dessert. Get ready to transform simple ingredients into a masterpiece that looks as good as it tastes, proving that homemade always triumphs. The journey to baking the perfect strawberry cake begins here, promising both a delightful process and an unforgettable treat.
Ingredients:
To achieve the unparalleled flavor and texture of this delightful strawberry cake, selecting high-quality ingredients is paramount. Freshness, especially for the strawberries, will significantly impact the final taste. Ensure all cold ingredients like butter, cream cheese, and milk are at room temperature unless otherwise specified, as this is crucial for proper emulsification and a smooth batter and frosting.
For the Cake:
- 2 ¾ cups (350g) all-purpose flour, sifted for a lighter cake crumb.
- 2 ½ teaspoons baking powder, providing the primary lift and airy texture.
- 1 teaspoon fine sea salt, to balance the sweetness and enhance flavors.
- ¼ teaspoon baking soda, to react with acidic ingredients (like strawberry puree) and contribute to softness.
- 1 cup (226g) unsalted butter, softened to room temperature, allowing for proper creaming.
- 2 cups (400g) granulated sugar, for sweetness and moisture.
- 4 large egg whites, separated, contributing to the cake’s light color and delicate texture without the richness of yolks.
- 2 teaspoons pure vanilla extract, a classic flavor enhancer.
- ½ cup (120ml) whole milk, at room temperature, for moisture and tenderness.
- ½ cup (120ml) fresh strawberry puree, made from ripe strawberries, providing natural flavor and moisture.
- Pink food coloring (optional), for an enhanced visual appeal and vibrant pink hue.
For the Strawberry Frosting:
- 8 ounces (226g) full-fat cream cheese, softened to room temperature, providing tang and richness to the frosting.
- 1 cup (226g) unsalted butter, softened to room temperature, for a creamy, stable frosting base.
- 1 teaspoon pure vanilla extract, complementing the strawberry and cream cheese flavors.
- Pinch of fine sea salt, to cut through the sweetness and round out the flavors.
- 6 to 7 cups (720g to 840g) powdered sugar, sifted, for sweetness and structure; adjust to your desired consistency.
- ¼ cup (60ml) fresh strawberry puree, providing intense strawberry flavor and a beautiful natural color.
Instructions:
Embark on your baking adventure with confidence, following these detailed instructions to craft a strawberry cake that will impress with its beauty and taste. Precision and patience are key to achieving the perfect results, from the tender cake layers to the luscious frosting.
For the Cake:
Creating the perfect cake layers is the foundation of this delightful dessert. Pay close attention to ingredient temperatures and mixing techniques to ensure a light, moist, and flavorful crumb.
Step 1: Prepare Your Baking Environment
Begin by preheating your oven to 350°F (175°C). This crucial step ensures that your cake starts baking immediately at the correct temperature, promoting an even rise and preventing it from drying out. Next, prepare two 9-inch round cake pans. Generously grease the pans with butter or a baking spray, making sure to coat the sides thoroughly. This prevents sticking and ensures easy release. For an extra layer of non-stick security, line the bottom of each pan with a circle of parchment paper. The parchment paper creates a barrier that guarantees the cake will not adhere to the bottom, simplifying the removal process and preserving the integrity of your beautiful cake layers. Proper pan preparation is a small effort that makes a big difference in the final presentation of your cake.
Step 2: Combine the Dry Ingredients
In a large mixing bowl, combine your all-purpose flour, baking powder, salt, and baking soda. Use a whisk to thoroughly blend these ingredients together for about 30 seconds to a minute. Whisking ensures that the leavening agents (baking powder and baking soda) and salt are evenly distributed throughout the flour. This uniform distribution is vital for a consistent rise and flavor in your cake. If these dry ingredients aren’t properly mixed, you might end up with unevenly risen layers or pockets of concentrated leavener, which can affect both the texture and taste of the finished cake. Sifting the flour before measuring can also contribute to a lighter cake crumb, but thorough whisking is always essential.
Step 3: Cream Butter and Sugar
In the bowl of a stand mixer fitted with the paddle attachment, or in a large mixing bowl using a hand mixer, begin by beating the softened unsalted butter on medium speed until it becomes smooth and creamy, usually for about 1-2 minutes. The butter should be at room temperature, which means it should be pliable enough to make a slight indentation when pressed, but not melted. Once the butter is creamy, gradually add the granulated sugar. Continue to beat the mixture on medium-high speed for approximately 5 minutes, or until it transforms into a light, fluffy, and pale-yellow consistency. This process, known as creaming, incorporates air into the butter and sugar, creating tiny pockets that will expand during baking, resulting in a tender and airy cake texture. Remember to scrape down the sides of the bowl occasionally with a rubber spatula to ensure all ingredients are thoroughly incorporated.
Step 4: Incorporate Wet Ingredients and Dry Mixture
After creaming the butter and sugar, scrape down the sides of the bowl once more to ensure everything is well mixed. Add the egg whites and vanilla extract to the creamed mixture. Beat on medium speed for about one minute until the mixture is well combined and appears slightly fluffy. The egg whites contribute to the cake’s light color and delicate texture. Now, reduce the mixer speed to low. Begin adding the dry flour mixture to the wet ingredients, alternating with the whole milk and fresh strawberry puree. Start and end with the dry ingredients, typically adding in three batches of flour mixture and two batches of liquids. Mix only until just combined after each addition. Overmixing at this stage can develop the gluten in the flour too much, leading to a tough and dense cake. It’s crucial to stop and scrape down the sides and bottom of the bowl frequently to ensure all ingredients are fully incorporated without overworking the batter. If you desire a more vibrant pink color, now is the time to add a drop or two of pink food coloring, mixing it in gently until evenly distributed. Finally, divide the prepared cake batter evenly between your two greased and parchment-lined 9-inch round cake pans. This ensures both layers bake uniformly.
Step 5: Bake and Cool the Cake Layers
Carefully transfer the cake pans to your preheated oven and bake for approximately 30 minutes. Baking times can vary depending on your oven, so it’s important to keep an eye on the cakes. You’ll know the cakes are done when they are golden brown, springy to the touch when lightly pressed in the center, and have started to pull away slightly from the sides of the pans. Another reliable test is to insert a wooden skewer or toothpick into the center of the cake; if it comes out clean, the cake is ready. Once baked, remove the pans from the oven and allow the cakes to cool in their pans on a wire rack for about 20 minutes. This initial cooling period allows the cakes to set and firm up, preventing them from breaking when transferred. After 20 minutes, carefully invert the cakes onto the wire rack, lift off the pans, and gently peel away the parchment paper from the bottom. Let the cake layers cool completely on the wire rack before frosting. Attempting to frost a warm cake will cause the frosting to melt and slide off, so patience here is key to a beautifully finished cake. Cooling completely can take anywhere from 1 to 2 hours.
For the Strawberry Frosting:
This luscious strawberry cream cheese frosting is the perfect complement to the delicate cake layers. Its tangy sweetness and smooth texture elevate the entire dessert. Ensure both butter and cream cheese are at proper room temperature for the best results.
Step 1: Cream Cream Cheese, Butter, and Vanilla
In a large mixing bowl, or using the bowl of a stand mixer fitted with the paddle attachment, combine the softened cream cheese, softened unsalted butter, and vanilla extract. Beat these ingredients together on medium speed for approximately 5 minutes, or until the mixture becomes wonderfully smooth, creamy, and fluffy. It’s crucial that both the cream cheese and butter are at room temperature to prevent lumps and ensure a silky-smooth frosting. Properly softened ingredients will emulsify beautifully, creating a stable and airy base for your frosting. This creaming process also incorporates air, making the frosting lighter and easier to spread. Take your time with this step, as a well-creamed base is the secret to a perfect cream cheese frosting.
Step 2: Incorporate Powdered Sugar and Strawberry Puree
With the mixer on low speed, begin to gradually add the sifted powdered sugar, alternating with tablespoons of fresh strawberry puree. This gradual addition helps to prevent a cloud of powdered sugar from erupting in your kitchen and ensures a smooth, lump-free frosting. Add about a cup of powdered sugar, then a tablespoon of puree, and continue alternating until all ingredients are incorporated. Make sure to stop the mixer a few times during this process and scrape down the sides and bottom of the bowl with a rubber spatula. This ensures all the powdered sugar and puree are fully mixed in and prevents any unmixed pockets. Once all ingredients have been added, increase the mixer speed to medium-high and beat for another 2-3 minutes until the frosting is light, fluffy, and perfectly aerated. If you find the frosting is too stiff, you can add an additional tablespoon or two of strawberry puree or milk until it reaches your desired consistency. For a thicker frosting, add more powdered sugar; for a thinner frosting, add more liquid. The goal is a spreadable, pipeable consistency that holds its shape beautifully.
To Assemble the Strawberry Cake:
Assembling the cake is where your masterpiece truly comes together. With properly cooled cake layers and a perfectly whipped frosting, this step is both simple and incredibly satisfying. Focus on creating even layers and a smooth finish for a professional-looking result.
To begin, carefully place one cooled cake layer onto your chosen cake stand or serving plate. Using an offset spatula or the back of a spoon, evenly spread about one cup of your luscious strawberry cream cheese frosting over the top of this first layer. Aim for a consistent thickness across the entire surface. This not only creates a beautiful visual but also ensures each slice has a balanced cake-to-frosting ratio. Gently place the second cake layer directly on top of the first, aligning it as best as possible. Now, take the remaining strawberry frosting and spread it evenly over the top and down the sides of the entire cake. Use your offset spatula to smooth the frosting, creating a neat finish. For a rustic look, you can swirl the frosting, or for a more polished appearance, use a bench scraper to achieve smooth sides. If desired, garnish with fresh strawberry slices, whole berries, or a sprinkle of chopped pistachios for added visual appeal and texture. Once assembled, the cake is ready to be served. If you’re not serving it immediately, cover the cake loosely with plastic wrap or a cake dome to prevent it from drying out. This exquisite strawberry cake can be kept at room temperature for up to 5 days, though for optimal freshness and texture, especially with cream cheese frosting, refrigeration is recommended after the first day, particularly in warmer climates. Let it come to room temperature for about 30 minutes before serving for the best flavor and consistency. Enjoy every delightful slice of your homemade strawberry masterpiece!
This melt-in-your-mouth strawberry cake is more than just a dessert; it’s an experience. Each component, from the tender, fruity cake layers to the rich, tangy cream cheese frosting, works in harmony to create a truly unforgettable treat. Whether you’re baking for a birthday, an anniversary, or simply to brighten a regular day, this recipe delivers on its promise of deliciousness. The vibrant color, the intoxicating aroma, and the exquisite flavor profile make it a centerpiece that will gather compliments and smiles. So go ahead, embrace the joy of baking, and create this sensational strawberry cake. It’s a labor of love that rewards you with pure, unadulterated pleasure in every single bite. Don’t be surprised if this becomes your most requested recipe!