
The Ultimate Extreme Oreo Cake with Marshmallow Frosting: A Dessert Lover’s Dream
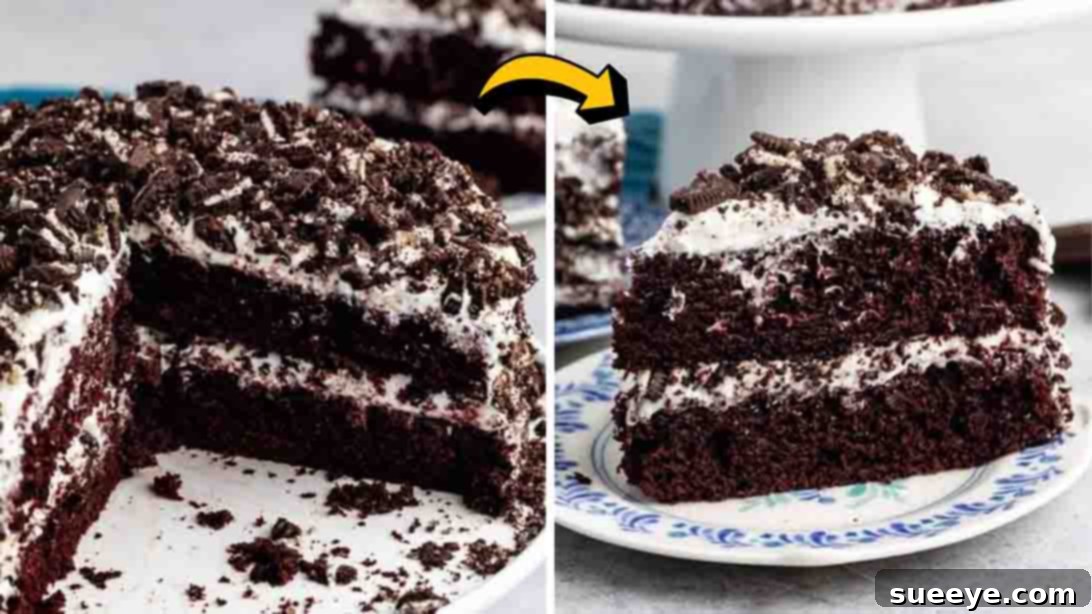
If you’re a devoted Oreo enthusiast, prepare to embark on a culinary journey to dessert paradise with this incredible “Extreme Oreo Cake.” Inspired by the delightful creation from Crazy for Crust on YouTube, this isn’t just a cake; it’s a celebration of all things Oreo. Imagine a deeply rich, moist chocolate cake generously slathered with a luscious, cloud-like marshmallow frosting, then showered with an abundance of perfectly crushed Oreo cookies. It’s an unforgettable experience, making it the quintessential dessert for any gathering or simply a decadent treat for yourself and your loved ones.
RELATED: Discover Another Fan Favorite: Best Oreo Chocolate Poke Cake
What makes this Extreme Oreo Cake truly special is its surprisingly straightforward preparation. Even if you consider yourself a novice baker, you’ll find this recipe approachable and rewarding. We adore making this cake as a family activity; the sheer joy and excitement it brings, especially to the kids, is priceless. This dessert isn’t just about satisfying a sweet craving; it’s about creating cherished memories in the kitchen and at the dining table. Dive into this recipe and discover firsthand why it has become a beloved classic for Oreo lovers everywhere!
Why This Extreme Oreo Cake Stands Out
In a world brimming with desserts, the Extreme Oreo Cake carves out its own unique niche. It’s a masterful blend of textures and intense flavors designed to captivate your senses. The foundation is a wonderfully moist chocolate cake, elevated by the distinct richness of dark cocoa and a hint of coffee, which deepens the chocolate notes without making it taste overtly like coffee. This creates a perfect canvas for the star of the show: the extraordinary marshmallow frosting. Unlike standard buttercream, this frosting boasts an airy, silky texture that melts in your mouth, offering a delightful counterpoint to the cake’s density. Each bite is further enhanced by the delightful crunch and familiar sweetness of crushed Oreos, creating an experience that’s truly “extreme” in its deliciousness. It’s a cake that doesn’t just taste good; it tells a story of indulgence and pure joy.
Ingredients for Your Extreme Oreo Cake Adventure
Crafting this sensational dessert requires a few key ingredients, thoughtfully divided between the decadent chocolate cake layers and the dreamy marshmallow frosting. Gathering all your components before you begin will ensure a smooth and enjoyable baking process. Quality ingredients make a noticeable difference in the final taste and texture, so opt for fresh products whenever possible.
For the Rich Chocolate Cake Layers:
These ingredients combine to create a deeply flavorful and incredibly moist chocolate cake that perfectly complements the sweet frosting. The hot liquids help to bloom the cocoa, intensifying its flavor, while the vinegar adds a subtle acidity that reacts with the baking soda for a perfect rise and tender crumb.
- 3 cups all-purpose flour
- 2 cups granulated sugar
- 1/2 cup unsweetened dark cocoa powder (for a richer chocolate flavor)
- 2 tsp baking soda
- 1 tsp salt
- 1 1/2 cups hot water
- 1/2 cup hot coffee (freshly brewed works best to enhance chocolate notes)
- 3/4 cup vegetable oil (or another neutral-flavored oil)
- 2 tbsp white vinegar
- 1 tsp vanilla extract (pure vanilla extract is recommended)
For the Dreamy Marshmallow Frosting:
This unique frosting is what truly elevates the “extreme” status of this cake. The combination of butter and shortening provides stability, while marshmallow cream delivers that signature fluffy texture and sweet, nostalgic flavor.
- 1/2 cup unsalted butter, softened
- 1/2 cup vegetable shortening (for a stable, fluffy frosting)
- 1 – 7 oz jar marshmallow cream (or Marshmallow Fluff)
- 3 cups powdered sugar, sifted (to avoid lumps)
- 1/2 tsp salt (balances the sweetness)
- 1 tsp vanilla extract
- 1 – 2 tbsp heavy whipping cream (adjust for desired consistency)
- 10 crushed Oreos (for sprinkling and topping)
Step-by-Step Guide to Baking Your Extreme Oreo Cake
Follow these detailed instructions to create your show-stopping Extreme Oreo Cake. Remember, baking is an art, but with these clear steps, you’ll achieve delicious results every time.
Step 1: Preparing Your Pans and Crafting the Perfect Cake Batter
Begin by preheating your oven to 350 degrees F (175°C). This ensures your oven is at the correct temperature when the cake goes in, promoting even baking. Next, meticulously prepare two 8-inch round cake pans. Generously grease the pans with butter or baking spray, then line the bottoms with parchment paper. This crucial step prevents sticking and ensures your beautiful cake layers release easily after baking.
In a large mixing bowl, combine all your dry cake ingredients: 3 cups of all-purpose flour, 2 cups of granulated sugar, 1/2 cup of unsweetened dark cocoa powder, 2 teaspoons of baking soda, and 1 teaspoon of salt. Use a whisk to thoroughly combine these ingredients, ensuring no lumps of cocoa or baking soda remain. This dry mix provides the structure and fundamental flavor of your cake.
In a separate, medium-sized bowl, prepare your wet ingredients. Combine 1 1/2 cups of hot water, 1/2 cup of hot coffee, 3/4 cup of vegetable oil, 2 tablespoons of white vinegar, and 1 teaspoon of vanilla extract. Whisk these together until they are well incorporated. The hot liquids help to bloom the cocoa, intensifying its flavor, while the vinegar adds a necessary acidity for activation of the baking soda.
Now, it’s time to bring these two mixtures together. Gradually pour the wet mixture into the dry ingredients while continuously whisking. This gradual addition helps prevent lumps and ensures a smooth, uniform batter. Continue whisking until just combined – be careful not to overmix, as this can lead to a tough cake. The batter should be smooth and pourable, with a lovely dark chocolate color.
Step 2: Baking Your Cake Layers and Whipping Up the Fluffy Marshmallow Frosting
Carefully divide the prepared batter evenly between your two greased and parchment-lined cake pans. For precise results, you can use a kitchen scale to ensure equal distribution. Place the pans into your preheated oven and bake for 34 to 38 minutes. To check for doneness, insert a toothpick into the center of the cakes; it should come out clean. Avoid overbaking, as this can dry out your cake layers.
Once baked, remove the cakes from the oven and let them cool in their pans on a wire rack for about 10-15 minutes. After this initial cooling, carefully invert them onto the wire rack, remove the parchment paper, and allow them to cool completely. This step is absolutely crucial; frosting a warm cake will cause the frosting to melt and slide off.
While your cakes are cooling, it’s the perfect time to prepare the star frosting. In a large mixing bowl, combine 1/2 cup of softened unsalted butter and 1/2 cup of vegetable shortening. Using an electric mixer, cream these two ingredients together until they are light and fluffy. This step incorporates air, which is essential for a truly light and airy frosting.
Next, add the entire 7 oz jar of marshmallow cream to the butter and shortening mixture. Continue mixing on medium speed until well combined and smooth. This is where the magic begins, introducing that distinctive marshmallow texture and flavor.
Gradually add 3 cups of sifted powdered sugar, one cup at a time, mixing thoroughly after each addition. Sifting your powdered sugar beforehand is highly recommended to prevent any lumps. Once all the sugar is incorporated, add 1 teaspoon of vanilla extract and 1 to 2 tablespoons of heavy whipping cream. Start with one tablespoon of cream and add more if needed to achieve your desired consistency – a smooth, spreadable, yet firm frosting. Continue mixing on medium-high speed for several minutes until the frosting is incredibly light, smooth, and fluffy. It should hold its shape beautifully.
Step 3: Assembling, Decorating, and Serving Your Masterpiece
Once your cake layers are completely cool and your marshmallow frosting is whipped to perfection, it’s time for the exciting assembly process. If your cake layers have slightly domed tops, you can use a serrated knife to carefully level them, creating a flat surface for easier stacking and a more professional look.
Place one cooled cake layer on your serving plate or cake stand. Spread approximately half of your marshmallow frosting evenly over the top of this first layer. Use an offset spatula or the back of a spoon to create a smooth, inviting surface. Generously sprinkle a good portion of your crushed Oreos over the frosting. This layer of cookie goodness adds an extra dimension of texture and flavor within the cake itself.
Carefully place the second cake layer on top of the first, aligning it as precisely as possible. Gently press down to secure it. Now, take the remaining marshmallow frosting and use it to cover the entire cake – both the top and the sides. Don’t be shy; ensure a thick, luxurious coating. You can aim for a perfectly smooth finish with an icing spatula or create an appealing rustic look with textured swirls.
For the grand finale, coat the entire cake with even more crushed Oreos. Press them gently into the frosting on the sides and sprinkle them generously over the top. This final layer of Oreos not only makes the cake visually stunning but also adds an irresistible crunch to every single slice.
Your Extreme Oreo Cake is now complete and ready to impress! Slice it up and serve this delightful creation to friends and family. Enjoy the smiles and compliments that are sure to follow!
Expert Tips for a Flawless Extreme Oreo Cake
Achieving bakery-quality results at home is easier than you think with a few simple tips:
- Room Temperature Ingredients: Ensure butter and eggs (if used in other recipes, though not this one for the cake) are at room temperature for both cake batter and frosting. This promotes even mixing and a smoother consistency.
- Do Not Overmix: When combining wet and dry ingredients for the cake, mix only until just combined. Overmixing develops gluten, leading to a tough, dry cake.
- Cool Cakes Completely: This cannot be stressed enough! Warm cakes will melt your beautiful frosting into a messy puddle. Patience here is key.
- Sift Powdered Sugar: Always sift your powdered sugar for the frosting to remove any lumps. This ensures a silky-smooth frosting texture.
- Adjust Frosting Consistency: If your frosting seems too thick, add heavy cream a teaspoon at a time. If it’s too thin, add a tablespoon of powdered sugar at a time until the desired consistency is reached.
- Crush Oreos Effectively: For even crumbs, place Oreos in a zip-top bag and crush them with a rolling pin or use a food processor for finer crumbs.
Creative Variations & Customizations
While the classic Extreme Oreo Cake is phenomenal, don’t hesitate to personalize it!
- Flavorful Oreos: Experiment with different Oreo flavors like Mint, Peanut Butter, or Golden Oreos for unique twists.
- Add-Ins: Fold chocolate chips, mini marshmallows, or even a swirl of caramel sauce into the cake batter or between the layers for extra indulgence.
- Different Frostings: While marshmallow frosting is amazing, a rich chocolate ganache or a creamy cream cheese frosting would also be delicious alternatives.
- Mini Cakes or Cupcakes: Adapt the recipe to make individual mini cakes or cupcakes for easy serving at parties. Adjust baking times accordingly.
- Decorative Touches: Garnish with whole Oreos, chocolate curls, or a drizzle of chocolate syrup for an even more impressive presentation.
Storage and Shelf Life
To keep your Extreme Oreo Cake fresh and delicious:
- Countertop: Store the cake in an airtight container at room temperature for up to 2-3 days.
- Refrigerator: For longer storage, refrigerate the cake in an airtight container for up to 5-7 days. Allow it to come to room temperature for about 30 minutes before serving for the best texture and flavor.
- Freezing: Unfrosted cake layers can be wrapped tightly in plastic wrap and then foil, and frozen for up to 2 months. Thaw in the refrigerator before frosting. Frosted slices can also be frozen, individually wrapped, for up to 1 month.
Experience the Ultimate Indulgence: Extreme Oreo Cake with Marshmallow Frosting
This Extreme Oreo Cake is more than just a dessert; it’s an edible masterpiece designed to bring joy and satisfaction to every bite. From the deep, rich chocolate cake layers to the light and airy marshmallow frosting, crowned with the irresistible crunch of crushed Oreos, every element works in harmony to create an unforgettable experience. Whether you’re celebrating a special occasion, hosting a party, or simply treating yourself to something extraordinary, this recipe promises to deliver. So, gather your ingredients, follow these steps, and prepare to bake the most epic Oreo cake you’ve ever tasted. Get ready to enjoy!