
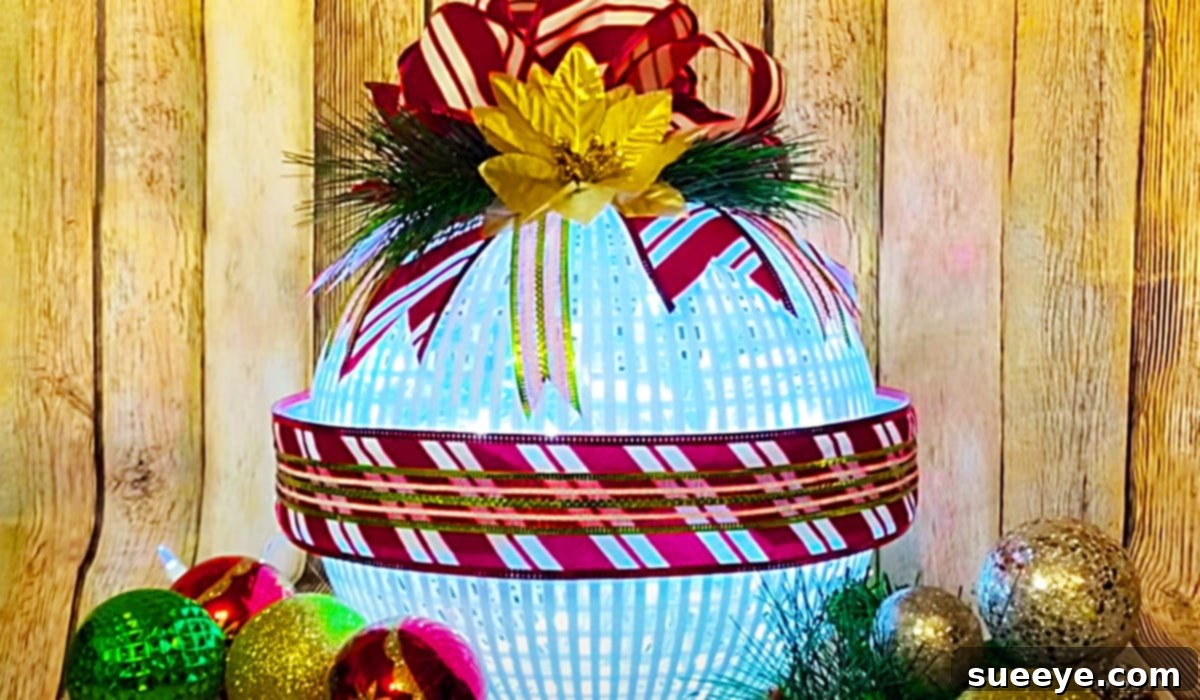
DIY Dollar Tree Colander Christmas Ornament: A Budget-Friendly & Stunning Holiday Decoration
For many years, my journey into the delightful world of crafting often led me to the familiar aisles of traditional craft stores, like Michael’s. I cherished these visits, always finding a treasure trove of craft goodies at very reasonable prices. However, a recent surge of captivating Dollar Tree DIYs across the internet truly piqued my interest. The sheer ingenuity and affordability showcased in these projects convinced me it was time to branch out and explore the creative potential offered by Dollar Tree. It wasn’t long before I discovered an absolute gem: an awesome Dollar Tree colander ornament video tutorial by This Southern Girl Can on YouTube. This particular DIY project immediately struck me as the perfect way to get acquainted with the incredible and budget-friendly crafting opportunities available at Dollar Tree. What’s more, this project is ideal for creating a large, eye-catching statement decoration that will undoubtedly enhance any part of your Christmas decor, from your outdoor porch to a prominent spot in your living room.
The Growing Appeal of Dollar Tree DIY Crafts
In a world where holiday decorations can often come with a hefty price tag, the rise of Dollar Tree DIYs offers a refreshing and practical alternative. These projects demonstrate that stunning, personalized decor doesn’t require a significant financial investment. Instead, they champion creativity, resourcefulness, and the joy of transforming simple, everyday items into something extraordinary. Dollar Tree’s accessible price point makes crafting inclusive, allowing enthusiasts of all budgets to participate in the satisfaction of handmade holiday cheer. The colander ornament is a prime example of this philosophy, showcasing how two humble kitchen items can be repurposed into a dazzling, festive display with minimal effort and expense.
Essential Materials for Your Dollar Tree Colander Christmas Ornament
One of the most appealing aspects of this festive DIY project is its straightforward material list. Everything you need is not only easy to find but also incredibly affordable, primarily available at your local Dollar Tree. Here’s a detailed breakdown of the supplies that will transform ordinary colanders into an extraordinary Christmas decoration:
- 2 Plastic Colanders: These are the fundamental components of our ornament. Dollar Tree often stocks plastic colanders in various colors, allowing you to choose classic festive shades like red or green, a crisp white for a snowy aesthetic, or even a metallic silver for a contemporary feel. It’s crucial that both colanders are the same size to ensure they fit together seamlessly. The numerous perforations are key, as they will serve as delightful conduits for the light to shine through, creating a captivating glow.
- 1 to 3 Strings of Battery-Operated Fairy Lights: The quantity of light strings depends on your desired level of brightness and fullness. Fairy lights, also known as micro LED string lights, are ideal due to their thin, flexible nature and the soft, magical glow they emit. Battery operation is a must for this project, offering versatility in placement without the need for an electrical outlet, which is particularly useful for outdoor displays. You can opt for warm white lights for a cozy, traditional ambiance or cool white for a more sparkling, ethereal effect.
- Stretchy Bead String (or strong fishing line/thin floral wire): This versatile item will primarily be used to create a durable hanging loop for your finished ornament, allowing it to be suspended from various points, such as a porch hook, a sturdy tree branch, or an interior ceiling hook. Additionally, it can provide extra reinforcement to secure the two colanders together, ensuring the structure remains intact. Choose a transparent or color-matching string to maintain a polished look.
- Decorative Ribbon of Your Choice: This is your opportunity to infuse your ornament with personal style and holiday spirit. Wired ribbon is highly recommended as it allows you to craft a large, voluminous bow that maintains its shape beautifully. Consider patterns such as classic plaid, festive stripes, or elegant glittery solids. Textures like luxurious velvet or rustic burlap can add depth and character, complementing your existing holiday theme. A wider ribbon will generally create a more dramatic and noticeable bow.
- Pipe Cleaners: These flexible crafting staples are incredibly useful for several tasks. They will primarily aid in securely attaching your decorative bow to the colander structure. They can also be used as temporary clamps to hold the two colanders together while the hot glue dries, providing additional stability. Select pipe cleaners in a color that either blends with your ribbon or offers a pleasing contrast.
- Hot Glue Gun and Plenty of Glue Sticks: Although not explicitly mentioned in the original list, a hot glue gun is absolutely indispensable for this project. It provides the strong, fast-drying bond needed to permanently join the two colanders and to attach all your decorative elements securely. Ensure you have a sufficient supply of glue sticks to complete the entire assembly process without interruption.
- Optional Embellishments: To elevate your colander ornament further, consider incorporating additional decorative elements. Faux evergreen sprigs, miniature berries, small shatterproof ornaments, a light dusting of glitter spray, or even artificial snow can add extra charm, texture, and sparkle, making your creation truly unique.
Step-by-Step Directions to Craft Your Stunning Colander Ornament
Crafting this charming and illuminated Christmas decoration is surprisingly simple, making it a fantastic project for crafters of all skill levels, from beginners to experienced DIY enthusiasts. By following these easy and detailed steps, inspired by the wonderful tutorial from This Southern Girl Can on YouTube, you’ll bring your festive vision to life in no time.
Step 1: Prepare Your Workspace and Gather Materials
Begin by clearing a clean, flat, and protected surface where you can work comfortably. Gather all your necessary materials, ensuring your hot glue gun is plugged in and allowed ample time to heat up completely. Take a moment to inspect your plastic colanders, making sure they are clean and dry, especially if they’ve been in storage.
Step 2: Carefully Arrange Fairy Lights in the First Colander
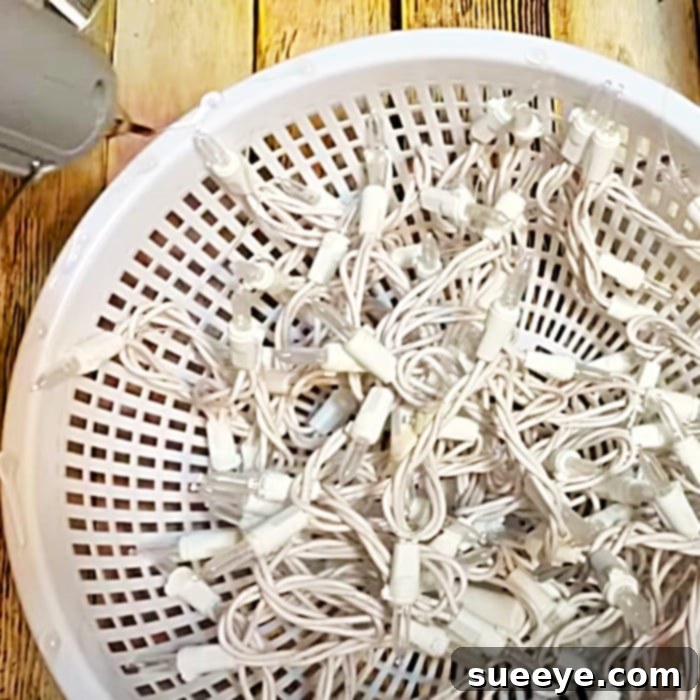
Take one of your plastic colanders. Begin to carefully place your battery-operated fairy light string(s) inside it. The goal here is to distribute the lights as evenly as possible throughout the interior of the colander, ensuring that the light will radiate beautifully through all the perforations. A good starting point is to tuck the battery pack into a discreet corner or against the side of the colander where it will be least visible once the ornament is assembled. You can use small pieces of clear tape or tiny dabs of hot glue in a few strategic spots to secure the light string, preventing it from shifting or clumping together. This ensures a consistent and full glow.
Step 3: Securely Join the Two Colanders Together
Once you are satisfied with the arrangement of your lights within the first colander, it’s time to unite the two halves. Apply a continuous, generous bead of hot glue all along the entire rim of the colander that contains the lights. Work efficiently but carefully, as hot glue sets relatively quickly. Immediately, take the second colander and precisely place it directly on top of the first, ensuring that their rims align perfectly. Press down firmly and hold the two colanders together for several minutes to allow the hot glue to form a strong, secure bond. For added stability while the glue cures, you can use pipe cleaners, clothes pegs, or strong clips temporarily around the perimeter to hold the colanders in place.
Step 4: Create and Attach Your Grand Decorative Bow
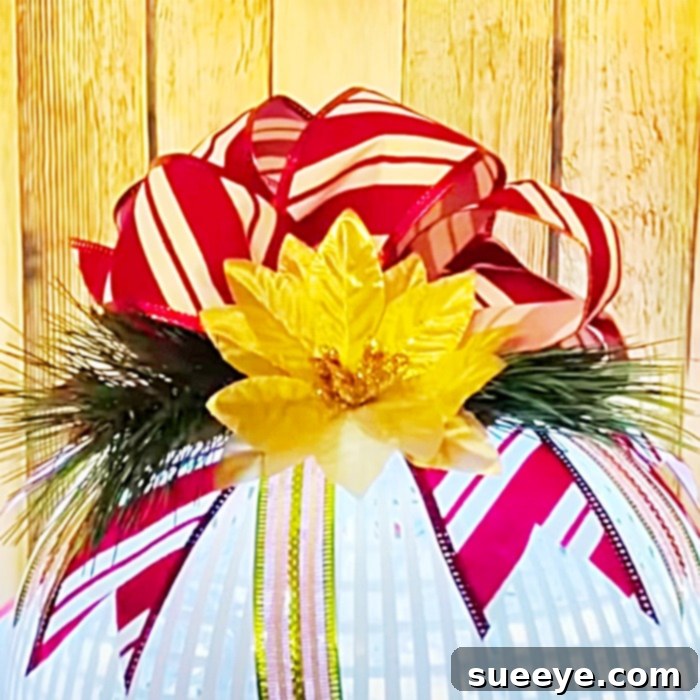
Now comes the fun part of adding festive flair! Select your decorative ribbon and craft a large, impressive bow. If bow-making is new to you, numerous simple video tutorials are available online that can guide you through the process. For the best results, especially for a voluminous bow that holds its shape, wired ribbon is highly recommended. Once your bow is beautifully fashioned, use a pipe cleaner or a thin piece of your stretchy bead string to securely attach it to the top of your newly joined colander structure. You can thread the pipe cleaner through one of the colander’s holes near the top, loop it around the central knot of your bow, and then twist the ends together securely on the inside of the ornament. Position the bow prominently at the very top, ensuring it becomes a striking focal point.
Step 5: Add Finishing Touches and a Secure Hanging Loop
This is where your unique ornament truly comes to life and takes on its personalized charm! If you decided to include optional embellishments, now is the perfect time to attach them. Use small, precise dabs of hot glue to secure faux berries, sprigs of evergreen, tiny glittery ornaments, or anything else that complements your design. A light mist of glitter spray or artificial snow can add an extra layer of magic and sparkle. Finally, create a robust hanging loop. Cut a suitable length of your stretchy bead string (or fishing line/thin wire), tie the ends together securely, and attach it to the very top of the colander. You can loop it through the pipe cleaner securing your bow or thread it through a sturdy perforation on the colander itself. Double-check that the loop is strong enough to reliably support the weight of the completed ornament.
Step 6: Display Your Magnificent Handmade Creation
With your DIY Dollar Tree Colander Christmas Ornament now complete, the only task remaining is to find the perfect spot to showcase its radiant beauty. Turn on the fairy lights and instantly transform your space with a soft, inviting glow. This impressive, statement piece is incredibly versatile in its display options. Consider hanging it on your front porch or near your entryway to warmly greet guests with festive cheer. Suspend it in a grand foyer, use it as a striking centerpiece above a mantelpiece, or even integrate it into a larger outdoor holiday light display. Its unique design and enchanting illumination are guaranteed to draw admiration, spark conversations, and spread abundant holiday joy throughout your home.
The Magic Behind This Easy and Affordable Christmas DIY
What truly elevates the Dollar Tree Colander Christmas Ornament beyond a simple craft project is its remarkable combination of simplicity, unmatched affordability, and undeniable visual impact. I can attest with confidence that this stands out as one of the easiest, most rewarding, and visually stunning Christmas DIYs I have ever had the pleasure of discovering and creating. The entire project can be conceptualized and brought to fruition in less than an hour, yet it yields a decoration that possesses an expensive, custom-made aesthetic far exceeding its minimal cost. It serves as a brilliant testament to the power of imaginative thinking and highlights the incredible hidden potential within common, everyday items found at any dollar store.
Unmatched Cost-Effectiveness
Imagine the satisfaction of creating a substantial, beautifully illuminated Christmas decoration for just a few dollars. That’s the core, irresistible appeal of this project. By strategically utilizing Dollar Tree’s pricing, you can craft truly impressive holiday decor without putting a strain on your budget, freeing up resources for other essential festive expenditures.
Simplicity for All Skill Levels
You absolutely do not need to possess years of crafting experience or advanced skills to achieve a spectacular result with this DIY. The step-by-step instructions are intuitive and easy to follow, and the materials themselves are forgiving and enjoyable to work with. This makes it an ideal introductory project for beginners, a quick and satisfying win for seasoned DIY enthusiasts, and a wonderfully engaging family activity that adults and older children can genuinely enjoy creating together.
Boundless Versatility and Customization
While the fundamental concept of joining two colanders and adding lights remains consistent, the avenues for personalization are virtually limitless. You have complete freedom to customize the colors of the colanders, the style and hue of the ribbon, and the selection of additional embellishments to perfectly align with your unique holiday theme or home decor. Envision a rustic farmhouse aesthetic? Opt for a natural burlap ribbon and sprigs of natural-looking greenery. Dreaming of a whimsical winter wonderland? Choose pastel-colored colanders and glittering accents. The creative choices are entirely yours to explore!
Expert Tips for Customizing Your Colander Ornament
To ensure your colander ornament truly reflects your personal style and holiday vision, consider these additional tips for customization:
- Transform with Paint: If your local Dollar Tree doesn’t offer colanders in your ideal color, don’t fret! A few coats of spray paint can instantly transform their appearance. Consider metallic silver, shimmering gold, a rich festive red, or even a frosted white. Always ensure you use paint specifically designed for plastic surfaces and allow ample drying time for each coat.
- Embrace a Theme: Move beyond general Christmas decor and think about specific holiday themes. For instance, you could create a charming snowman theme using white colanders, an orange ribbon shaped into a “carrot” nose, and black button embellishments. A vintage-inspired theme might involve muted color palettes and antique-looking ornaments.
- Incorporate Varied Textures: Introduce a richer, more tactile dimension by incorporating natural elements such as real or faux pinecones, a dusting of artificial snow, or frosted berries. These additions can significantly enhance the visual and sensory appeal of your ornament.
- Experiment with Lighting Effects: If your chosen fairy lights offer different settings (e.g., steady on, twinkling, slow fade), experiment with these options to create varied atmospheres. You could even use colored fairy lights for a truly vibrant and dynamic display.
Important Safety Considerations for Your DIY Project
While this project is designed to be fun and straightforward, it’s crucial to keep safety at the forefront of your crafting endeavors:
- Hot Glue Gun Safety: Always exercise extreme caution when operating a hot glue gun. The nozzle and the melted glue reach very high temperatures and can cause severe burns. Ensure that the hot glue gun is kept well out of reach of small children and pets during its use.
- Battery Safety: If you are displaying your ornament outdoors, it’s essential to ensure the battery packs for your fairy lights are securely protected from any moisture or adverse weather conditions. Always use the correct type of batteries specified by the manufacturer and replace them promptly when they are depleted.
- Secure Hanging Practices: When you hang your completed colander ornament, always verify that the hook, fastener, or branch you are using is robust and strong enough to comfortably support its entire weight, especially if the ornament will be exposed to wind or other environmental elements.
Conclusion: Illuminate Your Holidays with Dollar Tree Magic
This incredible Dollar Tree colander ornament is far more than just a decorative piece; it’s a vibrant celebration of creativity, resourcefulness, and the heartwarming spirit of the holiday season. It stands as compelling proof that magnificent and impactful decor doesn’t necessarily demand a hefty price tag, but rather a dash of imagination, a willingness to explore, and a few ingeniously repurposed affordable supplies. Whether you are a seasoned artisan with years of crafting experience or just embarking on your exciting DIY journey, this project promises a deeply rewarding experience and a truly stunning, conversation-starting result. So, why wait? Head over to your nearest Dollar Tree, gather those versatile colanders, and prepare to illuminate your home with a unique, handmade touch that will undoubtedly captivate hearts and spread abundant festive cheer throughout your holidays. Happy crafting, and may your season be merry and bright!