
Easy Whipped Shortbread Cookies: Your Go-To No-Chill Holiday Treat
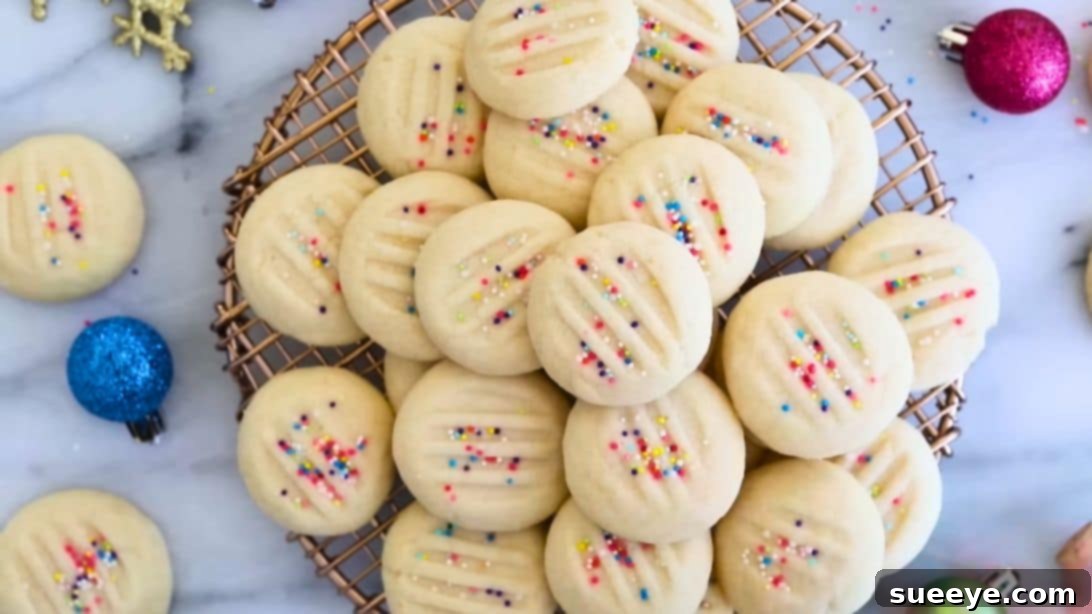
The enchanting Christmas season is truly upon us, bringing with it a wonderful excuse to fill our homes with the irresistible aroma of freshly baked goods. This year, simplify your holiday baking with these utterly delicious whipped shortbread cookies, a fantastic recipe inspired by Sugar Spun Run. Imagine sinking your teeth into a tender, buttery cookie that practically melts in your mouth—all achieved with minimal effort and maximum flavor. These delightful treats require an astonishingly short ingredient list, just six essential items (or seven if you fancy adding festive sprinkles!), and can be prepared from start to finish in about 30 minutes. Forget spending endless hours in the kitchen or waiting for dough to chill; these shortbread gems are designed for immediate gratification. They deliver that classic, rich, buttery goodness that rivals even the finest butter cookies, making them an instant holiday favorite.
RELATED: Looking for more quick and festive ideas? Explore 5 Easy Christmas Cookie Ideas to complement your baking repertoire.
Crafting these heavenly whipped shortbread cookies is an absolute breeze, making them ideal for both seasoned bakers and kitchen novices. The magic truly lies in the simplicity and quality of your ingredients. You’ll need softened butter, fine powdered sugar, aromatic vanilla extract, a pinch of table salt, all-purpose flour, and cornstarch. While sprinkles are entirely optional, they undeniably add a vibrant, festive touch, transforming simple cookies into miniature works of holiday art. A crucial tip for achieving perfection with this recipe: always opt for high-quality butter. Ensure it’s perfectly softened—pliable to the touch but not melty or oily—as this consistency is key to achieving that signature whipped texture. If you prefer to use salted butter, simply adjust the recipe by reducing the added salt to about 1/4 teaspoon to maintain the ideal flavor balance. The cornstarch, often a secret ingredient in many shortbread recipes, contributes to the cookies’ delicate, melt-away texture, making them irresistibly tender.
Essential Ingredients for Perfect Whipped Shortbread Cookies
Gathering your ingredients is the first exciting step towards baking these sublime cookies. Precision matters here, but don’t worry, it’s incredibly straightforward!
- 1 cup of unsalted butter (softened): The star of the show! Ensure it’s at room temperature for optimal creaming. If using salted butter, reduce the added salt.
- 3/4 cup of powdered sugar (plus more for dusting, if desired): This finely milled sugar gives the cookies their delicate, melt-in-your-mouth texture, unlike granulated sugar which can make them grainy.
- 1 teaspoon of pure vanilla extract: A splash of quality vanilla enhances the buttery flavor beautifully.
- 3/4 teaspoon of table salt: Balances the sweetness and brings out the richness of the butter.
- 2 cups of all-purpose flour: Provides the structure for our delicious shortbread.
- 2 tablespoons of cornstarch: The secret ingredient for that incredibly tender, almost crumbly texture that defines true whipped shortbread.
- Sprinkles (optional): Choose festive colors to add a delightful visual appeal for any occasion, especially during the holidays.
Step-by-Step Guide: Crafting Your Whipped Shortbread Masterpiece
Follow these simple instructions to bake a batch of whipped shortbread cookies that will impress everyone!
Step 1: Prepare Your Baking Environment
Begin by preheating your oven to 325°F (160°C). This ensures the oven is at the correct temperature when your cookies are ready to bake, leading to even cooking. Next, line a large baking sheet with parchment paper. This simple step prevents sticking and makes for easy cleanup, allowing your delicate shortbread cookies to slide off effortlessly.
Step 2: Cream Butter and Powdered Sugar
In the bowl of a stand mixer fitted with the paddle attachment, or a large mixing bowl if you’re using a handheld electric mixer, combine the softened butter and powdered sugar. Beat these two ingredients together on medium-high speed (for a stand mixer) or high speed (for a hand mixer). Continue mixing for a good 5 minutes or even a bit longer, until the mixture transforms into a wonderfully fluffy, pale, and creamy consistency. This extensive creaming process is crucial as it incorporates air, which contributes to the cookies’ light texture. Remember to pause occasionally and use a spatula to scrape down the sides and bottom of the bowl, ensuring all ingredients are thoroughly combined and no pockets of unmixed butter or sugar remain.
Step 3: Infuse with Flavor
Once your butter and sugar mixture is light and airy, add the vanilla extract and salt. Mix on low speed until these additions are just incorporated. Be careful not to overmix at this stage; you simply want to ensure the flavors are evenly distributed throughout the creamy base.
Step 4: Prepare the Dry Ingredients
In a separate, medium-sized bowl, combine the all-purpose flour and cornstarch. Use a whisk to thoroughly blend them together. This step ensures that the cornstarch is evenly distributed within the flour, which is vital for achieving the desired tender texture in your shortbread. Skipping this step could result in an uneven texture in your final cookies.
Step 5: Combine Wet and Dry
Return to your mixer and turn the speed to medium-low. Gradually add the flour and cornstarch mixture to the wet ingredients, a little at a time. Mix only until the flour is just combined. Overmixing the dough once the flour is added can develop the gluten, resulting in tougher cookies, and we want our shortbread to be wonderfully tender and delicate.
Step 6: Shape Your Cookies
Using a tablespoon-sized scoop, portion out the dough. Gently roll each portion between your palms to form smooth, uniform balls. This ensures even baking and a beautiful presentation. Place the shaped dough balls onto your prepared baking sheet, ensuring there’s about 1 to 2 inches of spacing between each cookie. This prevents them from sticking together as they slightly expand during baking.
Step 7: Flatten and Decorate (Optional)
Once the dough balls are on the baking sheet, take a fork and gently press down on each cookie to create a slightly flattened, classic shortbread pattern. If you find the dough is sticking to the tines of your fork, a clever trick is to dip the fork lightly in powdered sugar before pressing each cookie. This will prevent sticking and give your cookies a neat, professional finish.
Step 8: Add Festive Sprinkles
If you’re opting for sprinkles, now is the time to add them! Gently press your desired sprinkles onto the tops of the flattened cookies. This step is entirely optional but adds a wonderful pop of color and festivity, perfect for holiday gatherings or simply brightening your day.
Step 9: Bake to Golden Perfection
Carefully place the baking sheet into your preheated oven and bake for approximately 12 minutes. Whipped shortbread cookies are known for their pale appearance, so don’t expect them to turn golden brown. They will be done when the edges are just set and the centers still look very light in color, perhaps barely a hint of golden. The key is to bake them until they are cooked through but still retain their delicate texture. Overbaking can make them dry and crumbly rather than melt-in-your-mouth tender.
Step 10: Cool and Enjoy
Once baked, carefully remove the baking sheet from the oven. It’s crucial to let the cookies cool completely on the baking sheet before attempting to move them. Whipped shortbread cookies are quite delicate when warm and can easily break. As they cool, they will firm up, becoming easier to handle and retaining their beautiful shape. Once fully cooled, transfer them to a wire rack or serving platter and enjoy your perfectly baked, buttery whipped shortbread cookies!
Tips for Whipped Shortbread Cookie Success
- Butter Temperature is Key: Ensure your unsalted butter is genuinely at room temperature—soft enough to leave an indentation when pressed, but not greasy or melted. This allows it to cream beautifully with the sugar, incorporating essential air.
- Don’t Skimp on Creaming Time: The 5+ minutes of creaming butter and sugar is not a suggestion; it’s vital. This process creates the “whipped” texture and contributes to the cookies’ tenderness.
- Measure Flour Correctly: For best results, spoon your flour into the measuring cup and then level it off. Scooping directly can pack too much flour, leading to dry cookies.
- Avoid Overmixing: Once the flour is added, mix only until just combined. Overworking the dough develops gluten, which can make your shortbread tough instead of tender.
- Uniform Cookie Size: Use a cookie scoop to ensure all your cookies are the same size. This promotes even baking.
- Patience with Cooling: Resist the urge to move the cookies too soon. They are fragile when warm and firm up as they cool.
Creative Variations for Your Whipped Shortbread Cookies
While classic whipped shortbread is undeniably perfect on its own, these cookies are also a wonderful canvas for culinary creativity. Here are a few ideas to customize your next batch:
- Citrus Zest: Add 1-2 teaspoons of finely grated lemon, orange, or lime zest to the butter mixture for a bright, refreshing flavor.
- Extracts: Experiment with different extracts! Almond extract adds a lovely nutty note, while peppermint extract makes them extra festive for the holidays. Start with 1/2 teaspoon and adjust to taste.
- Chocolate Drizzle: Once cooled, melt some good quality chocolate (milk, dark, or white) and drizzle it artfully over the cookies. A sprinkle of sea salt on top of the chocolate can elevate the flavor even further.
- Dipped in Chocolate: For a more decadent treat, dip half of each cooled cookie into melted chocolate and let it set on parchment paper.
- Mini Chocolate Chips: Fold in 1/4 to 1/2 cup of mini chocolate chips along with the flour for a delightful surprise in every bite.
- Sanding Sugar: Instead of sprinkles, roll the shaped dough balls in colorful sanding sugar before baking for a sparkling finish.
- Cocoa Powder: Replace 2 tablespoons of flour with cocoa powder for a chocolate shortbread version.
Storing Your Delicious Whipped Shortbread
These shortbread cookies are excellent make-ahead treats! Once completely cooled, store them in an airtight container at room temperature for up to 1 week. If you need to stack them, place a piece of parchment paper between layers to prevent sticking and preserve their delicate texture. Whipped shortbread also freezes beautifully. Arrange cooled cookies in a single layer in an airtight freezer-safe container or bag, separating layers with parchment paper. They can be frozen for up to 2-3 months. Thaw at room temperature for a few hours before serving.
The Magic of Whipped Shortbread
What makes whipped shortbread so uniquely delightful compared to its traditional shortbread cousins? The secret lies in the “whipped” technique. By creaming the butter and powdered sugar for an extended period, you incorporate a significant amount of air into the mixture. This aeration, combined with the fine texture of powdered sugar and the addition of cornstarch, results in a cookie that is incredibly tender, delicate, and literally melts in your mouth with a rich, buttery flavor. Unlike denser traditional shortbreads, whipped shortbread offers a lighter, more ethereal experience, making it a truly exceptional treat for any occasion, especially when you’re seeking a quick yet elegant dessert.
Whether you’re baking for a holiday party, a cozy night in, or simply craving a sweet indulgence, these easy whipped shortbread cookies are guaranteed to become a cherished part of your recipe collection. Their simplicity, speed, and undeniable deliciousness make them a perfect choice for any baker. So, tie on your apron, gather your ingredients, and get ready to create some buttery, melt-in-your-mouth magic!