
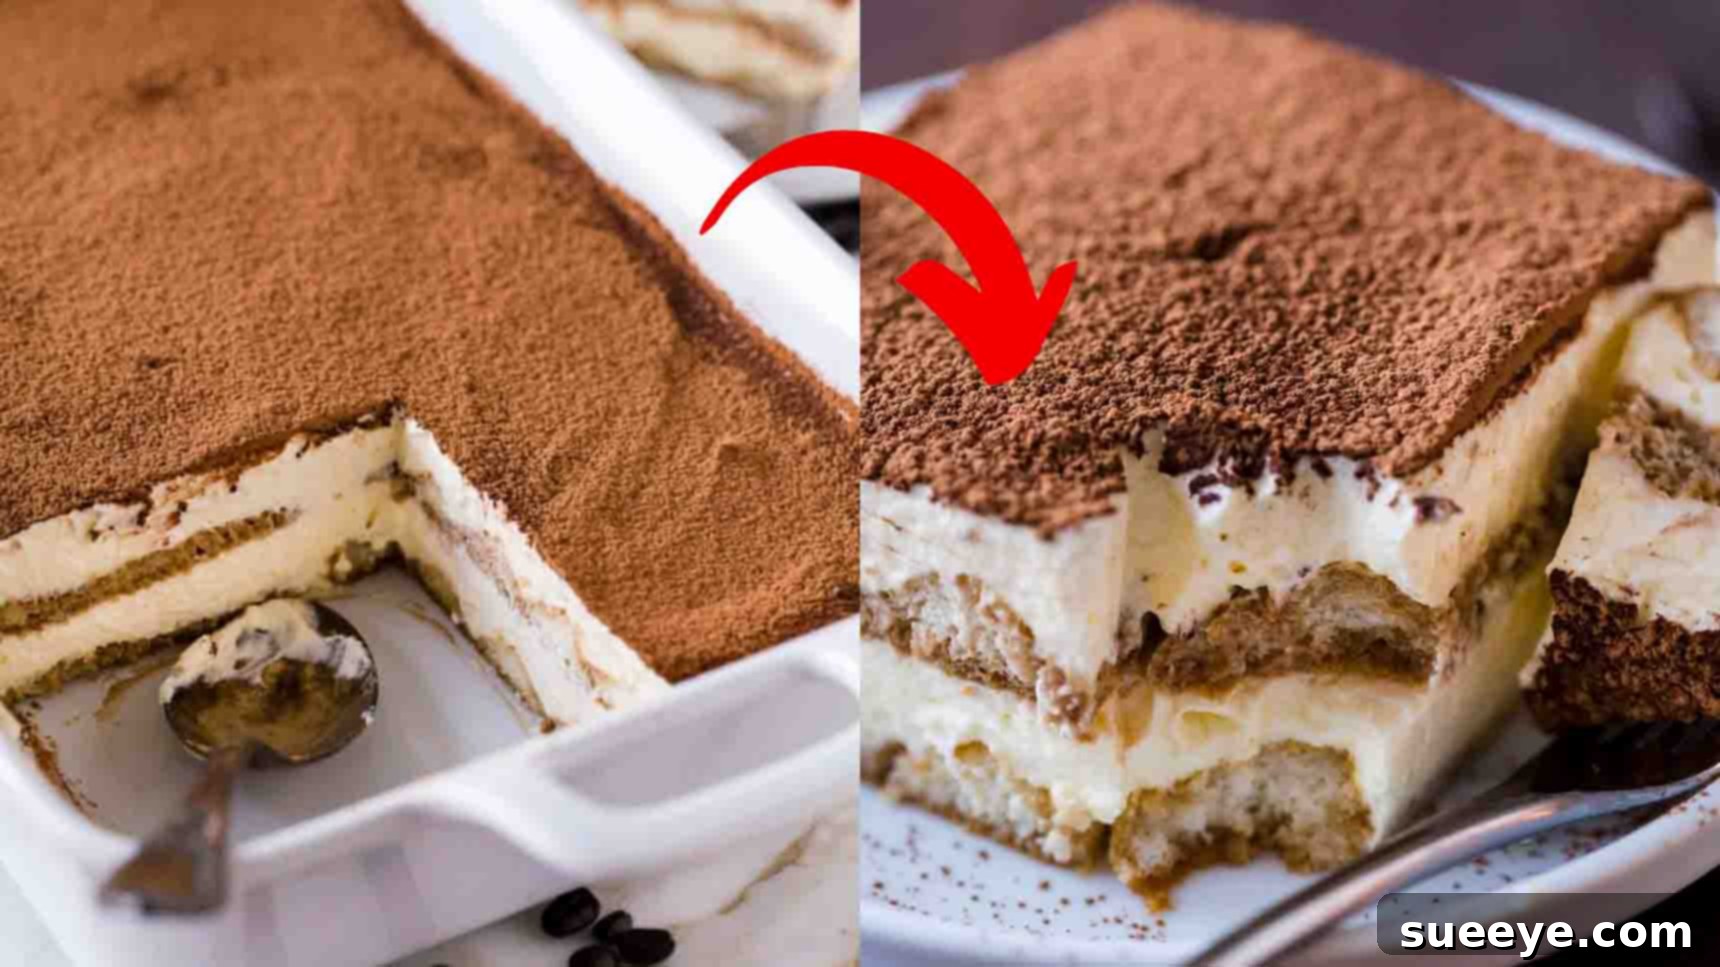
The Ultimate No-Bake Tiramisu: An Effortless & Elegant Dessert Recipe
Are you searching for an exquisite yet simple dessert that will impress your guests without the stress of oven baking? Look no further! This No-Bake Tiramisu recipe is a culinary masterpiece that combines rich flavors, creamy textures, and an incredibly straightforward preparation process. Inspired by the delicious creations often shared by culinary enthusiasts like Natasha’s Kitchen, this version is designed to be a showstopper at any gathering, big or small. Forget complicated baking steps; this dessert comes together beautifully, requiring only a little patience for chilling. It’s the perfect make-ahead treat, allowing you to focus on your guests while a decadent dessert chills to perfection in your refrigerator.
Tiramisu, meaning “pick me up” or “cheer me up” in Italian, lives up to its name with every delightful spoonful. Its signature layers of coffee-soaked ladyfingers and velvety mascarpone cream are simply irresistible. Our detailed guide ensures you can recreate this authentic Italian classic effortlessly, making it suitable for both novice and experienced dessert makers. Get ready to indulge in a dessert that’s rich, aromatic, and surprisingly easy to achieve.
Why You’ll Adore This No-Bake Tiramisu Recipe
There are countless reasons why this particular tiramisu recipe stands out as a must-try. First and foremost, its “no-bake” nature eliminates the need for an oven, making it ideal for hot summer days or when your oven is occupied with other dishes. It’s also incredibly versatile – perfect for a casual family dinner or an elegant dinner party. Its make-ahead convenience is a game-changer for hosts, allowing you to prepare it hours, or even a day, in advance. This ensures the flavors meld beautifully and the dessert sets perfectly, resulting in a superior taste and texture that only improves with time. Plus, it serves a large crowd generously, making it an economical and satisfying choice for entertaining.
Essential Ingredients for Your Perfect Tiramisu
Creating an authentic and delicious tiramisu relies on a few key, high-quality ingredients. Each component plays a vital role in building the signature flavor and texture profile of this beloved Italian dessert. Here’s what you’ll need to gather:
- 1 ½ cups strong brewed espresso (or very strong coffee), room temperature: This is the heart of your tiramisu’s flavor. The coffee provides the characteristic bitterness and aroma that balances the sweetness of the cream. Ensure it’s cooled to room temperature before dipping the ladyfingers to prevent them from becoming too soggy.
- 6 tablespoons golden rum, divided: Rum adds a wonderful depth and warmth to the tiramisu. Golden rum is preferred for its balanced flavor, but you can also use Marsala wine, brandy, or an alcohol-free substitute like coffee liqueur syrup or vanilla extract if preferred.
- 40 ladyfinger cookies (savoiardi): These light, airy, and crisp sponge cakes are essential for the structural integrity and texture of tiramisu. They absorb the coffee mixture beautifully without disintegrating, providing a delicate base for the creamy layers.
- 6 large egg yolks: These form the base of the rich, custardy mascarpone cream, contributing to its luxurious texture and golden hue. Ensuring they are fresh is key.
- ¾ cup granulated sugar: Sweetens the egg yolk mixture and balances the bitterness of the coffee and the richness of the mascarpone.
- 16 ounces mascarpone cheese, cold: The star of the cream filling! Mascarpone is an Italian cream cheese, renowned for its incredibly smooth, rich, and slightly sweet flavor. Keeping it cold is crucial for whipping it effectively.
- 2 cups heavy whipping cream: Whipped to medium peaks, this adds lightness and airiness to the mascarpone cream, making the dessert fluffy and decadent.
- 2-3 tablespoons unsweetened cocoa powder: Used for dusting the top, it provides a beautiful finish and a delightful bitter chocolate contrast to the sweet cream.
Ingredient Notes and Tips:
- Coffee Choice: While espresso is traditional, a very strong, dark-roast coffee will work just as well. For a less intense flavor, you can dilute strong coffee slightly.
- Alcohol-Free Option: If you prefer to make this dessert alcohol-free, simply omit the rum or replace it with an equal amount of decaf espresso or a non-alcoholic coffee syrup for flavor.
- Ladyfinger Quality: Look for authentic Italian savoiardi. They are typically drier and firmer than American-style ladyfingers, making them ideal for soaking without becoming mushy.
- Mascarpone Temperature: Ensure your mascarpone is cold straight from the fridge when you begin, as this helps prevent it from separating during mixing.
Essential Equipment You’ll Need
Gathering your tools before you start will make the process smooth and enjoyable. For this no-bake tiramisu, you’ll need a few common kitchen items:
- Large mixing bowls (at least 3)
- Whisk (hand whisk or electric mixer)
- Saucepan for simmering water (for the double boiler method)
- Rubber spatula or folding spoon
- 9×13 inch casserole dish or similar rectangular baking dish
- Sieve or fine-mesh strainer (for dusting cocoa powder)
- Plastic cling wrap
Step-by-Step Directions: Crafting Your Delicious Tiramisu
Follow these detailed instructions to assemble your stunning no-bake tiramisu. Take your time with each step, and you’ll be rewarded with a truly spectacular dessert.
Step 1: Prepare the Coffee Syrup and Egg Yolk Base
Begin by preparing the crucial liquid that will infuse your ladyfingers with flavor. In a medium-sized bowl, combine the 1 ½ cups of room temperature espresso (or strong coffee) with 3 tablespoons of golden rum. This is your coffee syrup; set it aside. Next, retrieve your ladyfingers. Working quickly, dip each ladyfinger cookie into the coffee mixture for just a second or two on each side. The goal is to moisten them without making them overly soggy. Arrange these dipped ladyfingers in a single, even layer at the bottom of your 9×13 inch casserole dish. You may need to break some ladyfingers to fit the corners and edges perfectly. Once the first layer is complete, set the dish aside.
Now, it’s time to prepare the rich egg yolk mixture. In a separate heat-proof mixing bowl, whisk together the 6 large egg yolks and ¾ cup granulated sugar until they are thoroughly combined and the mixture is light yellow. Place this bowl over a saucepan filled with about an inch or two of simmering water, creating a double boiler. Ensure the bottom of the bowl does not touch the simmering water. Keep the heat on low and continue to whisk the egg yolk mixture constantly for approximately eight to ten minutes. During this time, the mixture will thicken slightly, become paler, and reach a safe temperature, effectively pasteurizing the yolks. This step is critical for both safety and achieving the right texture for your cream. Once thickened, remove the bowl from the heat and set it aside to cool slightly.
Step 2: Craft the Velvety Mascarpone Cream
With your egg yolk base ready, you’ll now create the star of the show: the mascarpone cream. In another large mixing bowl, combine the 16 ounces of cold mascarpone cheese with the remaining 3 tablespoons of golden rum. Whisk these ingredients together until they are well incorporated and smooth. Then, gently fold in the slightly cooled egg yolk mixture, whisking until everything is uniformly combined and lump-free.
In a separate, very clean mixing bowl, pour in the 2 cups of heavy whipping cream. Using an electric mixer (or a hand whisk and a lot of arm power!), beat the heavy cream on medium-high speed for about three minutes, or until soft to medium peaks form. Be careful not to over-whip the cream, as it can become grainy. The cream should hold its shape but still be light and fluffy.
Now, gently incorporate the whipped cream into the mascarpone mixture. Start by folding about half of the whipped cream into the mascarpone base. Use a rubber spatula and a gentle, ‘fold-over’ motion to preserve the airiness. Once partially combined, add the remaining whipped cream and continue folding until the mixture is fully blended, smooth, and homogenous. The final cream should be light, airy, and luscious.
Step 3: Assemble and Chill Your Tiramisu
It’s time to bring all the delicious components together to form your tiramisu masterpiece. Spread half of the freshly prepared mascarpone cream mixture evenly over the first layer of coffee-soaked ladyfingers in your casserole dish. Use a spatula to ensure a smooth, consistent layer from edge to edge.
Next, take the remaining ladyfingers and quickly dip them into the coffee mixture, just as you did with the first batch. Arrange these moist ladyfingers in a single, even layer directly over the mascarpone cream. This creates the second structural layer of the dessert. Finally, spread the remaining mascarpone cream mixture over this second layer of ladyfingers, ensuring it’s smooth and covers all the cookies completely. You can create a decorative pattern with your spatula if desired.
Once assembled, cover the casserole dish tightly with plastic cling wrap. This prevents the dessert from absorbing any refrigerator odors and keeps it fresh. Refrigerate the tiramisu for a minimum of six hours, or ideally, overnight. Chilling is crucial; it allows the ladyfingers to fully soften, the flavors to meld beautifully, and the cream to set firmly, making for easy and clean slicing.
Step 4: The Finishing Touch – Dust with Cocoa
Just before serving, uncover your chilled tiramisu. Using a fine-mesh sieve or a small strainer, generously sprinkle 2 to 3 tablespoons of unsweetened cocoa powder evenly over the entire top surface of the cake. This final flourish adds a touch of elegance, a hint of bitterness that perfectly complements the sweet and creamy layers, and a delightful aromatic finish. Slice and serve immediately, marveling at the beautiful layers you’ve created!
Tips for the Perfect No-Bake Tiramisu
- Don’t Over-Soak Ladyfingers: This is perhaps the most crucial tip! Ladyfingers are like sponges; they absorb liquid quickly. A quick dip (1-2 seconds per side) is all that’s needed. Over-soaking will lead to a soggy, disintegrated dessert.
- Use Quality Ingredients: Since there’s no baking involved, the flavor of each ingredient truly shines. Invest in good quality espresso, fresh eggs, and authentic Italian mascarpone.
- Chill Thoroughly: Patience is key here. A minimum of 6 hours, or preferably overnight, allows the flavors to meld, the ladyfingers to soften perfectly, and the cream to set, making for clean slices.
- Whip Cream to Medium Peaks: Avoid over-whipping the heavy cream, as it can become grainy. You want it light and fluffy, yet able to hold its shape.
- Gentle Folding: When combining the whipped cream with the mascarpone mixture, fold gently. This preserves the air in the whipped cream, ensuring a light and airy texture in your final dessert.
- Temper Egg Yolks Correctly: The double boiler method ensures the egg yolks are gently cooked and pasteurized, contributing to a stable and safe cream base without scrambling. Stir constantly to prevent cooking on the bottom.
Storage and Make-Ahead Instructions
This no-bake tiramisu is the ultimate make-ahead dessert, making it perfect for entertaining. It needs significant chill time to set and for the flavors to fully develop, so preparing it the day before your event is highly recommended.
- Make-Ahead: Assemble the tiramisu (without the cocoa powder dusting) up to 24-36 hours in advance. Cover it tightly with plastic wrap and refrigerate.
- Storage: Leftover tiramisu should be stored in an airtight container in the refrigerator for up to 3-4 days. The flavors often deepen and improve on the second day!
- Freezing: While possible, freezing tiramisu can sometimes affect the texture of the cream, making it slightly more watery upon thawing. If you must freeze, ensure it’s tightly wrapped in several layers of plastic wrap and foil. Thaw overnight in the refrigerator before serving and dust with fresh cocoa.
Variations and Customizations for Your Tiramisu
While the classic tiramisu is divine, don’t hesitate to experiment with these delightful variations to suit your taste or occasion:
- Alcohol Alternatives: If rum isn’t your preference, try Marsala wine, brandy, Kahlua, or amaretto for different flavor profiles. For an alcohol-free version, simply use extra espresso or a splash of vanilla extract in the mascarpone mixture.
- Chocolate Lover’s Tiramisu: Add a layer of finely grated dark chocolate between the cream and ladyfinger layers, or mix some mini chocolate chips into the mascarpone cream.
- Mocha Twist: Incorporate a tablespoon of instant espresso powder or unsweetened cocoa powder into your mascarpone cream for an added mocha kick.
- Citrus Zest: A little bit of orange or lemon zest folded into the mascarpone cream can add a bright, refreshing note that beautifully cuts through the richness.
- Individual Servings: Instead of a large casserole dish, assemble the tiramisu in individual glasses, ramekins, or small mason jars for an elegant presentation that’s perfect for portion control.
- Spice it Up: A pinch of cinnamon or cardamom in the coffee mixture can add an unexpected warmth and complexity.
Frequently Asked Questions About Tiramisu
Here are answers to some common questions that arise when making this delicious no-bake tiramisu:
- Can I make tiramisu without eggs?
- Yes, you can! While eggs provide a traditional richness and help stabilize the cream, you can omit them for an egg-free version. In this case, you would typically stabilize the whipped cream more (e.g., with a bit of powdered sugar or cream of tartar) and ensure the mascarpone is very cold. The texture will be slightly different, but still delicious.
- What can I use if I don’t have ladyfingers?
- While ladyfingers are traditional, you can substitute them with other light sponges. Sponge cake slices, vanilla wafers, or even graham crackers can work in a pinch, though the absorption rate will differ, so dip carefully.
- How long does tiramisu need to chill?
- A minimum of 6 hours is necessary for the ladyfingers to soften and the cream to set. For the best flavor and texture, chilling overnight (12-24 hours) is highly recommended.
- My mascarpone cream looks too runny/separated. What went wrong?
- This can happen if the mascarpone cheese wasn’t cold enough, or if it was over-mixed. Mascarpone is delicate. Ensure it’s straight from the fridge and mix only until just combined. If it looks a little loose, try chilling it further, and if you haven’t added the whipped cream yet, adding that will help firm it up.
- Can I use decaf coffee?
- Absolutely! If you’re sensitive to caffeine or serving this dessert late in the evening, decaffeinated espresso or strong coffee is a perfect substitute. The flavor will remain intact.
- How do I get clean slices?
- Ensure your tiramisu is thoroughly chilled. Use a sharp, thin knife, wiping it clean with a damp cloth between each cut. This helps prevent the cream from sticking and dragging.
No-Bake Tiramisu: Your New Favorite Dessert
There you have it – a comprehensive guide to crafting an unforgettable No-Bake Tiramisu. This dessert truly embodies elegance and simplicity, proving that you don’t need a complex recipe or an oven to create something spectacular. The harmonious blend of coffee, rum, and the velvety mascarpone cream, all nestled between soft ladyfingers, creates a sensory experience that is both comforting and sophisticated.
Whether you’re hosting a grand celebration or simply indulging in a quiet evening at home, this tiramisu recipe is guaranteed to impress. Its make-ahead nature will free up your precious time, allowing you to relax and enjoy the company of your loved ones. So, gather your ingredients, follow these steps, and prepare to be enchanted by the timeless charm of this Italian classic. Give it a try today, and let us know how your delicious tiramisu turns out!