
Restore Your Shower’s Flow: The Ultimate DIY Guide to Limescale Removal with Vinegar
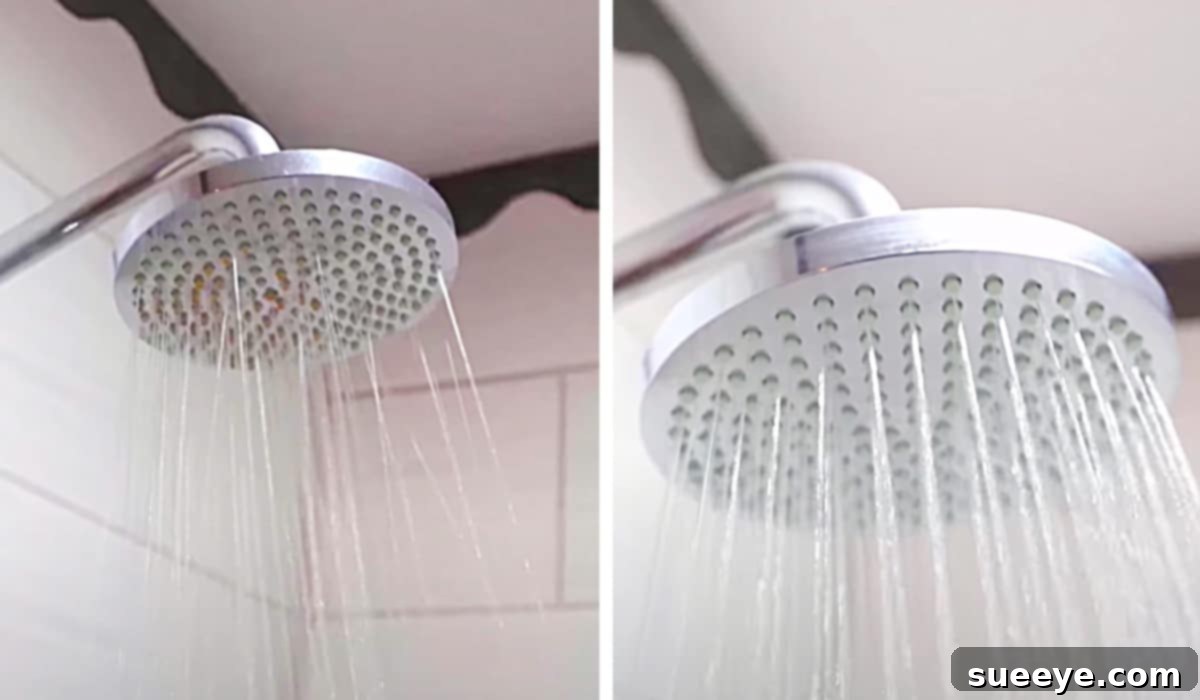
Is your morning shower less invigorating than it used to be? Perhaps you’ve noticed a significant drop in water pressure, or streams of water shooting out at odd angles? Chances are, limescale is the culprit. These stubborn mineral deposits, built up over time, can severely restrict water flow, clog nozzles, and make your shower head look unappealing. But before you rush out to buy a new one, there’s a surprisingly simple, incredibly effective, and remarkably cost-efficient solution right in your pantry: white distilled vinegar.
In this comprehensive guide, inspired by ingenious tutorials like the one from Smart Fox on YouTube, we’ll walk you through the entire process of transforming your scale-ridden shower head back to its pristine, high-performing glory. Say goodbye to weak streams and hello to a revitalized showering experience!
Understanding the Enemy: Why Limescale Builds Up on Your Shower Head
To effectively combat limescale, it helps to understand what it is and why it forms. Limescale is primarily composed of calcium and magnesium carbonates, minerals commonly found in “hard water.” When hard water passes through your shower head and then evaporates, these dissolved minerals are left behind, gradually accumulating on surfaces. Over time, these layers of mineral deposits harden, forming the chalky, white or off-white crust we know as limescale.
Beyond being an eyesore, limescale causes several problems:
- Reduced Water Pressure: As limescale builds inside and around the nozzles, it physically blocks the water’s pathway, leading to a noticeable drop in pressure and a less satisfying spray.
- Uneven Spray Patterns: Clogged nozzles can cause water to spray erratically, leading to an uneven and inefficient shower.
- Hygiene Concerns: Limescale can trap soap scum, dirt, and even encourage the growth of bacteria, making your shower head less hygienic.
- Damage and Lifespan Reduction: Constant exposure to harsh mineral deposits can slowly corrode the internal components of your shower head, potentially shortening its lifespan and necessitating early replacement.
The Power of Vinegar: A Natural, Eco-Friendly Limescale Solution
While many commercial cleaners exist for limescale removal, they often contain harsh chemicals that can be aggressive on surfaces, emit strong fumes, and are less environmentally friendly. White distilled vinegar, on the other hand, is a natural hero in the world of cleaning. Its secret weapon is acetic acid.
Acetic acid is a mild acid that reacts with and dissolves the mineral deposits that make up limescale. This chemical reaction breaks down the hardened scale, making it easy to rinse away. Furthermore, vinegar is:
- Non-toxic and Safe: Unlike many industrial cleaners, vinegar is food-safe and non-toxic, making it a safer choice for households, especially those with children or pets.
- Eco-friendly: It’s biodegradable and doesn’t introduce harmful chemicals into your wastewater system.
- Cost-Effective: A large bottle of white distilled vinegar is significantly cheaper than specialized cleaning products, offering an economical solution for routine maintenance.
- Widely Available: You can find it in any grocery store.
Materials You’ll Need for a Sparkling Clean Shower Head
The beauty of this method lies in its simplicity. You likely already have most, if not all, of these items at home:
- High-Acid White Distilled Vinegar: This is the star of our show. Ensure it’s white distilled vinegar, as other types might leave stains or odors. The higher acidity (typically 5% for household vinegar) is crucial for effective limescale breakdown.
- A Bowl or Small Bucket: Large enough to fully submerge your shower head. For fixed shower heads, a sturdy plastic bag and a rubber band will work.
- Your Scaly Shower Head: The primary target of our cleaning mission!
- An Old Toothbrush or Small Scrub Brush: For tackling stubborn spots and cleaning nozzles after soaking.
- Soft Cloth or Microfiber Towel: For drying and polishing.
- Optional: Adjustable Pliers and a Rag: If your shower head is difficult to unscrew by hand. The rag will protect its finish from the pliers.
Step-by-Step Guide: How to Deep Clean Your Shower Head with Vinegar
Ready to restore your shower head to its former glory? Follow these simple steps for a sparkling, high-pressure outcome:
1. Prepare Your Workspace and Gather Supplies
Before you begin, ensure you have all your materials within reach. If you’re removing the shower head, consider placing a towel on the shower floor to catch any drips or small parts. If you’re cleaning a fixed shower head, make sure you have a sturdy plastic bag ready.
2. Removing Your Shower Head (or Preparing to Soak a Fixed One)
This step varies depending on your shower head type:
- For Detachable Shower Heads: Most modern shower heads can be unscrewed by hand. Turn the shower head counter-clockwise at the point where it connects to the shower arm. If it’s too tight, wrap a rag around the connection point and use adjustable pliers to gently loosen it. Be careful not to overtighten when reinstalling later.
- For Fixed Shower Heads: If your shower head is not easily detachable, don’t worry! You can still clean it effectively. Take a sturdy plastic bag (like a freezer bag) and fill it with enough white distilled vinegar to fully submerge the shower head. Carefully place the bag over the shower head, ensuring all the nozzles are immersed in the vinegar. Use a rubber band, string, or zip tie to secure the bag tightly around the shower arm, preventing any leaks.
3. The Overnight Vinegar Soak
This is where the magic happens. For detachable shower heads, simply place the entire head into your bowl or bucket. Pour enough white distilled vinegar into the container to completely cover the shower head, ensuring all affected areas are submerged. If you’re using the plastic bag method for a fixed shower head, ensure the bag is securely fastened and the nozzles are fully immersed.
The key to success here is time. Allow the shower head to soak in the vinegar for at least 8 hours, or ideally, overnight (10-12 hours). This extended soaking period gives the acetic acid ample time to work its way through the hardened limescale, dissolving and loosening the mineral deposits.
4. Rinse and Scrub Away Any Remaining Residue
Once the soaking period is complete, carefully remove the shower head from the vinegar (or remove the plastic bag). You should notice that much of the limescale has already dissolved or softened considerably. Now, it’s time for a little elbow grease.
Use an old toothbrush or a small scrub brush to gently scrub away any lingering limescale around the nozzles and on the face of the shower head. For particularly stubborn spots within the nozzles, you can carefully use a toothpick or a straightened paperclip to dislodge any remaining debris. Avoid using sharp metal objects that could scratch or damage the delicate rubber nozzles.
After scrubbing, rinse the shower head thoroughly under running water to wash away all the loosened limescale and vinegar residue. Ensure no vinegar scent or residue remains.
5. Reattach and Enjoy Your Revitalized Shower
If you removed your shower head, carefully screw it back onto the shower arm, turning clockwise until it’s snug. Don’t overtighten, as this can damage the threading or the shower head itself. Run the hot water for a few minutes to flush out any internal vinegar or remaining loosened particles. You’ll instantly notice the difference: a strong, even, and consistent water flow!
Tackling Stubborn Limescale Deposits and Advanced Tips
While an overnight soak is usually sufficient, some shower heads, especially those in areas with extremely hard water or those neglected for years, might require a bit more attention:
- Repeat the Soak: If the first soak didn’t completely remove all the limescale, don’t hesitate to repeat the process for another 8-12 hours with fresh vinegar.
- Warm Vinegar: Gently heating the vinegar (do not boil, just warm) before soaking can sometimes accelerate the chemical reaction. However, ensure the shower head material can withstand warm temperatures and handle it with care.
- Pin or Toothpick for Nozzles: For individual, persistent clogs in the spray holes, a fine pin or a sturdy toothpick can be used very carefully to poke through and clear the obstruction. Be gentle to avoid damaging the rubber nozzles.
- Vinegar Paste for External Surfaces: For external limescale on the shower head body or arm, mix baking soda with a little vinegar to form a paste. Apply it to the affected areas, let it sit for 30 minutes, then scrub and rinse.
Preventative Measures: Keeping Your Shower Head Limescale-Free Longer
Once you’ve experienced the joy of a clean, high-pressure shower, you’ll want to keep it that way. Regular maintenance is key to preventing severe limescale buildup:
- Wipe Down Regularly: After each shower, quickly wipe down the face of your shower head with a soft cloth or towel. This removes standing water and prevents mineral deposits from forming.
- Monthly Quick Soak: Once a month, perform a shorter version of the vinegar soak (1-2 hours) as a preventative measure. This can be done with a plastic bag method while the shower head is still attached.
- Consider a Water Softener: If you live in an area with very hard water, investing in a whole-house water softening system can significantly reduce limescale buildup not just in your shower, but throughout your entire plumbing system and appliances.
- Run Hot Water: Briefly run hot water through the shower head after each use. Hot water evaporates faster, leaving less opportunity for minerals to deposit.
Benefits Beyond Cleanliness: Why This DIY Method Wins
Beyond simply restoring your water pressure, opting for this vinegar-based cleaning method offers several distinct advantages:
- Extends Shower Head Lifespan: Regular descaling prevents mineral corrosion and blockage, meaning your shower head will last longer and perform better for years to come.
- Improved Shower Experience: Consistent water pressure and an even spray pattern contribute to a more enjoyable and efficient shower.
- Healthier Environment: A clean shower head means less opportunity for bacteria and mold to thrive in limescale crevices.
- Environmentally Conscious: Using natural vinegar reduces your reliance on harsh chemical cleaners, benefiting both your home and the planet.
- Significant Savings: Avoid the expense of purchasing a new shower head or hiring a professional plumber for minor clogs. This DIY solution costs mere pennies.
Conclusion: A Simple Solution for a Big Impact
A clogged, limescale-ridden shower head can be a major source of frustration, but as this guide demonstrates, the solution is remarkably simple, accessible, and effective. By harnessing the natural power of white distilled vinegar, you can easily remove stubborn mineral deposits, restore optimal water pressure, and extend the life of your shower head.
Don’t let hard water diminish your daily routine. Take a cue from experts like Smart Fox and give this method a try. You’ll be amazed at the difference a little vinegar and an overnight soak can make. Enjoy your perfectly flowing, revitalized shower!