
Transform Your Old Dresser: DIY Vintage Suitcase Drawers for Unique Home Decor
Are you searching for an exciting and deeply satisfying DIY project that breathes new life into forgotten furniture? Look no further! This incredible guide will walk you through the process of transforming an ordinary, outdated dresser into a captivating focal point for any room: a set of vintage suitcase-style drawers. What might seem like a complex endeavor is surprisingly achievable, yielding results that are both unique and immensely rewarding. Prepare to be amazed by the potential hidden within that old piece of furniture!
The concept of merging the charm of vintage luggage with the functionality of a dresser is pure genius. Many of us appreciate the nostalgic appeal of old suitcases, their worn textures and classic hardware evoking stories of travel and adventure. However, it’s a stroke of brilliant creativity to imagine dresser drawers adopting this very aesthetic. When I first encountered images of such a transformation, I was genuinely fooled, wondering how someone managed to stack suitcases so perfectly as a functional dresser. The reality, a clever optical illusion achieved through thoughtful design, is even more impressive.
This project isn’t just about creating a piece of furniture; it’s about crafting a conversation starter. Each drawer becomes a canvas for expressing your personal style, allowing you to emulate the look and feel of travel cases from bygone eras. Imagine capturing the essence of the 1950s or 60s, a golden age of travel, right in your living room or bedroom. The beauty of this DIY adventure lies in its boundless creative freedom. While I gravitated towards styles and colors reminiscent of classic mid-century luggage, your imagination is the only limit. There’s no definitive “suitcase fabric” – whether you opt for rich faux leather, textured vinyl, or even patterned upholstery, any material can contribute to your vision. Furthermore, don’t shy away from vibrant colors! A bold colored vinyl can provide an unexpected and delightful “pop” that truly makes your piece stand out.
Why Choose This DIY Vintage Suitcase Dresser Project?
Beyond its stunning aesthetics, embarking on this DIY journey offers numerous compelling benefits:
- Sustainable Upcycling: In an era of increasing environmental consciousness, repurposing an old dresser is an eco-friendly choice. You’re diverting furniture from landfills and giving it a second, more exciting life, reducing waste and contributing to a greener planet.
- Unparalleled Uniqueness: Mass-produced furniture often lacks character. This project guarantees a one-of-a-kind piece that reflects your personal taste and craftsmanship. You won’t find anything like it in a store, making it a true centerpiece.
- Cost-Effective Decor: High-quality, unique furniture can be prohibitively expensive. By using an old dresser and readily available materials, you can achieve a high-end, bespoke look without breaking the bank.
- Personal Expression: From the choice of fabric and hardware to the overall color scheme, every decision you make allows you to infuse the piece with your individual style. It’s an opportunity to tell a story through your home decor.
- Functional Art: This isn’t just a decorative item; it’s a fully functional dresser providing essential storage. It seamlessly blends artistic expression with practical utility, proving that beauty and function can coexist beautifully.
Gathering Your Toolkit: Essential Materials and Supplies
Before diving into the transformation, ensure you have all the necessary items at hand. A well-prepared workspace and a complete inventory of materials will make the process smoother and more enjoyable.
The Core Components:
- An Old Dresser: The star of our project! Look for a dresser with sturdy drawers that slide smoothly. The overall structure doesn’t need to be perfect, as imperfections can be sanded or painted, but functionality is key. A dresser with flat drawer fronts will be easiest to work with.
- Fabric or Vinyl for Suitcase Exteriors: This is where your creative vision comes to life.
- Faux Leather: Excellent for an authentic, classic luggage look. Available in various textures and shades of brown, black, and tan.
- Patterned Vinyl: Offers durability and a wide array of patterns, from vintage maps to abstract designs.
- Upholstery Fabric: Choose durable, medium-weight fabrics with interesting textures or vintage-inspired patterns. Tweed, linen blends, or even velvet can work for a more luxurious feel.
- Decoupage Paper/Maps: For a truly unique, personalized touch, consider decoupaging old maps or vintage travel posters onto the drawer fronts.
Adhesives and Application Tools:
- Strong Adhesive:
- Spray Adhesive: Ideal for large, flat surfaces. Ensures an even coat and strong bond. Look for options specifically designed for fabric or heavy-duty use.
- Fabric Glue / Craft Glue: Useful for edges, corners, and detailed work where spray adhesive might be too messy.
- Scissors or Utility Knife: For precise cutting of your chosen fabric or vinyl. A self-healing cutting mat is highly recommended for protecting your work surface.
- Measuring Tape or Ruler: Accuracy is crucial for a professional finish.
- Smoothing Tool: A plastic squeegee or a clean, dry cloth to smooth out bubbles and wrinkles when applying your material.
Hardware and Decorative Embellishments:
These details are what truly sell the “suitcase” illusion.
- Suitcase Handles / Drawer Pulls:
- Vintage-Style Pulls: Metal cup pulls, bail pulls, or ring pulls can mimic traditional suitcase hardware.
- Actual Luggage Handles: For ultimate authenticity, source replica or genuine vintage luggage handles.
- Leather Straps: Create faux straps that appear to wrap around the “suitcases.” These can be thin leather strips, vinyl strips, or even strong fabric strips.
- Decorative Corner Protectors: Small metal corners (often found in craft stores or online for box-making) will greatly enhance the vintage luggage look. Alternatively, you can create faux corners from painted wood or thick cardboard.
- Faux Buckles/Latches: Small decorative buckles (non-functional) can be glued onto the faux straps to complete the illusion.
- Screwdriver/Drill: For attaching new hardware and potentially removing old ones.
Dresser Preparation and Finishing Supplies:
- Sandpaper: Various grits (medium to fine) for preparing the dresser surface for paint.
- Wood Filler (Optional): To repair any dings or imperfections in the dresser frame.
- Primer: Essential for ensuring paint adhesion and an even finish, especially if you’re painting over a dark or glossy surface.
- Paint for Dresser Frame: Choose a color that complements your suitcase drawer design. Matte black, deep grays, creams, or even a distressed antique white can work wonders.
- Paint Brushes/Rollers: For applying primer and paint smoothly.
- Protective Sealant (Optional but Recommended): A clear topcoat (polyurethane or polyacrylic) to protect the dresser frame and fabric-covered drawers from wear and tear.
- Clean Cloths: For cleaning and wiping surfaces.
- Painter’s Tape: To protect areas you don’t want to paint.
The Transformation Process: A Step-by-Step Guide
With your materials ready, let’s embark on this exciting journey to create your unique vintage suitcase dresser.
Step 1: Dresser Preparation – The Foundation of Your Project
- Empty and Clean: Start by completely emptying the dresser. Remove all drawers and any existing hardware (knobs, pulls, hinges). Give the entire dresser, inside and out, a thorough cleaning with a mild soap and water solution. Allow it to dry completely.
- Inspect and Repair: Examine the dresser for any damage. Fill in any significant dents, scratches, or holes with wood filler. Once dry, sand these areas smooth.
- Sand the Frame: Lightly sand the entire dresser frame (the parts that won’t be covered by fabric) to create a “key” for the primer and paint to adhere to. Use 120-150 grit sandpaper, then follow up with 220 grit for a smoother finish. Wipe away all sanding dust with a damp cloth and then a dry one.
- Prime and Paint the Frame: Apply a high-quality primer to the dresser frame. Once dry, apply two thin coats of your chosen paint, allowing adequate drying time between coats. Lightly sand between paint coats for a super smooth finish. Ensure the frame is fully cured before proceeding.
Step 2: Measuring and Cutting Your Suitcase Material
- Measure Drawer Fronts: Measure the width and height of each drawer front precisely. Decide if you want the fabric to wrap around the edges slightly or if you’ll trim it flush. Wrapping around creates a more finished look.
- Add Seam Allowance: If wrapping, add an extra 1-2 inches on all sides to allow for wrapping around the drawer edges. If trimming flush, add about 0.5 inches as a buffer for precise trimming.
- Cut Materials: Carefully cut your chosen fabric or vinyl according to your measurements. Use sharp scissors or a utility knife for clean, straight lines. For patterned materials, ensure the pattern is aligned correctly for each drawer.
Step 3: Adhering the Fabric/Vinyl to Drawer Fronts
This step requires care to achieve a smooth, bubble-free finish.
- Work in a Ventilated Area: If using spray adhesive, ensure you are in a well-ventilated space or outdoors.
- Apply Adhesive: Lay one drawer front face up. Apply an even layer of spray adhesive to the entire surface of the drawer front. If using fabric glue, apply it evenly, working in sections.
- Position the Fabric: Carefully place your cut fabric/vinyl onto the adhesive-covered drawer front, aligning it precisely. Start from one edge and slowly lay it down, smoothing as you go.
- Smooth Out Bubbles: Using your squeegee or a clean cloth, firmly smooth the fabric from the center outwards, pushing out any air bubbles or wrinkles. Work quickly before the adhesive sets completely.
- Wrap and Secure Edges (if applicable): If you added a seam allowance, carefully wrap the excess fabric around the edges of the drawer front. Use fabric glue or hot glue on the underside to secure these edges neatly. For a super crisp edge, you can trim the fabric flush with the drawer front, but wrapping creates a more professional look.
- Repeat for All Drawers: Continue this process for each drawer, allowing each to dry thoroughly according to the adhesive manufacturer’s instructions.
Step 4: Adding Authentic Suitcase Details – The Magic Touch
This is where your dresser truly begins to resemble vintage luggage.
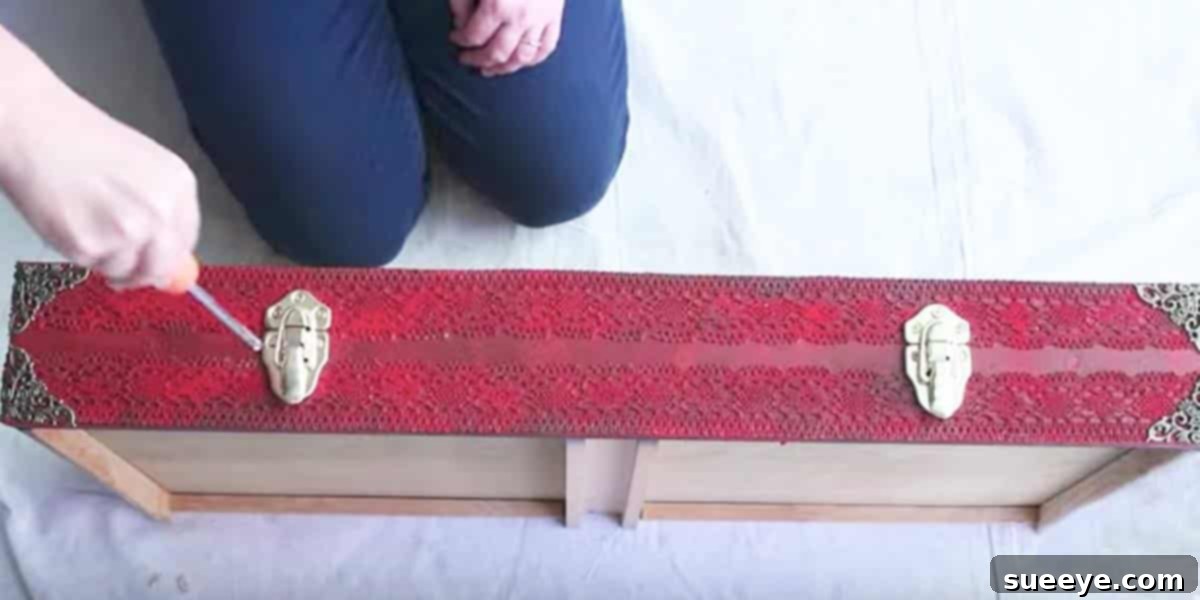
- Install Handles/Pulls: Mark the desired placement for your new drawer pulls or luggage handles. Drill pilot holes if necessary, and then securely attach the hardware. Consider offsetting handles slightly for a more authentic, antique look.
- Create Faux Straps:
- Measure and cut strips of your chosen material (leather, vinyl, or contrasting fabric) to mimic suitcase straps. These often run horizontally or vertically across the drawer front.
- Use a strong adhesive to glue these straps onto the fabric-covered drawer fronts. For added realism, you can glue them just under the main handle, suggesting they’re holding the handle in place.
- For a more dimensional look, you can slightly “pad” the straps by gluing a thin piece of foam or batting underneath before covering.
- Attach Decorative Buckles (Optional): Glue small, non-functional buckles onto the faux straps where they would traditionally close. This detail adds significant authenticity.
- Apply Corner Protectors: Carefully attach the metal or faux corner protectors to the corners of each drawer front. These are usually secured with small nails or adhesive. Ensure they are evenly spaced and aligned.
Step 5: Final Touches and Assembly
- Seal (Optional): If desired, apply a clear protective sealant (like a matte or satin polyacrylic) over the fabric-covered drawers and the painted frame. This will offer extra durability and protection against spills and wear. Ensure it’s compatible with your chosen fabric/vinyl.
- Reassemble: Once everything is completely dry and cured, carefully slide the transformed drawers back into the dresser frame.
- Admire Your Work: Step back and marvel at your incredible DIY creation!
Design and Styling Tips for Your Vintage Suitcase Dresser
Elevate your project with thoughtful design choices that make your dresser truly unique.
- Color Palette Matters: While traditional vintage suitcases often come in browns, tans, and deep greens, don’t be afraid to experiment. A set of drawers in various shades of muted blues and grays can evoke a sophisticated, travel-inspired theme. Or, for a vibrant, eclectic look, mix and match bright, solid-colored vinyls with different hardware styles.
- Mix and Match Materials: Instead of using the same fabric for all drawers, consider varying them. One drawer could be faux leather, another a patterned fabric, and a third decoupaged with vintage postcards. This adds depth and visual interest.
- Authentic Hardware is Key: Spend time sourcing the right hardware. Old brass latches, distressed leather straps, or ornate metal corners from antique shops or specialty hardware stores can instantly elevate the authenticity of your piece. If real vintage hardware is hard to find, look for reproductions that have an aged finish.
- Distressing for Character: For an even older, well-traveled look, lightly distress the painted frame of the dresser. Use fine-grit sandpaper to gently rub away paint on edges and corners, revealing the wood beneath. You can also lightly scuff the faux leather or fabric with sandpaper in strategic areas to simulate wear.
- Complementary Decor: Style the area around your dresser with other travel-themed or vintage decor. Think globes, old maps, antique books, or small trinkets from “travels.” This reinforces the theme and creates a cohesive look.
Beyond the Dresser: Other Vintage Suitcase Decor Ideas
The allure of vintage suitcases extends beyond dresser drawers. Here are a few more ways to incorporate their charm into your home:
- Stacked Side Tables: A stack of genuine vintage suitcases of varying sizes can make a quirky and functional side table or nightstand. They also offer hidden storage!
- Open Suitcase Shelves: Mount an open vintage suitcase (or just its lid) to the wall as a unique shadow box or shelving unit. Perfect for displaying small collectibles.
- Pet Beds: A sturdy, open suitcase, lined with a soft cushion, makes an adorable and unique pet bed for a small dog or cat.
- Coffee Table: A large, flat-topped vintage trunk or suitcase can be fitted with legs to serve as a distinctive coffee table.
Embark on Your DIY Journey!
The transformation of an ordinary dresser into a magnificent set of vintage suitcase drawers is more than just a craft project; it’s an act of creative alchemy. It’s about seeing potential where others see discard, celebrating sustainability, and injecting a generous dose of personality into your living space. The satisfaction of stepping back and admiring a piece of furniture you’ve designed and built with your own hands is truly immeasurable.
Remember, the journey itself is part of the fun. Don’t be afraid to experiment, make it your own, and let your imagination guide you. Whether you’re aiming for a shabby chic aesthetic, a bold retro statement, or a subtle nod to classic elegance, this project offers endless possibilities. So, gather your materials, clear your workspace, and get ready to create a truly inspiring piece that will capture attention and tell a story for years to come. Happy crafting!