
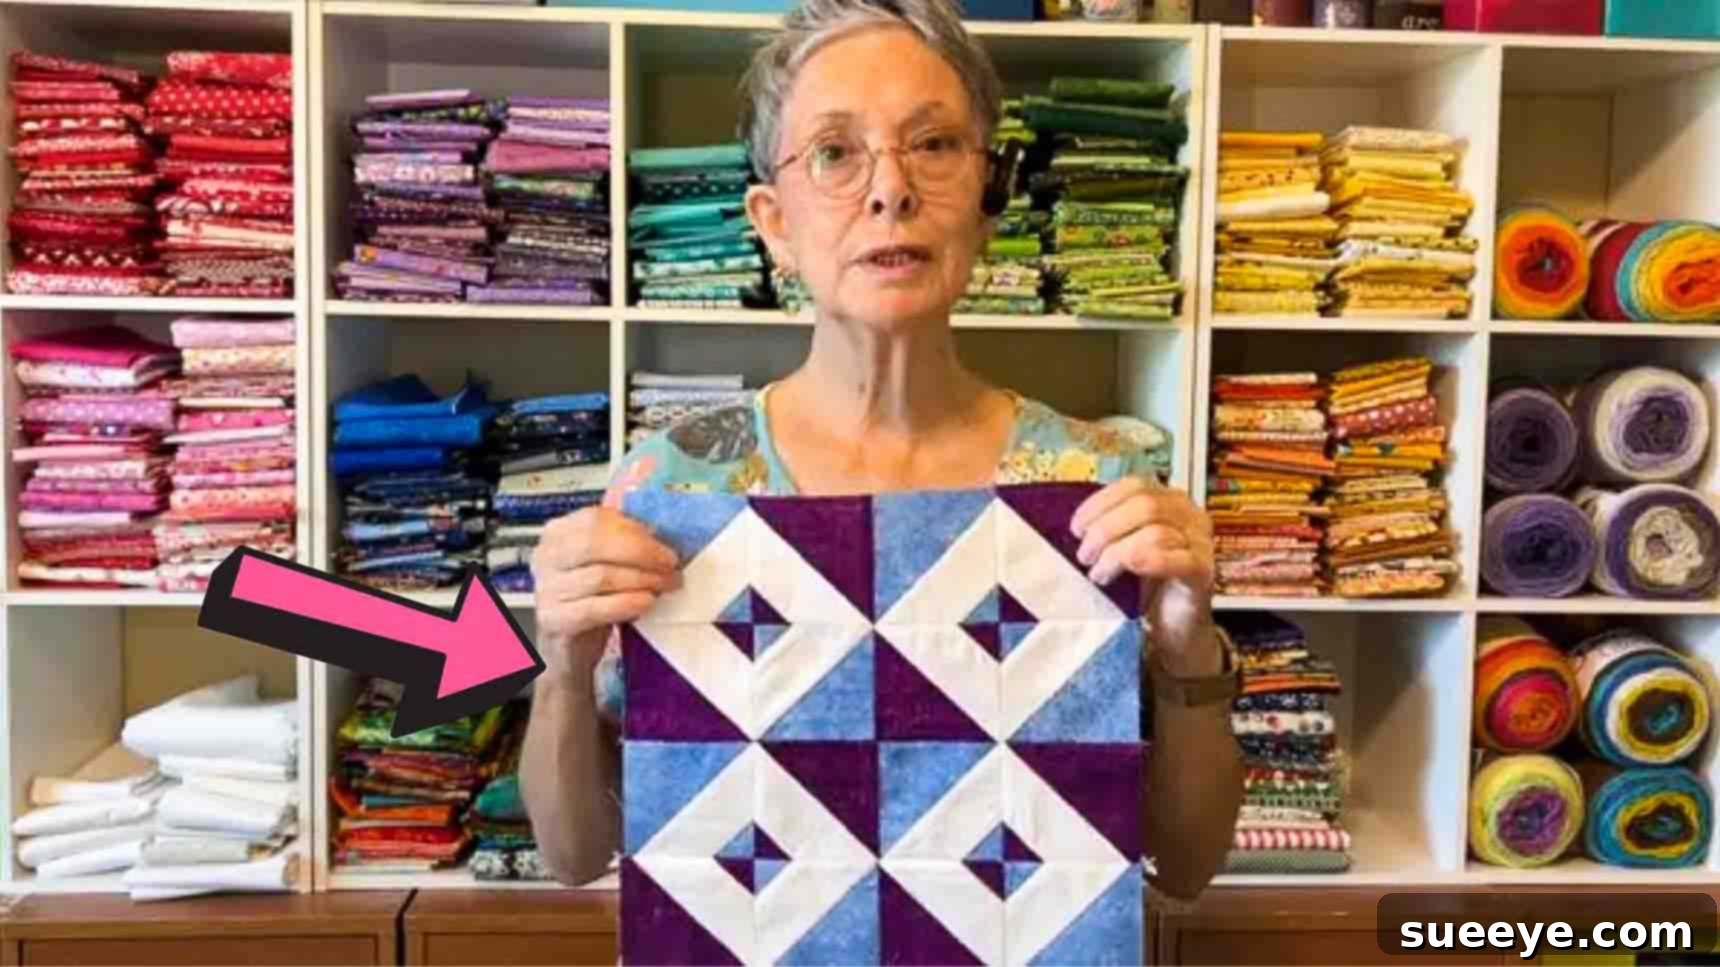
Embark on your quilting journey with confidence! The Friendship Square quilt block, brilliantly demonstrated by Tulip Square on YouTube, is an absolute gem for anyone new to the craft. Renowned for its simplicity and charming aesthetic, this block serves as the perfect entry point into the wonderful world of quilting. Whether you’re aiming to create a thoughtful baby shower gift, a personalized birthday present, or simply a quick and satisfying project for yourself, the Friendship Square delivers. While its beginner-friendly nature makes it accessible, even experienced quilters will delight in the speed and versatility this pattern offers. It’s often a go-to choice for those seeking an easy quilt project, allowing for endless creative variations simply by shuffling fabric choices and colors. This comprehensive guide will walk you through each step, ensuring a beautiful finished block every time.
The beauty of the Friendship Square lies in its foundational elements: simple squares and the magic of half-square triangles (HSTs). These basic units combine to form a visually striking block that can be arranged in countless ways to create intricate quilt designs. Its name itself evokes warmth and community, making it a popular choice for gifts that symbolize connection. Beyond its sentimental value, this block is an excellent skill-builder, helping you master essential quilting techniques like accurate cutting, precise piecing, and effective pressing – all crucial for successful quilting.
Why Choose the Friendship Square Quilt Block?
For aspiring quilters, finding a pattern that balances ease with beautiful results is key. The Friendship Square perfectly fits this description. Here’s why it stands out as an ideal choice:
- Beginner-Friendly: The instructions are straightforward, focusing on fundamental techniques without overwhelming complexity. It’s a fantastic way to build confidence.
- Quick to Assemble: Unlike intricate patterns that can take weeks or months, you can construct multiple Friendship Square blocks in a single sitting, making it perfect for last-minute gifts or when you need a swift creative outlet.
- Versatile Design: By simply rotating the blocks or playing with color placement, you can achieve a myriad of different patterns within your quilt. This encourages creativity and allows for unique outcomes.
- Stash Buster: This pattern is excellent for utilizing fabric scraps. Those smaller pieces you’ve been saving can finally find a purpose, reducing waste and adding character to your projects.
- Gift-Worthy: A quilt made from Friendship Squares makes a heartfelt and personalized gift for any occasion – baby showers, birthdays, holidays, or just to show someone you care.
Essential Materials for Your Friendship Square Quilt Block
Before diving into the sewing, gathering all your materials is crucial for a smooth and enjoyable quilting experience. Precision in cutting is paramount, so invest in quality tools where possible. For a single Friendship Square block, you will need the following fabric cuts. Remember, consistent seam allowances throughout the project will contribute significantly to the overall accuracy and beauty of your finished block.
Light Print Fabric:
- Cut 1 (4 pieces): 3 – 7/8″ square (These will be used for your half-square triangles.)
- Cut 2 (8 pieces): 1 – 1/2″ square (These are your smaller corner squares.)
Dark Print Fabric:
- Cut 1 (4 pieces): 3 – 7/8″ square (These will also be used for your half-square triangles, contrasting with the light print.)
- Cut 2 (8 pieces): 1 – 1/2″ square (These are your smaller corner squares, contrasting with the light print.)
White-on-White Print Fabric (or a solid contrasting background):
- Cut 2 (8 pieces): 3 – 7/8″ square (These form the background for your half-square triangles.)
- For a printable guide with precise measurements and visual aids, you can access the free pattern here.
Beyond the Fabric: While fabric is the star, don’t forget these essential quilting tools:
- Rotary Cutter, Mat, and Ruler: For accurate and efficient cutting.
- Sewing Machine: With a 1/4-inch presser foot for consistent seams.
- Iron and Ironing Board: Crucial for pressing seams flat and accurately.
- Fabric Marker/Pencil: For drawing diagonal lines.
- Thread: A good quality 50wt cotton thread that matches or blends with your fabrics.
- Fabric Scissors: For snipping threads and occasional trimming.
Step-by-Step Directions to Create Your Friendship Square Block
Follow these detailed instructions to construct your beautiful Friendship Square quilt block. Take your time with each step, focusing on accuracy, and you’ll be delighted with the results.
Step 1: Constructing Half-Square Triangles and Corner Units
Begin by preparing your fabric squares. You will need eight 3-7/8″ squares of your white-on-white print and four each of your light and dark 3-7/8″ print squares. Take each of the white-on-white squares and, on the wrong side, draw a diagonal line from one corner to the opposite corner. This line will serve as your guide for cutting. Now, pair each white-on-white square with one of your colored 3-7/8″ squares (either light or dark). Place them right sides together, ensuring all edges are aligned. Using your sewing machine, stitch a 1/4-inch seam allowance on both sides of the diagonal line you just drew. This step is critical for creating two perfect half-square triangle units from each pair of squares.
Once stitched, take your rotary cutter and carefully cut directly along the diagonal line. You will now have two separate units. Gently open each unit and press the seam allowance towards the darker fabric. This technique helps to “nest” seams later, reducing bulk and ensuring flatter blocks. Repeat this process for all eight white-on-white squares paired with your colored squares. You should now have eight half-square triangle (HST) units made with light fabric and eight HST units made with dark fabric. Next, prepare your smaller corner units. Take one 1-1/2″ colored square (either light or dark, depending on the desired contrast) and align it diagonally with the corner of each of your white blocks (the original 3-7/8″ white squares that form part of your HST units). Sew directly across the diagonal of the small square. This creates a charming “snowball” effect on the corners of your units.
Step 2: Assembling Your Friendship Square Block
After successfully completing all your half-square triangle units and adding the small corner squares, it’s time to assemble them into the final Friendship Square block. Carefully snip off any excess fabric from the corners where you attached the small squares, leaving a clean 1/4-inch seam allowance. Press these seams open to reduce bulk and ensure your blocks lie flat. Now, arrange your completed units according to the block diagram (refer to the free pattern for visual guidance). The traditional Friendship Square layout typically involves arranging the HSTs to create a central “plus” or “cross” design, surrounded by contrasting corner units.
Take your units and begin sewing them together in pairs. Place two units right sides together, aligning the edges, and stitch with a consistent 1/4-inch seam allowance. Press the seams open or to one side, alternating directions for nesting. Once you have sewn all units into pairs, take two pairs and sew them together to create a larger row or section of the block. Continue this process, building up your block row by row or quadrant by quadrant. The key is to ensure your seams are accurately aligned and pressed after each step to maintain the squareness of your block.
Finally, once you have created four individual smaller blocks or quadrants, sew these four together to form one large, complete Friendship Square quilt block. Pay close attention to nesting your seams at the intersections, which will help your points align beautifully and result in a flat, professional-looking block. After sewing the final seams, give your entire block a good press. Measure your finished block to ensure it is the correct size (e.g., 12.5 inches square, depending on your initial cuts). If it’s slightly off, a gentle block squaring can help, but consistent seam allowances are your best friend for accurate block sizing.
Tips for Success with Your Friendship Square Quilt Block
Achieving a perfect quilt block is a journey of practice and precision. Here are some invaluable tips to help you succeed, especially when working with the Friendship Square:
- Accurate Cutting is Key: Use a sharp rotary blade, a non-slip ruler, and a self-healing mat. Measure twice, cut once! Even a slight deviation in your initial cuts can lead to wonky blocks later.
- Consistent 1/4-inch Seam Allowance: This is the golden rule of quilting. Practice sewing a perfect 1/4-inch seam. Many sewing machines have a dedicated 1/4-inch presser foot, which is highly recommended.
- Pressing Matters: Don’t underestimate the power of good pressing. Pressing seams towards the darker fabric (or open, depending on the method) reduces bulk and helps your blocks lie flat. Avoid ironing, which can stretch fabric; instead, lift and press.
- Chain Piecing: To save time, especially when making multiple HSTs or units, try chain piecing. Sew one unit, feed the next without cutting the thread, and continue until all units are sewn. Then, snip them apart.
- Square Up Your Blocks: After assembling your main block, use a square ruler to trim it down to its final, exact size (e.g., 12.5 inches unfinished). This ensures all your blocks will fit together perfectly when assembling the quilt top.
- Choose Contrasting Fabrics: For the Friendship Square to truly shine, select fabrics that offer a good contrast between the light and dark prints. This helps define the block’s design.
- Don’t Fear the Seam Ripper: Every quilter, no matter how experienced, uses a seam ripper. If a seam isn’t right, unpick it and re-sew. It’s better to fix it now than to have a crooked block in your finished quilt.
Creative Variations for Your Friendship Square Quilt
The beauty of the Friendship Square block extends far beyond its initial design. Once you’ve mastered the basic construction, you can unleash your creativity and explore a multitude of variations. Here are a few ideas to inspire you:
- Color Play: Experiment with different color palettes. Use vibrant primary colors for a cheerful children’s quilt, or subtle pastels for a more sophisticated look. Gradual color changes across blocks can create stunning ombre effects.
- Fabric Swaps: Instead of light and dark prints, try using solids with prints, or even two different prints that have varying levels of contrast. Using novelty fabrics can add a fun, personalized touch.
- Block Rotation: Simply rotating the finished Friendship Square blocks can dramatically alter the overall quilt pattern. Arrange them in a straight grid, or try turning every other block 90 degrees to see new designs emerge.
- Sashing and Borders: Add sashing (strips of fabric between blocks) to create visual separation and make your blocks pop. Borders can frame your quilt and add an extra layer of design.
- Scrap Quilt: The Friendship Square is an ideal candidate for a scrap quilt. Mix and match different fabrics from your stash to create a wonderfully eclectic and unique piece. The small pieces needed for the HSTs and corner squares are perfect for utilizing those treasured remnants.
- Size Adjustments: While this tutorial provides specific measurements, you can scale the block up or down by adjusting the initial square sizes. Just remember to maintain the correct proportions for your HSTs and corner squares.
Beyond the Block: Assembling Your Quilt
Once you have a collection of perfectly constructed Friendship Square blocks, the real magic begins: assembling them into a complete quilt top. Lay out your blocks on the floor or a design wall to arrange them in a pleasing pattern. Once satisfied with the layout, sew the blocks together into rows, pressing seams carefully. Then, join the rows to form your quilt top. After your quilt top is complete, you’ll need to prepare the batting and backing fabric, create a “quilt sandwich,” and then quilt through all three layers (either by hand or machine). Finally, the quilt will be finished by binding its edges, creating a durable and beautiful border. The journey from a single block to a finished quilt is incredibly rewarding, and the Friendship Square is the perfect foundation for this creative adventure.
Friendship Square Quilt Block: Your Quilting Adventure Starts Here
The Friendship Square quilt block is more than just a pattern; it’s a gateway to a fulfilling hobby. Its simplicity empowers beginners, while its versatility ensures endless creative possibilities for all skill levels. By following the detailed steps and embracing the tips for success, you’ll not only create a beautiful block but also build fundamental quilting skills that will serve you well in future projects. So, gather your fabrics, fire up your sewing machine, and enjoy the process of bringing your Friendship Square quilt block to life. Happy quilting!