
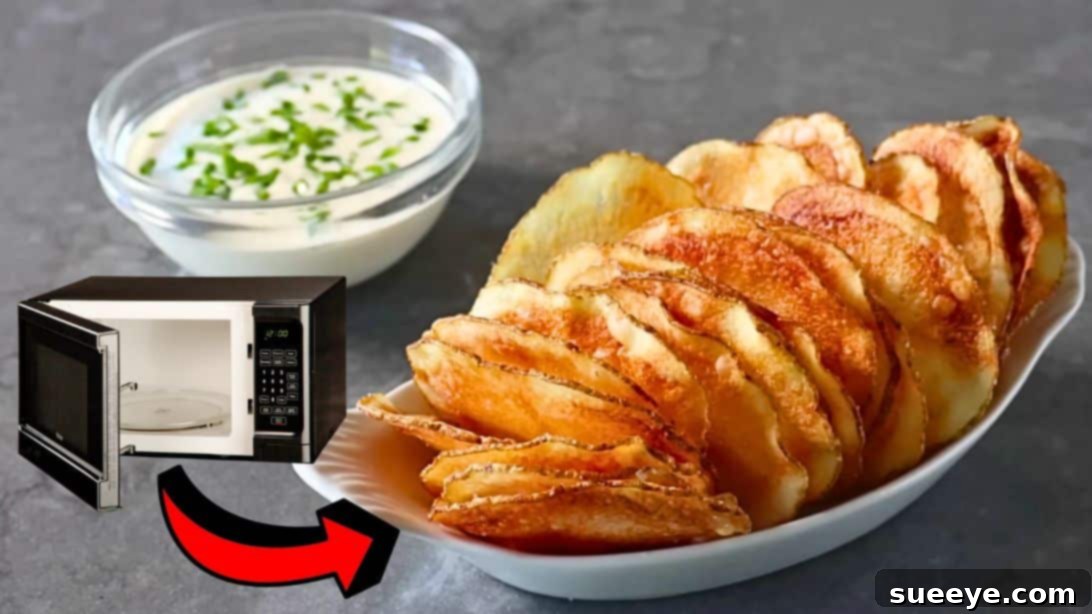
There’s an undeniable truth in the world of snacks: potato chips reign supreme. Their irresistible crunch, savory flavor, and satisfying texture make them a go-to treat for virtually everyone. Whether you’re unwinding after a long day, hosting a casual get-together, or simply craving something salty and crispy, a bag of potato chips often hits the spot like nothing else. From the moment you open a fresh bag to the satisfying crunch of the last piece, it’s an experience that’s hard to beat. However, the store-bought varieties, while convenient, sometimes leave you wanting more – perhaps a fresher taste, fewer additives, or the ability to customize flavors to your exact preference.
Imagine being able to recreate that addictive crunch and rich potato flavor right in your own kitchen, with minimal effort and in just a few minutes. The idea of homemade potato chips might sound daunting, conjuring images of deep-fryers and greasy messes. But what if we told you that the secret to achieving perfectly crispy, delicious potato chips lies within a common kitchen appliance? That’s right – your microwave! This revelation is a game-changer for snack enthusiasts, offering an incredibly convenient and hassle-free method to enjoy fresh, homemade potato chips anytime you desire. Not only is it surprisingly simple, but it also opens up a world of flavor possibilities, allowing you to season your chips exactly how you like them. Prepare to say goodbye to store-bought bags; once you master this technique, you’ll discover a newfound appreciation for crafting your own ultimate snack.
RELATED: Easy Chicken Fried Chips & French Onion Dip Recipe
Why Make Your Own Microwave Potato Chips? The Ultimate Snack Upgrade
Beyond the sheer novelty of making chips at home, there are compelling reasons to choose the microwave method. It’s not just about convenience; it’s about control, freshness, and a superior snacking experience that store-bought options simply can’t match. Here’s why homemade microwave potato chips are an absolute must-try:
Unbeatable Freshness and Flavor
There’s a significant difference between a chip that’s been sitting on a shelf for weeks and one that’s made moments before you eat it. Homemade chips offer an unparalleled freshness, bringing out the natural, earthy flavor of the potato in a way that’s often masked by preservatives and intense seasonings in commercial varieties. You’ll taste the pure potato, elevated by your chosen seasonings, resulting in a more vibrant and authentic snack.
A Healthier Snacking Choice
Commercial potato chips are often deep-fried in unhealthy oils and loaded with excessive salt, artificial flavors, and preservatives. When you make them at home, you have complete control over the ingredients. You can opt for healthier oils, significantly reduce the sodium content, and avoid any unwanted additives. While still a treat, homemade microwave chips can be a much lighter and more conscious snacking option.
Cost-Effective Snacking
Buying bags of potato chips regularly can add up, especially if you have a family of snack lovers. Potatoes are an inexpensive staple, and a single large potato can yield a surprisingly generous batch of chips. Making your own at home is a budget-friendly alternative that allows you to enjoy a gourmet snack without breaking the bank.
Endless Flavor Customization
This is where the real fun begins! Are you a fan of classic salt, or do you prefer something bolder? With homemade chips, your seasoning options are limited only by your imagination. From spicy chili-lime to savory garlic-herb, or even a hint of smoky paprika, you can tailor each batch to your specific cravings. This level of personalization is impossible with pre-packaged chips.
Incredible Convenience and Speed
Forget the mess and time commitment of traditional deep-frying. The microwave method is remarkably quick and requires minimal cleanup. In just minutes, you can transform a humble potato into a crispy, golden snack. It’s perfect for those sudden chip cravings or for whipping up a last-minute appetizer when guests arrive.
Understanding the Magic: How Microwaves Crisp Chips
The science behind microwaving potato chips is quite fascinating. Microwaves heat water molecules within the potato slices, causing them to evaporate rapidly. As the water escapes, the potato tissue dries out and becomes crispy, much like when an item is baked or fried. The key is thin slicing and thorough drying of the potato slices before microwaving. This ensures that the water can escape quickly and efficiently, leaving you with that desirable crunch without the need for excessive oil or a deep fryer. The process is efficient, clean, and surprisingly effective at delivering perfectly golden and crisp chips.
Ingredients for Perfect Microwave Potato Chips: Simplicity at Its Best
One of the beauties of this recipe is its simplicity, requiring just a handful of basic ingredients you likely already have on hand. Quality ingredients, even in small quantities, make a big difference in the final product.
- 1 large Russet potato, scrubbed: Russet potatoes are ideal for chips due to their high starch content and low moisture. This combination helps them achieve an incredibly crispy texture when cooked. Ensure it’s thoroughly scrubbed to remove any dirt, as we’ll be leaving the skin on for extra flavor and nutrients.
- 2 tbsp of canola oil: Canola oil is a neutral-flavored oil with a high smoke point, making it suitable for crisping. It helps achieve a golden-brown color and enhances the crispness of the chips. You can also experiment with other light oils like grapeseed or a very light olive oil.
- Salt, to taste: A fundamental seasoning for potato chips. Start with a light sprinkle and adjust to your preference. Fine-grained salt adheres best to the chips.
- Optional seasonings: This is where you can let your creativity shine! Consider garlic powder, onion powder, paprika, chili powder, black pepper, nutritional yeast for a cheesy flavor, or even a sprinkle of dried herbs like rosemary or thyme.
How to Make Crispy Microwave Potato Chips: A Step-by-Step Guide
Creating your own delicious, crispy potato chips in the microwave is an incredibly satisfying process. Follow these detailed steps to ensure perfect results every time. Consistency and attention to detail are key to achieving that ideal crunch.
Step 1: Meticulous Potato Preparation
Begin by preparing your workspace. Line a microwave-safe plate with parchment paper; this prevents sticking and aids in crisping. Using a mandolin slicer is highly recommended for this step, as it allows you to achieve uniformly thin slices, which are crucial for even cooking and optimal crispiness. Aim for slices that are about 1/16th of an inch thick. If you don’t have a mandolin, a very sharp knife and a steady hand can work, but strive for consistency. As you slice the scrubbed potato, immediately place the thin rounds into a large bowl filled with cold water. This cold water bath serves a vital purpose: it helps to rinse away excess starch from the potato slices. Removing starch is essential for preventing the chips from sticking together and for ensuring they crisp up beautifully. Let the slices soak for about 10-15 minutes, stirring gently a few times. After soaking, drain the potato slices thoroughly. Transfer them onto a clean, lint-free kitchen towel, then gently blot them with paper towels. The goal here is to get them as dry as possible. Any residual moisture will steam the chips rather than crisp them, so don’t rush this drying process.
Step 2: Oiling and Arranging for Optimal Crispness
Once your potato slices are perfectly dry, lightly brush the prepared parchment paper on your microwave plate with a thin layer of canola oil. This not only prevents sticking but also contributes to the golden color and crisp texture of the chips. Arrange the potato slices on the oiled parchment paper in a single layer, ensuring that they do not overlap. Overlapping slices will steam rather than crisp, resulting in unevenly cooked and soggy chips. Space them out as much as possible to allow even microwave exposure. Once arranged, lightly brush the top of each potato slice with a bit more oil. This ensures both sides are lightly coated, promoting even browning and crispness. The oil also acts as a flavor carrier for your seasonings.
Step 3: Microwaving to Perfection
Carefully place the plate with your arranged potato slices into the microwave. Cooking times can vary significantly depending on your microwave’s wattage, so think of these times as a guideline. Start by cooking the chips on high power for approximately 3½ minutes. After this initial cooking phase, carefully remove the plate and, using tongs or a spatula, flip each potato slice over. Return the plate to the microwave and continue cooking for another 4 minutes or more. The total cooking time for a batch can range from 6 to 10 minutes, sometimes even longer, depending on your microwave and the thickness of your slices. It’s crucial to understand that microwave cooking isn’t like traditional frying where you can set a timer and walk away. You need to remain vigilant.
Step 4: Monitoring, Cooling, and Seasoning
During the second cooking phase, it is absolutely essential to check on your potato chips frequently, especially in the last few minutes. Chips can go from perfectly golden and crispy to burnt in a matter of seconds. Look for the edges to begin browning and the center to become translucent and firm. Once they appear golden and crispy, immediately remove the plate from the microwave. Transfer the hot chips to a cold plate or a wire rack to cool down. This step is vital because chips continue to crisp up as they cool. If they seem slightly soft when hot, don’t worry; they will firm up significantly as they come to room temperature. While they are still warm, sprinkle them generously with salt (and any other desired seasonings). The warmth of the chips will help the seasonings adhere better. Repeat this process for the remaining potato slices, cooking them in batches until all your potatoes are transformed into delightful, homemade chips. Serve them immediately with your favorite dipping sauce, or enjoy them as a standalone snack. Enjoy your incredibly fresh, customized, and utterly delicious microwave potato chips!
Unleash Your Creativity: Flavor Variations for Homemade Chips
The beauty of homemade chips lies in the endless possibilities for customization. While classic salt is always a winner, don’t hesitate to experiment with different flavor profiles to match your mood or meal.
- Classic Salt & Pepper: A timeless combination. Use freshly ground black pepper for a more pungent aroma.
- Spicy Kick: Sprinkle with paprika, cayenne pepper, or a dash of chili powder for a fiery twist.
- Herbal Infusion: Finely chop fresh rosemary or thyme, or use dried versions, for an aromatic and sophisticated flavor.
- Cheesy Delights: Nutritional yeast offers a dairy-free cheesy flavor, or use finely grated Parmesan cheese immediately after cooking.
- Garlic & Onion Power: A blend of garlic powder and onion powder creates a savory, allium-rich seasoning that’s universally loved.
- Smoky BBQ: Mix paprika, brown sugar, a hint of cumin, and a touch of smoked salt for a backyard barbecue flavor.
Remember to apply seasonings while the chips are still warm to ensure they adhere properly. You can even create small batches with different flavors to cater to various preferences.
Tips for Microwave Potato Chip Perfection
Achieving consistently crispy, delicious microwave potato chips requires a few insider tips. Keep these pointers in mind for your best batch yet:
- Uniform Slices are Paramount: This cannot be stressed enough. Inconsistent slice thickness will lead to some chips burning while others remain undercooked. A mandolin slicer is your best friend here.
- Don’t Overcrowd the Plate: Always arrange chips in a single layer with space between each slice. Overlapping or crowded chips will steam, resulting in soggy, limp results. Patience for batch cooking pays off!
- Know Your Microwave: Every microwave is different. Start with the suggested times, but be prepared to adjust. A lower wattage microwave will take longer, while a higher wattage one will cook faster. Watch carefully, especially during the last few minutes.
- Thoroughly Dry Potatoes: Water is the enemy of crispiness. After rinsing, ensure your potato slices are as dry as possible using kitchen towels and paper towels. Blot, don’t rub, to avoid tearing delicate slices.
- Season Generously and Immediately: Salt and other seasonings stick best to warm chips. Don’t wait until they’re completely cool to season them.
- Cool Completely for Maximum Crispness: Chips will continue to crisp as they cool on a wire rack or cold plate. Resist the urge to eat them all straight out of the microwave if they still feel a little pliable.
Serving Suggestions: What to Pair with Your Homemade Chips
While homemade microwave potato chips are absolutely delicious on their own, they also make a fantastic accompaniment to a variety of meals and dips. Elevate your snacking experience with these pairing ideas:
- Classic Dips: French onion dip, creamy ranch, spicy salsa, or a vibrant guacamole are all excellent choices.
- Sandwiches & Burgers: Replace store-bought chips with your homemade version for a fresher, tastier side to your favorite deli sandwich or gourmet burger.
- Salad Topping: Crush a few chips and sprinkle them over a fresh green salad for an unexpected crunch and burst of flavor.
- Soup Accompaniment: Serve alongside a hearty bowl of tomato soup or chili for a comforting meal.
- Standalone Snack: Sometimes, pure simplicity is best. Enjoy them straight from the bowl, savoring every crispy bite.
Making potato chips in the microwave is an absolute revelation for snack lovers. It transforms a humble potato into a gourmet treat with surprising ease and speed. The ability to control ingredients, customize flavors, and achieve that perfect crispy texture without the hassle of deep-frying makes this method a true game-changer. Whether you’re looking for a healthier snack alternative, a budget-friendly option, or simply want to impress your friends and family with your culinary prowess, these homemade microwave potato chips are guaranteed to be a hit. So, grab a potato, a mandolin, and your microwave, and get ready to experience the ultimate crispy, delicious, and personalized snack. You’ll wonder why you ever bought a bag from the store again! This recipe from Food Wishes via YouTube truly simplifies the art of chip making, bringing the joy of homemade snacks right to your fingertips.
*All these images are credited to Food Wishes via YouTube. Give his channel a visit and subscribe for more!
How to Make Potato Chips in a Microwave: Quick Recipe Overview
For a quick reference, here’s a summary of how to make delicious, crispy potato chips using your microwave:
- Prepare Potatoes: Scrub a large Russet potato. Use a mandolin to slice it very thinly (1/16 inch). Immediately place slices in cold water for 10-15 minutes to remove starch.
- Dry Thoroughly: Drain slices and blot them completely dry with kitchen and paper towels. This is crucial for crispiness.
- Oil and Arrange: Line a microwave-safe plate with parchment paper. Lightly brush paper with canola oil. Arrange potato slices in a single layer, without overlapping, then brush tops with more oil.
- Microwave Cook (First Pass): Place in the microwave and cook on high for approximately 3½ minutes.
- Flip and Continue Cooking: Flip each chip, then return to the microwave and cook for another 4 minutes or more, checking frequently until golden and crispy.
- Cool and Season: Transfer hot chips to a cold plate or wire rack to cool (they will crisp more as they cool). Season immediately with salt and your favorite spices. Repeat for remaining batches.
- Serve and Enjoy: Enjoy your fresh, homemade microwave potato chips with your favorite dip or as a standalone snack.