
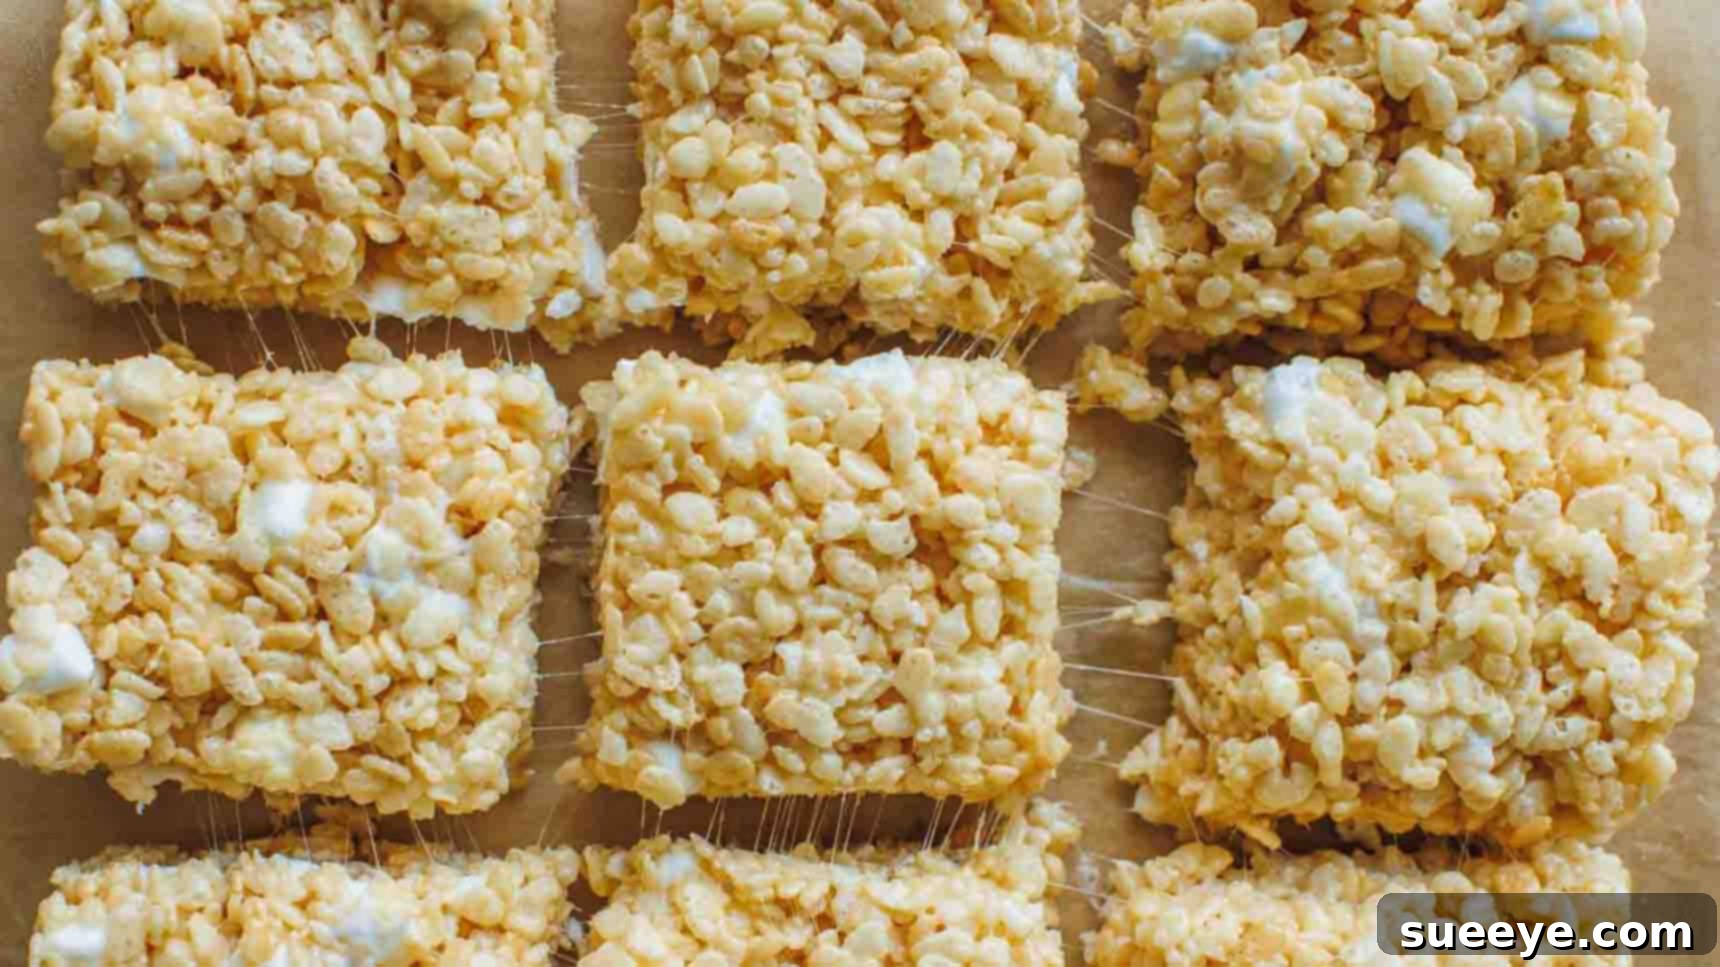
The Ultimate Homemade Rice Krispie Treats: A Timeless Classic Everyone Loves
Few desserts capture the essence of childhood joy and nostalgic comfort quite like a perfectly crafted Rice Krispie Treat. These delightfully chewy, crispy, and irresistibly sweet bars have graced countless lunchboxes, delighted guests at potlucks, and been a beloved staple at family gatherings for generations. If you’re a devout fan of these iconic marshmallow cereal bars, prepare to elevate your expectations and fall completely in love with this homemade rendition, proudly inspired by the fantastic recipe shared by Natasha’s Kitchen on YouTube. What truly sets this recipe apart is its incredible simplicity and accessibility: requiring merely five fundamental ingredients, it’s not just astonishingly easy to execute but also offers a wonderful opportunity for a fun, interactive bonding experience with children in the kitchen. Imagine the infectious smiles and shared laughter as you meticulously stir together gooey, melted marshmallows and crunchy cereal, culminating in a treat that’s unequivocally superior to any pre-packaged, store-bought alternative you’ve ever encountered.
Just last week, my sister and I decided to dedicate an afternoon to whipping up a batch of these glorious treats, and the outcome was nothing short of phenomenal! Each square boasted an impeccable balance of chewiness and crispiness, subtly enhanced by a delightful hint of pure vanilla extract and a crucial touch of fine sea salt, which brilliantly amplifies and balances the inherent sweetness. We found it impossible to resist just one, so, driven by sheer deliciousness, I promptly prepared another batch with the intention of sharing them with my extended family and close friends. The feedback was overwhelmingly positive; everyone universally adored them, and the requests for more began pouring in almost immediately. In fact, my beloved nephews, having discovered their new favorite indulgence, have been persistently asking for them for the past two days, prompting me to plan another batch for today’s afternoon delight. This isn’t merely a recipe; it’s a proven gateway to forging delicious memories and creating genuinely happy moments. If your culinary quest has led you to seek the definitive Rice Krispie Treat recipe that consistently delivers perfection, your search triumphantly ends here. I wholeheartedly encourage you to try this recipe, and prepare to be utterly amazed by how effortlessly you can produce such a universally cherished dessert that will undoubtedly earn you endless rave reviews. For a visual guide, you can also seamlessly follow along with the detailed step-by-step video instructions provided by Natasha’s Kitchen.
Why Homemade Rice Krispie Treats Are Always the Superior Choice
While the convenience of store-bought Rice Krispie Treats is undeniable, they simply cannot rival the fresh, vibrant taste and superior texture of a homemade batch. When you craft these treats from scratch, you gain complete control over the quality of each ingredient, ensuring the butter is fresh and aromatic, the marshmallows melt into a perfectly smooth, luscious binder, and the crispy rice cereal retains its optimal, satisfying crunch. The result is a dessert that is consistently softer, chewier, and profoundly more delicious, often vanishing within mere minutes of being presented. Moreover, the enchanting aroma of melting butter and sweet marshmallows wafting through your kitchen is an immersive sensory experience in itself, adding to the joy of creation.
Essential Ingredients for Unforgettable Rice Krispie Treats
One of the most appealing aspects of this beloved classic dessert is its reliance on a minimal selection of simple, readily available ingredients. However, it’s important to remember that using high-quality components can make a discernible and positive difference in the ultimate taste and delightful texture of your finished treats, so choose your ingredients with care!
- 8 tablespoons (1 stick) Unsalted Butter: The foundation of flavor and richness. Opting for unsalted butter grants you precise control over the overall saltiness of your treats, allowing you to fine-tune the flavor profile to perfection. Its creamy, rich taste forms an essential backbone for the marshmallow mixture.
- 16 ounces Mini Marshmallows: The magical binder that brings it all together. Mini marshmallows are the preferred choice because they melt far more quickly and uniformly than their larger counterparts, guaranteeing a consistently smooth, lump-free, and delightfully gooey binder. Ensure they are fresh for optimal meltability and the signature chewy texture.
- 1 teaspoon Pure Vanilla Extract: A non-negotiable flavor enhancer. This seemingly small addition is absolutely crucial; pure vanilla extract elevates the flavor profile far beyond mere sweetness, introducing a comforting warmth and subtle depth that flawlessly complements and enhances the marshmallow’s natural taste.
- 1/2 teaspoon Fine Sea Salt: The secret weapon for balanced sweetness. While adding salt to a sweet treat might initially seem counterintuitive, it is an absolute game-changer. Fine sea salt expertly balances the intense sweetness of the marshmallows and significantly enhances all the other flavors, preventing the treats from becoming cloyingly sweet and instead creating a harmonious taste experience.
- 7 cups Crispy Rice Cereal: The star of the show, delivering the iconic crunch! Use your preferred brand of crispy rice cereal. It is paramount that the cereal is fresh and exceptionally crispy, as stale cereal can unfortunately lead to a less satisfying, often soft or crumbly, texture in your final product.
Key Kitchen Equipment You’ll Need for Success
Before you embark on your Rice Krispie Treat journey, gathering these straightforward kitchen tools will ensure a seamless, efficient, and thoroughly enjoyable cooking experience:
- A generously sized mixing bowl to comfortably combine all ingredients.
- A large Dutch oven or a heavy-bottomed pot; a non-stick surface is a definite advantage for easy cleanup.
- A 9×9 inch baking pan for thick, substantial treats, or a 9×13 inch pan if you prefer thinner bars.
- Parchment paper, essential for effortless removal of the cooled treats.
- A sturdy rubber spatula or a wooden spoon, ideally non-stick or lightly greased, for mixing and pressing.
- Standard measuring cups and spoons for precise ingredient portions.
Step-by-Step Directions for Irresistibly Delicious Rice Krispie Treats
Step 1: Preparing Your Pan and Crafting the Gooey Foundation
Your journey to perfect Rice Krispie Treats begins with thorough pan preparation, a crucial step to prevent sticking and ensure effortless removal. Take your 9×9 inch baking pan (note: a 9×13 inch pan can also be utilized if you desire thinner treats, but be mindful that the cooling time might need slight adjustment) and liberally grease its interior with a small amount of melted butter or a reliable non-stick cooking spray. For an added layer of convenience and truly effortless extraction, meticulously line the greased pan with parchment paper, allowing a generous overhang on two opposite sides. These overhangs will ingeniously serve as “handles,” making it incredibly simple to lift the entire slab of finished treats out of the pan. Once prepared, set this pan aside to be ready for the next stage.
Next, procure your large Dutch oven or a substantial heavy-bottomed pot. Place it over a consistent medium-low heat setting. The cardinal rule here is to use low and slow heat; this judicious approach is vital for preventing the butter from scorching and the delicate marshmallows from burning or seizing. Add the full 8 tablespoons (one stick) of unsalted butter to the preheated pot. Allow the butter to melt completely, stirring gently and occasionally to ensure even distribution of heat. Once the butter has melted into a shimmering, golden pool, introduce the entire 16 ounces of mini marshmallows into the pot. Continue to stir the mixture gently and continuously until the marshmallows have completely transformed into a smooth, incredibly gooey, and luxuriously consistent liquid. It is imperative to remove the pot from the heat source immediately once the marshmallows are fully melted to prevent any possibility of overcooking, which can unfortunately lead to treats that become undesirably hard and brittle upon cooling.
Step 2: Combining Flavors, Pressing Gently, and Cooling to Perfection
With the marshmallows now perfectly melted and the pot carefully removed from the heat, it’s time for the crucial step of infusing rich flavor and incorporating the beloved crunch. Without delay, add 1/2 teaspoon of fine sea salt and 1 teaspoon of pure vanilla extract directly into the hot, melted marshmallow mixture. Stir these additions quickly and thoroughly until they are completely and seamlessly incorporated into the gooey base. The residual warmth of the mixture will aid in blending the vanilla and salt effortlessly, ensuring an even flavor distribution throughout.
Now, working with swift precision, gently introduce the 7 cups of crispy rice cereal into the marshmallow mixture. If you desire an even gooier texture, this is the opportune moment to fold in an additional 1-2 cups of fresh mini marshmallows (this is an optional addition not in the main ingredient list but highly recommended for marshmallow lovers). Carefully and gently fold the cereal into the marshmallow mixture until every single crispy flake is uniformly coated. It is vital to resist the temptation to mash or over-mix the ingredients, as this can unfortunately crush the delicate cereal and result in dense, hard treats rather than light and airy ones. The objective is an even, fluffy coating.
Without hesitation, quickly transfer the entire mixture into your previously prepared baking pan. Using a greased rubber spatula, a piece of greased parchment paper, or even lightly buttered hands, gently and evenly press the mixture into the bottom of the pan. Here’s a critical piece of advice: **Do not press too firmly!** Over-compressing the mixture is a very common misstep that inevitably leads to hard, unappealingly brick-like treats, detracting from their signature light and chewy quality. Only light, even pressure is necessary to ensure the mixture fills the pan uniformly and sets properly.
Once the mixture is gently pressed into place, cover the pan with plastic wrap or another piece of parchment paper and allow it to cool completely at room temperature for a minimum of one hour. Rushing this essential cooling step can negatively impact the setting process and the overall texture of your treats. For optimal results, exercise patience and allow them to cool and set thoroughly. After they have completely cooled and firmed up, utilize the convenient parchment paper overhangs to carefully lift the entire slab of Rice Krispie Treats out of the pan. Transfer it to a clean cutting board and, with a sharp knife, slice into your desired square sizes for serving. Congratulations! You are now ready to savor your perfectly homemade, truly irresistible Rice Krispie Treats!
Pro Tips for Achieving Rice Krispie Treat Perfection Every Time
While this recipe is remarkably straightforward, incorporating a few expert tips can genuinely elevate your homemade treats from simply good to absolutely legendary and unforgettable:
- Always Use Fresh Marshmallows: This is a non-negotiable tip! Older marshmallows tend to become dry and will not melt as smoothly or evenly, often leading to a slightly grainy, less desirable texture. Always opt for the freshest bag of mini marshmallows you can find.
- Never Overcook the Marshmallows: The moment your marshmallows have completely melted into a smooth, liquid state, remove the pot from the heat immediately. Continuing to cook them beyond this point can cause them to become tough, hard, and unpleasantly brittle once they cool and set.
- Embrace Speed in Your Process: The marshmallow mixture begins to set and firm up as it cools, so efficiency is key. Ensure all your ingredients are meticulously measured out and your baking pan is fully prepared and waiting before you even start melting. Working quickly is paramount when mixing in the cereal and pressing the mixture into the pan.
- Master the Art of Light Pressing: This is arguably the single most crucial tip for achieving that ideal chewy yet airy texture! Pressing the mixture too firmly or aggressively into the pan will unfortunately crush the delicate cereal, resulting in dense, unyielding, and hard treats. Instead, use gentle, even pressure with a greased spatula or the tips of your lightly buttered fingers.
- Grease, Grease, Grease Everything: To prevent the incredibly sticky marshmallow mixture from adhering to every surface, lightly greasing your spatula, the mixing bowl (if you’re using a separate one for combining), and your hands (should you choose to press by hand) will save you a lot of frustration and messy cleanup.
- The Unsung Hero: Salt is Essential: Do not, under any circumstances, skip the fine sea salt! It plays a vital role in perfectly balancing the intense sweetness of the marshmallows, significantly enhancing and deepening the overall flavor profile without making the treats taste salty.
- Exercise Patience During Cooling: In the realm of Rice Krispie Treats, patience truly is a virtue. Allowing the treats to cool and set completely at room temperature (avoiding the refrigerator, which can make them excessively hard) is fundamental to developing their perfectly balanced chewy-crispy texture.
Creative Variations and Delicious Customizations
The inherent beauty of Rice Krispie Treats lies in their incredible versatility and how effortlessly they can be customized to suit virtually any taste preference, special occasion, or seasonal theme. Here are some inspiring ideas to ignite your culinary imagination and add your unique touch:
- Decadent Chocolate Drizzle: For an extra layer of pure indulgence, melt your favorite chocolate chips (whether milk, dark, or white chocolate) and artfully drizzle it over the fully cooled and set treats. Allow the chocolate to harden before serving.
- Festive Sprinkles Galore: Before your treats have completely set, generously sprinkle a vibrant assortment of colorful sprinkles over the top. This instantly adds a festive, celebratory touch, making them perfect for birthdays, holidays, or any joyful occasion.
- Exciting Add-Ins: Expand the flavor and texture profile by gently folding in various miniature chocolate chips, colorful M&M’s, finely chopped nuts, dried fruits (like cranberries or raisins), or even crushed candy canes (for a delightful holiday-themed twist) alongside the crispy rice cereal.
- Experiment with Different Cereals: Don’t limit yourself to just crispy rice! Venture out and experiment with other puffed cereals such as classic Cheerios, sweet Fruity Pebbles, or rich Cocoa Krispies to explore entirely new and exciting flavor combinations.
- Nut Butter Swirl Sensation: For a delightful nutty twist, swirl in a couple of tablespoons of creamy peanut butter, almond butter, or even cashew butter into the melted marshmallow mixture just before adding the cereal.
- Bold Flavor Extracts: Beyond the traditional vanilla, consider adding a few drops of almond extract for a marzipan-like note, peppermint extract for a refreshing kick, or even a citrus extract like orange or lemon for a bright, unexpected flavor profile.
Optimal Storage and Maximizing Shelf Life
To ensure your homemade Rice Krispie Treats retain their optimal freshness, delightful chewiness, and satisfying crispiness, it is crucial to store them properly. Place them in an airtight container at room temperature. They are undeniably at their absolute best when enjoyed within 2 to 3 days of preparation, but with proper storage, they can remain delicious for up to a full week. It is generally advisable to avoid storing them in the refrigerator, as the cold can cause them to become excessively hard and significantly diminish their desirable chewy texture. Should your treats feel a bit firmer than desired, you can gently microwave a single treat for a very brief period (typically 5-10 seconds) to slightly soften it, bringing back some of its original tenderness.
Your Go-To Guide for Unforgettable Homemade Rice Krispie Treats
This meticulously detailed recipe, inspired by the culinary wisdom of Natasha’s Kitchen and enriched with our comprehensive expert tips, truly establishes the gold standard for homemade Rice Krispie Treats. It transcends the definition of a mere dessert; it embodies a simple pleasure that effortlessly brings forth immense joy, profound comfort, and a touch of deeply cherished nostalgic magic to any given day. Whether your intention is to prepare them for a vibrant party, pack them as a cherished school snack, or simply satisfy a sudden, undeniable sweet craving, these remarkably easy-to-make treats are unequivocally guaranteed to be a resounding success with everyone who tries them. So, gather your high-quality ingredients, perhaps enlist the enthusiastic help of your little kitchen assistants, and prepare to embark on a delightful culinary adventure to create a batch of the absolute best, chewiest, and crispiest Rice Krispie Treats you have ever had the immense pleasure of tasting. Happy no-baking, and may your kitchen be filled with delicious aromas and happy smiles!