
Unlock Convenience: Your Ultimate DIY Emergency Spare Key from a Can Lid
Few things are as frustrating as realizing you’ve lost your keys or simply need a spare to access a padlock, a garden shed, or a toolbox. The immediate thought often turns to the inconvenience and cost of calling a locksmith or making a trip to the hardware store for a traditional key duplication. But what if there was a surprisingly simple, almost magical, way to create an emergency spare key using nothing more than a common household item and a few basic tools? Prepare to be amazed, because this ingenious tutorial reveals how you can fashion a functional, temporary key from an ordinary can lid, potentially saving you time, money, and a lot of headaches.
This clever technique isn’t about crafting a high-security, everyday key for your front door, but rather an incredibly resourceful solution for those moments of need when you require a quick, temporary backup. Imagine the relief of having a homemade spare that can unlock a simple padlock when the original is nowhere to be found. It’s a testament to ingenuity and resourcefulness, transforming a discarded item into a valuable tool.
Why Having a Spare Key is Absolutely Essential
The importance of a spare key often goes underestimated until a critical moment arises. Whether it’s the gate to your garden, a secure storage unit, your bicycle lock, or a simple locker, needing access and being denied due to a lost or misplaced key can disrupt your day significantly. Traditional key cutting services, while reliable, come with a price tag and require a trip to a specialized store during business hours. For certain applications, particularly low-security locks or those used infrequently, a robust, professionally cut metal key might be overkill, especially if you only need a temporary fix.
This DIY method provides a unique answer to such dilemmas. It empowers you with the ability to create a functional key in a pinch, bypassing the traditional route entirely. It’s not just about convenience; it’s about being prepared and resourceful, transforming a potentially stressful situation into a manageable one with a touch of clever craftsmanship. While this isn’t a permanent replacement for a professional key, its utility as an emergency backup is undeniable.
The Ingenious Method: Crafting Your Can Lid Key
The core of this extraordinary hack lies in the principle of carbon transfer and precise cutting. It’s a process that sounds complex but is remarkably straightforward, requiring patience and attention to detail. We’ll walk through the steps, elaborating on each to ensure you achieve the best possible results for your DIY emergency key. This method, popularized by figures like Dave Hax, leverages simple household items to create a practical solution.
Step 1: Preparing Your Original Key for Impression
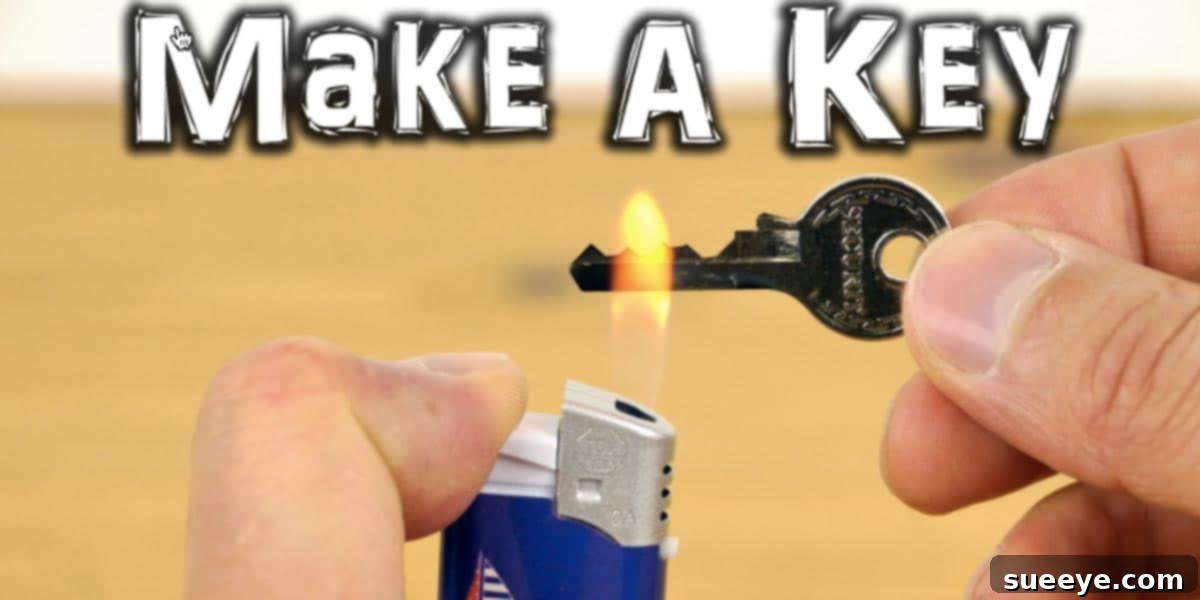
The first crucial step involves preparing your original key to create a clear, transferable impression. The goal here is to coat the key evenly with carbon residue, which will act as the “ink” for your template. Using a common lighter, hold the flame directly against the metal surface of your original key. Move the flame back and forth, ensuring that every groove, ridge, and indentation of the key’s bitting is thoroughly blackened. You want a thick, uniform layer of soot covering the entire working surface of the key. This carbon deposit is essential for creating a visible and accurate outline.
Safety Note: Always exercise caution when using an open flame. Perform this step in a well-ventilated area, away from flammable materials. Allow the key to cool slightly after blackening to avoid burns, though it won’t get excessively hot for long due to the metal’s heat dissipation.
Step 2: Creating the Key Impression with Tape
Once your key is sufficiently blackened, it’s time to capture its unique pattern. Take a piece of strong adhesive tape – packing tape or even duct tape works exceptionally well due to its robust stickiness and width. Lay the blackened side of your key carefully onto the adhesive surface of the tape. Apply firm, even pressure across the entire key for a few seconds. The goal is to transfer the carbon soot from the key onto the tape, creating a perfect, mirror-image impression of the key’s shape and bitting. Gently peel the key away from the tape. You should now have a distinct, black outline of your key’s profile on the tape. Inspect the impression closely; ensure all the intricate details are clear and legible. If the impression is incomplete or smudged, clean the key and repeat the blackening and transfer process.
Step 3: Transferring the Impression to the Can Lid
With a clear impression on your tape, the next phase involves transferring this template to your chosen metal can lid. Select a clean, flat portion of a metal can lid, such as those from tuna cans, pet food, or even sturdy aluminum beverage cans. Ensure the lid is free of any residue, bends, or significant imperfections that could distort your key’s shape. Carefully place the piece of tape with the key impression onto the chosen section of the can lid, adhesive side down. Smooth out any air bubbles, ensuring the tape adheres completely and flatly to the metal surface. The black outline of your key should now be clearly visible and firmly attached to the can lid, ready for the next crucial step.
Step 4: Precisely Cutting Out Your DIY Key
This is where your can lid transforms into a functional key. Precision and safety are paramount here. Using a pair of robust pliers, such as needle-nose pliers or combination pliers, begin carefully cutting around the black outline of the key on the can lid. Work slowly and meticulously, taking small snips to follow the exact contours of the key’s bitting and shaft. The goal is to replicate the original key’s shape as accurately as possible. Pay close attention to the intricate cuts that form the “teeth” of the key, as these are critical for engaging with the lock’s tumblers.
Critical Safety Warning: Metal can lids can be incredibly sharp once cut, posing a significant risk of cuts and lacerations. Always wear sturdy, cut-resistant safety gloves during this step. Eye protection is also highly recommended to shield against any small flying metal fragments. Take your time, prioritize safety over speed, and handle the newly cut key with extreme care.
Once the key is fully cut out, you may find the edges to be rough and sharp. Gently smooth these edges using fine-grit sandpaper or a small metal file. This not only enhances safety but can also improve the key’s ability to smoothly enter and exit the lock without snagging. Ensure the key’s head is large enough for you to grip comfortably and apply turning pressure.
Essential Tools and Materials You’ll Need
To embark on this resourceful DIY project, gather the following simple items:
- Original Key: The key you wish to duplicate temporarily.
- Lighter: A standard butane lighter or utility lighter for blackening the key.
- Strong Adhesive Tape: Packing tape, duct tape, or even good quality electrical tape will work.
- Clean Metal Can Lid: A sturdy lid from a food can (e.g., tuna, pet food, or even a thicker aluminum beverage can).
- Pliers: A pair of needle-nose or combination pliers with good cutting jaws.
- Safety Gloves: Mandatory cut-resistant gloves to protect your hands.
- Safety Glasses (Recommended): To protect your eyes from metal shards.
- Fine-Grit Sandpaper or Small File (Optional but Recommended): For smoothing rough edges.
Testing Your Newly Crafted Key
With your can lid key in hand, the moment of truth arrives. Approach the padlock or simple lock you intend to open. Gently insert your newly crafted key into the keyway. Do not force it. If it doesn’t slide in smoothly, it might be slightly too wide or have a burr on an edge. Recheck the shape and smooth any rough spots. Once inserted, try to turn the key gently. Remember, this key is flimsy compared to a standard metal key, so excessive force can bend or break it. If it works, fantastic! If not, don’t despair; slight adjustments to the bitting or smoothing can often resolve issues. Practice and refinement are key to success.
Limitations and Best Practices for Your DIY Key
While incredibly clever, it’s crucial to understand the limitations of a can-lid key. This is a temporary, emergency solution, not a permanent replacement. It is:
- Flimsy: Aluminum or thin steel from a can lid is not robust. It can bend, break, or wear down quickly, especially with repeated use or aggressive turning.
- For Simple Locks Only: This method is most effective for basic wafer tumbler locks or simple pin tumbler locks, commonly found on padlocks, shed doors, or utility boxes. It will likely not work on complex, high-security, or well-lubricated locks with tight tolerances.
- Not a Security Solution: Never rely on a can-lid key for anything requiring real security, such as your home’s main entry, a car, or valuables. Its primary purpose is emergency access for low-risk situations.
- Limited Durability: Expect one to a few uses at most before the key deforms or breaks.
When to Utilize This DIY Key
This ingenious hack shines in specific scenarios:
- Emergency Padlock Access: You’ve lost the key to your garden shed, a toolbox, or a bicycle padlock, and you need immediate access.
- Forgotten Key: You left the original key at home but need to quickly unlock a simple storage unit.
- A Fun Learning Project: It’s an excellent demonstration of basic locksmithing principles and resourcefulness.
- Never for Primary Security: Under no circumstances should this key be used for anything where security is paramount.
Beyond the Basics: Tips for Enhanced Success
To maximize your chances of success with this DIY project, consider these additional tips:
- Practice Makes Perfect: If possible, try making a key for an old, non-critical lock first to refine your technique.
- Clean Original Key: Ensure your original key is free of dirt, oil, or rust before blackening to get the clearest impression.
- Quality Tape Matters: A strong adhesive tape will give a crisper transfer.
- Sharpen Your Cutting Skills: The more accurately you cut, the better the chances of the key working on the first try. Small, precise snips are better than large, sweeping cuts.
- Smooth Edges: Don’t skip the sanding/filing step. Smooth edges prevent the key from snagging inside the lock and make it safer to handle.
The Environmental Angle: Upcycling and Resourcefulness
Beyond its practical utility, this DIY key-making method also embraces an element of upcycling. Instead of discarding a metal can lid, you are giving it a new purpose, diverting potential waste from landfills. It’s a small but meaningful act of resourcefulness, demonstrating how everyday items can be reimagined and repurposed to solve common problems.
Conclusion: Empowering You with a Clever Hack
The ability to create an emergency spare key from a simple can lid is more than just a party trick; it’s a valuable life hack that embodies ingenuity and self-reliance. While it won’t replace your trusted locksmith or provide robust security, it offers an astonishingly effective solution for those common, low-stakes lockout situations. It’s a testament to the power of simple physics and a bit of DIY spirit. So, the next time you find yourself needing a quick solution for a forgotten or lost key for a simple lock, remember this clever tutorial. With a lighter, some tape, a can lid, and a dose of caution, you too can unlock convenience. Just remember to prioritize safety, particularly when handling the sharp edges of cut metal. Give it a try – you might just surprise yourself with your newfound key-making abilities!