
Master Your Machine: The Ultimate Guide to Preventing Bobbin Thread Jams
There’s arguably no greater source of frustration for a sewist, whether a curious beginner or a seasoned professional, than the dreaded bobbin thread jam. That tangled mess under your fabric, the sudden grinding halt of your machine, the snapped needles – it’s enough to make anyone want to throw their project across the room. But fear not! This comprehensive guide is designed to demystify this common headache, offering clear solutions and expert insights to ensure your sewing sessions are smooth, efficient, and enjoyable. We’ll dive deep into three essential tips championed by Twinsnneedles LLC, alongside a wealth of other troubleshooting advice to transform your sewing experience.
RELATED: 5 Sewing Tips You Haven’t Heard Before
Understanding the core reasons behind bobbin thread jams is the first step toward conquering them. This knowledge won’t just save you precious time and materials; it will also build your confidence and foster a deeper connection with your sewing machine. By adopting these best practices, you’ll not only prevent future tangles but also enhance the overall quality of your stitches. So, let’s unravel the mystery behind those pesky threads and get your machine purring smoothly again!
What Exactly Is a Bobbin Jam and Why Does It Happen?
A bobbin jam occurs when the lower thread, which comes from the bobbin, becomes tangled, knotted, or otherwise obstructed, preventing it from forming proper stitches with the upper thread. This can manifest as a bird’s nest of thread under your fabric, skipped stitches, or the complete seizure of your sewing machine. At its core, bobbin jamming is almost always a result of an imbalance in thread tension, an improper setup, or an interruption in the smooth flow of thread through the machine’s intricate mechanisms. It’s a clear signal that something in your machine’s delicate timing or threading path is out of sync. Ignoring these warning signs can lead to broken needles, damaged fabric, and even potential harm to your machine’s internal components.
Three Crucial Tips to Eliminate Bobbin Jams
While bobbin jams can seem complex, many are easily preventable by following these three fundamental practices. These tips focus on the initial setup and proper handling of your machine, addressing common pitfalls that lead to those frustrating tangles.
Tip #1: Always Hold Your Thread Tails Firmly When Starting
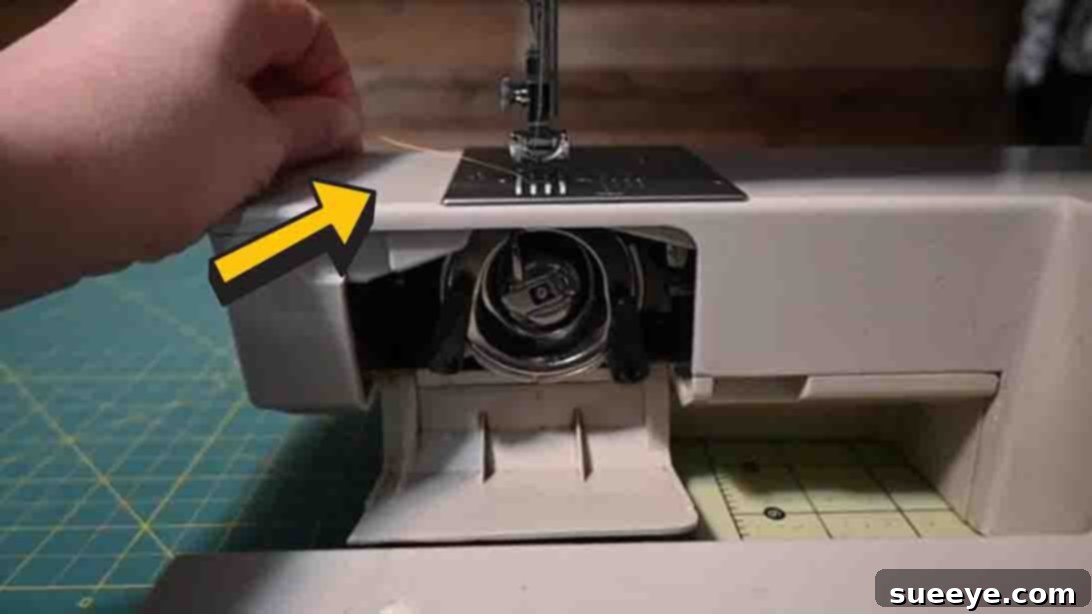
The journey of a perfect stitch begins even before you press the foot pedal. One of the most common, yet easily avoidable, causes of bobbin jams is simply letting the thread tails (both upper and bobbin threads) hang loose at the start of your sewing project. When you begin stitching with loose thread tails, especially in the first few stitches, there’s a significant risk that these uncontrolled threads will be pulled down into the bobbin area beneath the needle plate. Here, they can easily get caught in the feed dogs, tangle around the bobbin case, or interfere with the shuttle hook mechanism, quickly creating a knotted mess and causing your machine to seize up.
To prevent this, adopt the habit of holding both the upper and bobbin thread tails firmly with one hand as you begin to sew. Gently guide them towards the back of the machine, keeping a light tension on them. Maintain this hold for the first two to three stitches. This short initial period is crucial because it allows the machine to properly establish the first few stitch formations without any interference from errant thread ends. Once these initial stitches are securely formed, the machine’s tension system takes over, and the threads will naturally feed through the fabric without tangling. This simple act provides the necessary control during the most vulnerable stage of stitch formation, ensuring a smooth start to every seam and dramatically reducing the likelihood of bobbin thread tangles. Make this a fundamental part of your sewing routine for consistent, jam-free results.
Tip #2: Always Turn Your Hand Wheel in the Correct Direction
The hand wheel on the side of your sewing machine is a powerful tool for manual control, allowing you to precisely position the needle and fabric. However, its use comes with a critical rule: it must only ever be turned in one specific direction. For the vast majority of sewing machines, this direction is towards you (counter-clockwise). While it’s always best to consult your machine’s manual for 100% certainty, this “towards you” rule holds true for nearly 99% of models.
The reason for this strict adherence to direction is rooted in the internal mechanics of your sewing machine. The hand wheel is directly linked to the machine’s timing mechanism, which coordinates the movement of the needle, the take-up lever, and the bobbin hook to form a perfect stitch. Turning the hand wheel backward (away from you) disrupts this delicate timing. Specifically, it causes the upper thread to lose its proper tension and slacken prematurely. When this “extra slack” is introduced into the thread path, the bobbin hook can’t properly catch and form the loop, or the upper thread might get tangled around the bobbin case. This results in loops of thread accumulating under your fabric – the classic “bird’s nest” – and inevitably leads to a frustrating bobbin jam. Consistently turning the hand wheel in the correct direction ensures the thread path remains taut and correctly aligned, allowing the stitch formation process to happen seamlessly and preventing any unnecessary tangles. This simple yet vital practice is key to maintaining consistent stitch quality and avoiding one of the most common causes of thread problems.
Tip #3: Always Ensure Your Take-Up Lever is at Its Highest Position When Stopping
The take-up lever, the oscillating arm located above the needle, plays a vital role in every stitch formation. It’s responsible for pulling the upper thread from the spool, feeding it through the tension discs, and then pulling it back up to tighten the stitch. This rhythmic up-and-down motion is essential for creating a balanced and secure stitch. Therefore, its position when you stop sewing is critical for preventing jams.
When you finish a seam or pause your sewing, it is imperative to ensure that the take-up lever is in its highest possible position. You can achieve this by manually turning the hand wheel (in the correct direction, towards you!) until the lever reaches its peak. If you stop sewing when the take-up lever is in a lower position, it means that there is too much slack in the upper thread. This excess slack becomes problematic when you start your next seam. The loose thread can get caught in the bobbin area, create messy loops under your fabric, or even pull the bobbin thread out of its case, all leading to a jam. Furthermore, if the take-up lever is low, it hasn’t finished pulling the last stitch tight, leaving a vulnerable loop that can easily snag. By consistently stopping with the take-up lever in its topmost position, you ensure that the upper thread is fully withdrawn, properly tensioned, and cleared from the bobbin area. This prepares your machine for a smooth, jam-free start to your next stitch, ensuring that both the upper and bobbin threads are perfectly aligned for optimal stitch formation.
Beyond the Three Tips: Other Common Causes of Bobbin Jams and Solutions
While the three tips above address critical starting and stopping procedures, bobbin jams can also stem from other factors related to threading, tension, and machine maintenance. Here are additional areas to check when troubleshooting:
Incorrect Threading (Upper & Bobbin)
Even experienced sewists can make threading mistakes. The upper thread must be seated correctly in all guides and tension discs. If it’s not, the tension will be off, leading to loops and tangles. Similarly, the bobbin thread needs to be inserted correctly into its case and properly routed through the tension spring. A misplaced thread can cause immediate problems. Always re-thread your machine from scratch when you encounter persistent issues.
Wrong Bobbin Type or Poorly Wound Bobbin
Sewing machines are particular about bobbins. Using a bobbin that isn’t the correct size or material for your machine can cause friction, uneven tension, and jams. Similarly, a bobbin that is wound too loosely, too tightly, or unevenly can create inconsistent thread flow and lead to tangles in the bobbin case. Ensure bobbins are wound smoothly and evenly, and only use bobbins specified for your machine model.
Improper Thread Tension Settings
The balance between upper and lower thread tension is crucial for perfect stitches. If the upper tension is too loose, it won’t pull the bobbin thread up sufficiently, resulting in loops on the underside of your fabric. If the upper tension is too tight, it can snap the thread or pull the bobbin thread too hard. Always test on a scrap piece of your fabric and adjust tension as needed for different materials and threads.
Low-Quality Thread or Incompatible Thread
Cheap thread often sheds lint, breaks easily, or has inconsistent thickness. This can clog up tension discs, needle eyes, and the bobbin area, leading to jams. Using thread that is too thick for your needle or machine can also cause issues. Invest in good quality thread and ensure it’s suitable for your project and machine.
A Dirty Sewing Machine
Lint, dust, and tiny fabric fibers accumulate over time, especially in the bobbin area, under the needle plate, and in the feed dogs. This build-up can obstruct the thread path, interfere with the bobbin case, and lead to significant jamming problems. Regular cleaning with a small brush and occasional oiling (as per your manual) is paramount for smooth operation.
Damaged Needle or Needle Plate
A bent, dull, or burred needle can catch the thread, causing it to shred or jam. Similarly, nicks or burrs on the needle plate, particularly around the needle hole, can snag the thread as it passes through. Replace needles frequently (every 8-10 hours of sewing or at the start of a new project) and inspect your needle plate for any damage.
Your Path to Jam-Free Sewing
By understanding and implementing these crucial tips, you’re well on your way to a vastly improved sewing experience. The three core practices – holding your thread tails, correctly operating the hand wheel, and ensuring the take-up lever is in its highest position – are foundational habits that will prevent the majority of bobbin thread jams. Combine these with diligent maintenance, careful threading, and mindful material choices, and you’ll find yourself spending more time creating and less time troubleshooting.
Remember, patience and practice are your best allies in the world of sewing. Every jam is an opportunity to learn more about your machine and refine your technique. Don’t be afraid to consult your machine’s manual, re-thread completely if unsure, and always test on scrap fabric before diving into your main project.
For further expert advice and visual demonstrations, be sure to check out Twinsnneedles LLC’s helpful video, where these tips are brought to life. Embrace these strategies, and get ready to enjoy smoother, more confident sewing sessions, free from the frustration of tangled bobbin threads! Happy sewing!