
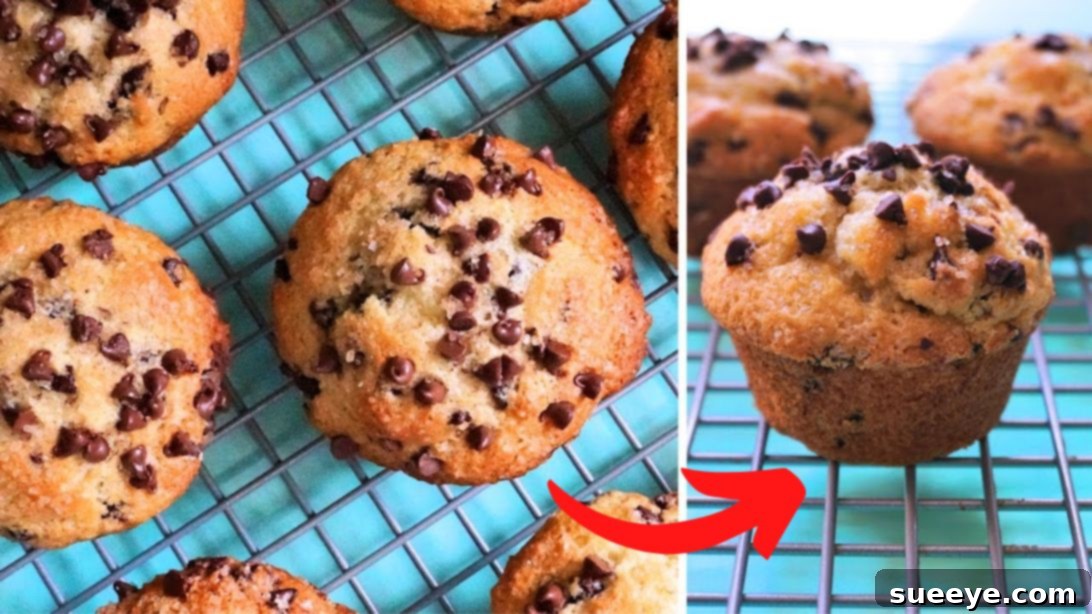
There’s nothing quite like biting into a warm, freshly baked muffin. However, if you’re a passionate home baker, you’ve likely experienced the disappointment of a muffin that didn’t live up to its bakery counterpart – perhaps it was too dense, too dry, or lacked that perfect domed top. The quest for the ultimate bakery-style chocolate chip muffin ends here! This incredible recipe, generously shared by What’s For Din’? on YouTube, promises to deliver muffins that are not only supremely fluffy on the inside, feeling like light, airy clouds with every chew, but also boast a delightfully crusty, golden-brown exterior loaded with irresistible chocolatey goodness. Prepare to impress yourself and your loved ones with these perfectly crafted, homemade treats that truly taste like they came straight from your favorite local bakery.
The Secret to Bakery-Style Chocolate Chip Muffins: A Detailed Look
Achieving bakery-quality muffins at home is a dream for many, and this recipe provides the roadmap. It emphasizes key techniques and ingredient choices that elevate a simple chocolate chip muffin to something truly special. From the ideal batter consistency to the perfect baking temperature, every step is designed to ensure maximum flavor, a tender crumb, and that coveted crispy top. These aren’t just any muffins; they are an experience in texture and taste, guaranteed to become a staple in your baking repertoire.
Ingredients for Irresistible Chocolate Chip Muffins:
The foundation of any great recipe lies in its ingredients. For these luscious chocolate chip muffins, quality and preparation matter. Using fresh, high-quality ingredients ensures the best possible flavor and texture. Pay close attention to temperatures, as they play a crucial role in the final outcome of your muffins.
- 2½ cups all-purpose flour: The backbone of our muffin structure. Ensure it’s correctly measured by spooning it into a measuring cup and leveling it off.
- 1 tbsp baking powder: A key leavening agent responsible for those beautiful, high domes and fluffy texture.
- 1 tsp baking soda: Works in tandem with the buttermilk to provide additional lift and tenderness.
- ½ tsp salt: Balances the sweetness and enhances the overall flavor of the chocolate.
- 1 cup mini semi-sweet chocolate chips: Distributed throughout the batter, these melt into pockets of rich chocolate. Mini chips ensure chocolate in every bite without being too overwhelming.
- 1 cup granulated sugar: Provides sweetness and contributes to the golden-brown crust.
- ¼ cup butter, melted: Adds richness and a tender crumb. Melting it helps it incorporate smoothly into the wet ingredients.
- ¼ cup coconut oil, melted: Contributes to a moist texture and a subtle, delightful aroma, enhancing the overall depth of flavor.
- 1 tbsp vanilla extract: A classic flavor enhancer that complements the chocolate beautifully. Use pure vanilla for the best results.
- 1 cup buttermilk, at room temperature: Essential for a moist, tender crumb and reacts with the baking soda to create lift. Room temperature ensures it mixes smoothly and emulsifies properly with other wet ingredients.
- 2 large eggs, at room temperature: Bind the ingredients together and add richness. Room temperature eggs emulsify better, leading to a smoother batter and a more even bake.
- ½ cup mini chocolate chips, for topping: Sprinkled generously on top before baking, these create an inviting visual appeal and an extra burst of chocolate flavor on the surface.
- Turbinado sugar, for topping: Also known as sugar in the raw, this coarse sugar adds a delightful crunch and a beautiful sparkle to the muffin tops, reminiscent of classic bakery muffins.
Step-by-Step Directions for Bakery-Style Chocolate Chip Muffins:
Follow these detailed instructions carefully to ensure your muffins achieve that perfect bakery-style quality. Precision in mixing and baking techniques is key to success.
Step 1: Preparing the Batter for Optimal Texture
Begin by combining all your dry ingredients in a spacious mixing bowl. Add the precisely measured all-purpose flour, salt, baking soda, and baking powder. Using a whisk, thoroughly combine these ingredients until they are evenly distributed. Proper aeration at this stage is important for a light final texture. Once the dry ingredients are blended, gently stir in about 1 cup of mini semi-sweet chocolate chips. Coating the chips in flour helps prevent them from sinking to the bottom of the muffins during baking. Set this mixture aside.
In a separate, equally large mixing bowl, prepare your wet ingredients. Whisk together the granulated sugar, melted butter, melted coconut oil, vanilla extract, room temperature eggs, and room temperature buttermilk. Continue whisking until the mixture is fully combined and smooth. The room temperature buttermilk and eggs are crucial here; they emulsify better with the fats, resulting in a more uniform batter and a tenderer muffin.
Now, it’s time to marry the wet and dry mixtures. Gradually add approximately half of the prepared flour mixture to the wet ingredients. With a spatula or a wooden spoon, gently mix them together until they are just combined. Avoid overmixing at this stage, as it can develop the gluten in the flour too much, leading to tough, chewy muffins. Once this first half is incorporated, add the remaining half of the flour mixture. Continue to gently fold until the batter is just moistened and no streaks of dry flour remain. Remember, a few small lumps are perfectly acceptable and even desirable for tender muffins; overmixing is the enemy of a light crumb. The goal is to achieve a cohesive, yet slightly lumpy batter.
Once your batter is perfectly mixed, cover the bowl tightly with plastic wrap. Place the bowl in the refrigerator and allow the batter to chill for at least 30 minutes. This chilling period is a secret weapon for bakery-style muffins; it allows the flour to fully hydrate, the flavors to meld, and the fats to firm up slightly. This process contributes significantly to the development of those coveted tall, domed muffin tops and a superior, tender texture.
Step 2: Baking for the Perfect Golden-Brown Finish and Fluffy Interior
While your batter is chilling, preheat your oven to a robust 425°F (218°C). This initial high temperature is critical for creating a powerful “oven spring,” which encourages the muffins to rise rapidly and develop those characteristic tall, domed tops. Prepare your muffin pan by brushing each cup generously with melted butter or lining them with paper cupcake liners, then giving them a light spray with non-stick cooking spray. Setting up your pan correctly ensures easy removal and a beautiful exterior. Set the prepared pan aside.
Once the oven is preheated and your batter has chilled sufficiently, retrieve the batter from the refrigerator. Fill each greased muffin cup with the chilled batter, aiming to fill them quite generously – almost up to the brim. Overfilling slightly is a technique often used in bakeries to achieve those impressive, overflowing muffin tops. Then, liberally sprinkle the remaining ½ cup of mini chocolate chips over the top of each muffin. The final touch for that bakery-style appeal is a generous dusting of turbinado sugar over the chocolate chips. This coarse sugar not only adds a beautiful glimmer but also provides a delightful, crunchy texture to the muffin crowns, creating an appealing contrast to the soft interior.
Place the filled muffin pan into the preheated 425°F oven. Bake for precisely 5 minutes at this high temperature. This initial burst of heat is what creates the quick rise and forms the structure of the dome. After 5 minutes, and without opening the oven door (which is crucial to maintain the internal temperature and prevent the muffins from collapsing), lower your oven temperature to 375°F (190°C). Continue baking for an additional 10 to 15 minutes. The lower temperature allows the muffins to cook through evenly without burning the tops, ensuring a moist interior.
To check for doneness, insert a clean wooden toothpick into the center of a muffin. If it comes out clean, the muffins are perfectly baked. If there are wet crumbs or batter, continue baking for a few more minutes and retest. Avoid overbaking, as this can lead to dry muffins. Once baked, carefully remove the pan from the oven. Allow the muffins to cool in the pan for about 2 minutes. This brief cooling period helps them set and makes them easier to remove. After 2 minutes, gently unmold the muffins and transfer them to a wire cooling rack to finish cooling completely. Cooling on a rack prevents the bottoms from becoming soggy. Serve these magnificent bakery-style chocolate chip muffins warm or at room temperature, and savor every delightful bite!
There you have it – a comprehensive guide to baking the most exquisite bakery-style chocolate chip muffins right in your own kitchen. This recipe delivers on its promise of fluffy interiors, crispy tops, and a rich chocolate flavor that will transport you straight to your favorite pastry shop. Whether for breakfast, a snack, or a delightful dessert, these homemade muffins are guaranteed to be a hit. Don’t hesitate to experiment with different types of chocolate chips or even add a sprinkle of sea salt on top for a gourmet twist. Enjoy the process of baking and the incredible reward of these perfect muffins!
*All image credit belongs to What’s For Din’ via YouTube. Follow and subscribe to her channel for more amazing recipes and baking inspiration!