
A window air conditioning unit is an essential appliance that provides much-needed relief during warm months. However, these hardworking units are prone to accumulating a significant amount of dirt, dust, grime, and even harmful mold and mildew over time. The idea of disassembling and thoroughly cleaning an AC unit can understandably seem daunting, leading many homeowners to neglect this crucial maintenance task. Yet, keeping your window AC unit clean is paramount for several critical reasons: it actively prevents the growth of unpleasant and unhealthy mold and mildew, significantly improves the quality of your indoor air, boosts the unit’s energy efficiency, and ultimately extends the operational lifespan of your valuable investment. Inspired by the wonderfully easy and effective AC cleaning ideas shared by How To Do It All on YouTube, this comprehensive guide will walk you through a quick, easy, and relatively mess-free method to get your window unit sparkling clean and running optimally. By gathering just a few simple household ingredients and tools, you can embark on this rewarding project immediately and enjoy the benefits of a fresh, efficient AC.
How to Deep Clean Your Window AC Unit for Optimal Performance and Health
Regular maintenance of your window air conditioner isn’t merely about aesthetics; it’s fundamental to ensuring a healthy living environment and cost-effective operation. A neglected AC unit can quickly become a breeding ground for allergens, dust mites, bacteria, and mold spores. When the unit operates, these pollutants are then circulated throughout your home, potentially triggering allergies, asthma, and other respiratory issues for occupants. Furthermore, a dirty unit struggles to perform its primary function, forcing the compressor to work much harder to cool your space. This increased workload directly translates to higher electricity bills and accelerates wear and tear on its internal components, drastically shortening its overall lifespan. This detailed guide aims to empower you to tackle the task of cleaning your window AC unit with confidence, ensuring your appliance provides cool, clean air efficiently and reliably for many seasons to come.
Why Regular AC Unit Cleaning Is Crucial for Your Home and Health
Understanding the multitude of benefits that come with a clean AC unit can serve as a strong motivator to add this task to your seasonal home maintenance checklist. Here’s a breakdown of why it’s so incredibly important:
- Improved Indoor Air Quality: Over time, your AC unit’s air filter and evaporator coils become clogged with an accumulation of dust, pollen, pet dander, and other airborne particles. Without regular cleaning, these accumulated pollutants are constantly recirculated into your home’s air, significantly diminishing indoor air quality and potentially exacerbating respiratory conditions for household members.
- Effective Mold and Mildew Prevention: The inherently cool and damp environment inside an AC unit creates an ideal breeding ground for mold and mildew growth. Regular and thorough cleaning actively eliminates these fungal growths, preventing musty odors and mitigating the health risks associated with exposure to mold spores, such as allergic reactions and respiratory problems.
- Enhanced Energy Efficiency: A layer of dirt and debris acting as an insulator on your evaporator coils makes it considerably harder for the unit to efficiently absorb heat from your home’s air. This inefficiency forces the compressor to run longer and work harder to achieve the desired temperature, consuming more electricity and consequently increasing your utility bills. A clean unit operates more efficiently, directly saving you money.
- Extended Appliance Lifespan: When an AC unit is dirty, its critical components, such as the compressor and fan motor, are subjected to significantly more strain. This excessive workload can lead to premature mechanical failure and necessitate costly repairs or even a full replacement. Regular cleaning reduces this operational stress, helping your valuable appliance last longer and maintain its optimal performance.
- Elimination of Unpleasant Odors: Stagnant condensation, mold growth, and trapped organic debris within the unit can cause your AC to emit unpleasant, musty, or sour odors. Cleaning removes the source of these smells, ensuring your home feels fresh and clean every time the AC is running.
Materials You’ll Need for Cleaning Your AC Window Unit:
Before you begin the cleaning process, it’s highly recommended to gather all the necessary items and have them within easy reach. This preparation step will make the cleaning process smoother, more efficient, and less prone to interruptions. Thankfully, most of these are common household items, making this a budget-friendly DIY project.
- A Bowl of Warm Water: Essential for mixing cleaning solutions and for light rinsing.
- One or Two Towels: To be placed beneath the unit to protect your floor or countertop from any drips, spills, or debris during the cleaning process.
- Dawn Liquid Dish Soap: Widely recognized for its powerful degreasing properties, making it excellent for breaking down grime and dirt on coils and various surfaces.
- A Spray Bottle: Perfect for creating and applying your cleaning solution evenly to coils, fins, and other hard-to-reach areas.
- A Small Bucket or Deep-Dish Bowl: Useful for preparing larger batches of cleaning solution or for holding dirty components.
- Hydrogen Peroxide (3% solution): An effective, environmentally friendly, and relatively safe disinfectant for killing mold and mildew without the use of harsh, toxic chemicals.
- A Soft-Bristle Toothbrush or Small Cleaning Brush: Ideal for gently scrubbing delicate fins, cleaning small vents, and reaching into tight crevices without causing damage.
- A Can of Compressed Air: Excellent for blowing loose dust and debris out of tight spaces, especially from delicate evaporator coils and condenser fins, without introducing moisture.
- A Screwdriver (Phillips or Flathead, as needed): Necessary for carefully removing the front grille and other panels to gain access to the unit’s internal components.
- Protective Gloves: To safeguard your hands from dirt, grime, and the cleaning solutions used during the process.
- Safety Glasses: To protect your eyes from any dislodged debris, dust, or splashes from cleaning solutions.
Step-by-Step Directions to Deep Clean Your Window AC Unit:
Follow these detailed steps carefully to thoroughly clean your window AC unit. Remember to work patiently and prioritize safety throughout every stage of the process.
Step 1: Safety First and Initial Preparation
Before you begin to touch or disassemble any part of your AC unit, always ensure it is completely unplugged from its power source. This is the most critical safety measure to prevent any risk of electric shock. Once the unit is safely unplugged, place one or two large towels or an old blanket beneath the unit. This will effectively catch any water, cleaning solution, or debris that might drip during cleaning, protecting your floors or furniture. If possible, move the unit to an area where you have ample space to work and good ventilation, such as outdoors on a patio or in a garage. Wearing protective gloves and safety glasses from this point onward is highly recommended.
Step 2: Remove and Clean the Front Grille and Air Filter
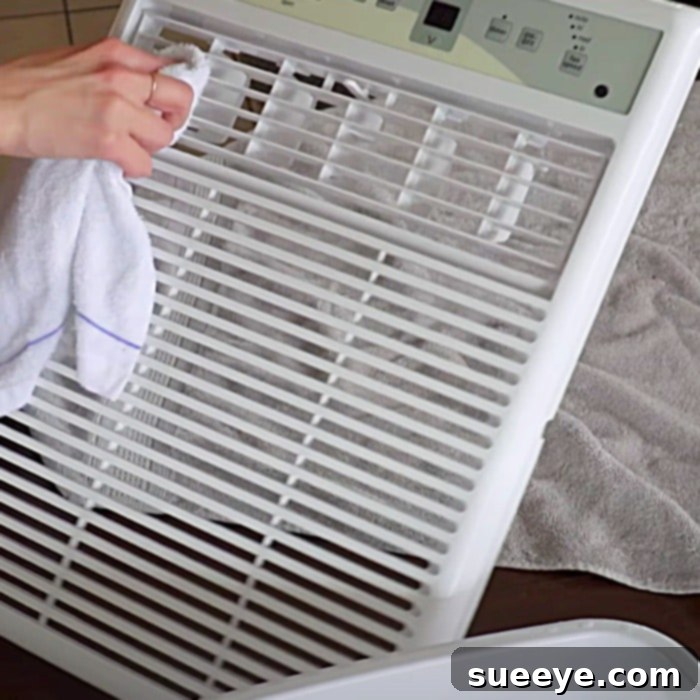
Carefully remove the front panel or grille of your window AC unit. This usually involves pressing release clips or removing a few screws with your appropriate screwdriver. Once the grille is detached, locate and gently remove the air filter. Most filters slide out easily. For washable filters, rinse them thoroughly under warm running water to remove all accumulated dust, lint, and debris. If the filter is heavily soiled, you can use a mild detergent like Dawn dish soap and a soft brush to gently clean it. Ensure the filter is rinsed completely free of soap residue. Allow the filter to air dry completely before reinstallation to prevent mold growth. If your unit uses a disposable filter, this is the ideal time to replace it with a new one for optimal performance.
Step 3: Clean the Evaporator Coils and Fins
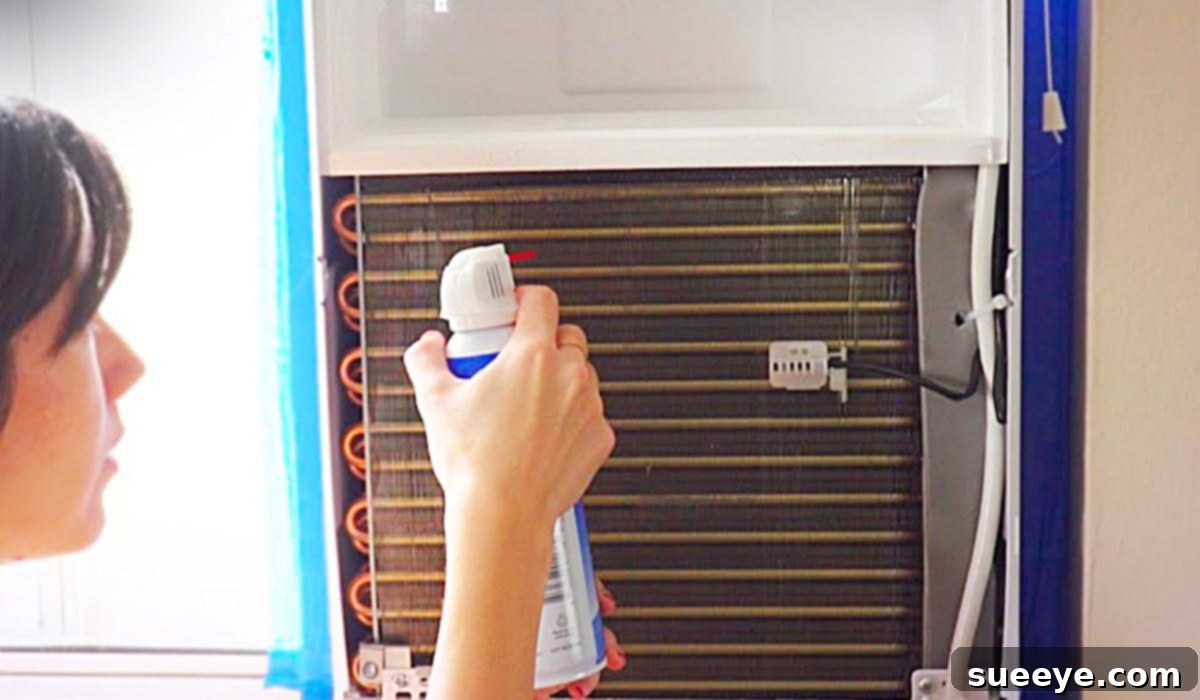
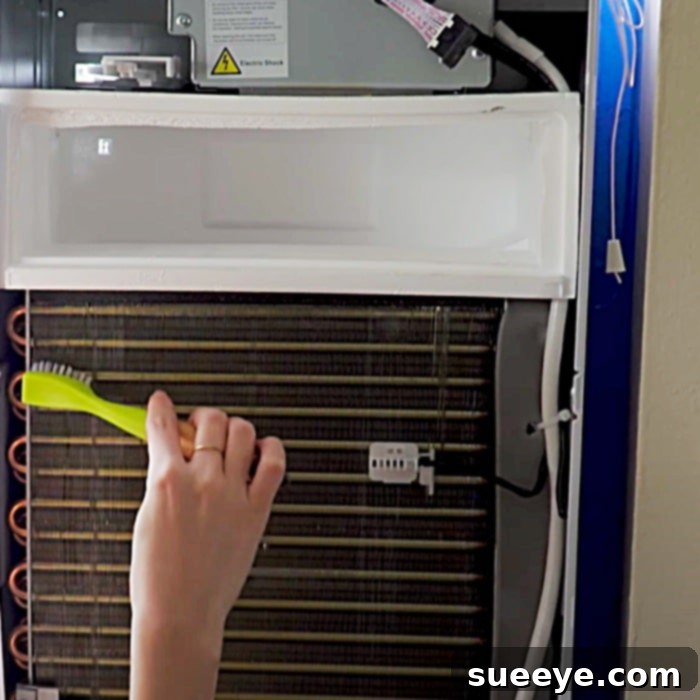
With the front panel and filter removed, you will now have access to the evaporator coils, which typically appear as a series of thin, delicate metal fins. These coils are crucial for the heat exchange process and are often heavily clogged with dirt and debris, hindering efficiency. In your spray bottle, mix warm water with a few drops of Dawn liquid dish soap (a good ratio is about 1 teaspoon of soap per cup of water). Lightly spray this solution onto the evaporator coils, ensuring not to oversaturate them or get water into electrical components. Allow the solution to sit for 5-10 minutes; this will give the soap time to effectively break down any accumulated grease and grime. For particularly stubborn areas or visible dirt, you can gently scrub with your soft-bristle toothbrush. Exercise extreme caution during this step to avoid bending or damaging the delicate fins, which can impair airflow. After letting the solution sit, lightly spray with plain water to rinse, again being mindful of electrical parts. Alternatively, and often more effectively, use a can of compressed air to meticulously blow out dust and debris from between the fins. Always direct the spray away from yourself and away from sensitive electrical connections.
Step 4: Address Mold and Mildew with Hydrogen Peroxide
If you observe any visible mold or mildew growth on the evaporator coils or on the interior casing of the unit, now is the opportune moment to thoroughly address it. Hydrogen peroxide is an excellent, non-toxic, and effective option for killing mold spores. Pour some 3% hydrogen peroxide into a separate clean spray bottle. Lightly mist the affected areas with the hydrogen peroxide solution. Allow it to sit undisturbed for approximately 10-15 minutes to ensure it fully disinfects and breaks down the mold. There is no need to rinse off the hydrogen peroxide, as it naturally decomposes into harmless water and oxygen. For any particularly persistent spots or stains, you can gently wipe with a clean cloth or carefully scrub with your toothbrush.
Step 5: Clean the Drain Pan and Drainage System
The drain pan, typically situated beneath the evaporator coils, is designed to collect condensation generated by the unit. This area is notoriously prone to accumulating stagnant water, leading to slime and mold growth. If the drain pan is easily accessible and removable, take it out and clean it thoroughly using your Dawn soap solution and warm water. Use a brush to scrub away any slime, mold, or debris that has built up. Rinse it very well and ensure it is completely dry before reinstalling it. Additionally, inspect the unit’s drain hole or drainage tube for any blockages and carefully clear them to ensure proper water runoff, preventing future water buildup and potential leaks.
Step 6: Clean the Blower Fan (If Accessible)
In some window AC units, the blower fan (also known as the squirrel cage fan) is accessible for cleaning. If your unit allows access, carefully inspect the fan blades for significant dust and grime buildup. This buildup can severely impede airflow. Use your soft-bristle toothbrush or a damp cloth moistened with the Dawn solution to gently wipe down the individual fan blades. Cleaning this component is crucial for maintaining optimal airflow and the overall efficiency of your unit.
Step 7: Clean Small Vents, Internal Surfaces, and Exterior Casing
As highlighted in the original method, it’s vital to “clean the small vents on the inside using a soft bristle toothbrush, then a can of compressed air.” These are typically the air outlet vents located on the interior side of the unit. Use your soft-bristle toothbrush to carefully dislodge any dust or debris trapped within these smaller vents and tight crevices. Follow up with a can of compressed air to effectively blast out any stubborn particles, ensuring maximum and unimpeded airflow. Also, take a moment to wipe down all accessible internal plastic surfaces with a damp cloth to remove any remaining dirt or cleaning solution residue. Finally, give the entire exterior casing of the window AC unit a good wipe-down with a damp cloth and mild soap solution to remove accumulated dust and fingerprints, restoring its clean appearance.
Step 8: Dry and Reassemble the Unit
Allow all cleaned components to air dry thoroughly and completely before you begin reassembling the unit. This step is absolutely critical to prevent the immediate re-growth of mold or mildew within the unit. You can use a clean, dry towel to speed up the drying process for external parts and plastic components. Once everything is confirmed to be completely dry, carefully reinsert the clean (or new) air filter, reattach the front grille, and secure any panels you removed using the screwdriver. Double-check that all connections and fastenings are secure and properly aligned.
Step 9: Final Test and Enjoy
Once your window AC unit is fully reassembled, plug it back into its power outlet. Turn it on and let it run for a few minutes, ideally on a high fan setting. You should immediately notice a significant improvement in airflow and potentially a much fresher, cleaner scent emanating from the unit. Listen carefully for any unusual noises and ensure that the unit is cooling effectively. Congratulations, you’ve successfully deep-cleaned your window AC unit!
Tips for Ongoing AC Maintenance and Longevity
To keep your window AC unit performing its absolute best and to ensure its longevity between deep cleans, consider integrating these simple, routine maintenance tips into your schedule:
- Regular Filter Checks: During peak usage seasons, make it a habit to check your air filter at least once a month. Clean or replace it as needed. A clean filter is your first and most effective line of defense against internal dirt buildup.
- Seasonal Deep Cleaning: Aim for a thorough, comprehensive deep clean of your entire unit at least once a year, ideally just before the start of the cooling season to ensure it’s ready for heavy use.
- Keep the Exterior Clear: Always ensure that no curtains, furniture, plants, or other debris are blocking the airflow around the unit’s intake and exhaust vents. Proper airflow is essential for efficient operation.
- Wipe Down Regularly: Quickly wipe the exterior casing of your unit with a damp cloth every few weeks. This simple step helps to prevent the accumulation of surface dust and keeps your unit looking tidy.
Conclusion
Cleaning your window AC unit might initially seem like a daunting chore, but with this straightforward, step-by-step guide, it transforms into an achievable and highly rewarding DIY project. By dedicating just a little time and effort to this essential maintenance, you’ll not only enjoy significantly cooler, cleaner, and healthier air within your home but also benefit from noticeably reduced energy bills and a significantly extended lifespan for your valuable appliance. This effective method, as brilliantly demonstrated by “How To Do It All” on YouTube, truly works wonders, transforming a grungy, inefficient unit into a fresh, high-performing cooling machine. Embrace this simple yet impactful maintenance routine, and breathe easier knowing your home’s air quality is top-notch and your AC unit is operating at its best.