
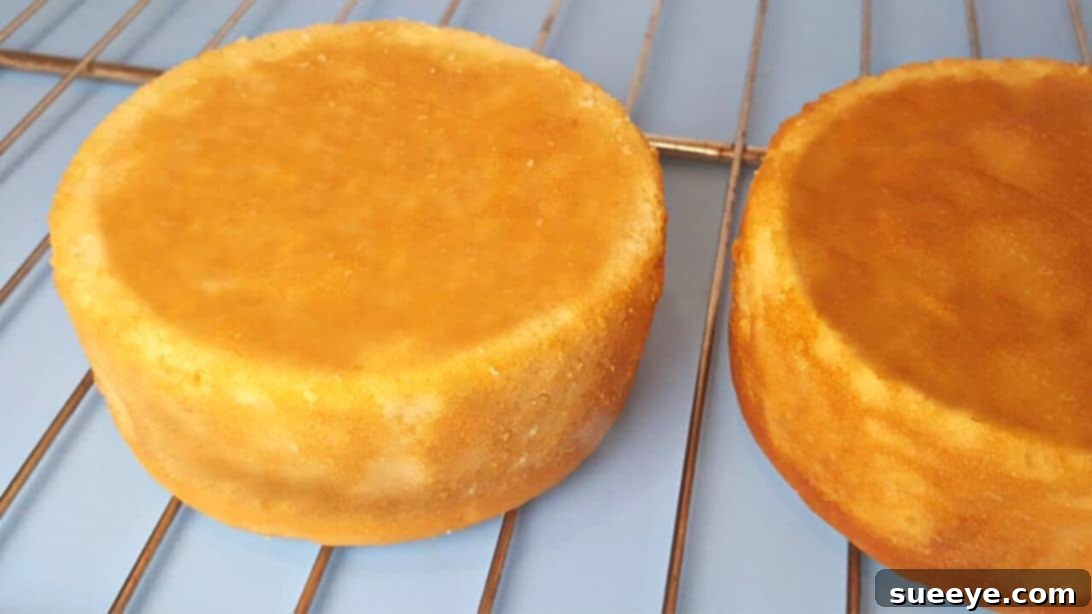
There’s something truly magical about a perfectly baked vanilla cake – the aroma filling your kitchen, the soft crumb, and the sweet, comforting flavor. While countless recipes promise perfection, very few deliver a truly fluffy and irresistibly moist vanilla cake. After experimenting with numerous online recipes, I can confidently say that this particular vanilla cake recipe, inspired by the talented Buttercut Bakery, stands head and shoulders above the rest. It consistently produces a cake that is light as air, incredibly soft, and bursting with delicate vanilla notes. It’s the kind of cake that makes any occasion feel special, or simply elevates an ordinary Tuesday into something extraordinary.
Whether you’re an experienced baker or just starting your culinary journey, this recipe is designed for success. Its straightforward steps and thoughtful techniques ensure a spectacular result every time. Get ready to bake a vanilla cake that will impress everyone, including yourself. Read on for the full instructions and valuable baking tips to achieve this delicious masterpiece.
Essential Ingredients for a Perfect Vanilla Cake
Crafting a truly exceptional vanilla cake starts with high-quality ingredients. Each component plays a vital role in achieving that coveted fluffy texture and rich, moist crumb. Here’s a detailed look at what you’ll need and why:
- 5 Large Eggs: Eggs provide structure, richness, and help with leavening. For best results, ensure your eggs are at room temperature. This allows them to incorporate more air when whisked, leading to a lighter, fluffier cake.
- 2 Cups (400g) Granulated Sugar: Sugar sweetens the cake and also contributes significantly to its moisture and tenderness by attracting and retaining water. It also helps with browning and tenderizing the crumb.
- 1 Cup (240ml) Vegetable Oil: Unlike butter, which contains water, oil is 100% fat, making cakes baked with oil incredibly moist and giving them a longer shelf life. It also contributes to a lighter, more open crumb structure. Canola or sunflower oil are good, neutral-flavored options.
- 3 and 3/4 Cups (450g) Cake Flour: This is a crucial ingredient for a truly fluffy cake. Cake flour has a lower protein content than all-purpose flour, which results in less gluten development and a more tender, delicate crumb. If you don’t have cake flour, you can make a substitute: for every cup of cake flour, use 7/8 cup (125g) all-purpose flour mixed with 2 tablespoons (15g) cornstarch, then sift thoroughly.
- 1 and 1/2 Cups (360ml) Whole Milk: Milk adds moisture and richness to the cake. Using whole milk contributes to a richer flavor and helps tenderize the cake due to its fat content. Like eggs, room temperature milk integrates more smoothly into the batter.
- 1 Tablespoon Baking Powder: This chemical leavening agent is essential for giving the cake its rise and airy texture. Ensure your baking powder is fresh for optimal results; you can test its freshness by adding a teaspoon to hot water – it should bubble vigorously.
- Pinch of Salt (approx. 1/4 teaspoon): A small amount of salt enhances the sweetness of the cake and balances the flavors, preventing it from tasting flat. Don’t skip it!
- 1 Tablespoon Pure Vanilla Extract: This is where the “vanilla” in vanilla cake comes from! Opt for high-quality pure vanilla extract for the best flavor. Imitation vanilla can leave an artificial aftertaste.
Step-by-Step Instructions for Your Best Vanilla Cake
Baking this fluffy and moist vanilla cake is a rewarding experience, especially when you follow these instructions carefully. Precision and technique are key to achieving that perfect texture and flavor. Make sure all your ingredients are measured accurately and are at room temperature unless otherwise specified, as this greatly impacts the final outcome of your cake.
Step 1: Whisk the Eggs for Volume
In a large mixing bowl, crack the 5 large, room-temperature eggs. Using an electric mixer (either a stand mixer with a whisk attachment or a hand mixer), begin whisking the eggs on a high setting for about 2 to 3 minutes. Your goal here is to incorporate air into the eggs, making them light, frothy, and pale yellow. This aeration is the first step towards achieving a truly fluffy cake.
Step 2: Incorporate Sugar and Continue Aerating
Gradually add the 2 cups of granulated sugar to the whisked eggs, a little at a time, while continuing to mix on high speed. Continue beating for another 3 to 4 minutes. The mixture should transform into a pale, thick, and very fluffy consistency, forming what bakers call a “ribbon.” When you lift the whisk, the batter should fall back into the bowl in a thick ribbon that holds its shape on the surface for a few seconds before dissolving. This step is crucial for both sweetness and contributing to the cake’s light texture.
Step 3: Gently Fold in the Oil
Pour the 1 cup of vegetable oil into the egg and sugar mixture. Mix on a low setting, or gently fold with a spatula, until just combined. Be careful not to overmix at this stage; you simply want to integrate the oil evenly. The oil contributes significantly to the cake’s moistness and tender crumb, so ensure it’s fully incorporated without deflating the airy egg mixture.
Step 4: Prepare the Dry Ingredients
In a separate medium-sized bowl, sift together the 3 and 3/4 cups of cake flour, 1 tablespoon of baking powder, and the pinch of salt. Sifting is vital as it removes any lumps, aerates the flour, and ensures the leavening agents are evenly distributed throughout the dry mixture. Use a whisk to combine these ingredients thoroughly, ensuring every bite of your cake rises evenly.
Step 5: Alternate Wet and Dry Ingredients for a Smooth Batter
Now, it’s time to combine your wet and dry mixtures using the “alternating” method, which helps prevent overmixing and ensures a smooth, uniform batter. Add approximately one-third of the sifted flour mixture to your wet ingredients. Mix on a low setting just until it’s fully incorporated and no dry streaks remain. Then, add about one-third of the 1 and 1/2 cups of milk and mix until just combined. Repeat this process, alternating between flour and milk, ending with the final portion of flour. Always mix on the lowest speed possible and stop as soon as the ingredients are blended to avoid developing tough gluten.
Step 6: Add the Vanilla Extract
Once your batter is smooth and lump-free, add the 1 tablespoon of pure vanilla extract. Mix on the lowest setting for only a few seconds, just until the vanilla is evenly distributed. Adding vanilla last helps preserve its delicate flavor, which can sometimes be cooked off if added too early.
Step 7: Chill the Cake Batter
Cover the bowl of cake batter tightly with plastic cling wrap and place it in the refrigerator for about 20 to 30 minutes. This chilling step is a fantastic technique that helps hydrate the flour further, relaxes the gluten, and allows the flavors to meld. The slightly firmer, chilled batter also bakes more evenly, contributing to that desirable moist and fluffy texture.
Step 8: Prepare Your Baking Pan
While the batter is chilling, prepare your baking pan(s). Generously grease all the sides and bottom of your baking mold (e.g., two 8-inch round pans or one 9×13 inch rectangular pan) with butter or cooking spray. Then, line the bottom of the pan with parchment paper. You can trace the bottom of your pan onto parchment and cut it out. For round pans, you can also cut strips of parchment for the sides. This ensures that your beautiful cake will release effortlessly after baking, preventing any sticking or tearing.
Step 9: Fill the Mold and Prepare for Even Baking
Pour the chilled cake batter into your prepared mold(s), filling each about three-quarters of the way full. This allows ample space for the cake to rise without overflowing. Gently tap the pan(s) on your countertop a few times to release any large air bubbles trapped within the batter, which helps create a more even crumb. If you want to achieve a perfectly flat-topped cake without doming, consider using baking strips. These can be purchased, or you can make your own: soak old kitchen towels or strips of aluminum foil wrapped around wet paper towels in water, then wrap them tightly around the outside of your cake pan. These strips insulate the sides of the pan, causing the cake to rise more evenly.
Step 10: Bake to Golden Perfection
Preheat your oven to 330 degrees Fahrenheit (165 degrees Celsius). Once preheated, carefully place your cake pan(s) inside the oven. Bake for approximately 40 minutes, though baking times can vary slightly depending on your oven and the size of your pan. To check for doneness, insert a clean wooden skewer or a thin knife into the center of the cake. It should come out clean, with no wet batter attached. The cake should also be golden brown on top and spring back lightly when gently pressed.
Step 11: Cool and Store Your Masterpiece
Once baked, remove the cake from the oven and carefully remove any baking strips. Allow the cake to cool in its pan for 5 to 10 minutes on a wire rack. This initial cooling period allows the cake to set and prevents it from crumbling. After this time, invert the cake onto the wire rack, remove the parchment paper, and let it cool completely. Cooling on a wire rack ensures air circulation all around the cake, preventing condensation and sogginess. If you plan to use the cake the next day, once fully cooled, wrap it tightly in plastic film to lock in moisture. If you wish to freeze it for later, wrap it first in plastic film, then tightly in aluminum foil, or place it in a freezer-safe bag. Frozen cake can last for several weeks and thaws beautifully, maintaining its moistness.
Tips for a Perfect Fluffy and Moist Vanilla Cake Every Time
Achieving the perfect vanilla cake isn’t just about following the steps; it’s also about understanding the nuances of baking. Here are some extra tips to ensure your cake is always a success:
- Room Temperature Ingredients are Key: This cannot be stressed enough. Room temperature eggs and milk emulsify better, incorporate air more efficiently, and result in a smoother, more uniform batter.
- Measure Accurately: Baking is a science. Use a kitchen scale for flour and sugar if possible, or use the “spoon and level” method for flour to avoid adding too much.
- Do Not Overmix: Overmixing develops gluten, leading to a tough, dry cake. Mix only until ingredients are just combined.
- Preheat Your Oven: Always preheat your oven for at least 15-20 minutes before baking to ensure it reaches and maintains the correct temperature.
- Trust Your Senses (and a Skewer): Oven temperatures vary. While the time is a guide, rely on the skewer test and visual cues (golden brown, springs back) for doneness.
- Invest in Good Vanilla: Since vanilla is the star flavor, a high-quality pure vanilla extract will make a noticeable difference in taste.
Serving Suggestions and Delicious Variations
This fluffy and moist vanilla cake is fantastic on its own, but it also serves as a perfect canvas for various toppings and flavors. Here are some ideas to elevate your cake experience:
- Classic Buttercream: A simple vanilla or cream cheese buttercream frosting is the traditional choice and complements the cake beautifully.
- Fresh Berries and Cream: For a lighter touch, serve slices with a dollop of whipped cream and a medley of fresh seasonal berries like strawberries, raspberries, or blueberries.
- Citrus Zest: Add the zest of one lemon or orange to the batter with the vanilla extract for a bright, zesty twist.
- Almond Extract: Substitute half of the vanilla extract with pure almond extract for a delicate almond flavor profile.
- Simple Glaze: A quick powdered sugar glaze (powdered sugar mixed with a little milk or lemon juice) can be drizzled over the top for an elegant finish.
- Chocolate Ganache: For chocolate lovers, a luscious chocolate ganache poured over the cooled cake creates a rich and decadent dessert.
Experience the Joy of Homemade Fluffy and Moist Vanilla Cake
Baking this fluffy and moist vanilla cake is more than just following a recipe; it’s an act of creation, a moment of comfort, and a sure way to bring smiles to faces. The dedication to quality ingredients and careful technique truly shines through in every tender, flavorful bite. You’ll find yourself reaching for this recipe again and again for birthdays, celebrations, or simply to treat yourself to an exquisite homemade dessert.
So, gather your ingredients, set aside some time, and embark on this delightful baking adventure. You’ll be amazed at how simple it is to achieve such a professional-quality cake in your own kitchen. Share your creations with loved ones, and savor the pure, unadulterated joy of a truly perfect vanilla cake. Happy baking!