
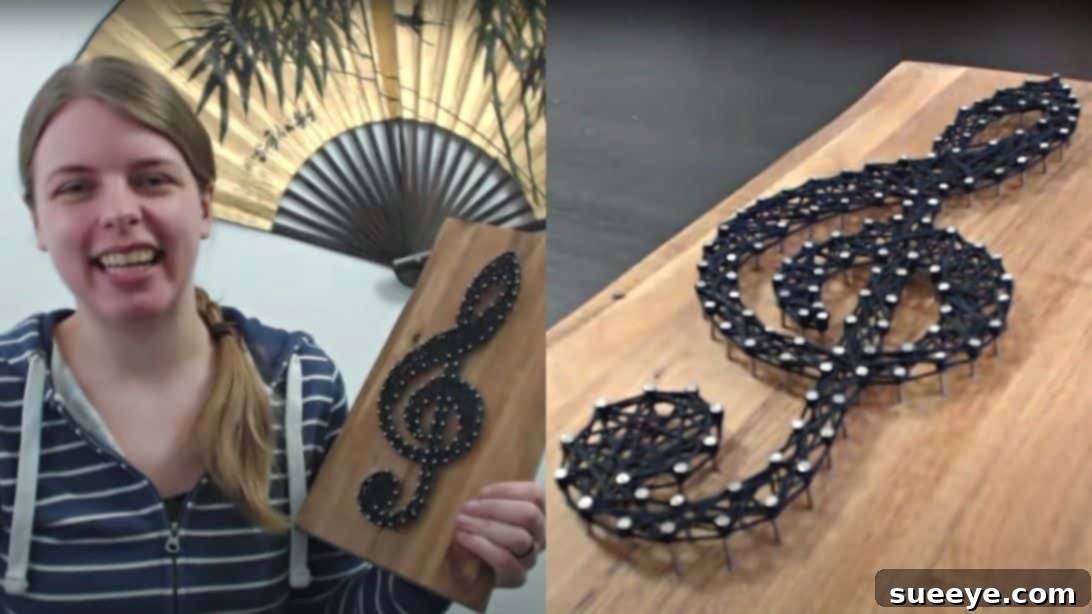
Unlock Your Creativity: The Ultimate Beginner’s Guide to Stunning String Art
String art has taken the creative world by storm, captivating enthusiasts with its unique blend of simplicity and striking visual appeal. What starts as a collection of threads and nails transforms into a beautiful piece of art that can personalize any space. More than just a captivating decorative item, string art offers a wonderfully meditative hobby that can help you unwind and express your artistic side. Whether you’re searching for a new craft to dive into, a thoughtful handmade gift idea, or even a promising venture to sell your creations online, this comprehensive tutorial is your perfect starting point. We’ll guide you through every step, ensuring you master the techniques to craft your own beautiful string art pieces. This detailed guide draws inspiration from the fantastic work of Crafts With Ellen, whose clear instructions are invaluable for any budding string artist.
My own journey into string art began as a simple experiment, but it quickly blossomed into a passion. The initial pieces I created were well-received by family and friends, leading to an exciting turn: I started getting requests for custom string art, and yes, they were paid commissions! This experience truly highlights the potential of string art not only as a fulfilling hobby but also as a viable craft to sell. If you’re ready to explore this rewarding craft and perhaps even turn it into a source of income, let’s gather our materials and begin this creative adventure.
Essential Materials for Your String Art Project
Before embarking on your string art journey, it’s crucial to gather all the necessary materials. Having everything ready ensures a smooth and enjoyable crafting experience. Here’s a detailed list of what you’ll need, along with tips for choosing the best options:
- A Piece of Wood: The foundation of your string art. Plywood, MDF, or even a reclaimed wood board works wonderfully. Opt for a smooth, flat surface. The size will depend on your chosen pattern, but beginners might start with a 10×10 or 12×12 inch piece.
- Saw: If your wood isn’t already cut to size, a hand saw or power saw will be needed. Always prioritize safety when using cutting tools.
- Sandpaper: Essential for smoothing the edges of your wood. Start with a coarser grit (like 80-100) for rough edges and finish with a finer grit (180-220) for a silky-smooth surface.
- Lots of Small Nails: These will form the framework for your string. Brads or finishing nails, typically 1/2 inch to 1 inch long, work best. Choose nails with a small head to prevent the string from slipping off easily. The quantity depends on your pattern’s complexity, but it’s always good to have extra.
- Hammer: A small, lightweight hammer is ideal for precision work and less tiring for your hands.
- Small Pliers: Indispensable for holding tiny nails in place while hammering, preventing injuries, and helping to remove bent or misplaced nails.
- Hooks/Other Hardware to Hang Your Piece: D-rings, saw-tooth hangers, or eye hooks are common choices. Ensure they are appropriate for the weight of your finished artwork.
- String: The heart of your string art! Cotton yarn, embroidery floss, or crochet thread are excellent choices due to their strength and vibrant color options. The example often uses cotton yarn suitable for crochet, known for its durability and rich texture. Experiment with different thicknesses for varied effects.
- Scissors: Sharp scissors are crucial for clean cuts and preventing fraying.
- Big (Yarn) Needle: A blunt-tipped yarn needle is perfect for weaving in loose ends and navigating tight spaces without piercing the wood or existing strings.
Consider the color palette of your string and how it will complement your chosen wood or the space where the art will hang. Don’t be afraid to experiment with different types and colors of string to add depth and personality to your creations.
Step-by-Step Guide to Creating Your String Art Masterpiece
Step 1: Preparation and Nailing the Foundation
The success of your string art hinges on careful preparation and precise nail placement. This initial phase sets the stage for the beauty that will emerge.
Choosing and Preparing Your Pattern
Start by selecting the image or design you wish to transform into string art. Simple shapes, silhouettes, letters, or geometric designs are excellent for beginners. Print your chosen picture to the desired size, ensuring it fits comfortably on your wood piece. Carefully cut out the shape, creating a stencil-like outline. This will serve as your guide for nail placement.
Wood Preparation: Cutting and Smoothing
Next, cut your wood board to the exact dimensions required for your pattern. If you’re using a pre-cut board, you might skip this step. Once cut, the edges of the wood will likely be rough. Take your sandpaper and thoroughly smooth out all edges and surfaces. Starting with a coarser grit (e.g., 80-100) to remove splinters and significant imperfections, then progressing to a finer grit (e.g., 180-220) for a smooth finish. This step not only makes the piece aesthetically pleasing but also prevents snags on your string later.
Attaching Hanging Hardware
Before you place your pattern, secure the hanging hardware to the back of the wood. This ensures that when your masterpiece is complete, it’s ready for display. Position the hook (D-ring or saw-tooth hanger) centrally at the top edge of the back of the board, ensuring it will allow your artwork to hang level.
Securing the Pattern and Nailing
Carefully center your cut-out paper pattern on the front of the prepared wood. Secure it firmly in place using masking tape or painter’s tape; you want it to be flat and not shift during the nailing process. Now, with your small nails and hammer, begin meticulously hammering the nails along the outline of your pattern. Aim for consistent spacing between each nail (usually 1/4 to 1/2 inch apart, depending on the pattern’s detail and desired string density) and uniform depth for each nail (leaving about 1/2 to 3/4 inch exposed). Use your small pliers to hold the nails steady, especially the smaller ones, to protect your fingers and ensure they go in straight. For intricate corners or tight curves, you might need to place nails closer together. Once all nails are in place, gently peel off the paper pattern from the wood. Any leftover paper fragments clinging to the nails can be easily removed using a stiff brush, like a dishwashing brush, or even a toothpick for precision.
Step 2: The Art of Stringing Your Design
With your nails securely in place, it’s time for the most creative and visually rewarding part: stringing your design. This is where your artwork truly comes to life.
Starting the Outline
Choose your first color of string. Begin by tying a secure knot around one of the nails on the outermost perimeter of your design. Ensure the knot is tight so the string doesn’t slip. Now, start winding the string around each consecutive nail head along the outline of your pattern. Maintain a consistent, gentle tension as you go, ensuring the string sits snugly around the base of each nail head. This creates a clean, defined border for your artwork. When you return to the very first nail you tied your string to, loop the string around it one more time and tie a firm knot to secure the outline. Trim any excess string close to the knot.
Addressing Loose Nails
Occasionally, a nail might become loose during the stringing process, especially if tension is uneven. If this happens, don’t worry. Gently pull the nail out, apply a small drop of strong adhesive (like super glue or wood glue) into the nail hole, and re-insert the nail firmly. Allow the glue to dry completely before continuing to string around that particular nail.
Filling the Interior: Creativity Unleashed
This is where your string art truly comes alive and where you can unleash your creativity. There are several ways to fill the interior of your design:
- Geometric Patterns: For a structured and striking look, you can create various geometric patterns. This often involves criss-crossing the string from one nail to a non-adjacent nail on the opposite side, then moving to the next nail on the perimeter and repeating the criss-cross. You can create triangles, squares, or more complex starburst effects by varying the nails you connect.
- Random Fill: A simpler approach is to criss-cross the string randomly between nails within the boundary. This technique often results in a dense, web-like appearance, creating interesting textures and shadows.
- Layered Stringing: Experiment with different colors and layers. You might use one color for the outer outline, then another for the initial interior fill, and a third for a final, denser layer or specific accents.
- Directional Stringing: You can create a sense of movement or direction by stringing in specific patterns, such as all lines radiating from a central point, or lines flowing horizontally, vertically, or diagonally across the design.
As you string, be mindful of the yarn’s tendency to unravel, especially if you’re using a looser twist yarn. Handle it gently and maintain an even tension. The key to a beautiful finish is consistency. Try to end your stringing at the same nail you began your interior fill, or at a nail that allows you to discreetly hide the knot.
Finishing Your String Art Piece
Once you’ve filled your design to your satisfaction, it’s time to secure the end of the string. Carefully insert the end of the yarn into your big yarn needle. Weave the needle underneath one or two existing strings attached to a nail, making sure the new string is well-hidden and secured. Then, tie a small, tight knot around the base of that nail or around an existing string, ensuring it won’t come undone. Trim any excess string close to the knot, making it as invisible as possible.
Beyond the Basics: Tips, Variations, and Selling Your Creations
Creative Variations and Personalization
Once you’ve mastered the basic techniques, the possibilities for string art are endless. Don’t be afraid to experiment:
- Multi-Color Designs: Introduce multiple colors to create gradients, contrasting sections, or emphasize different elements of your design. Plan your color changes carefully to ensure a harmonious result.
- Adding Embellishments: Consider incorporating small beads, sequins, or even tiny dried flowers into your string art for added texture and visual interest.
- Different Wood Finishes: Before nailing, you can paint or stain your wood board. A dark stain can make bright strings pop, while a light paint might offer a more minimalist aesthetic.
- Text and Typography: Create string art pieces that spell out names, inspiring words, or quotes. This makes for incredibly personalized gifts.
- Geometric Abstractions: Move beyond predefined shapes and create abstract geometric patterns that play with lines, angles, and color blocking.
String art is a highly customizable craft, making it perfect for creating unique gifts for birthdays, weddings, or housewarmings. Imagine a string art piece depicting a couple’s initials or a silhouette of a pet!
The Therapeutic Benefits of String Art
Beyond its aesthetic appeal, string art offers several therapeutic advantages. The repetitive motion of hammering nails and winding string can be incredibly meditative and calming, making it a wonderful stress-relief activity. It encourages focus and mindfulness, allowing you to disconnect from daily worries and immerse yourself in a creative flow state. Furthermore, completing a string art project provides a profound sense of accomplishment, boosting confidence and fostering a can-do attitude towards new challenges.
Turning Your Hobby into a Business: Selling String Art Online
As mentioned earlier, string art has the potential to be a profitable side hustle. If your creations are well-made and you enjoy the process, consider selling them. Here’s how to get started:
- Quality is Key: Ensure your string art pieces are meticulously crafted. Pay attention to neatness, consistent tension, secure knots, and smooth finishes on the wood.
- Photography Matters: High-quality, well-lit photographs are crucial for online sales. Showcase your art from different angles, highlighting details and texture. Lifestyle shots (e.g., hanging in a beautifully decorated room) can also help customers visualize the product.
- Pricing Your Work: Calculate the cost of your materials and factor in your time. Research similar string art pieces online to get an idea of competitive pricing. Don’t undersell your talent and effort!
- Where to Sell: Online marketplaces like Etsy, Shopify, or even local craft fairs and art markets are excellent platforms. You can also leverage social media platforms like Instagram and Pinterest to showcase your work and drive traffic to your shop.
- Branding: Develop a unique name for your craft business and create a consistent brand aesthetic. This helps your work stand out and creates a memorable experience for customers.
- Custom Orders: Offer personalized or custom-made string art pieces. This can be a significant draw for customers looking for unique gifts.
Selling your string art not only provides an income but also allows you to share your passion with a wider audience and connect with other craft enthusiasts.
Care and Maintenance of Your String Art
To keep your string art looking its best, follow these simple care tips: Dust regularly with a soft, dry cloth or a feather duster. Avoid direct sunlight, as prolonged exposure can fade the string colors over time. Keep it away from high humidity areas to prevent wood warping or string degradation. If any string becomes loose, a tiny dab of fabric glue can help secure it back in place.
Embark on Your String Art Journey Today!
String art is a wonderfully accessible and deeply rewarding craft that offers endless possibilities for creativity and personalization. From selecting your perfect pattern and meticulously hammering each nail to delicately weaving the colorful threads, every step in the process is an opportunity to create something truly unique and beautiful. Whether you’re looking to adorn your own living space, craft meaningful gifts for loved ones, or even establish a thriving online business, this tutorial provides the foundational knowledge you need to succeed. Remember, practice makes perfect, and each piece you create will further refine your skills and artistic vision. So, gather your materials, follow these steps, and prepare to be amazed by what you can create with just a few nails and a length of string. We extend our sincere gratitude to Crafts With Ellen for her inspiration and excellent guidance. Now, go forth and string your art!