
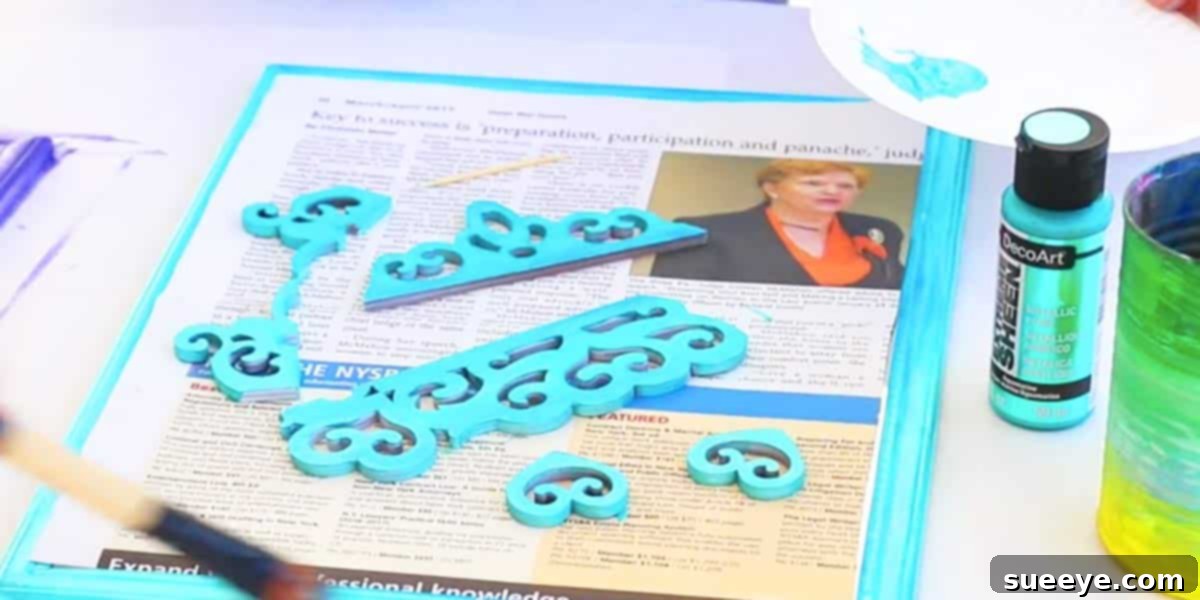
Transform Your Home: Crafting an Exquisite DIY Moroccan Laser Cut Mirror
There’s an undeniable magic in discovering a DIY project that instantly captivates your imagination, promising to infuse your living space with unique character and charm. For many, that moment arrives with the first glance at a magnificent Moroccan-inspired mirror. Imagine a piece that perfectly blends intricate design with an air of exotic elegance, yet remains surprisingly accessible to create. This isn’t just another craft project; it’s an opportunity to bring a touch of timeless artistry into your home, reflecting not only your image but also your personal style.
The allure of Moroccan aesthetics, characterized by geometric patterns, ornate details, and a rich cultural heritage, has long inspired interior designers and homeowners alike. When this author first encountered the concept of using laser-cut pieces to achieve such a sophisticated look, the initial thought was of prohibitive expense. However, a quick dive into online resources revealed a delightful surprise: laser-cut frames are incredibly affordable, with prices starting under $2.00 at craft stores like Hobby Lobby, depending on size and complexity. Pair these exquisite pieces with an inexpensive framed mirror, and you have the foundation for a truly remarkable and budget-friendly home decor transformation.
This project, despite its seemingly complex appearance, is remarkably straightforward and budget-conscious. What you’ll create is a statement piece that unequivocally looks far more expensive than its actual cost. It’s a testament to the power of thoughtful DIY – transforming humble materials into an artifact of enduring beauty. A DIY Moroccan laser cut mirror is more than just a reflective surface; it’s a conversation starter, a focal point, and a timeless addition that seamlessly integrates into various decor styles, from the vibrant bohemian to the thoughtfully curated eclectic.
Embracing Bohemian and Eclectic Elegance
The beauty of this DIY Moroccan mirror lies in its inherent versatility. For enthusiasts of bohemian and eclectic design, this piece is an absolute dream. It effortlessly complements spaces filled with vivid colors, diverse textures, and treasures from around the globe. In a home already adorned with brightly colored pillows, hand-painted furniture, and a collection of unique artwork, a mirror painted in a bold, favorite color – such as a vibrant turquoise – acts as a unifying element, pulling together disparate elements into a cohesive and inviting narrative. This deliberate choice of color, far from being an arbitrary preference, can become a signature touch that resonates throughout your entire home decor.
Creating a living environment that is both warm and cozy, as many guests describe this author’s home, is a true art form. It’s about layering, personalization, and choosing pieces that evoke comfort and joy. This DIY mirror contributes significantly to that atmosphere. Its intricate patterns add visual interest and depth, preventing a space from feeling bland or uninspired. The reflective quality of the mirror itself also plays a crucial role, bouncing light around the room, making it feel more expansive and brighter, enhancing that desired sense of warmth and welcome that truly makes a house a home.
The Undeniable Allure of DIY Home Decor Projects
Beyond the aesthetic appeal and cost savings, engaging in DIY home decor projects offers a wealth of personal benefits. There’s an immense satisfaction that comes from creating something beautiful with your own hands, transforming raw materials into a cherished item for your home. This process isn’t just about the end product; it’s about the journey of discovery, problem-solving, and the pure joy of creative expression. DIY projects provide an escape from the mundane, allowing you to channel your energy into a constructive and rewarding activity.
Moreover, DIY allows for unparalleled customization. Unlike mass-produced items, your handmade mirror can be tailored to your exact specifications. Want it in a specific shade to match an existing artwork? You can paint it. Prefer a distressed finish for a vintage appeal? That’s entirely within your control. This level of personalization ensures that your decor truly reflects your unique personality and vision, creating a home that feels authentically yours rather than a showroom display. It’s an empowering experience that fosters a deeper connection to your living space, making every corner feel purposeful and loved.
Gathering Your Materials for This Stunning Project
While the full step-by-step tutorial (which we will link at the end) provides comprehensive details, here’s a general overview of the materials you’ll likely need to embark on this exciting DIY journey. One of the greatest advantages of this project is its reliance on readily available and affordable components, making it accessible to almost anyone eager to try their hand at crafting.
- A Pre-framed Mirror: Look for an inexpensive, basic framed mirror. Thrift stores, discount retailers, or even the clearance section of craft stores are excellent places to find suitable options. The frame itself doesn’t need to be fancy, as it will be transformed.
- Laser-Cut Wood or MDF Pieces: These are the stars of the show, providing the intricate Moroccan patterns. Hobby Lobby, local craft stores, or online retailers specializing in craft supplies often stock a wide variety of designs and sizes. Select patterns that resonate with the Moroccan or bohemian aesthetic you desire.
- Craft Glue or Wood Adhesive: A strong adhesive suitable for bonding wood or MDF to your mirror frame. E6000 or a similar craft adhesive is often recommended for its strong hold.
- Acrylic or Spray Paint: Choose your desired color. As mentioned, turquoise can create a vibrant, statement piece, but metallics (gold, silver, copper), deep jewel tones, or even matte black can create entirely different yet equally stunning effects.
- Paint Brushes or Applicators: For applying paint evenly and getting into the intricate details of the laser-cut pieces.
- Protective Drop Cloth or Newspaper: To protect your work surface during painting.
- Optional: Sandpaper (fine grit for light sanding), clear sealant (to protect the paint finish).
A Glimpse into the Creation Process
Though we’re linking to the detailed tutorial, understanding the general flow of this DIY project can help demystify it and encourage you to start. The process is designed to be enjoyable and manageable, even for those with limited crafting experience. The key is patience and attention to detail, especially when working with intricate laser-cut designs.
- Prepare Your Mirror: Clean the mirror surface and, if necessary, lightly sand the existing frame for better paint adhesion. If you’re painting the original frame a new color, apply a base coat.
- Arrange the Laser-Cut Pieces: Before gluing, experiment with the placement of your laser-cut pieces on the mirror frame. Play with different arrangements until you achieve a pattern that is visually appealing and symmetrical. This step is crucial for visualizing the final look.
- Adhere the Pieces: Carefully apply glue to the back of each laser-cut piece and firmly press it onto the mirror frame. Allow ample time for the adhesive to cure completely, as per the product instructions, to ensure a strong bond.
- Paint Your Masterpiece: Once the glue is fully dry, it’s time for the transformation! Apply your chosen paint color to both the laser-cut pieces and any visible parts of the original mirror frame. Several thin coats often yield a smoother, more professional finish than one thick coat. Allow each coat to dry thoroughly.
- Optional Finishing Touches: If desired, apply a clear sealant to protect the paint and give it a durable finish. You can also add distressing for an aged look or highlight certain details with metallic accents.
This simple sequence of steps culminates in a truly remarkable decorative piece. The satisfaction of seeing your vision come to life, from humble materials to a stunning focal point, is unparalleled.
Integrating Your Moroccan Mirror into Diverse Interiors
Once your beautiful DIY Moroccan mirror is complete, the next exciting step is deciding where to place it to maximize its impact. Its versatility allows it to enhance various rooms and decor themes, making it a truly adaptable piece. Consider it not just as a mirror, but as a piece of art that reflects and amplifies the existing beauty of your home.
- Entryway Welcome: Placing the mirror in your entryway creates an immediate statement, setting a sophisticated tone for your entire home. It also offers a convenient spot for a last-minute check before heading out.
- Living Room Focal Point: Above a fireplace, sofa, or console table, the mirror becomes a captivating focal point. Its intricate details draw the eye, while its reflective surface can make the living room feel larger and brighter.
- Bedroom Serenity: In the bedroom, a Moroccan mirror can add a touch of exotic romance and tranquility. Placed above a dresser or as part of a gallery wall, it contributes to a serene and personalized retreat.
- Dining Room Elegance: Hung in the dining room, it can reflect the glow of candlelight during evening meals, creating an intimate and elegant ambiance.
- Gallery Wall Addition: Integrate it into a larger gallery wall arrangement, mixing it with artwork, photographs, and other decorative elements to create a dynamic and visually rich display.
Remember that a mirror’s placement also influences light and space. Strategically positioning your DIY Moroccan mirror to reflect a window or a beautiful piece of art can dramatically alter the feel of a room, enhancing brightness and perceived depth. This smart styling choice further elevates the mirror beyond a mere decorative object to a functional element of interior design.
Finding Inspiration and Empowering Your Creativity
This project, like many brilliant DIY endeavors, comes to us thanks to creative minds such as Mark Montano. His ability to distill complex-looking designs into achievable, step-by-step tutorials is truly inspiring. The internet is a treasure trove of such inspiration, proving that with a little guidance and a willingness to try, anyone can transform their home with personalized touches.
Embracing DIY isn’t just about saving money; it’s about fostering a deeper connection with your living space. It’s about injecting your personality into every corner, making your home a true reflection of who you are. So, if you’re looking for a project that promises high visual impact with low financial investment, and offers the immense satisfaction of creating something beautiful with your own hands, then this DIY Moroccan laser cut mirror is undoubtedly for you. It’s an invitation to unleash your inner designer and craft a timeless piece that will be admired for years to come.
Ready to embark on this fabulous journey? You can find Mark Montano’s comprehensive step-by-step tutorial, which served as the inspiration for this amazing project, at the end of this post. Dive in and transform your space!