
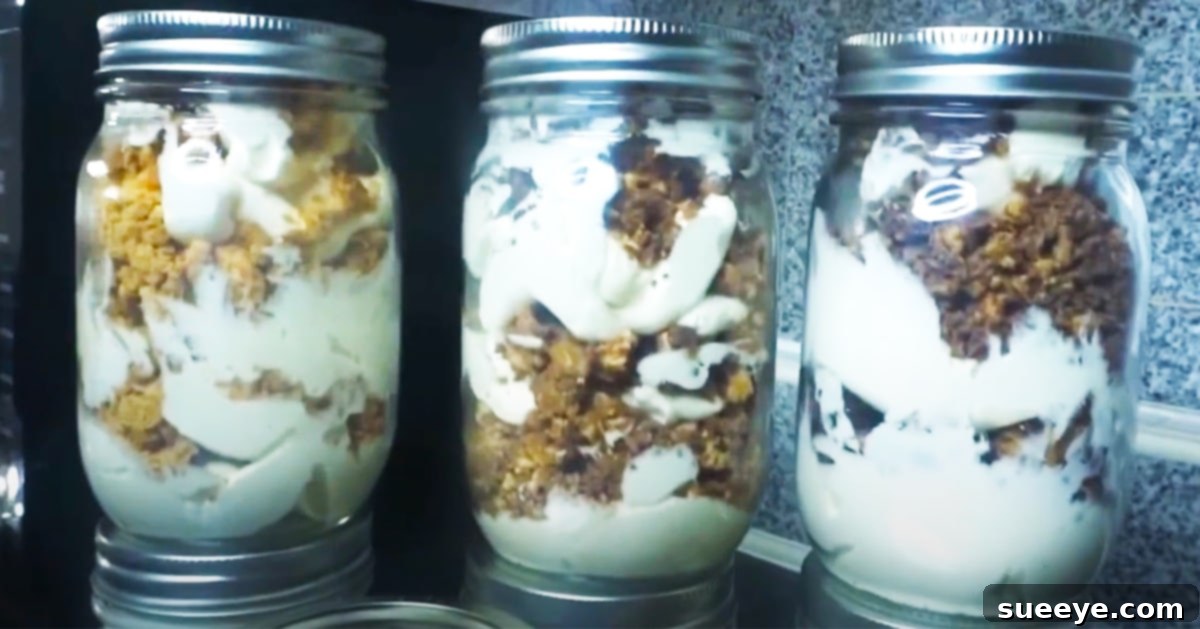
The culinary world is often perceived as complex, filled with intricate techniques and extensive ingredient lists that can intimidate even the most enthusiastic home cooks. However, sometimes, the simplest recipes yield the most delightful results. My recent discovery of The Cooper Family’s no-bake cheesecake tutorial on YouTube was a revelation, perfectly illustrating this principle. It completely reshaped my understanding of homemade cheesecake, proving that a truly delicious dessert doesn’t require hours of labor or a professional pastry chef’s expertise. The sheer simplicity of this recipe, astonishingly requiring only three core ingredients, blew my mind. It’s a game-changer for anyone who loves the rich, creamy indulgence of cheesecake but shies away from the traditional baked methods.
What makes this no-bake cheesecake in a jar particularly appealing is its incredible versatility and the sheer ease of preparation. The base recipe is so straightforward, leaving ample room for endless creativity when it comes to toppings. From decadent chocolate bars to fresh seasonal fruits, the possibilities are limited only by your imagination. The key, as I learned, is to simply blend or crush your chosen toppings before layering them in. This streamlined approach to dessert making is incredibly attractive to me. While I do enjoy a good challenge in the kitchen from time to time, I genuinely dislike spending endless hours on a single dish, especially when the goal is a quick and satisfying treat. This recipe strikes the perfect balance: it’s incredibly easy, yet the finished product looks sophisticated and utterly delicious. Furthermore, the individual portions in mason jars make these cheesecakes ideal for travel, packing in a lunch bag, or serving at gatherings without the fuss of slicing and plating. They are not just desserts; they are convenient, portable, and utterly charming culinary creations.
Essential Ingredients for Your No-Bake Cheesecake
Achieving a velvety smooth and delightfully rich no-bake cheesecake requires just a handful of quality ingredients. This minimalist approach ensures that each component shines, creating a harmonious balance of flavors and textures. The beauty of this recipe truly lies in its simplicity, making it accessible to even beginner bakers.
- 2 (12-ounce) blocks full-fat cream cheese, softened to room temperature: The foundation of any great cheesecake, cream cheese provides the characteristic tangy flavor and incredibly creamy texture. Using full-fat cream cheese is crucial for achieving the desired richness and stability in a no-bake dessert. Ensuring it’s at room temperature is paramount; cold cream cheese will result in a lumpy mixture, no matter how much you blend it.
- 2 teaspoons pure vanilla extract: Vanilla extract is a flavor enhancer that adds warmth, depth, and a subtle aromatic sweetness to the cheesecake filling. Opt for pure vanilla extract over imitation for the best taste, as its nuanced notes beautifully complement the cream cheese.
- 1 cup powdered sugar (confectioners’ sugar): Unlike granulated sugar, powdered sugar dissolves instantly, guaranteeing a smooth and lump-free filling without the need for extensive mixing. It provides the perfect level of sweetness while contributing to the light and airy texture of the no-bake mixture.
Optional Toppings: Unleash Your Creativity
While the three core ingredients create a magnificent cheesecake on their own, the real fun begins with customizing your jars with an array of delicious toppings. These suggestions are just a starting point; feel free to experiment with your favorite candies, fruits, and sauces to personalize each serving.
- Butterfingers: Crushed Butterfingers add a delightful crunch and a unique peanut butter and toffee flavor.
- Reese’s Peanut Butter Cups: Chopped Reese’s cups bring a classic chocolate and peanut butter combination that is always a crowd-pleaser.
- Snickers: Diced Snickers offer a decadent mix of chocolate, caramel, nougat, and peanuts, creating a truly indulgent experience.
- Oreos: Crushed Oreos are a universally loved topping, providing a satisfying crunch and a rich chocolatey flavor that pairs perfectly with cheesecake.
- Nutter Butter: For peanut butter enthusiasts, crushed Nutter Butter cookies offer an intense peanut butter flavor and a pleasant textural contrast.
Beyond Candy: More Topping Ideas
Don’t limit yourself to just candy! Consider these additional categories for expanding your topping repertoire:
- Fresh Fruits: Sliced strawberries, blueberries, raspberries, mango, or peaches add a refreshing tartness and vibrant color.
- Fruit Compotes or Sauces: Homemade or store-bought berry compotes, cherry pie filling, or a simple lemon curd can elevate your cheesecake.
- Chocolate: Chocolate shavings, mini chocolate chips, or a drizzle of chocolate fudge sauce are always welcome additions.
- Caramel: A generous drizzle of salted caramel sauce provides a sophisticated sweetness.
- Nuts: Chopped pecans, walnuts, or almonds can add a lovely crunch and earthy flavor.
- Cookie Crumbles (Crust): While not explicitly listed as an ingredient, a simple crushed cookie crust (like graham crackers, Oreos, or Biscoff mixed with a little melted butter) can be a fantastic base layer.
Essential Materials for Assembly
Having the right tools on hand will make the assembly process incredibly smooth and enjoyable, ensuring your no-bake cheesecakes look as good as they taste.
- Mason jars (8 oz or 12 oz recommended): These charming glass jars are perfect for individual portions, offering both aesthetic appeal and practical portability. The size depends on how generous you want each serving to be. They also make wonderful presentation vessels for gifting.
- Piping bag (or a sturdy zip-lock bag): A piping bag is invaluable for neatly layering the cheesecake filling into the jars, creating clean lines and an attractive presentation. If you don’t have a dedicated piping bag, a large, sturdy zip-lock bag with one corner snipped off works just as effectively.
- Large mixing bowl: Essential for combining and blending your cream cheese mixture.
- Electric mixer (handheld or stand mixer): A mixer is crucial for whipping the cream cheese to a smooth, lump-free consistency and incorporating the sugar and vanilla thoroughly.
- Spatula: For scraping down the sides of the bowl and ensuring all ingredients are fully incorporated.
- Measuring cups and spoons: For accurate ingredient measurements.
Step-by-Step Guide to Crafting Your No-Bake Cheesecake Jars
Creating these delightful no-bake cheesecakes is incredibly straightforward. Follow these steps for perfect, individual dessert portions every time.
Step 1: Prepare the Cream Cheese Base
Begin by scooping the softened cream cheese into a large mixing bowl. It’s crucial that your cream cheese is at true room temperature; this ensures it will whip up smoothly without any stubborn lumps. Using an electric mixer (either a handheld or stand mixer fitted with the paddle attachment), beat the cream cheese on medium speed for about 2-3 minutes. You want to achieve a light, fluffy, and exceptionally smooth consistency. Take your time with this step, as a well-beaten cream cheese base is the secret to a perfectly uniform cheesecake filling.
Step 2: Incorporate Sweetness and Flavor
Once your cream cheese is wonderfully smooth, gradually add the cup of powdered sugar to the bowl. Start by mixing on low speed to prevent the sugar from flying out of the bowl, then increase to medium-high. Beat until the powdered sugar is fully incorporated and the mixture is light and airy, about 1-2 minutes. Next, add the 2 teaspoons of vanilla extract. Continue mixing until everything is thoroughly combined and the mixture has a uniform, creamy texture. Scrape down the sides of the bowl with a spatula to ensure all ingredients are evenly distributed.
Step 3: Prepare Your Toppings (Optional Crust Layer)
If you’re opting for a cookie crust (like crushed graham crackers or Oreos mixed with a tablespoon of melted butter), press about 1-2 tablespoons firmly into the bottom of each mason jar. For your chosen candy or fruit toppings, ensure they are prepped and ready: crush candies, chop fruits, or prepare any sauces. Having all your components ready before assembly makes the layering process seamless.
Step 4: Layering Your Cheesecake Jars
Now for the fun part! Carefully transfer the cheesecake filling into your piping bag (or zip-lock bag with the corner snipped off). This method allows for precise and clean layering. Insert the piping bag into the center of a mason jar, starting with a layer of cheesecake filling. Pipe enough to cover the bottom or crust layer if you’ve added one. Then, add a layer of your prepared toppings. Repeat this process, alternating layers of cheesecake filling and toppings, until the jar is nearly full. Aim for a visually appealing presentation with distinct layers. You can even top the final cheesecake layer with an extra flourish of toppings.
Step 5: Chill and Enjoy!
Once assembled, loosely cover your mason jars and transfer them to the refrigerator. Chilling is a crucial step for no-bake cheesecakes, as it allows the filling to firm up and the flavors to meld beautifully. Chill for at least 4 hours, or ideally, overnight. This will ensure your cheesecakes set perfectly and achieve that delightful, creamy texture. When ready to serve, simply grab a spoon and enjoy your homemade, easy, and incredibly delicious no-bake cheesecake in a jar!
Overall, my fascination with no-bake cheesecakes in a mason jar goes beyond just their taste; it’s also about their aesthetic appeal and unparalleled convenience. They are undeniably cute, a miniature masterpiece that brings a smile to anyone’s face, whether seen in a store display or presented at a party. The individual portions eliminate the hassle of cutting and serving, making them perfect for potlucks, picnics, or simply as a grab-and-go treat. What’s truly exciting is the opportunity for personalization and creative expression. You can elevate their charm by adding decorative elements like colorful ribbons tied around the lids, crafting custom stickers for the outside, or even attaching elegant labels that list the ingredients for dietary considerations or simply to add a gourmet touch. This level of customization transforms a simple dessert into a thoughtful gift or a stunning centerpiece for any celebration. Embracing this simple no-bake recipe not only brings a delightful dessert into your life but also opens up a world of creative possibilities, proving that sometimes, the best things in life (and in the kitchen) truly are the easiest and most charming.