
As the hot season approaches and temperatures begin to soar, many of us seek ingenious ways to keep our living spaces cool and comfortable without relying heavily on air conditioning. The constant hum of an AC unit and the accompanying high electricity bills can be a significant burden. Fortunately, there’s a brilliantly simple, low-cost, and incredibly effective DIY method that can transform your room into a cooler sanctuary. The innovative creators at Where We Went on Youtube have championed a fantastic technique for surviving the summer heat: bubble wrap window insulation. This method is particularly impactful for rooms with windows, which are often the primary entry points for unwanted heat into your home.
It’s widely known that glass windows and doors are significant conduits for heat transfer. During hot weather, they allow solar radiation to penetrate your home, warming interiors, and poorly insulated glass readily conducts heat indoors. This is precisely where the magic of bubble wrap comes into play. The small, air-filled bubbles on these sheets serve as insulating pockets, effectively trapping air. This ingenious “bubble wrap insulation method” dramatically increases the resistance to heat flow through glass. By creating a thermal barrier, it significantly slows down the transfer of heat from the scorching outdoors to your cooler indoors. Not only is this a remarkably good and cheap choice for cooling your room, but it also has the distinct advantage of still allowing diffused natural light to brighten your space, unlike blackout curtains. Dive into this guide to learn the science, benefits, and practical steps to implement this game-changing technique.
The Science of Cooling with Bubble Wrap: How It Blocks Heat
To fully appreciate why bubble wrap is such an effective insulator, it helps to understand the basics of heat transfer. Heat moves in three ways: conduction, convection, and radiation. In your home, especially through windows, all three are at play. Conduction occurs when heat passes directly through the glass. Convection happens when heated air moves around. Radiation is the direct transfer of energy from the sun. Glass, particularly single-pane windows, is not a very good insulator, meaning it allows a lot of heat to pass through it via these mechanisms, leading to uncomfortable indoor temperatures.
Bubble wrap leverages the power of trapped air. Air, when it’s still, is an excellent thermal insulator. The thousands of tiny bubbles on a sheet of bubble wrap create numerous small, enclosed air pockets. These pockets act as miniature barriers, preventing heat from easily conducting through the material and significantly reducing convective heat transfer by minimizing air movement. When applied to a window, the bubble wrap forms an additional layer that significantly increases the window’s R-value (a measure of thermal resistance). This means less heat can penetrate your windows from the outside. By impeding the transfer of heat, bubble wrap effectively keeps your indoor environment cooler by reducing the amount of solar gain and ambient heat that would otherwise enter through the glass. It’s a passive cooling solution that works tirelessly to maintain a more comfortable temperature without consuming any energy.
Benefits of Implementing Bubble Wrap Window Insulation
Choosing bubble wrap for your window insulation offers a multitude of compelling advantages that make it a standout solution for beating the summer heat:
- Outstanding Cost-Effectiveness: This is arguably one of the cheapest and most accessible cooling methods available. A roll of bubble wrap is significantly less expensive than an AC unit, even a portable one. You might even be able to repurpose bubble wrap from recent deliveries, making it a zero-cost solution.
- Substantial Energy Savings: By reducing the amount of heat infiltrating your home, your existing cooling systems (if any) won’t have to work as hard, or you might not need to turn them on at all. This directly translates into lower electricity bills, offering tangible financial relief throughout the summer.
- Effortless DIY Installation and Removal: No special tools or professional skills are required. The application process is incredibly straightforward, relying on the simple adhesion provided by water. When the cooler seasons arrive, or if you wish to clean your windows, the bubble wrap can be easily peeled off without leaving sticky residue or causing any damage to the glass.
- Preserves Natural Light: Unlike heavy drapes or opaque blinds that can make a room feel dark and gloomy, bubble wrap allows a pleasant amount of diffused natural light to still enter your space. This means you can enjoy a brighter room while simultaneously blocking out excessive heat, contributing to a more pleasant ambiance.
- Environmentally Friendly Choice: Reusing bubble wrap from packaging reduces waste destined for landfills, giving the material a second, purposeful life. Furthermore, by decreasing your reliance on energy-intensive air conditioning, you contribute to a smaller carbon footprint, supporting sustainable living practices.
- Reduces Glare: The textured surface of the bubble wrap helps to scatter and diffuse direct sunlight. This can significantly reduce harsh glare on computer screens, televisions, and other surfaces, making your room more comfortable for daily activities.
- Versatile All-Season Solution: While highly effective for summer cooling, bubble wrap insulation also works in reverse during colder months. It helps to trap warmth inside your home, preventing heat from escaping through windows, thereby improving your home’s energy efficiency year-round.
Materials You’ll Need for Your DIY Cooling Project
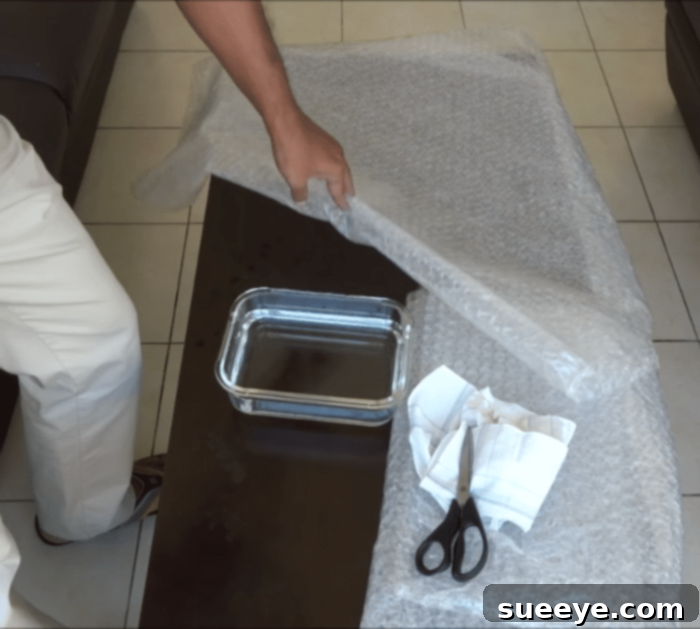
Embarking on this simple project requires only a few basic items, most of which you might already have on hand. Preparing these materials beforehand will ensure a smooth and efficient installation process:
- Bubble Wrap Sheet: There are many types of bubble wrap available. For optimal insulation, consider sheets with larger bubbles, as they trap more air. Feel free to use any type or color you have, but ensure you have enough to cover all targeted windows.
- Water in a Container: A spray bottle is highly recommended for an even and controlled application of water to both the window and the bubble wrap. However, a bowl of water will also work if a spray bottle isn’t available.
- Pair of Sharp Scissors or a Utility Knife: These will be essential for accurately cutting the bubble wrap to the precise dimensions of your window panes. A utility knife with a straight edge can help achieve very clean cuts.
- Several Clean Pieces of Cloth: You’ll need at least two: one for thoroughly cleaning the window glass before application, and another dry one for smoothing out the bubble wrap and pressing it firmly onto the glass.
Step-by-Step Installation Guide for Bubble Wrap Window Insulation
Follow these straightforward steps for a perfect application that will keep your room noticeably cooler:
Step 1: Clean the Window Pane Thoroughly
The first and most crucial step is to prepare your window surface. Using a clean, damp cloth (you can also use a mild window cleaner for better results), thoroughly wipe down the entire inside face of the window pane. This process removes any accumulated dust, dirt, grease, or grime. A pristine, clean surface is absolutely essential for the bubble wrap to adhere properly and maintain its position without peeling off. Take your time with this step to ensure optimal results.
Step 2: Prepare and Wet the Bubble Wrap
Begin by measuring your window pane accurately. Using your scissors or a utility knife, carefully cut the bubble wrap sheet to the exact size of the window glass. Trim off any hard edges or excess material to ensure a neat fit. Once cut, lay the bubble wrap flat on a clean surface with the bubble side facing up. Dip one of your clean cloths into your water container (or use a spray bottle to mist it) and generously wet the entire bubble side of the sheet. Ensure the bubbles are thoroughly saturated with water, but avoid making it so wet that it’s dripping excessively. This moisture is key to the temporary adhesion process.
Step 3: Apply the Wet Bubble Wrap to the Window
Now, gently mist the inside face of the window glass with water using your spray bottle or a wet cloth. The glass should be damp, not soaked. This additional moisture on the window surface creates the necessary surface tension for the bubble wrap to adhere effectively. Carefully pick up your wet bubble wrap sheet, ensuring the wet, bubble side is facing the window. Starting from the top, gently stick the wet bubble side of the sheet to the equally wet glass. Work your way down, aligning the edges as precisely as possible. The water will act as a temporary adhesive, allowing the bubble wrap to cling to the window.
Step 4: Secure the Bubble Wrap and Finish
Once the bubble wrap is positioned on the window, take your dry cloth and gently but firmly press the entire surface of the bubble sheet onto the glass. Begin pressing from the center and work your way outwards towards the edges. This action will help to smooth out the bubble wrap, remove any trapped air bubbles, and push out excess water between the sheet and the glass, ensuring a strong and uniform adhesion. Pay particular attention to the edges and corners to ensure they are well-sealed. If any section doesn’t seem to stick, simply lift it slightly, re-wet both the glass and the bubble wrap in that area, and press again. You will now have a neatly insulated window, ready to provide a noticeable reduction in heat and contribute to a much cooler room environment.
Maximizing Effectiveness and Longevity of Your Bubble Wrap Insulation
To ensure your bubble wrap insulation performs at its best and lasts through the season, consider these helpful tips:
- Optimal Bubble Size: For superior insulation, always opt for bubble wrap with larger, more pronounced bubbles. These larger air pockets offer enhanced thermal resistance compared to their smaller counterparts, leading to better heat blocking.
- Perfect Fit is Key: Ensure the bubble wrap covers the entire glass surface of the window pane for maximum effectiveness. A precise fit, with no gaps around the edges, creates a more robust thermal barrier. You may need to trim carefully for a custom look.
- Maintaining Cleanliness: A clean window surface is paramount for long-lasting adhesion. Any dust or grime will weaken the bond. Regular cleaning of the window before reapplication, if necessary, will help.
- Target High-Impact Windows: Prioritize windows that receive the most direct and intense sunlight, typically south or west-facing windows. Insulating these first will yield the most significant immediate relief from heat gain.
- Temporary & Reusable Nature: The beauty of this method lies in its temporary and non-damaging nature. When you no longer need the insulation, or when the season changes, simply peel the bubble wrap off. Store it flat and dry, and it can be reused in subsequent seasons, adding to its eco-friendliness and cost savings.
- Dealing with Corners and Edges: If corners or edges begin to peel, simply re-wet the affected area on both the glass and the bubble wrap, then press firmly back into place with a dry cloth.
Beyond Bubble Wrap: Complementary Strategies to Cool Your Room Without AC
While bubble wrap insulation is a powerful tool, combining it with other smart, low-cost strategies can amplify your efforts to keep your home cool and comfortable without relying on air conditioning. A holistic approach to passive cooling yields the best results:
- Strategic Use of Window Coverings: Utilize curtains, blinds, or shades effectively. Keep them closed during the hottest parts of the day, especially on sun-exposed windows. Thermal-backed curtains or blackout blinds can offer an additional layer of insulation and block direct sun.
- Enhance Airflow with Fans: Position floor or desk fans to create a cross-breeze by placing one near an open window to draw in cooler air and another to push warmer air out. Ceiling fans should be set to rotate counter-clockwise in the summer to create a cooling downdraft.
- Minimize Internal Heat Sources: Be mindful of appliances and lighting that generate heat. Switch to energy-efficient LED bulbs, which produce less heat than incandescent ones. Turn off electronics when not in use. Avoid using ovens and stovetops during peak heat hours; opt for cooler, no-cook meals or outdoor grilling.
- Create a DIY “Swamp Cooler”: For an instant chill, place a shallow bowl of ice or a frozen water bottle in front of a fan. As the fan blows over the ice, it will circulate a stream of cooler, slightly humidified air throughout the room.
- Nighttime Ventilation: As outdoor temperatures drop in the evening, open windows on opposite sides of your home to facilitate cross-ventilation. This allows hot indoor air to escape and draws in cooler night air, naturally cooling your home before the next day’s heat. Remember to close windows again in the early morning before temperatures begin to climb.
- Stay Hydrated and Cool Down Personally: While not a room-cooling strategy, keeping your body hydrated by drinking plenty of water, taking cool showers, or using a damp cloth on your pulse points can make a significant difference in your personal comfort level, even in a warm environment.
- Consider Outdoor Shading: If possible, plant trees or shrubs to provide natural shade for your windows. Awnings or pergolas can also effectively block direct sunlight from hitting your windows and exterior walls.
Conclusion: Embrace a Cooler and More Efficient Summer
The relentless summer heat no longer needs to be a source of discomfort or exorbitant energy bills. The bubble wrap insulation method stands out as a remarkably simple, incredibly cost-effective, and environmentally conscious way to significantly cool your room without AC. By understanding the fundamental principles of heat transfer and skillfully utilizing the insulating power of trapped air, you can effectively transform your ordinary windows into robust barriers against the sun’s scorching rays. This DIY solution is not only straightforward to implement but also requires minimal materials, offering immediate and tangible relief while still allowing that desirable natural light to filter through.
There’s no need to endure another sweltering summer day. Gather your materials, follow these easy, step-by-step instructions, and prepare to experience the remarkable difference that bubble wrap insulation can make in your home. For those who prefer a visual demonstration, be sure to watch the informative “Where We Went” YouTube video linked earlier in this article. Embrace these smarter, simpler approaches to staying cool, and enjoy a more comfortable, energy-efficient, and pleasant home environment throughout the hottest months of the year. Your wallet, your comfort, and the planet will undoubtedly thank you!