
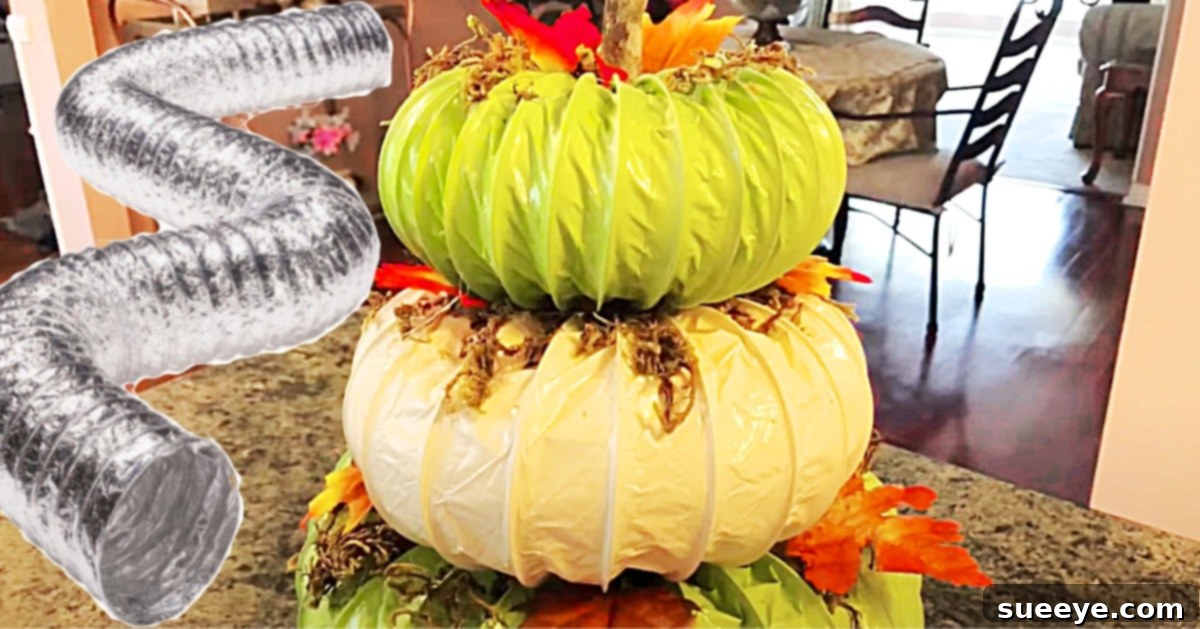
How To Make A Stunning Pumpkin Topiary Using Dryer Vent Hose
As the leaves begin to turn vibrant shades of red, orange, and gold, there’s an undeniable magic in the air that inspires creativity, especially when it comes to Fall decorating. I absolutely adore Autumn crafts, and I am perpetually on the hunt for innovative and exciting DIY projects that not only capture the essence of the season but also genuinely impress my family and guests. The joy of crafting something beautiful with your own hands, especially when it involves repurposing unexpected materials, is incredibly fulfilling.
My quest for that perfect, standout Fall project recently led me to an ingenious creation: a charming pumpkin topiary made from a dryer vent hose by The Magnolia Housewife on YouTube. The moment I stumbled upon this idea, I knew I had found exactly the kind of unique and impactful project I had been searching for. This pumpkin topiary craft isn’t just remarkably easy to assemble; it’s also undeniably gorgeous and adds a sophisticated touch to any Fall display. The true genius of this project lies in its core material – the humble dryer duct hose – which transforms into surprisingly realistic and elegant pumpkins. Repurposing something so ordinary into extraordinary decor is not only environmentally conscious but also incredibly clever.
What makes this DIY Fall pumpkin topiary even more appealing is the accessibility of its materials. You can find most of the structural components for this project right at your local hardware store, making it a convenient and budget-friendly endeavor. For the decorative Fall leaves, moss, and other embellishments, you can easily source them from craft stores like Michael’s or even budget-friendly retailers such as Dollar Tree, ensuring your masterpiece is both beautiful and economical. Prepare to be amazed at how a simple appliance accessory can become the centerpiece of your Autumn decorations!
Essential Materials for Your DIY Dryer Vent Hose Pumpkin Topiary:
Gathering your materials before you begin will ensure a smooth and enjoyable crafting experience. Here’s a detailed list of what you’ll need, along with tips for selecting the best items:
- Plastic Dryer Duct Packages:
- 1 (4-inch x 8-foot) plastic dryer duct package: This will form your larger pumpkins, providing a sturdy and flexible base. Look for the flexible, corrugated plastic type, not the rigid metal kind.
- 1 (3-inch x 8-foot) plastic dryer duct package: This size is perfect for creating smaller, complementary pumpkins, allowing for a varied and visually interesting topiary. Having different diameters adds depth and realism to your pumpkin stack.
- Tip: Ensure the duct hose is clean and free of any debris if you’re repurposing an old one. New packages are readily available and typically inexpensive.
- Rust-Oleum Gloss Spray Paint (Ivory): A lovely, neutral shade that provides an excellent base for a classic pumpkin look. Gloss finishes often give a slightly more polished and durable result.
- Rust-Oleum Gloss Spray Paint (Green Apple): Perfect for creating realistic pumpkin stems or adding a subtle accent color. You can also opt for a darker forest green or brown if you prefer a more rustic aesthetic for your stems.
- A Sturdy Stick (approximately 18-24 inches long): This will serve as the central support pole for your topiary. Look for a strong, relatively straight branch from your yard, or purchase a dowel rod from a craft or hardware store. The length can be adjusted based on your desired topiary height.
- Hot Glue Gun and Plenty of Glue Sticks: An absolute essential for securing all your elements. A good quality hot glue gun will make assembly quick and efficient. Make sure you have extra glue sticks on hand, as you’ll be using a fair amount.
- Clothespins: These are incredibly useful for temporarily holding the duct in place as you shape it and for securing decorative elements while glue dries.
- Fall Leaves and Moss (from Dollar Tree, Michael’s, or local craft store): These are your primary decorative elements.
- Fall Leaves: Look for faux leaves in various autumn colors and sizes to add fullness and a natural touch. Garland sections can be easily snipped apart.
- Moss: Reindeer moss or Spanish moss can add texture and help conceal any seams or glue, giving your topiary a more refined finish.
- Side Cutting Pliers (or heavy-duty scissors/tin snips): Crucial for cleanly and efficiently cutting the plastic dryer duct. Regular scissors might struggle with the thickness and rigidity, so dedicated cutters will save you effort and ensure precise cuts.
- Optional Materials for Enhanced Decoration and Stability:
- Twine or burlap ribbon: For bows, wraps, or accents.
- Small faux berries or acorns: To add extra detail and texture.
- A decorative pot or planter: To hold your finished topiary for display, along with floral foam or rocks for weight and stability.
- Newspaper or drop cloth: For protecting your workspace during spray painting.
- Gloves and face mask: For safety during spray painting.
Step-by-Step Directions: Crafting Your Beautiful Dryer Vent Hose Pumpkin Topiary:
This project, as demonstrated by The Magnolia Housewife on YouTube, is designed to be straightforward and enjoyable. Follow these detailed steps to create your own impressive Fall decoration.
Step 1: Preparing Your Workspace and Materials
Before you begin, set up a well-ventilated workspace, preferably outdoors or in a garage with open doors. Lay down newspaper or a drop cloth to protect surfaces from paint. Gather all your materials and tools to have them readily accessible.
Step 2: Measuring and Cutting the Dryer Duct into Pumpkin Rings
This is where your dryer duct hose begins its transformation! You’ll need to create several circular sections that will form the body of your pumpkins. For a standard three-tiered topiary, aim for three distinct sizes (one large, one medium, one small), or two larger ones if you’re using the 4-inch duct for the bottom two and the 3-inch for the top.
- Uncoil the Duct: Carefully uncoil your 4-inch dryer duct. It’s flexible but can be stiff.
- Measure Your Rings: For each pumpkin, you’ll be creating a circular shape. The length of the duct you cut will determine the circumference of your pumpkin.
- For Large Pumpkins (using 4-inch duct): Cut two sections, each approximately 25-30 inches long. These will form your widest pumpkins.
- For Medium Pumpkins (using 4-inch duct): Cut one section, approximately 20-25 inches long.
- For Small Pumpkins (using 3-inch duct): Cut one section, approximately 15-20 inches long. This will be your smallest, topmost pumpkin.
Adjust these measurements based on how full and round you want your pumpkins to appear. A longer piece will result in a wider, squatter pumpkin when shaped.
- Cut with Pliers: Using your side cutting pliers (or tin snips), carefully cut through the plastic duct at your measured points. Be precise to ensure clean edges.
- Form Circles: Take each cut section of duct and bring the two ends together to form a circle. Overlap the ends by about an inch. Secure this overlap firmly with hot glue. You can use a clothespin to hold the ends together while the glue sets. Repeat this for all your cut sections, creating several distinct rings.
Step 3: Shaping and Painting Your Dryer Duct Pumpkins
Now it’s time to give these rings their pumpkin-like appearance and a fresh coat of color.
- Sculpting the Pumpkin Shape: Once the glue holding your rings is dry, gently press down on the top and bottom of each circle, and slightly inward on the sides, to create a more rounded, flattened pumpkin shape. The corrugated nature of the duct allows for this flexibility. You can use additional hot glue strategically on the inside folds to help hold the desired shape if needed, or even a few small pieces of wire.
- Prepare for Painting: Arrange your pumpkin rings on your protected workspace. Ensure they are stable and not touching each other, allowing for even spray paint application.
- Spray Painting: Wearing gloves and a face mask for safety, apply light, even coats of the Rust-Oleum Ivory spray paint to all sides of your pumpkin rings. It’s better to apply several thin coats than one thick coat, as this prevents drips and ensures a smooth finish. Allow ample drying time between coats (refer to paint can instructions). Flip the rings to ensure all angles are covered.
- Optional Detail: Once the ivory paint is fully dry, you can lightly distress the pumpkins with a tiny bit of brown or orange paint on a rag for a more weathered look, if desired.
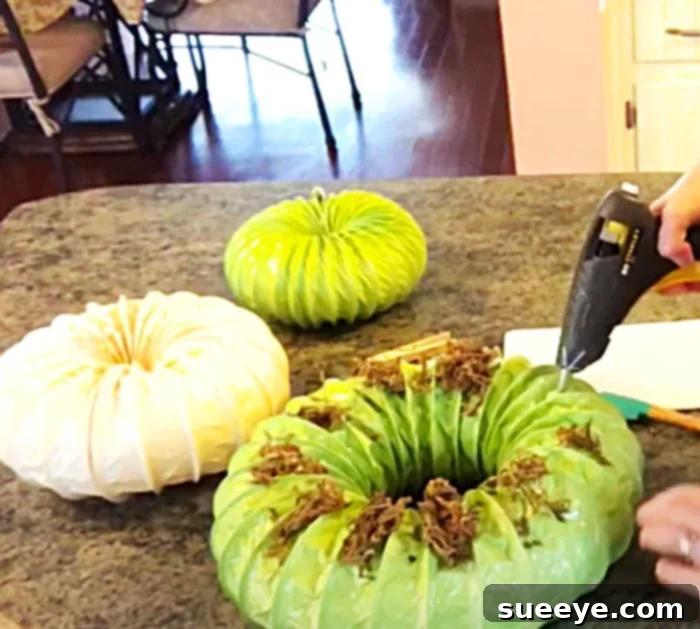
Step 4: Assembling the Topiary Structure
With your painted pumpkins ready, it’s time to bring them together on your central stick.
- Prepare the Stick: If your stick is too long, trim it to your desired height. You can also spray paint your stick brown or green if you prefer a more uniform look, or leave it natural for a rustic charm.
- Attach the First Pumpkin: Start with your largest pumpkin ring. Apply a generous amount of hot glue to the bottom center of the pumpkin. Carefully center the stick vertically on this glued section and hold it firmly until the glue sets. Ensure the pumpkin is securely attached and level.
- Stack Subsequent Pumpkins: Next, take your medium-sized pumpkin. Apply hot glue to both the bottom of this pumpkin and the top of the pumpkin already on the stick. Carefully lower the medium pumpkin onto the stick, centering it directly above the large pumpkin. Press down gently to ensure good contact and hold until the glue cures. Repeat this process for your smallest pumpkin, placing it on top. Ensure each pumpkin is aligned centrally on the stick, creating a stable vertical stack.
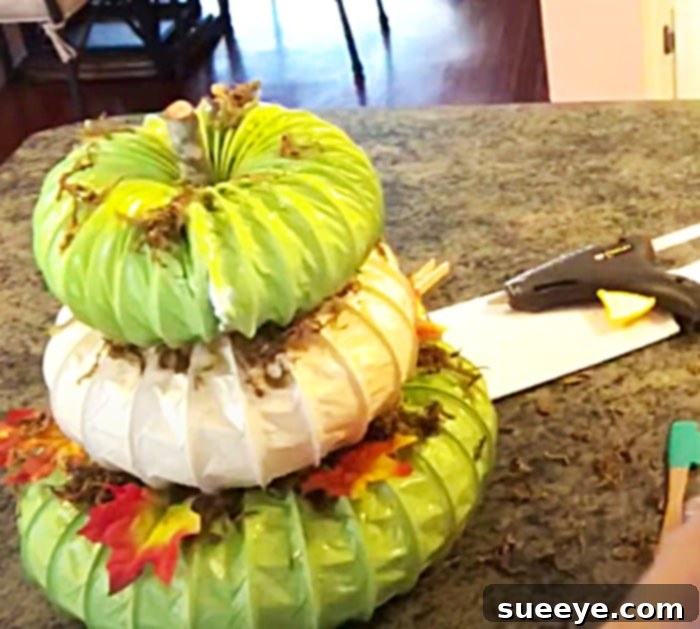
Step 5: Adding the Stem and Decorative Embellishments
Now for the fun part – bringing your topiary to life with beautiful Fall touches!
- Creating the Stem: Take a small piece of your dryer duct (about 3-4 inches long) and form it into a tight spiral or coil. This will be your pumpkin stem. Spray paint this small piece with the Rust-Oleum Green Apple paint. Once dry, hot glue it securely to the very top center of your smallest pumpkin. You can also use a real twig for a more authentic look.
- Decorating with Leaves and Moss:
- Leaves: Begin by hot gluing your faux Fall leaves around the base of each pumpkin, where it meets the one below it, and also around the base of the top stem. Arrange them naturally, allowing some to slightly overlap or extend outwards. Use clothespins to hold leaves in place while the glue sets.
- Moss: Fill in any gaps between the pumpkins or around the stem with strands of moss. This adds texture and helps to hide any visible glue or seams, creating a more professional and finished appearance.
- Additional Details: Feel free to add other decorative elements like small faux berries, acorns, miniature pinecones, or even a piece of twine wrapped around the stick between pumpkins for added rustic charm. A simple burlap bow tied around the base of the top pumpkin or at the very bottom can also add a lovely accent.
Step 6: Displaying Your Finished Pumpkin Topiary
Your magnificent DIY Fall pumpkin topiary is complete and ready to adorn your home!
- Placement: This topiary looks fantastic on a front porch, as a welcoming entryway accent, on a mantelpiece, or as a centerpiece on a dining table.
- Stability: If you plan to display it outdoors or in a high-traffic area, consider placing the stick into a decorative pot filled with floral foam, sand, or rocks to ensure it remains upright and stable. You can cover the top of the pot with more moss or small decorative gourds.
This truly is a gorgeous project that transcends typical Fall decor. Its ingenious use of repurposed materials makes it a fantastic conversation starter, and guests will undoubtedly be curious about how you crafted such a unique and charming piece. Beyond its aesthetic appeal, there’s immense satisfaction in creating something so beautiful and impactful from unexpected beginnings. Embrace the spirit of Autumn and enjoy the process of bringing this delightful dryer vent hose pumpkin topiary to life in your home!