
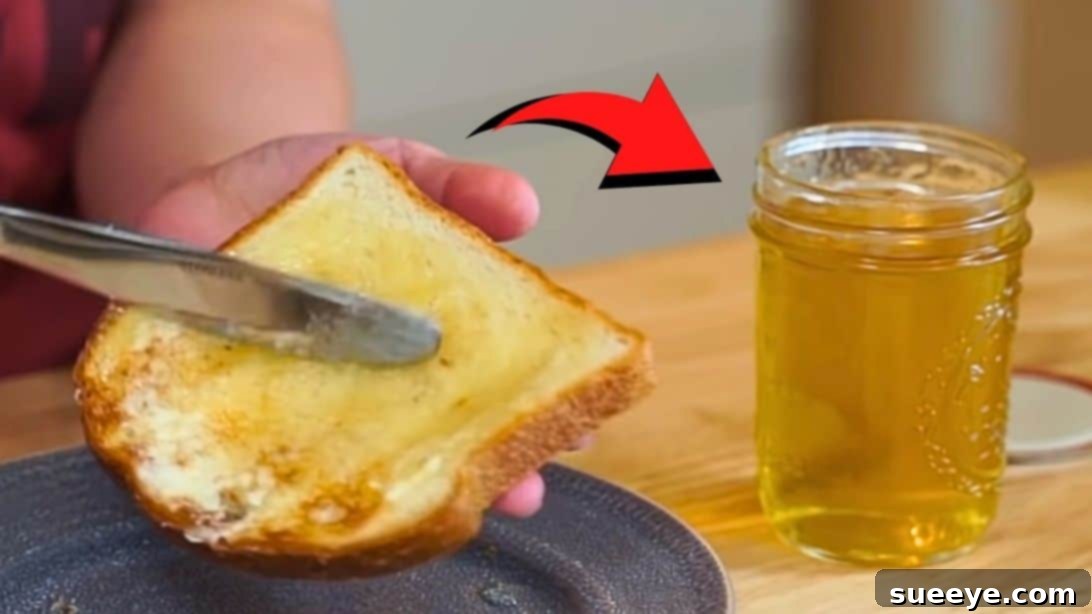
Dandelion Jelly: Crafting Nature’s Golden Nectar (The Ultimate “Poor Man’s Honey” Recipe)
Imagine transforming the vibrant yellow blossoms that grace your lawn each spring into a jar of liquid gold. This isn’t just a fantasy; it’s the delightful reality of making dandelion jelly, often lovingly referred to as “Poor Man’s Honey.” This unique preserve captures the subtle, earthy sweetness of dandelions in a spread that’s both economical and incredibly rewarding to make. With just a few simple ingredients and a touch of patience, you can create a truly special treat that will surprise and impress. This comprehensive guide, inspired by culinary creator emmymade on YouTube, will walk you through every step to ensure your dandelion jelly is perfect.
The Allure of Dandelion Jelly: Why Forage This Golden Gem?
Dandelions, often dismissed as mere weeds, are a treasure trove of culinary potential. Dandelion jelly stands out as a testament to their versatility, offering a flavor profile that is subtly floral, delicately sweet, and reminiscent of actual honey, yet distinctly its own. Making this jelly connects you directly to nature, transforming something wild and abundant into a gourmet pantry staple. It’s an act of sustainable living, resourcefulness, and a delightful way to celebrate the arrival of spring.
Beyond its unique taste, crafting dandelion jelly is a remarkably cost-effective endeavor. The primary ingredient, dandelions, are free for the picking, making this a truly accessible recipe for anyone looking to experiment with homemade preserves. It’s a wonderful project for both seasoned canners and beginners alike, promising a satisfying reward for your efforts.
Responsible Foraging: Harvesting Your Dandelions
Before you begin, selecting the right dandelions is paramount for both taste and safety. Here are key considerations for a successful harvest:
- Location Matters: Always gather dandelions from areas free of pesticides, herbicides, or other chemical treatments. Avoid roadsides where exhaust fumes can contaminate the plants. Opt for untouched fields, your own backyard, or trusted organic spaces.
- Timing is Key: The best time to pick dandelions is on a sunny morning, shortly after the dew has dried but before the sun is too high. This is when the blossoms are fully open and their nectar is most abundant.
- Pick Fresh, Fully Open Blossoms: Choose vibrant, healthy flowers with all petals open. Avoid any that are wilted, closed, or showing signs of damage.
- Be Mindful of Bees: Dandelions are an early and vital food source for bees. When foraging, take only what you need and leave plenty for the pollinators.
- Only the Yellow Petals: For this recipe, you will primarily use the yellow petals. The green parts (sepals and the base of the flower) can impart a bitter taste, so careful separation is essential.
Ingredients for Your Golden Harvest:
Making dandelion jelly requires a surprisingly short and simple list of ingredients, most of which you likely already have on hand. The magic happens when these humble components come together.
- 2 cups of dandelion petals: Ensure these are freshly picked and carefully separated from the green parts.
- 4 cups of boiling water: Used to create the flavorful dandelion tea infusion.
- 2 tablespoons of fresh lemon juice: Adds a bright, zesty note and, crucially, helps activate the pectin for a proper set.
- 1 box of pectin (typically 1.75 oz / 49g): A natural gelling agent derived from fruit, essential for achieving the desired jelly consistency. Make sure to use a brand designed for standard jellies.
- 4 cups of granulated sugar: Provides sweetness, texture, and acts as a natural preservative.
Note: You will also need several clean canning jars (half-pint or pint size are ideal), along with their lids and rings, for proper preservation.
Essential Equipment for Jelly Making:
Having the right tools ready will make your jelly-making process smooth and enjoyable.
- Large Bowl: For steeping the dandelion petals.
- Large Stockpot with Lid: For boiling water and sterilizing jars.
- Canning Rack: To place at the bottom of your stockpot for sterilizing and processing jars.
- Fine-Mesh Sieve or Cheesecloth: For straining the dandelion tea.
- Saucepan (large, heavy-bottomed): For cooking the jelly mixture.
- Whisk: To mix ingredients and prevent lumps.
- Measuring Cups and Spoons: For accurate ingredient measurement.
- Canning Jars (with lids and bands): Half-pint (8 oz) or pint (16 oz) jars are common choices.
- Jar Lifter: Essential for safely handling hot jars.
- Canning Funnel: Helps prevent spills when filling jars.
- Ladle: For transferring hot jelly into jars.
- Damp Washcloth: For wiping jar rims clean.
- Clean Kitchen Towels: For cooling jars.
Step-by-Step Guide: Crafting Your Dandelion Jelly
Step 1: Petal Perfection – Preparing Your Dandelions
Begin by gently rinsing your freshly picked dandelion blossoms under cool water to remove any dirt or insects. The most crucial step for achieving a non-bitter jelly is to meticulously separate the bright yellow petals from all green parts. The green sepals and the base of the flower contain compounds that can impart a bitter flavor to your finished jelly. Use a pair of small scissors or your fingers to snip or pluck only the yellow petals, discarding all green material. Continue this process until you have precisely 2 cups of loosely packed dandelion petals.
Step 2: The Dandelion Infusion – Steeping for Flavor
Once your petals are prepared, place the 2 cups of clean dandelion petals into a heat-proof bowl or a large glass jar. Bring 4 cups of water to a rolling boil, then carefully pour the hot water directly over the dandelion petals. This hot infusion process will extract the delicate flavors and colors from the petals. Cover the bowl securely and place it in the refrigerator. Allow the dandelion tea to steep undisturbed for approximately 24 hours. This extended steeping time ensures maximum flavor extraction, creating a robust base for your jelly.
Step 3: Sterilization Station – Preparing Your Canning Jars
The day your dandelion infusion is ready, you’ll need to sterilize your canning jars. This step is vital for food safety and preventing spoilage. Bring a large pot of water (your canning pot) to a boil, ensuring it’s large enough to comfortably hold your jars. Place a canning rack at the bottom of the pot. Carefully place your clean jars (along with their screw bands, but not the lids) into the boiling water. The boiling water sterilizes them and also heats them up, preventing thermal shock and cracking when you fill them with hot jelly. Allow them to boil for a full 5 minutes. Using a jar lifter, carefully remove the hot jars and place them upside down on a clean kitchen towel to drain and keep warm. Place the flat lids in a small saucepan with hot (but not boiling) water, keeping them warm until ready to use.
Step 4: Extracting the Golden Liquid – Straining the Dandelion Tea
After 24 hours of steeping, remove the dandelion infusion from the refrigerator. Place a fine-mesh sieve or a colander lined with several layers of cheesecloth over a large clean bowl. Pour the entire contents of the dandelion mixture through the sieve or cheesecloth. Once the initial liquid has drained, gather the edges of the cheesecloth (if using) and gently but firmly squeeze out as much of the remaining liquid from the petals as possible. You want to extract every drop of that precious dandelion tea, which will now be a lovely golden hue.
Step 5: The Magic of Jelly Making – Cooking the Concoction
Measure out 3 1/2 to 4 cups of your strained dandelion tea and pour it into a large, heavy-bottomed saucepan. Add the 2 tablespoons of fresh lemon juice. The lemon juice not only adds a lovely brightness to the flavor but also provides the necessary acidity to help the pectin set properly. Sprinkle the entire box of pectin over the liquid, whisking continuously to ensure it dissolves completely and no lumps form. Bring this mixture to a full, rolling boil over high heat, stirring constantly. Once it reaches a strong boil that cannot be stirred down, slowly add the 4 cups of granulated sugar, whisking vigorously until all the sugar is completely dissolved. Return the mixture to a full, rapid rolling boil and continue to cook for exactly 2 minutes, stirring constantly to prevent scorching. This crucial boiling period activates the pectin and ensures your jelly will set.
Step 6: Filling and Sealing – Into the Jars
Immediately after cooking, carefully ladle the hot dandelion jelly mixture into your hot, sterilized jars. Use a canning funnel to minimize spills and ensure a clean pour. Fill each jar, leaving approximately a quarter inch of headspace from the rim of the jar. This headspace is essential for proper sealing during processing. Take a damp, clean washcloth or paper towel and carefully wipe the rims of each filled jar. Any residue on the rim can prevent a proper seal. Place a warmed flat lid onto each jar, then screw on the band “finger-tight.” This means tightening until you feel resistance, then turning just a little bit more, without overtightening.
Step 7: Water Bath Processing – Ensuring Longevity
Using your jar lifter, carefully place the filled and sealed jars back into the boiling water canner, ensuring they are on the canning rack. Add more boiling water if necessary, making sure that there is at least an inch of boiling water covering the tops of all the jars. This ensures uniform heat distribution and proper sterilization throughout the processing.
Step 8: The Grand Finale – Cooling and Setting
Bring the water in the canner back to a strong, rolling boil. Once it reaches a vigorous boil, begin timing and continue processing the jars for 10 minutes. (Note: Adjust processing time for higher altitudes if necessary – check a reliable canning guide for specific adjustments). After 10 minutes, turn off the heat and carefully remove the jars from the canner using your jar lifter. Place the hot jars upright on a clean kitchen towel or a wire rack, leaving ample space between them to allow for even cooling. Do not disturb the jars for at least 24 hours. During this cooling period, the jars will seal, and the jelly will firm up and set. You’ll often hear a satisfying “ping” sound as the lids seal, indicating a vacuum has formed.
Tips for Perfect Dandelion Jelly:
- Freshness is Key: Use dandelions that are freshly picked and vibrant.
- Don’t Rush Petal Separation: This step is critical for a smooth, non-bitter jelly. Take your time.
- Accurate Measurements: Jelly making is a science. Precisely measure your dandelion tea, lemon juice, pectin, and sugar for the best results.
- Rolling Boil is Non-Negotiable: Ensure your jelly reaches and maintains a full, rolling boil for the specified time; a gentle simmer isn’t enough to activate the pectin.
- Check for Set: Before canning, you can perform a “spoon test” or “plate test” to check if the jelly will set. Chill a small plate, place a spoonful of hot jelly on it, wait 30 seconds, then push it with your finger. If it wrinkles, it’s ready.
- Clean Rims: A clean jar rim is essential for a good seal. Don’t skip wiping them before placing lids.
- Finger-Tight Lids: Overtightening can prevent a proper seal by not allowing air to escape during processing.
- Altitude Adjustment: If you live at a high altitude, consult a canning guide for adjusted processing times to ensure safe preservation.
Storing Your Homemade Dandelion Jelly:
Once your jars have cooled for 24 hours, check for proper seals. The center of the lid should be concave and not flex when pressed. If any jar did not seal, refrigerate it immediately and consume within 2-3 weeks. Properly sealed jars of dandelion jelly can be stored in a cool, dark place (like a pantry) for up to 1 year. Once a jar is opened, store it in the refrigerator and enjoy within a few weeks.
Creative Ways to Enjoy Your Dandelion Nectar:
Dandelion jelly is incredibly versatile and can be enjoyed in numerous ways:
- Classic Spreads: The most obvious way! Spread generously on toast, biscuits, scones, or English muffins.
- Breakfast Delights: Drizzle over pancakes, waffles, or crepes for a unique twist.
- Cheese Pairings: Serve alongside a soft cheese like brie or goat cheese on a charcuterie board.
- Savory Glaze: Use it as a glaze for roasted pork or chicken, adding a subtle sweetness and floral note.
- Dessert Enhancer: Incorporate it into cake fillings, tartlets, or as a topping for vanilla ice cream.
- Yogurt or Oatmeal: Stir a spoonful into your morning yogurt or oatmeal for natural sweetness and flavor.
Beyond the Basic: Dandelion Jelly Variations
While the classic dandelion jelly is wonderful on its own, you can experiment with variations to suit your palate. Consider adding a small amount of grated ginger or a vanilla bean to the steeping liquid for an extra layer of flavor. A hint of orange zest or a different citrus juice could also introduce an interesting dynamic. Once you master the basic recipe, the possibilities for customization are endless.
Conclusion: A Taste of Wild Abundance
Making dandelion jelly is more than just a recipe; it’s an experience that connects you with the natural world and the rich traditions of homemade food. From foraging the bright yellow blossoms to ladling the shimmering golden liquid into jars, each step is a journey of transformation. The resulting “Poor Man’s Honey” is a testament to the idea that some of the most extraordinary flavors can be found in the most unexpected places. So, embrace the abundance of spring, step outside, and unlock the sweet secret of the dandelion. You’ll be rewarded with a unique, delicious preserve that truly tastes like sunshine in a jar.