
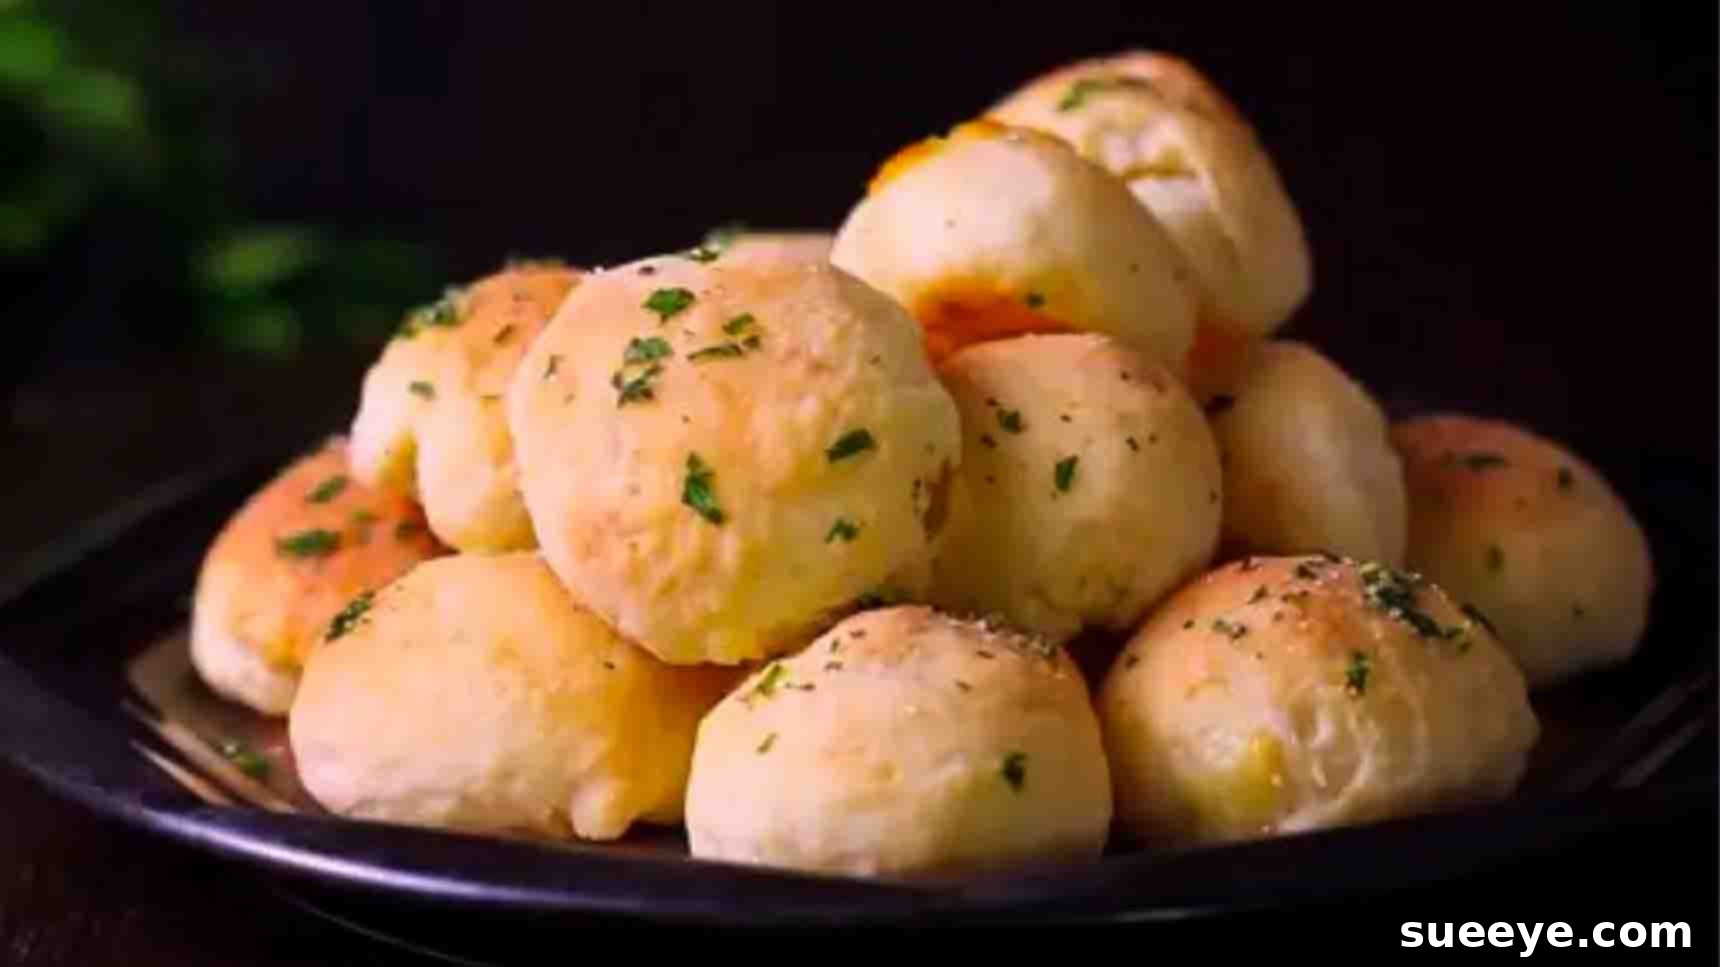
There’s something truly magical about freshly baked goods, especially when they’re packed with gooey, melted cheese and aromatic garlic. We’re thrilled to share with you an absolute gem of a recipe: Homemade Garlic Cheese Bombs, inspired by the fantastic culinary creators at
Home Cooking Adventure
on Youtube. These aren’t just any ordinary snack; they’re soft, flaky, and unbelievably flavorful savory treats that promise to tantalize your taste buds and become an instant favorite in your household. Imagine biting into a warm, golden-brown puff, only to discover a molten core of delicious mozzarella, all wrapped in a tender, garlic-infused dough. Pure bliss!
What makes these cheese bombs stand out is not just their incredible taste and texture, but also their surprisingly simple preparation. Crafted from scratch with readily available ingredients, this recipe demystifies the art of baking, making it accessible even for novice cooks. Forget complicated techniques or long proofing times; these delightful bites come together with ease, proving that homemade doesn’t have to mean arduous. They’re perfect for any occasion – whether you need a crowd-pleasing appetizer for a party, a comforting snack for movie night, or a unique side dish to complement your dinner.
In this comprehensive guide, we’ll walk you through every step, from selecting the finest ingredients to mastering the technique of creating that perfectly flaky dough and irresistible garlic butter topping. We’ll delve into the secrets of achieving maximum flavor and texture, ensuring your Garlic Cheese Bombs turn out heavenly every single time. Get ready to embark on a delightful baking adventure that will fill your kitchen with an intoxicating aroma and your family with joy. Let’s dive in and create these extraordinary cheese bombs today!
Ingredients for Ultimate Garlic Cheese Bombs
Crafting the perfect garlic cheese bombs starts with selecting high-quality ingredients. Each component plays a crucial role in achieving that desirable flaky texture, rich flavor, and irresistible gooey center. Here’s what you’ll need:
- All-Purpose Flour: 2 cups. The foundation of our dough, providing structure and stability.
- Granulated Sugar: 1 tablespoon. A touch of sweetness that balances the savory notes and aids in browning.
- Garlic Powder: 1 ½ teaspoons. Infuses the dough with a delightful, aromatic garlic essence.
- Salt: ¼ teaspoon. Essential for enhancing all the other flavors in the dough.
- Baking Powder: 2 ½ teaspoons. Our primary leavening agent, responsible for the light, fluffy, and flaky texture of the cheese bombs.
- Cold Unsalted Butter: 5 tablespoons, cut into small cubes. Keeping the butter cold is paramount for creating flaky layers. Unsalted butter allows you to control the overall saltiness of the recipe.
- Cold Buttermilk: ¾ cup. The acidity in buttermilk reacts with the baking powder, contributing to a tender crumb and further enhancing the flakiness. Its cold temperature also helps keep the butter solid.
For the Irresistible Filling:
- Mozzarella Cheese: 5 ounces. The star of the show! We recommend a low-moisture, part-skim mozzarella block for the best gooey melt. Avoid fresh mozzarella as it can release too much water during baking. Cut into approximately 18 small cubes for easy encapsulation.
For the Flavorful Garlic-Parsley Butter Brush:
- Unsalted Butter: 2 tablespoons. Melted butter creates a rich base for our topping.
- Salt: ¼ teaspoon. A pinch to elevate the savory notes of the topping.
- Fresh Parsley: 1 teaspoon, finely chopped. Adds a vibrant color and fresh herbaceousness that complements the garlic beautifully.
- Garlic Clove: 1, minced. Fresh garlic provides an intense, pungent aroma and flavor that truly makes these “garlic” cheese bombs shine.
Step-by-Step Guide to Baking Perfect Garlic Cheese Bombs
Follow these detailed instructions to create the most delicious garlic cheese bombs you’ve ever tasted. Precision and patience are key to achieving their signature flaky texture and gooey center.
Step 1: Preparing the Flaky Dough and Shaping
The foundation of our cheese bombs is a tender, flaky dough. Start by ensuring all your cold ingredients, especially the butter and buttermilk, are thoroughly chilled. In a large mixing bowl, combine the dry ingredients: 2 cups of all-purpose flour, 1 tablespoon of granulated sugar, ¼ teaspoon of salt, 1 ½ teaspoons of garlic powder, and 2 ½ teaspoons of baking powder. Whisk these together thoroughly to ensure all leavening and flavoring agents are evenly distributed.
Next, it’s time to incorporate the cold butter. Add the 5 tablespoons of cold unsalted butter, cut into small cubes, to your dry mixture. Using a fork, a pastry blender, or even your fingertips (working quickly to prevent the butter from warming), cut the butter into the flour mixture. Continue until the butter is incorporated and the mixture resembles coarse crumbs, with some pea-sized pieces of butter still visible. These small pockets of butter are what will create those desirable flaky layers as the cheese bombs bake.
Now, pour in the ¾ cup of cold buttermilk. Mix gently with a fork or a spatula until a shaggy dough begins to form. Be careful not to overmix; overworking the dough can lead to a tough, dense texture. Once the ingredients are just combined and a loose dough forms, cover the bowl and refrigerate the dough for ten minutes. This chilling period helps the butter firm up, making the dough easier to handle and contributing to a flakier result.
While your dough is chilling, prepare the mozzarella cheese. Take your 5 ounces of mozzarella and cut it into approximately 18 small, even cubes. The goal is to have a perfectly sized cheese cube for each cheese bomb.
After chilling, lightly dust your working surface with a small amount of flour. Transfer the chilled dough onto this floured surface. Sprinkle a little more flour on top of the dough and your rolling pin to prevent sticking. Using the rolling pin, carefully roll the dough into a rectangular shape, aiming for dimensions of about 12 x 15 inches. This thin, even sheet of dough is crucial for creating uniformly sized cheese bombs. Once rolled, use a sharp knife or a pizza cutter to divide the dough into 18 equal pieces. Aim for squares or rectangles that can easily enclose a cheese cube.
Step 2: Assembling, Baking, and Finishing with Garlic Butter
Now comes the exciting part: assembling your cheese bombs! Take one of your pre-cut mozzarella cubes and place it onto the center of a dough piece. Carefully bring the edges of the dough together around the cheese, pinching and sealing them completely to form a tight ball. It’s crucial to ensure there are no gaps or openings; otherwise, the cheese might leak out during baking. Roll the dough gently between your palms to create a smooth, round bomb. Repeat this process for all 18 pieces of dough and mozzarella cubes.
Preheat your oven to 400 degrees Fahrenheit (200 degrees Celsius). Line a baking tray with parchment paper to prevent sticking and ensure easy cleanup. Arrange the assembled cheese bombs on the prepared baking tray, leaving a little space between each one to allow for even baking and expansion. Avoid overcrowding the tray. Place the tray into your preheated oven and bake for approximately 15 to 18 minutes. Keep a close eye on them; you’re looking for a beautiful lightly golden-brown color on the exterior, indicating they are fully cooked through and wonderfully flaky.
While your cheese bombs are baking, prepare the aromatic garlic butter topping. In a small saucepan, melt 2 tablespoons of unsalted butter over low heat. Once the butter is melted and slightly bubbling, add 1 teaspoon of freshly chopped parsley, ¼ teaspoon of salt, and 1 minced clove of garlic. Cook this mixture gently for about one minute, just enough to infuse the butter with the garlic and parsley flavors without browning the garlic. The goal is a fragrant, vibrant topping that will elevate the cheese bombs.
Once your cheese bombs emerge from the oven, piping hot and golden, immediately brush the tops generously with the prepared garlic-parsley butter mixture. The hot surface of the cheese bombs will absorb the flavorful butter, adding an extra layer of savory deliciousness and a beautiful glossy finish. The aroma alone will be enough to make your mouth water!
Serve these heavenly Garlic Cheese Bombs immediately while they are still warm, and the cheese inside is perfectly gooey and stretchy. They are best enjoyed fresh out of the oven, allowing you to experience their optimal texture and flavor. These delightful bites are sure to be a showstopper and a guaranteed hit with anyone who tries them.
Tips for Success & Variations
To ensure your garlic cheese bombs turn out perfectly every time, here are a few expert tips and exciting variations you can try:
- Keep it Cold: The secret to flaky dough is cold butter and buttermilk. Work quickly when incorporating the butter and don’t skip the dough chilling step. Warm butter melts into the flour, resulting in a less flaky texture.
- Don’t Overmix: Mix the dough just until combined. Overmixing develops gluten, which can make your cheese bombs tough instead of tender. A shaggy dough is a happy dough!
- Seal Tightly: Double-check that each cheese bomb is perfectly sealed. Any tiny opening can allow the glorious melted cheese to escape during baking, leaving you with less gooey goodness inside.
- Even Baking: Ensure your oven is fully preheated before placing the cheese bombs inside. Also, arrange them with adequate space on the baking sheet for even airflow and consistent browning.
- Watch the Garlic: When making the butter topping, cook the minced garlic only briefly (about one minute) to infuse its flavor. Overcooking it can make it bitter.
- Serving Temperature: These cheese bombs are absolutely at their best served warm, straight out of the oven, when the cheese is at its melting peak.
Exciting Variations to Try:
- Cheese Swaps: Experiment with different types of cheese! A blend of mozzarella and provolone, or even a sharp cheddar, can add new dimensions of flavor. Just ensure the cheese melts well.
- Herb Infusion: Add finely chopped fresh herbs like chives, dill, or oregano directly into the dough for an extra layer of flavor.
- Spicy Kick: Incorporate a pinch of red pepper flakes into the dough or the butter topping for those who enjoy a little heat.
- Everything Bagel Seasoning: Sprinkle a generous amount of everything bagel seasoning on top of the cheese bombs before baking, or mix it into the butter topping for a delightful textural and savory crunch.
- Mini Pizzas: Add a tiny piece of pepperoni or a sprinkle of Italian seasoning along with the mozzarella for a mini pizza bomb experience.
Serving Suggestions and Storage
These versatile garlic cheese bombs are perfect for a wide array of occasions. Serve them as an irresistible appetizer at your next gathering, where they’re guaranteed to disappear quickly. They also make a fantastic side dish to complement pasta dishes, hearty soups, or even a simple green salad, adding a gourmet touch to your meal. For a casual evening, they are the ultimate movie night snack, far more exciting than popcorn. Don’t forget dipping sauces! A warm marinara sauce, creamy ranch, or even a homemade pesto can elevate the experience even further.
While best enjoyed fresh, you can store any leftover cheese bombs in an airtight container at room temperature for up to 24 hours, or in the refrigerator for up to 3 days. To reheat, simply place them in a preheated oven at 350°F (175°C) for about 5-7 minutes, or until warmed through and the cheese is soft again. Avoid microwaving if possible, as it can make the dough chewy rather than flaky. You can also freeze unbaked cheese bombs: arrange them on a baking sheet and freeze until solid, then transfer to a freezer-safe bag for up to 1-2 months. Bake directly from frozen, adding a few extra minutes to the baking time.
Garlic Cheese Bombs Recipe Summary
This recipe provides a detailed roadmap to creating incredibly delicious, flaky, and gooey garlic cheese bombs from scratch. With its simple steps and accessible ingredients, it’s a perfect baking project for anyone looking to impress with homemade goodness. Remember the importance of cold ingredients, gentle mixing, and tight sealing for optimal results. Whether you stick to the classic recipe or venture into exciting variations, these savory treats are sure to become a beloved staple in your culinary repertoire. Enjoy the process, savor the aroma, and delight in every cheesy bite!