
Have you ever experienced the sheer frustration of a freshly wrapped bath towel slipping down at the most inconvenient moment, leaving you feeling exposed while you’re simply trying to get ready? It’s a common nuisance that disrupts the calm of your post-shower routine, but there’s an elegant, simple, and incredibly practical solution: the bath towel wrap. For many, once you’ve embraced the comfort and unwavering security of a well-fitting towel wrap, returning to the constant re-adjustment of a traditional, unsecured towel becomes almost unimaginable. What’s even better is that these fantastic wraps aren’t just for purchase; they are remarkably easy and inexpensive to create right in your own home, offering a personalized touch that store-bought options can rarely match.
Imagine stepping out of a warm shower and effortlessly securing a plush, absorbent towel around you, confident that it will stay perfectly in place as you move, apply makeup, style your hair, or simply enjoy a quiet moment. This hands-free convenience is precisely what a custom bath towel wrap offers. While I initially opted to purchase mine, I quickly realized the immense satisfaction and significant savings that come with crafting your own. The DIY process is surprisingly straightforward, requires minimal time and basic sewing skills, and allows for complete personalization, making it a truly rewarding project. Bid farewell to the days of awkwardly re-adjusting your towel or resorting to flimsy hair clips that never quite hold; it’s time to embrace the stability, comfort, and chic style of a custom-made bath towel wrap.
Why a Bath Towel Wrap is a Game Changer for Your Daily Routine
The traditional bath towel, while perfectly functional for drying, often falls short when it comes to hands-free post-shower wear. The continuous struggle of keeping it securely wrapped can transform a relaxing routine into a minor annoyance, forcing you to use one hand to hold it in place. This is precisely where the bath towel wrap truly shines, revolutionizing your daily ritual into a more comfortable, efficient, and dignified experience.
Firstly, the paramount benefit of a well-designed towel wrap is its inherent security. Engineered with an elasticized top and a strong, adjustable Velcro closure, a towel wrap stays firmly in place, giving you the complete freedom to move, bend, and stretch without any fear of exposure. This invaluable peace of mind is crucial, whether you’re rushing to get dressed, preparing for a special occasion, or simply enjoying a moment of self-care and relaxation. It allows you to perform tasks like brushing your teeth, moisturizing, or blow-drying your hair without interruption.
Secondly, it offers unparalleled comfort. Typically crafted from soft, highly absorbent terry cloth or similar plush fabrics, these wraps are gentle against the skin and provide the perfect amount of warmth without overheating. Unlike full-length bathrobes, they are less bulky and allow for better airflow, making them an ideal choice for warmer climates or simply for feeling lighter and freer around the house. The snug, tailored fit ensures comfort without any uncomfortable constriction, adapting to your body’s contours.
Finally, the practicality of a bath towel wrap extends far beyond just post-shower use at home. It’s an excellent, versatile accessory for various situations: ideal for spa days, convenient for gym locker rooms, practical for dorm life, and even perfect for getting ready before a swim. Its ability to stay put makes it superior to an ordinary towel in these dynamic environments, simplifying your routine and adding a touch of organized luxury to almost every aspect of your daily life.
Embrace the DIY Spirit: Crafting Your Own Personalized Towel Wrap
While a wide array of store-bought bath towel wraps are readily available, there’s a unique sense of satisfaction and a myriad of advantages to be gained from crafting your own. The DIY approach not only empowers you with a new, practical skill but also unlocks a world of possibilities for customization, cost savings, and environmental consciousness.
One of the most significant perks of making your own towel wrap is the unparalleled ability to personalize it. You are not confined to standard sizes, generic colors, or limited patterns. Instead, you have the freedom to choose a towel that perfectly complements your bathroom decor, select a fabric that exquisitely appeals to your personal taste, or even add unique embellishments that reflect your individuality. This level of bespoke customization ensures that your towel wrap is truly yours, meticulously reflecting your unique style and precisely meeting your specific comfort and modesty needs.
From an economic standpoint, creating your own wrap is often far more budget-friendly than investing in a high-quality, store-bought equivalent. You can cleverly repurpose an old favorite bath towel that is still soft and absorbent but perhaps has a minor flaw, giving it a vibrant new lease on life. Alternatively, you can purchase an inexpensive yet plush bath sheet or terry cloth fabric, thereby keeping your material costs delightfully low. The primary expenses will be the towel itself, some elastic, and a strip of Velcro – all relatively inexpensive items that deliver immense value.
Moreover, the process of making a towel wrap is surprisingly straightforward and accessible, even for beginner sewers. It serves as an excellent introductory project to hone fundamental sewing skills, such as achieving neat straight stitches, creating a functional casing for elastic, and securely attaching closures. The profound sense of accomplishment and pride you’ll feel from wearing something you’ve meticulously made yourself is truly rewarding. It’s not just an inexpensive fix to an irritating problem; it’s an opportunity to create a tailored solution precisely to your measurements and preferences, making it a thoughtful gift as well.
Essential Preparations: Tips Before You Begin
- Choosing the Right Towel: For optimal coverage, superior comfort, and a truly luxurious feel, especially for women, it is highly recommended to use a bath sheet rather than a standard bath towel. Bath sheets boast more generous dimensions (typically around 35×60 inches or larger), providing ample length and width to ensure the finished wrap offers both security and modesty. When shopping, prioritize towels known for their exceptional softness, plushness, and high absorbency. Take the time to visit stores with a wide selection, such as a specialized home goods retailer, to physically feel different textures and weights of towels. A high-quality, dense terry cloth will undoubtedly be more comfortable, durable, and last longer. Carefully consider the color and pattern – this will become your new favorite go-to accessory, so choose wisely!
- Selecting Flexible Velcro: The type of Velcro you choose can significantly impact both the ease of sewing your project and the ultimate comfort of your finished wrap. Always opt for a sew-on Velcro that is notably flexible and relatively thin. Thicker, more rigid Velcro strips can present considerable challenges to sew through, potentially damaging your sewing machine needle or creating an uncomfortable bulk where the wrap fastens. Look for a width of approximately 1 to 1.5 inches for a truly secure closure. Ensure you purchase both the “hook” (rougher) and “loop” (softer) sides, and estimate the total length you’ll require – typically around 6-8 inches for the main closure, plus any extra for potential adjustments or if you wish to add additional fastening points.
- Gathering Your Tools: Beyond the essential towel and Velcro, you’ll need to assemble a few standard sewing supplies to ensure a smooth crafting process. A functional sewing machine is absolutely essential for creating neat, strong, and durable seams. You’ll also require a pair of sharp fabric scissors for precise cuts, a flexible tape measure for accurate sizing, several sewing pins or fabric clips to hold fabric securely in place, a spool of high-quality thread that perfectly matches or complements your chosen towel, and a large safety pin or a bodkin to efficiently thread the elastic through its casing. Having an iron and an ironing board readily available will also significantly enhance the process, helping you achieve crisp, professional-looking folds and perfectly pressed seams.
Step-by-Step Guide: How to Make Your Own Custom Bath Towel Wrap
Are you ready to transform a simple, ordinary towel into a luxurious, perfectly secure, and incredibly comfortable bath wrap? Follow these detailed, easy-to-understand steps to create a custom-fitted accessory that will undoubtedly revolutionize your entire post-shower routine, bringing a spa-like experience directly to your home.
Step 1: Measure and Prepare Your Towel
Begin by accurately taking your personal measurements. Stand upright and use your tape measure to determine the circumference around the fullest part of your bust or chest. To this measurement, add an additional 4 to 6 inches; this allowance is crucial for comfortable overlap and ease of movement, and it will represent the final width of your towel wrap. Next, determine the desired length of your wrap. Measure from just below your underarm down to where you wish the wrap to comfortably end (e.g., mid-thigh, just above the knee, or knee-length).
Carefully lay your chosen bath sheet or terry cloth flat on a clean, spacious surface, smoothing out any wrinkles. Using your previously calculated body width measurement, trim the towel to the appropriate width. If your chosen towel is already the ideal width, horizontal trimming may not be necessary. However, if you are using a standard bath towel that proves too narrow, you might consider seaming two pieces together (though using a generous bath sheet usually negates this need). For the length, precisely cut the towel to your desired measurement, adding an extra 1 inch for the top elastic casing and another 1 inch for the bottom hem. For example, if you aim for a 30-inch long wrap, cut your towel to a total length of 32 inches.
Once cut, if any raw edges remain (which will most likely be the case if you’ve trimmed the sides or bottom), meticulously hem them. To do this, fold the raw edge over by about 1/2 inch, press firmly with an iron, then fold over another 1/2 inch, press again, and stitch neatly along the inner fold line to create a clean, durable, and professional-looking hem. This process applies to any newly cut vertical side edges and the bottom edge of your future wrap. The top edge will be handled differently in the next step when creating the elastic casing.
Step 2: Create the Elastic Casing
The elastic casing is a critical component that ensures your towel wrap stays snug, secure, and perfectly in place. Take the top raw edge of your prepared towel. Carefully fold it over towards the wrong side (the side that won’t be visible when worn) by approximately 1/2 inch and press firmly with a hot iron. This initial fold establishes a clean, crisp edge for your casing.
Next, fold it over again, this time by about 1.25 to 1.5 inches. The exact measurement here is crucial and depends directly on the width of your elastic; you want the casing to be just wide enough for your elastic to pass through easily without excessive bunching or being too loose. Press this second fold firmly with your iron to create a well-defined channel for your elastic.
Using your sewing machine, stitch along the inner edge of this fold, close to the bottom of your newly formed casing, all the way around the entire top edge of the towel. It is extremely important to remember to leave a 2-inch opening unstitched at one end of the casing. This strategically placed opening is where you will precisely insert your elastic in the subsequent step. Don’t forget to backstitch at the very beginning and end of your stitching to secure the seam and prevent it from unraveling over time.
Step 3: Insert the Elastic
Now it’s time to add the elastic that will imbue your towel wrap with its signature secure and comfortable fit. Cut a piece of high-quality elastic. For an ideal comfortable fit, this piece should typically be about 4-6 inches smaller than your actual bust measurement. For example, if your bust measures 36 inches, aim to cut your elastic to approximately 30-32 inches. The goal is a snug fit that provides security without being uncomfortably tight or restrictive.
Attach a large safety pin to one end of the elastic. Carefully, yet confidently, thread the elastic, safety pin first, through the unstitched opening in the casing you meticulously created. Guide the safety pin and elastic all the way through the entire channel until the safety pin triumphantly emerges from the other side of the opening.
Exercise caution and ensure you do not accidentally lose the other end of the elastic inside the casing – a helpful tip is to pin it securely to the towel edge at the opening to prevent it from slipping in. Once both ends of the elastic are safely outside the casing, gently pull on the elastic to gather the fabric evenly along the top edge of the wrap.
Overlap the two ends of the elastic by about 1 inch and securely stitch them together using a strong zigzag stitch on your sewing machine. Reinforce this seam several times with multiple passes to ensure it holds firmly under tension. Once the elastic is robustly joined, gently pull the fabric of the casing to tuck the elastic seam neatly inside the channel. Finally, carefully close the 2-inch opening in your casing with a neat, straight stitch, again remembering to backstitch at the start and end for maximum durability.
Step 4: Attach the Velcro Closure
The Velcro closure is the defining element that makes your towel wrap truly functional, adjustable, and convenient. Lay your partially completed towel wrap flat with the newly elasticized top edge facing you. Clearly identify the two vertical ends of the wrap.
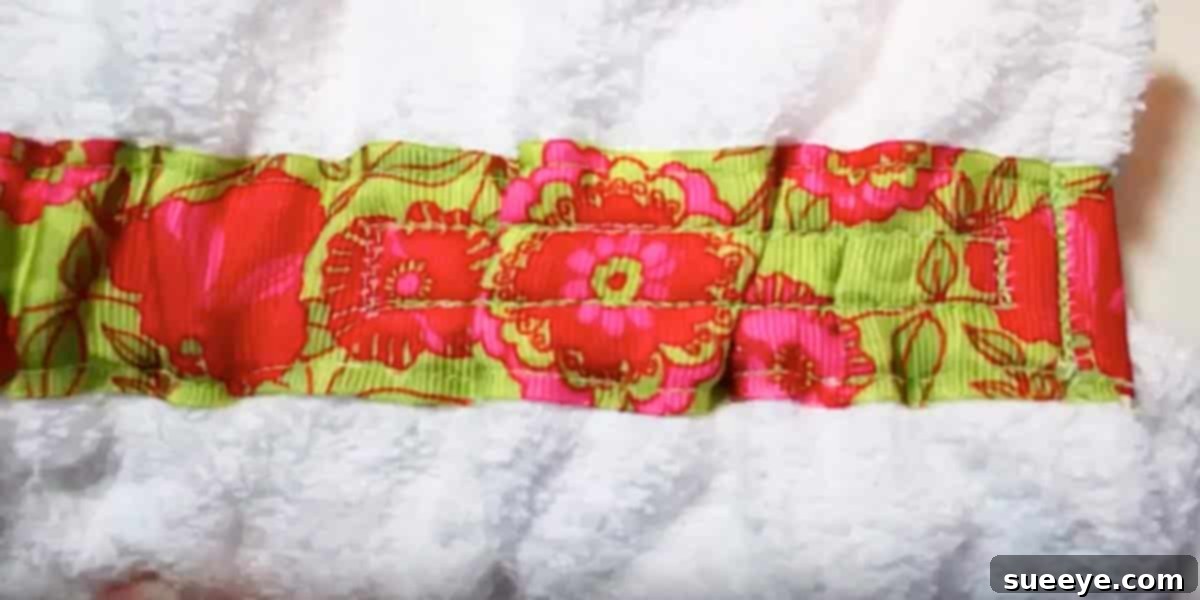
Take your sew-on Velcro. Cut a piece that is approximately 6-8 inches long. Decide which side of the wrap you prefer to overlap when worn. On the inner side of one vertical edge (this will be the side that rests underneath when the wrap is closed), carefully pin the “loop” (softer) side of the Velcro, starting from the top of the elastic casing and extending downwards. Ensure it is positioned neatly and perfectly straight. Stitch this piece of Velcro securely in place, sewing meticulously all around its perimeter and perhaps adding an ‘X’ stitch in the middle for extra reinforcement against tearing.
Then, on the outer side of the other vertical edge (this will be the side that rests on top when the wrap is closed), pin the “hook” (rougher) side of the Velcro. This piece should be precisely aligned to overlap and fasten perfectly with the first Velcro strip when the wrap is brought closed. Stitch this hook side firmly and neatly in place, just as you did with the loop side. Ensure your stitching is consistently neat and exceptionally strong, as this particular part of the wrap will experience regular use and stress. The generous length of the Velcro strip allows for slight adjustments in tightness, providing a customized fit every time.
Step 5: Final Touches and Testing
You’re almost there! Your bespoke bath towel wrap is nearing completion. Take a moment to meticulously trim any lingering loose threads from all your seams, ensuring a clean and professional finish. Give the entire wrap a final press with a warm iron to smooth out any wrinkles, making sure all seams lie perfectly flat and crisp.
Now for the most exciting part: it’s time to try on your magnificent, new, custom-made bath towel wrap! Wrap it comfortably around yourself, making absolutely sure the Velcro perfectly aligns and fastens securely. Take a moment to check the fit – does it feel snug but not uncomfortably tight? Does it feel wonderfully comfortable and reliably secure as you move, bend, or stretch?
If, by chance, you find it’s a little too loose, you can often remedy this by adding a small additional piece of Velcro further in on the “underneath” side, allowing for a tighter, more personalized closure. If, conversely, it feels too tight, you could potentially adjust the elastic or the Velcro placement if absolutely necessary, though careful measuring in Step 1 should ideally minimize such adjustments. Enjoy the instant transformation of your routine!
Customization Ideas to Make It Uniquely Yours
Once you’ve successfully mastered the basic construction of the bath towel wrap, the possibilities for personalization and creative expression are truly boundless. Don’t hesitate to let your imagination soar and get wonderfully creative to make your wrap truly unique and reflective of your personal style!
- Add Pockets for Convenience: For the ultimate in hands-free convenience, seriously consider adding a small patch pocket to the front or side of your wrap. This thoughtful addition is perfect for securely holding your phone, hairbrush, keys, or even a small book while you’re getting ready or relaxing. Simply cut a square or rectangular piece of matching towel fabric, neatly hem its edges, and stitch it securely onto your wrap before the final Velcro application.
- Embellishments and Decorative Trim: Elevate the aesthetic appeal of your wrap with a variety of decorative elements. You could easily add a contrasting trim or a colorful bias tape along the top or bottom edges, or even along the edge of the Velcro closure for an unexpected pop of color and texture. Personal touches like intricate embroidery, charming fabric appliqués, or even stylish iron-on patches can add significant character and make your wrap truly stand out from the crowd.
- Explore Different Fabric Choices: While classic terry cloth is the traditional and most popular choice, don’t be afraid to explore other fabrics for different feels and uses. Microfiber towels, for instance, are incredibly absorbent, lightweight, and exceptionally quick-drying, making them an ideal choice for gym use, travel, or humid environments. Waffle weave fabrics offer a distinctly luxurious, spa-like texture and excellent breathability. Just ensure that your chosen fabric is suitable for sewing and feels comfortable against your skin.
- Sizing for the Whole Family: Why stop at just one? Extend the joy of a custom towel wrap to everyone in your household! Easily adjust the measurements to create perfectly fitted wraps for children, partners, or even thoughtful guests. You could use different colors, patterns, or add personalized embroidered initials to easily distinguish whose wrap is whose, making bath time more organized and enjoyable for everyone.
Caring for Your Handmade Towel Wrap to Ensure Longevity
To ensure your beautiful, meticulously handmade bath towel wrap remains wonderfully plush, highly absorbent, and perfectly functional for many years to come, proper and consistent care is absolutely essential. A little attention to detail in maintenance will go a long way in preserving its quality and extending its lifespan.
- Washing Instructions: Always adhere closely to the specific care instructions provided for your original towel fabric. Generally, it’s safe to machine wash your towel wrap in warm or cold water with similar colors. Avoid the temptation to use excessive amounts of detergent, as this can lead to a sticky residue buildup in the towel fibers, which will unfortunately reduce their absorbency over time. For best results and to prevent lint transfer, it is often highly recommended to wash towels separately from other clothing items.
- Velcro Care: Prior to every wash, it is crucial to always close the Velcro tabs securely. This simple yet effective step prevents the “hook” (rougher) side of the Velcro from snagging, pulling, and potentially damaging the delicate towel fabric during the wash cycle. It also efficiently keeps lint and stray fibers from accumulating within the Velcro itself, which can significantly weaken its grip and effectiveness over time, ensuring a strong closure for longer.
- Drying Tips: When drying, tumble dry your towel wrap on a low to medium heat setting. Over-drying towels can damage the fibers, leading to a stiff texture, and can also degrade the elastic prematurely. For optimal results and to preserve the delightful softness and absorbency, you can remove the wrap from the dryer while it is still slightly damp and then allow it to air-dry completely. It is also advisable to avoid using liquid fabric softener, as it can coat the towel fibers, thereby reducing their natural absorbency and potentially impacting the elastic.
Congratulations once again! You have successfully brought to life your very own bath towel wrap, a splendid testament to your creativity, resourcefulness, and practical skills. No more wrestling with slipping, insecure towels or feeling self-conscious while diligently getting ready for your day. You now possess a custom-fitted, reliably secure, and incredibly comfortable accessory that will seamlessly integrate a touch of spa-like luxury and unmatched everyday convenience into your routine. Enjoy the newfound freedom, comfort, and sheer elegance of your new favorite bath essential!