
Clever DIY Jar Storage Solutions: Organize Your Home with Ease
Are you constantly searching for that elusive item, buried under a pile of clutter? Do you dream of a home where everything has its place, easily accessible and beautifully organized? If so, you’re in the right place! This article will guide you through a brilliant, convenient, and incredibly satisfying DIY organization method that puts everything right at your fingertips when you need it most. Get ready to transform your living spaces with simple jar storage solutions.
The Universal Challenge of Clutter and the Joy of Organization
It’s a universal truth: keeping things organized can be a significant challenge, especially for items you use frequently. Whether it’s the multitude of threads and notions in a sewing room, the endless array of spices in the kitchen, or the assortment of screws and bolts in the garage, clutter has a way of accumulating. This problem is particularly acute in creative spaces or areas of high activity where items are constantly in use and need to be readily available. The good news is that with a bit of creativity and some accessible materials, you can implement organizational systems that not only look great but also drastically improve your efficiency and reduce stress.
Why Organization Matters: Beyond Just Tidiness
The benefits of a well-organized home extend far beyond mere aesthetics. An organized space contributes significantly to your overall well-being and productivity:
- Saves Time: No more frantic searches for misplaced items. When everything has a designated spot, you spend less time looking and more time doing.
- Reduces Stress: A cluttered environment can contribute to mental fatigue and stress. An orderly space promotes a sense of calm and control.
- Increases Productivity: In a tidy workspace, your focus remains on the task at hand, free from distractions caused by disarray.
- Protects Your Belongings: Storing items properly prevents damage, spills, and loss, extending their lifespan.
- Enhances Aesthetics: An organized home simply looks better, creating a more inviting and enjoyable living environment.
- Maximizes Space: Clever storage solutions help you utilize every inch of your home, making even small areas feel larger and more functional.
Discover the Versatility of Jar Storage: A DIY Revolution
One of the most effective, economical, and aesthetically pleasing ways to organize small items is by utilizing jars. From the classic Mason jar to recycled food jars, these clear containers offer an incredible range of possibilities for decluttering your home. Their transparent nature allows you to see the contents at a glance, eliminating the need for rummaging through opaque boxes or drawers. This simple yet brilliant concept can be applied to a plethora of items, limited only by your imagination.
Embracing Mason Jars and Beyond
While any sturdy glass jar can be repurposed for organization, Mason jars hold a special place in the DIY community. Their robust construction, standardized mouth sizes, and charming aesthetic make them a popular choice. Available in various sizes, they can accommodate everything from tiny beads to larger dried goods. However, don’t overlook other glass jars from your pantry – pickle jars, jam jars, and even baby food jars are perfect candidates for this upcycling project, offering diverse sizes and shapes to suit specific needs.
Unleash the Power of Under-Shelf Jar Storage
One particularly ingenious method takes jar organization to the next level: under-shelf storage. This technique leverages vertical space, freeing up valuable countertop or shelf real estate. It’s especially effective in areas where every inch counts, like craft rooms, kitchens, or workshops. The brilliance lies in securing the jar lids to the underside of a shelf, allowing the jars themselves to be easily screwed on and off. This not only keeps items organized but also makes them highly visible and accessible.
The Ingenious Lid-to-Shelf Method Explained
The core of this DIY project involves attaching the lid of a jar directly to the underside of a shelf or cabinet. Once the lid is securely fastened, the body of the jar can then be twisted into place. When you need something, simply unscrew the jar from its lid. This method works exceptionally well with single-piece jar lids, but it’s also perfectly adaptable for Mason jars. For Mason jars, you typically use the metal “ring” part of their two-piece lid. The ring is screwed to the shelf, and then the jar, containing its contents, is twisted into this secured ring. This offers a sturdy and reliable storage solution, providing a clear view of your items while keeping them neatly tucked away.
Materials You’ll Need
Gathering your supplies is the first step towards a beautifully organized space. Here’s what you’ll likely need:
- Glass Jars with Lids: Mason jars (pint, quart, or half-pint sizes are popular), recycled jam jars, pickle jars, or baby food jars. Ensure the lids are sturdy enough to be screwed into.
- Wooden Shelf or Cabinet: Choose a shelf sturdy enough to hold the weight of your filled jars.
- Screws: Wood screws that are long enough to pass through the jar lid and securely into the shelf, but not so long that they protrude through the top of the shelf.
- Drill/Screwdriver: For making pilot holes and driving screws.
- Pencil or Marker: For marking screw placement.
- Ruler or Measuring Tape: To ensure even spacing.
- Safety Glasses: Always recommended when using power tools.
Step-by-Step Guide to Your DIY Jar Storage
Transforming your space is easier than you think with these straightforward steps:
- Prepare Your Jars: Thoroughly wash and dry all jars and their lids. Remove any labels for a cleaner look.
- Measure and Mark: Decide on the placement of your jars under the shelf. Use a ruler to ensure even spacing between each jar. Place the lid face down on the underside of the shelf and mark the spots where you want to drill your pilot holes, typically 3-4 holes per lid, spaced evenly around the edge.
- Drill Pilot Holes: Using a drill bit slightly smaller than your screws, carefully drill pilot holes through the marked spots on the lids. These holes will prevent the lid from cracking and make screwing easier. Then, drill corresponding pilot holes into the underside of the shelf, making sure they align perfectly with the lid holes.
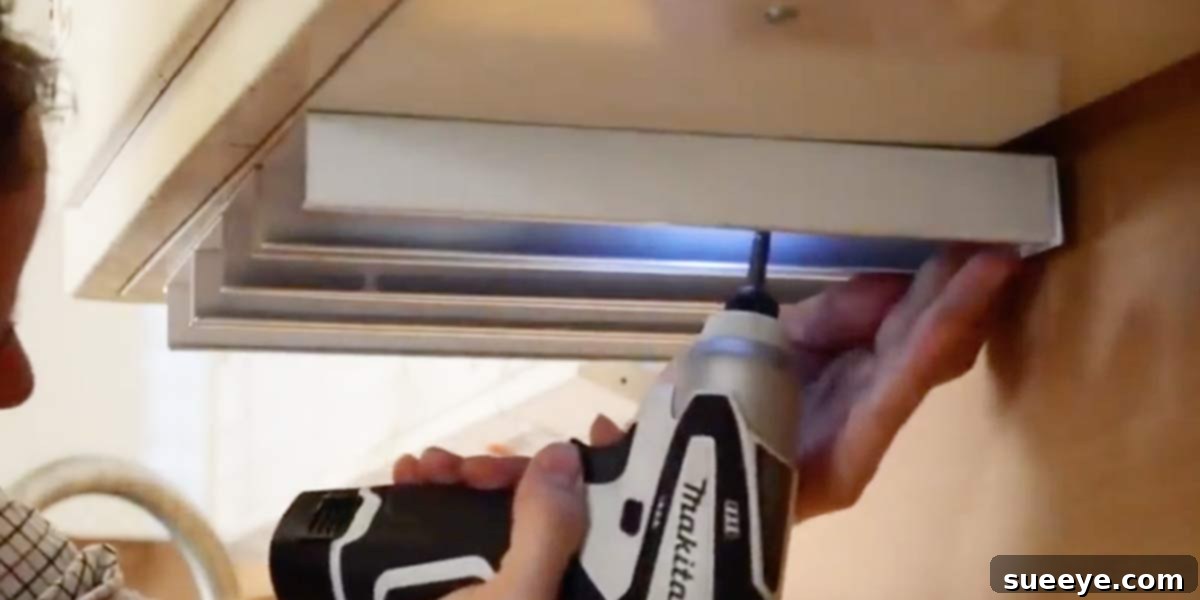
- Attach the Lids: Place the lid flat against the underside of the shelf, aligning the pilot holes. Drive your screws through the lid and into the shelf until the lid is securely fastened. Repeat for all your chosen lids.
- Fill Your Jars: Once all lids are securely in place, fill your jars with your desired items.
- Screw Jars into Lids: Carefully twist each filled jar into its corresponding lid, ensuring it’s snug but not overly tightened.
- Label (Optional but Recommended): For ultimate organization, label your jars. This could be with a permanent marker directly on the glass, a label maker, chalkboard paint, or even small tags tied around the neck.
Transforming Every Corner of Your Home with Jar Storage
The beauty of this jar storage system lies in its adaptability. Once you master the technique, you’ll find endless applications throughout your home. Let’s explore some specific areas where this DIY solution shines:
Craft and Sewing Room Magic
For crafters and sewers, the sheer volume of small notions can be overwhelming. Under-shelf jar storage is a game-changer:
- Bobbins and Thread: Keep bobbins organized by color or type, with the corresponding thread spools stored nearby.
- Safety Pins and Straight Pins: No more scattered pins! Keep them in easily visible jars.
- Beads and Buttons: Sort by color, size, or material. The clear jars make it simple to find the perfect embellishment.
- Needles and Thimbles: Store these small but essential tools safely and visibly.
- Small Fabric Scraps: Perfect for holding tiny fabric remnants useful for patchwork or appliqué.
- Glitter and Embellishments: Keep your creative supplies tidy and ready for your next project.
Kitchen and Pantry Perfection
The kitchen is another area ripe for organization, especially when it comes to spices and small dry goods:
- Spices and Herbs: Say goodbye to cluttered spice racks. Mount jars under a cabinet for an easily accessible and visually appealing spice collection.
- Baking Sprinkles and Decorations: Keep your colorful baking essentials neat and visible.
- Tea Bags or Coffee Pods: A stylish way to store your daily brews.
- Small Dry Goods: Seeds, nuts, dried fruits, or even small pasta shapes can be beautifully displayed and kept fresh.
- Food Safety Note: When storing food items, ensure your jars are thoroughly cleaned and dry. For longer storage, consider airtight seals or regularly rotating contents.
Workshop and Garage Genius
The garage or workshop often becomes a repository for countless small parts. Jar storage can bring order to the chaos:
- Screws, Nails, and Washers: Sort hardware by size and type, making repairs and projects much more efficient.
- Nuts and Bolts: Keep matching pairs together or categorize them for quick retrieval.
- Drill Bits and Small Tools: Protect delicate tools and keep them within reach.
- Crafting Components: If you work with electronics or model building, small components can be perfectly organized in jars.
- Fishing Tackle: Hooks, sinkers, and lures can be neatly sorted, preventing tangles and rust.
Bathroom and Office Harmony
Even these smaller spaces can benefit from the jar storage treatment:
- Bathroom Essentials: Cotton balls, Q-tips, hair ties, bobby pins, bath salts, and small soaps.
- Office Supplies: Paper clips, rubber bands, push pins, staples, and thumb tacks.
Tips for Maximizing Your Jar Storage System
To get the most out of your DIY jar organization, consider these extra tips:
- Label Everything: Even with clear jars, labels save time and ensure items are returned to their correct spot. Consider using chalkboard paint on the jar lids for erasable labels.
- Vary Jar Sizes: Use a mix of large and small jars to accommodate different item sizes, optimizing space and storage.
- Decorate Your Jars: For a personalized touch, you can paint the lids, add decorative labels, or even frost the glass for a softer look.
- Mind the Weight: While sturdy, ensure your shelf can support the combined weight of the jars and their contents. Distribute heavier items evenly.
- Regular Maintenance: Periodically check the security of the screwed-on lids and dust the jars to maintain a clean appearance.
Embrace the Organized Life: The Lasting Reward
Getting your home organized, especially with ingenious DIY solutions like this jar storage system, always makes you feel better. It might require a bit of effort and time to set up, but the feeling of satisfaction and calm you experience once it’s done is truly priceless. Imagine walking into a sewing room where every bobbin is in its place, a kitchen where spices are perfectly arranged, or a workshop where every screw is easy to find. This isn’t just about tidiness; it’s about reclaiming your space, saving time, and fostering a more peaceful and productive environment.
So, why wait? Gather your jars, pick your shelf, and start transforming your cluttered spaces into models of organization. Dive into the world of DIY, and experience the lasting reward of a beautifully ordered home. Your future organized self will thank you!