
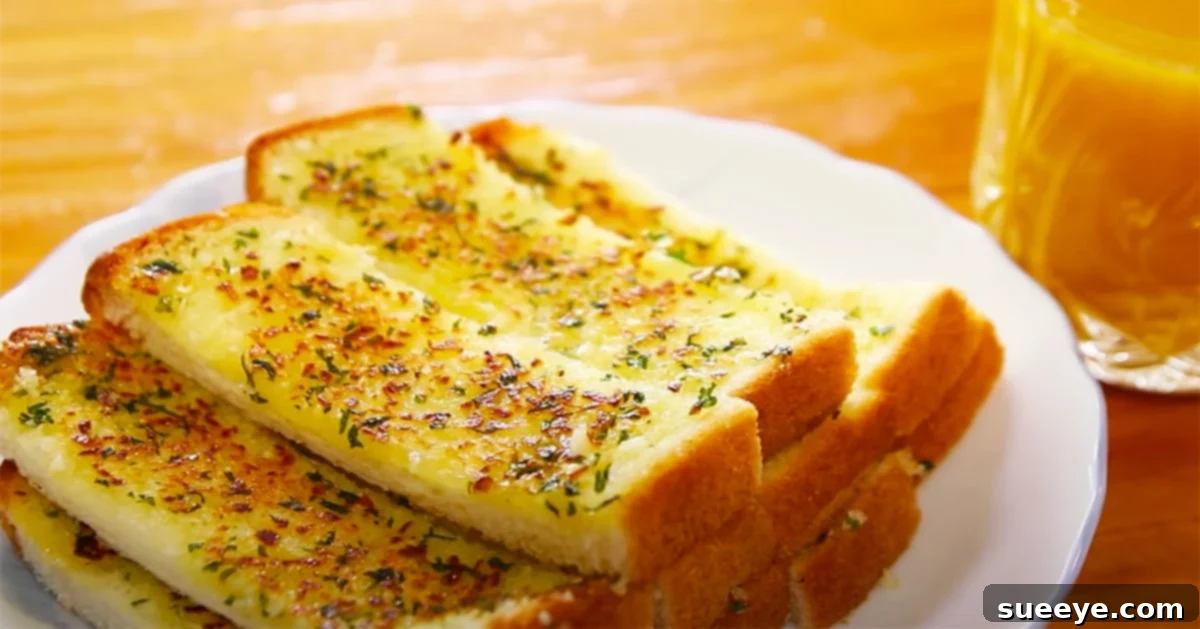
Craving the irresistible aroma and savory taste of freshly made garlic bread but don’t want to turn on your oven? Look no further! This incredible stovetop garlic bread recipe, inspired by the innovative methods of Healing Cooking on YouTube, offers a simple, quick, and equally delicious alternative. Perfect for any time of day, whether as a delightful snack or a quintessential side dish for your favorite pasta, this recipe proves that you don’t need fancy equipment to create culinary magic.
What makes this recipe truly stand out is its incredible ease and accessibility. Most of the ingredients are likely already staples in your pantry, making it a go-to option for those spontaneous cravings. Unlike many traditional recipes that rely on an oven, this method utilizes a simple nonstick pan, bringing the joy of homemade garlic bread to any kitchen, big or small. While the original recipe suggests a touch of sugar, I personally lean towards a more savory profile and often substitute it with a pinch of salt to enhance the garlic and butter flavors. The true star here, however, is the use of fresh, finely chopped garlic – a detail that elevates the taste far beyond what garlic powder can achieve. The vibrant punch of fresh garlic makes an undeniable difference, transforming a simple slice of bread into an extraordinary treat.
This pan-fried garlic bread isn’t just about convenience; it’s about maximizing flavor with minimal effort. Imagine golden-brown, crispy edges giving way to a soft, garlicky interior, all achieved in minutes right on your stovetop. It’s an experience that rivals any oven-baked version, offering a fresh perspective on a beloved classic. Plus, for those who love a little extra decadence, a sprinkle of cheese during the final moments of cooking can easily transform it into a cheesy garlic bread masterpiece. Get ready to impress your taste buds with this unbelievably easy and incredibly tasty homemade garlic bread.
Essential Ingredients for Your Stovetop Garlic Bread:
Crafting the perfect pan-fried garlic bread begins with selecting quality ingredients. This recipe keeps things wonderfully simple, relying on a handful of pantry staples to create an explosion of flavor. Here’s a detailed look at what you’ll need:
- 4 Slices of Your Preferred Bread: While the original recipe is flexible, common sandwich bread works beautifully. For a more robust flavor and texture, consider using Texas toast, sourdough slices, or even a section of a French baguette cut into manageable pieces. The key is a bread that can absorb the garlic butter and crisp up nicely.
- 2 Tablespoons of Freshly Chopped Garlic: This is non-negotiable for superior flavor. Fresh garlic provides a pungent, aromatic kick that garlic powder simply cannot replicate. Finely mince your garlic cloves to ensure even distribution and maximum flavor release. Adjust the amount to your personal preference – some like it mild, others love a bold garlic punch!
- 4 Tablespoons of Softened Butter (or 4 Small Pieces): Butter is the heart of any good garlic bread. Using softened, unsalted butter allows you to control the overall saltiness of your spread. If you only have salted butter, simply omit any additional salt you might add. Ensure it’s soft enough to mix easily but not melted, as this will help create a creamy, spreadable consistency.
- 2 Teaspoons of Granulated Sugar (Optional, or Substitute with Salt): This ingredient is where personal preference truly comes into play. While the original recipe includes sugar, it can give the garlic bread a slightly caramelized and sweet undertone that some enjoy. However, for a purely savory experience, I highly recommend replacing the sugar with a generous pinch of fine sea salt or kosher salt (about 1/2 to 1 teaspoon, adjusted to taste). Salt will accentuate the garlic and butter, making the flavors pop.
- A Dash of Parsley Powder (or Fresh Chopped Parsley): Parsley adds a touch of fresh, herbaceous flavor and a beautiful visual appeal. While parsley powder is convenient, fresh chopped parsley will offer a brighter, more vibrant taste and texture. Don’t hesitate to use other herbs like dried oregano or a mix of Italian herbs if you desire a different aromatic profile.
Step-by-Step Directions for Perfect Stovetop Garlic Bread:
Preparing this incredibly flavorful garlic bread on your stovetop is a straightforward process. Follow these detailed steps to achieve golden, crispy, and utterly delicious results every time.
1. Prepare Your Bread Base
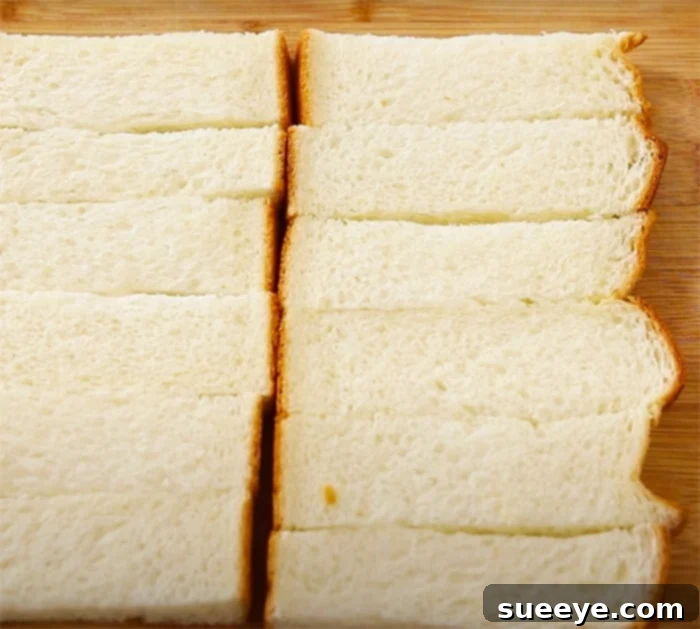
Begin by taking your chosen slices of bread. Carefully cut off the crusts from all sides. While this step is optional, removing the crusts ensures a uniform texture and allows the garlic spread to reach every edge, contributing to a more tender and enjoyable bite. Once the crusts are removed, cut each slice of bread into smaller, manageable strips or triangles. This increases the surface area for the garlic butter and makes them perfect for snacking or serving alongside a meal. Aim for pieces that are easy to handle and cook evenly in your pan.
2. Create the Aromatic Garlic Spread
In a small mixing bowl, combine the softened butter, freshly chopped garlic, your choice of sugar or salt, and the parsley powder (or fresh parsley). Using a spoon or a small spatula, thoroughly mix all the ingredients until they are well incorporated and form a cohesive, spreadable paste. Ensure the garlic is evenly distributed throughout the butter mixture. The consistency should be soft enough to spread easily but firm enough to cling to the bread without melting too quickly. This vibrant mixture is the heart of your garlic bread, so take a moment to ensure it’s perfectly combined.
3. Generously Apply the Garlic Mixture
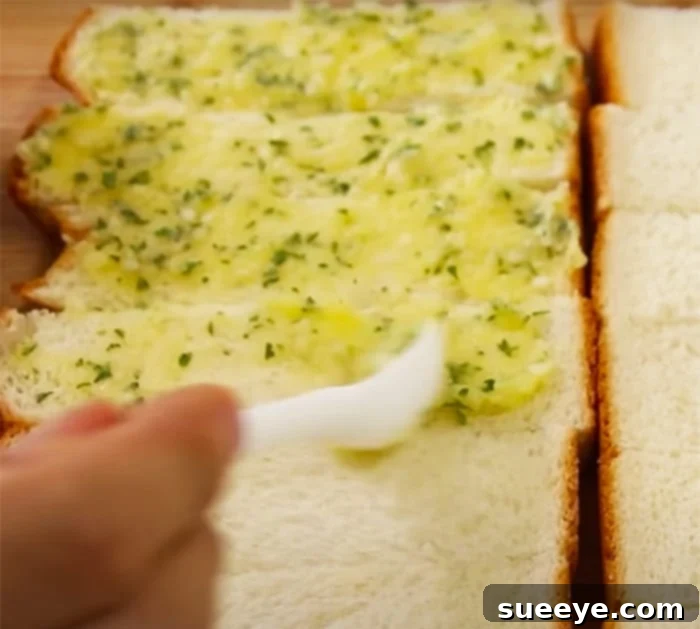
Once your garlic spread is ready, take each individual bread strip and liberally apply the mixture to one side. You can use a butter knife or the back of a spoon for this. Don’t be shy – a generous layer ensures maximum flavor! Make sure the spread covers the entire surface of the bread piece. The goal is to coat each slice evenly, ensuring every bite delivers that delightful garlic butter goodness. If you plan to add cheese, this is the side you’ll eventually sprinkle it on.
4. Begin the Stovetop Cooking Process
Place a nonstick pan over your stovetop and heat it to the lowest possible setting. It’s crucial to start with a very low heat to prevent the garlic from burning and to allow the bread to crisp up slowly and evenly. Once the pan is gently warmed, carefully lay down the prepared bread slices, garlic-butter side up, into the pan. Do not overcrowd the pan; cook in batches if necessary to ensure each piece has enough space to cook properly without steaming. Let the first side (the plain bread side) cook until it turns a beautiful golden brown and becomes delightfully crispy. This usually takes a few minutes, so be patient and resist the urge to crank up the heat.
5. Flip, Finish, and Optional Cheese
Once the bottom side of the bread is golden and crisp, it’s time to carefully flip each piece over. Now, the garlic-butter side will be directly in contact with the pan. This is a critical step: maintain that lowest heat setting! The butter and garlic will quickly heat up and become aromatic. Watch it closely, and do not burn the garlic sauce. The goal is to toast the bread until it’s golden and the garlic is fragrant and lightly cooked, not charred. If you’re making cheesy garlic bread, now is the time to sprinkle your chosen shredded cheese (like mozzarella, parmesan, or a blend) over the garlic-butter side. Cover the pan for a minute or two to help the cheese melt, creating a gooey, irresistible topping. Once done, remove the garlic bread from the pan immediately to prevent overcooking.
Tips for Stovetop Garlic Bread Success:
- Control the Heat: The absolute most important tip is to keep your stovetop heat on the lowest setting. High heat will burn the garlic and butter quickly, leading to a bitter taste and an unappetizing appearance. Low and slow is the secret to perfectly golden, fragrant garlic bread.
- Don’t Overcrowd the Pan: Cook your bread in batches if necessary. Overcrowding the pan reduces the pan’s temperature and can lead to steaming rather than toasting, resulting in soggy garlic bread. Give each piece space to breathe and crisp up.
- Fresh Garlic is Key: While garlic powder is convenient, it simply doesn’t compare to the robust, fresh flavor of finely chopped garlic. Invest the extra minute to mince fresh cloves for a superior taste.
- Adjust Seasoning to Taste: The debate between sugar and salt in garlic bread is personal. If you prefer savory, definitely substitute the sugar with salt. Taste your garlic butter mixture before spreading to ensure it matches your preference.
- Experiment with Herbs: While parsley is classic, don’t hesitate to try other fresh or dried herbs like oregano, thyme, rosemary, or a good Italian seasoning blend. Each will add a unique aromatic dimension.
- Serve Immediately: Garlic bread is best enjoyed hot and fresh from the pan. The butter is still melted, the bread is crispy, and the aromas are at their peak.
Creative Variations & Serving Suggestions:
This basic stovetop garlic bread recipe is fantastic on its own, but it also serves as an excellent canvas for creativity. Here are a few ideas to customize your garlic bread and elevate your meal:
- Cheesy Garlic Bread: As mentioned, this is a crowd-pleaser. Simply sprinkle shredded mozzarella, cheddar, or a blend of Italian cheeses over the garlic-butter side during the last minute of cooking, covering the pan to melt the cheese until gooey.
- Spicy Garlic Bread: Add a pinch of red chili flakes to your garlic butter mixture for a subtle kick, or a generous dash for those who love the heat.
- Herb Lover’s Garlic Bread: Beyond parsley, incorporate finely chopped fresh basil, chives, or a mix of dried Italian herbs for an extra layer of flavor.
- Garlic Bread Crostini: Use thinly sliced baguette or ciabatta bread for elegant, bite-sized crostini that are perfect for appetizers.
- Serving Suggestions: This versatile garlic bread is an ideal companion for a wide array of dishes. It’s an absolute must-have for any pasta night, pairing beautifully with spaghetti, lasagna, or a creamy Alfredo. It also makes a fantastic side for hearty soups, fresh salads, or grilled meats. Beyond being a side, these small, flavorful pieces are excellent as a quick snack on their own, or as a delightful appetizer for any gathering.
Storing and Reheating Leftovers:
While garlic bread is best enjoyed fresh, you can store any leftovers. Allow them to cool completely before placing them in an airtight container at room temperature for up to two days, or in the refrigerator for up to four days. To reheat, simply place them back in a nonstick pan over low heat until warmed through and crispy again, or toast them lightly in a toaster oven.
Overall, this stovetop garlic bread recipe is an absolute game-changer for anyone who loves the classic comfort food but seeks a simpler, quicker preparation method. Its incredible flavor, combined with the ease of preparation, makes it a perfect snack or a delightful accompaniment for your next pasta night, soup dinner, or casual gathering. The small, perfectly portioned pieces are incredibly tasty and so easy to devour. While the inspiring YouTube tutorial is presented in Korean, the visual instructions are so clear and straightforward that you can easily follow along even without understanding the language. However, turning on the subtitles is always an option if you prefer. Embrace the simplicity and savor every garlicky, buttery bite of this homemade wonder!