
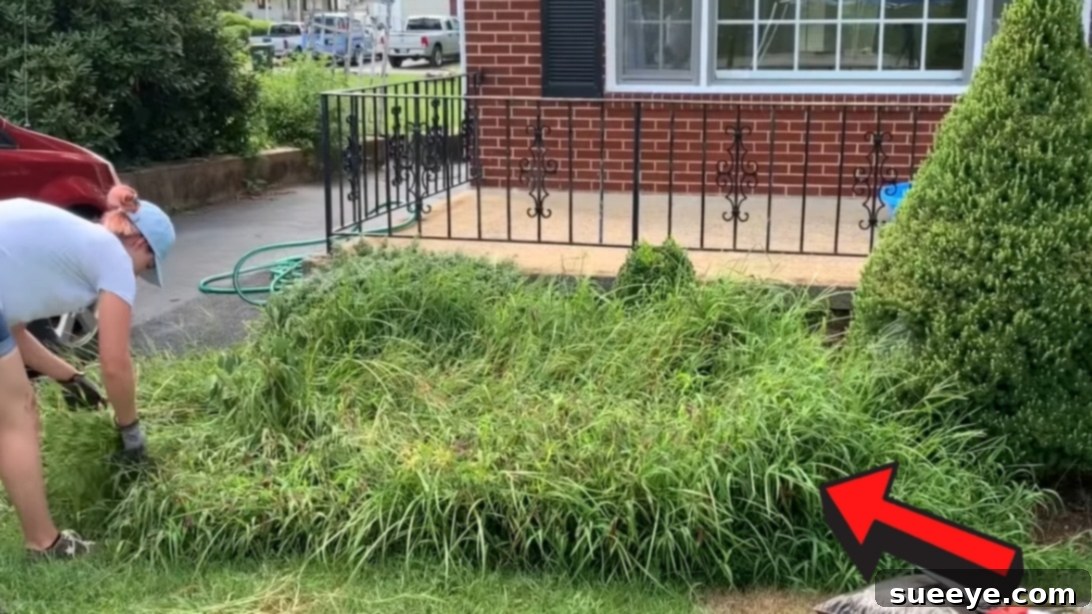
Tired of battling relentless weeds that seem to sprout overnight, robbing your garden of its beauty and your plants of essential nutrients? Many gardeners spend countless hours and significant money on herbicides or exhausting manual labor, only to see weeds return. But what if there was a simple, affordable, and incredibly effective method to reclaim your garden with minimal effort? Inspired by the brilliant technique shared by Crystal Does, this guide will walk you through an ingenious approach that leverages common materials to create a long-lasting, weed-free environment. This isn’t just about getting rid of weeds; it’s about fostering healthier soil, conserving water, and creating a more sustainable garden. Prepare to transform your landscape and enjoy the tranquil beauty of a meticulously maintained garden without the usual hassle.
Essential Materials for Effective Weed Control
Gathering the right tools and materials is the first step towards a pristine garden. This method is incredibly budget-friendly, often utilizing items you might already have or can source easily. Ensure you have everything on hand before you begin to make the process seamless.
- Razor Blade or Utility Knife: Essential for precise cutting, especially when preparing cardboard around existing plants or tackling tough cardboard boxes. A sharp blade makes all the difference.
- Ample Supply of Mulch: This is your primary defense layer. We recommend acquiring significantly more mulch than you initially anticipate needing. A generous second layer provides superior weed suppression and insulation. Opt for organic mulches like wood chips, shredded bark, straw, or even compost, depending on your aesthetic preferences and garden’s needs.
- Plenty of Cardboard: This is the secret weapon of our technique. Collect cardboard boxes, ensuring they are free from plastic coatings, excessive tape, or glossy labels. Plain, corrugated cardboard is ideal. The more you have, the better your coverage will be.
- Durable Gardening Gloves: Protect your hands from dirt, thorns, and any potential irritants. Comfort is key for an enjoyable gardening experience.
- Grass Cutter Scissors or Hand Pruners: Useful for neatly trimming down existing vegetation and precisely cutting back plants if necessary.
- Water Source: A watering can or hose is needed to thoroughly wet the cardboard layer, helping it settle and initiate decomposition.
Expert Tip: When sourcing cardboard, local appliance stores, bike shops, or grocery stores are excellent places to find large, clean sheets for free. Always prioritize cardboard that is free of plastic or wax coatings, as these will hinder decomposition and introduce unwanted chemicals into your soil.
Step-by-Step Guide to a Weed-Free Garden
This method, often referred to as “sheet mulching” or “lasagna gardening,” works by smothering existing weeds, blocking light, and building healthy soil. Follow these steps carefully for the best results in your garden weed removal project.
Step 1: Preparing Your Garden Bed for Weed Removal
The initial preparation of your garden bed is crucial for the success of this weed control method. While the beauty of this technique is that it minimizes exhaustive weeding, a little upfront effort goes a long way. Begin by wearing your protective gardening gloves. You have two main approaches for dealing with existing weeds and grass:
- Manual Removal (for sparse weeds or small areas): For smaller, more manageable weed patches, manually pull out the weeds, ensuring you remove as much of the root system as possible. This is particularly effective for annual weeds with shallow roots.
- Trimming (for dense weeds or larger areas): For areas with dense weed growth or established grass, you can simply cut the vegetation down to a very low height, ideally about a quarter of an inch from the soil surface. This reduces the biomass that the cardboard needs to smother, making the process more efficient. There’s no need to remove all the clippings; they will naturally decompose under the cardboard and contribute organic matter to the soil. This approach is excellent for preparing large areas without excessive physical strain.
The goal here is to reduce the existing plant material, making it easier for the cardboard to create an effective light barrier. Even if you leave some roots, the cardboard will deprive them of light, eventually causing them to die and decompose.
Step 2: Preparing Existing Garden Plants
If you have existing plants in the area you’re treating, it’s important to prepare them for the new conditions. This step is about ensuring their continued health and vigor under the cardboard and mulch layers. Carefully inspect your plants:
Look for any signs of struggle or excessive foliage. If you notice a plant with a slightly green stem but an abundance of leaves, consider giving it a gentle trim. Using your grass cutter scissors or hand pruners, carefully cut back some of the foliage. The key here is to trim *without* causing undue stress or “shocking” the plant. The reason for this trimming is twofold: first, it signals to the plant to focus its energy on root establishment and new growth rather than maintaining a large canopy. Second, it reduces the plant’s need to sustain extensive foliage when it’s already adapting to potential changes in light and moisture availability from the new weed barrier. This thoughtful pruning helps the plant conserve energy and adapt more readily to its newly weed-free, mulched environment.
Step 3: Laying the Cardboard Foundation for Weed Suppression
This is arguably the most critical step in creating your long-term weed barrier. The cardboard layer acts as an impenetrable blanket, smothering existing weeds by blocking sunlight and inhibiting new weed seeds from germinating. Begin by breaking down your collected cardboard boxes into manageable pieces, if they aren’t already flat. Remove all tape, staples, and plastic labels – these materials will not decompose and can introduce unwanted elements into your soil. Once prepared, start laying the cardboard directly over the cleared or trimmed garden bed.
Key Principles for Cardboard Placement:
- Overlap Extensively: Ensure that each piece of cardboard significantly overlaps the adjacent pieces by at least 4 to 6 inches. This creates a continuous barrier and prevents weeds from finding gaps to push through. Think of it like laying shingles on a roof.
- Cover Completely: Strive to cover as much of the soil surface as possible. The more thoroughly you cover, the fewer opportunities weeds will have to emerge. Extend the cardboard beyond the immediate planting area if you wish to expand your garden bed or create a wider weed-free zone.
- Perimeter for Existing Plants: If you have established plants you wish to keep, use your utility knife or razor blade to carefully cut out a circular perimeter around the base of each plant. This opening should be generous enough to allow water and air to reach the plant’s roots without being restricted by the cardboard. Avoid placing cardboard directly against the stem, as this can trap moisture and encourage disease.
Once you’ve laid down a solid, overlapping layer of cardboard, it’s essential to thoroughly water it. Drench the cardboard until it is completely saturated. This serves several purposes: it helps the cardboard mold and settle firmly to the contours of the ground, preventing it from blowing away on windy days, and initiates the decomposition process. The moisture also encourages beneficial soil microbes to begin breaking down the cardboard, turning it into rich organic matter for your soil over time. This crucial step ensures your cardboard foundation is stable and ready to work its magic.
Step 4: Applying the Mulch Layer for Enhanced Protection and Aesthetics
With your cardboard foundation firmly in place and saturated, the final step is to apply a generous layer of mulch. This layer is not merely for aesthetics; it plays a vital role as a second line of defense against weeds, while also providing numerous benefits for your soil and plants. Liberally apply your chosen mulch directly on top of the wet cardboard.
Mulch Application Guidelines:
- Thickness Matters: Aim for a substantial layer of mulch, typically 4 to 6 inches deep. This thickness is crucial for effective weed suppression, as it further blocks any light that might attempt to penetrate the cardboard gaps and adds significant weight to hold the cardboard in place.
- Even Distribution: Spread the mulch evenly across the entire cardboard-covered area. Consistent depth ensures uniform weed control and a cohesive, attractive appearance. Use a rake or your gloved hands to distribute it smoothly.
- Benefits of Mulch: Beyond aesthetics and weed blocking, mulch offers incredible advantages. It helps retain soil moisture by reducing evaporation, meaning you’ll need to water your plants less frequently. It regulates soil temperature, keeping roots cooler in summer and warmer in winter. As organic mulches decompose, they slowly release nutrients, enriching your soil and feeding beneficial microorganisms. Furthermore, mulch prevents soil erosion and compaction, contributing to overall garden health.
By creating this two-tiered system of cardboard followed by a thick layer of mulch, you’re building a formidable barrier that effectively smothers existing weeds and prevents new weed seeds from germinating. The result is a beautifully maintained garden that requires significantly less effort to keep weed-free throughout the growing season.
Why This Method is the Easiest Way to Get Rid of Weeds (Cheap and Fast)
This “sheet mulching” technique offers a multitude of benefits that make it superior to many traditional weed control methods. It’s not just about eliminating weeds; it’s about building a healthier, more sustainable garden ecosystem.
- Unmatched Weed Suppression: The combination of cardboard and mulch creates an incredibly effective barrier. Cardboard smothers existing weeds by blocking sunlight and acts as a physical barrier against new growth from below. The mulch then serves as a secondary blocker, catching any airborne weed seeds and preventing them from reaching the soil.
- Significant Time and Labor Savings: Imagine spending less time bent over, pulling stubborn weeds! After the initial setup, your weeding chores will drastically decrease, freeing up your time to enjoy your garden or focus on other planting projects. It’s a “set it and forget it” solution for long-term weed control.
- Incredibly Cost-Effective: Cardboard is often free for the taking, and organic mulches can be sourced affordably, especially if you opt for local wood chips, shredded leaves, or even homemade compost. This method eliminates the need for expensive chemical herbicides or specialized weeding tools.
- Boosts Soil Health Organically: As the cardboard and organic mulch layers decompose, they gradually break down into nutrient-rich organic matter. This process significantly improves soil structure, aeration, and fertility, fostering a thriving environment for beneficial microbes, earthworms, and your desired plants. You’re essentially building healthy soil from the top down.
- Excellent Water Conservation: The thick layer of mulch dramatically reduces water evaporation from the soil surface. This means your plants will stay hydrated longer, requiring less frequent watering, which is not only good for your plants but also conserves a precious resource and reduces your water bill.
- Environmentally Friendly: By avoiding chemical herbicides, you protect local waterways, beneficial insects (like bees), and the overall biodiversity of your garden. Reusing cardboard also diverts waste from landfills, making this a truly sustainable gardening practice.
- Temperature Regulation: The mulch layer acts as an insulator, protecting plant roots from extreme temperature fluctuations. It keeps the soil cooler in the scorching summer heat and provides a degree of warmth and protection during colder periods.
Tips for Long-Term Success and Garden Maintenance
While this method is largely “set and forget,” a few ongoing tips will ensure its continued effectiveness and the long-term health of your garden.
- Persistent Weeds: For exceptionally tenacious perennial weeds (e.g., bindweed, thistle, or aggressive grasses) that may try to push through, a single layer of cardboard might not always be enough. Consider adding a second, overlapping layer of cardboard, or for truly stubborn patches, a thicker initial layer. You can also spot-treat any breakthroughs by pulling them immediately or adding a small piece of cardboard and mulch.
- Adding New Plants: If you wish to plant new additions to your mulched bed, simply part the mulch, use your utility knife to cut an “X” or a small circle through the cardboard, and plant directly into the soil beneath. Then, gently push the mulch back around the base of your new plant.
- Replenishing Mulch: Over time, your organic mulch will decompose, enriching the soil. Depending on the type of mulch and local climate, you may need to top up your mulch layer annually or bi-annually. Aim to maintain a consistent 3-4 inch depth for optimal benefits.
- Edge Control: Weeds can be persistent at the edges of your garden beds. Consider installing an edging material (such as metal, plastic, or stone) to create a definitive barrier and prevent weeds from creeping in from surrounding lawn areas.
- Watering Established Plants: While mulch significantly reduces water needs, monitor your plants, especially during dry spells. Ensure water can penetrate the mulch and cardboard layers to reach the roots of your desired plants. Deep, infrequent watering is generally more beneficial than shallow, frequent watering.
By implementing this simple yet powerful technique, you’ll not only achieve a beautifully manicured garden free from the tyranny of weeds but also foster a healthier, more vibrant ecosystem that thrives with minimal intervention. This method is truly a game-changer for any gardener looking for an easy, cheap, and fast solution to their weed woes. Embrace the power of cardboard and mulch, and watch your garden flourish!