
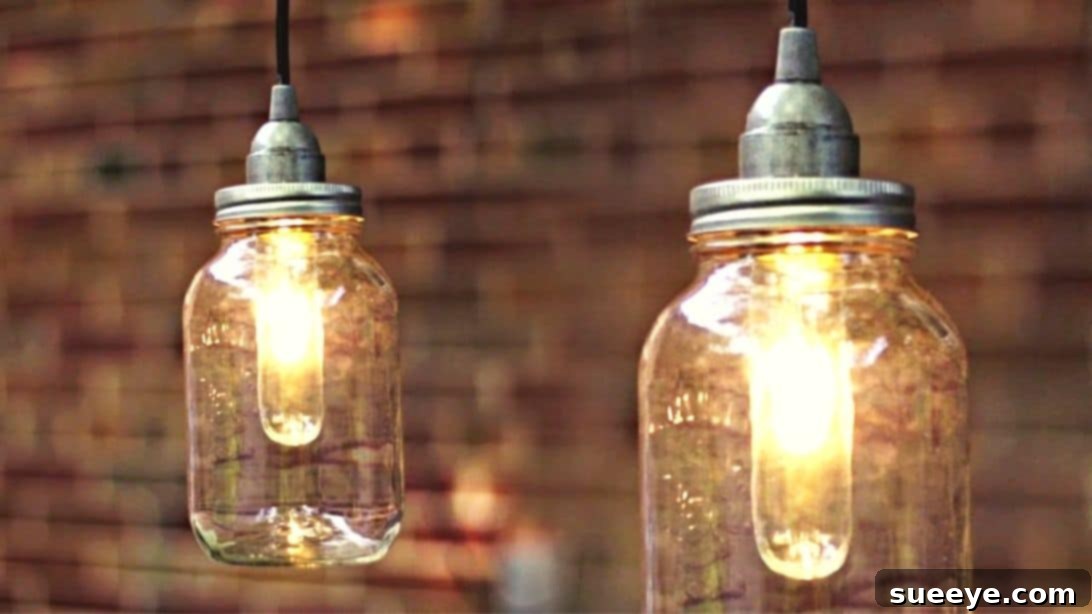
Illuminating Your Space: A Comprehensive Guide to DIY Mason Jar Lanterns
Transforming your living space, whether it’s a cozy patio, a welcoming front porch, or an intimate living room, often comes down to the subtle magic of lighting. Elegant light fixtures can infuse warmth and personality, but store-bought options can quickly become an expensive endeavor. Fortunately, crafting your own beautiful and budget-friendly lighting is simpler than you might think. This detailed guide, inspired by the creative tutorial from TheSorryGirls on YouTube, will walk you through creating stunning mason jar lanterns. All you need are a few common items: some versatile mason jars and a suitable lightbulb, along with a handful of tools. Prepare to illuminate your surroundings with a touch of handmade charm and a glow that’s uniquely yours.
Why Choose DIY Mason Jar Lanterns?
Embracing the DIY approach for your lighting needs offers a plethora of benefits beyond just saving money. These charming mason jar lanterns are an ideal project for anyone looking to add a personalized touch to their home decor. Here’s why this project is a brilliant idea:
- Cost-Effective: By repurposing old mason jars and utilizing readily available components, you can create high-quality lighting at a fraction of the retail price.
- Customizable: The design possibilities are virtually endless. From paint colors to decorative embellishments, you have complete control over the aesthetic to match your existing decor or create a unique focal point.
- Eco-Friendly: Reusing mason jars reduces waste, giving new life to items that might otherwise be discarded. It’s a wonderful way to practice sustainable living.
- Creates Ambiance: Mason jar lanterns emit a warm, diffused light that instantly adds a cozy, inviting, and sophisticated atmosphere to any indoor or outdoor setting.
- Sense of Accomplishment: There’s immense satisfaction in seeing a project through from start to finish, especially when the result is a functional and beautiful piece of home decor.
- Versatile Decor: These lanterns are perfect for a variety of settings – from casual backyard BBQs to elegant evening gatherings, or simply as everyday decorative lighting.
Materials:
Gathering the right materials and tools before you begin ensures a smooth and enjoyable crafting process. Here’s what you’ll need for your DIY mason jar lantern:
- 1 Large Mason Jar: Opt for a large jar (e.g., quart or half-gallon size) to provide ample space for the lightbulb and good light distribution.
- Cord Set: Choose a cord set specifically designed for light fixtures, complete with a socket, switch, and plug. Ensure it’s rated for the bulb you intend to use.
- Lightbulb: A low-heat LED bulb is highly recommended for safety and energy efficiency. Make sure its size allows it to fit comfortably inside the mason jar without touching the glass.
- Painter’s Tape: Essential for masking areas of the cord set that you don’t want to paint, ensuring clean lines and a professional finish.
- Metallic Spray Paint: This will be used to unify the look of the lid and parts of the cord set. Choose a color like bronze, silver, or gold to add an elegant touch.
- Hanging Hook: A sturdy screw-in hook suitable for your ceiling or desired hanging surface. Ensure it can safely support the weight of the lantern.
- Hammer: For puncturing holes in the mason jar lid.
- Nail: A strong, sharp nail (medium to large size) to create initial holes in the lid.
- Pliers: Needle-nose or similar pliers will be crucial for gripping and removing the metal from the lid.
- Safety Gloves and Eye Protection (Recommended): Always prioritize safety when working with tools and spray paint.
Directions:
Follow these steps carefully to construct your beautiful and functional mason jar lantern. Precision and safety are key to a successful outcome.
Step 1: Preparing the Mason Jar Lid
The first critical step involves modifying the mason jar lid to accommodate the light socket. This requires careful measurement and steady hands:
- Disassemble the Jar: Begin by separating the mason jar’s lid into its two components: the flat disc and the screw band. You will only be working with the flat disc.
- Trace the Socket: Place the base of your cord set’s socket onto the back (underside) of the lid disc. Using a pencil or marker, carefully trace the exact outline of the socket’s base onto the lid. This tracing will serve as your cutting guide.
- Puncture Initial Holes: Using a hammer and a sturdy nail, meticulously start puncturing a series of small, closely spaced holes all around the traced shape on the lid. Aim for a perimeter of holes that closely follows your traced line. These initial perforations will make it much easier to remove the central portion of the metal.
- Create Central Openings: Once the perimeter is established, add a few more holes at the very center of the traced area, ensuring they are extremely close to one another. This cluster of holes will provide an entry point for your pliers.
- Remove the Metal Disc: Insert the nose of your pliers into the cluster of central holes. Grip the metal tightly and begin to pull and twist, carefully removing the material at the center until the entire traced area is completely hollow. Exercise caution during this step to avoid sharp edges and ensure a clean opening for the socket. You may need to use the pliers to snip or bend stubborn pieces of metal.
Step 2: Painting, Assembly, and Installation
With the lid prepared, it’s time to add the finishing touches and assemble your lantern, culminating in its installation:
- Mask and Paint the Cord Set: Before painting, use painter’s tape to carefully mask off any parts of the cord, switch, or plug that you do not want to be painted. Focus on protecting the electrical components. With the desired areas taped, take your metallic spray paint and apply a thin, even coat to the exposed cord near the base of the socket. This step ensures the cord integrates seamlessly with the lantern’s aesthetic.
- Paint the Lid: While the paint on the cord set is still fresh, apply a matching coat of metallic spray paint to both sides of the prepared mason jar lid disc. Ensure full coverage for a cohesive look.
- Allow for Complete Drying: Place both the painted cord and the lid in a well-ventilated area and allow them to dry completely according to the spray paint manufacturer’s instructions. Rushing this step can lead to smudges and an uneven finish.
- Add Ventilation Holes: Once the paint is dry, grab your nail and hammer again. Carefully create another layer of small holes around the edges of the now-hollow center of the lid. These additional holes are crucial for proper ventilation, allowing steam and heat generated by the lightbulb to pass through freely, enhancing both safety and bulb longevity.
- Thread the Cord and Assemble: Carefully push the cord of the light fixture through the newly hollowed and ventilated lid. Once the socket base protrudes through the lid, screw and assemble the socket components together, securing the lid firmly in place.
- Attach the Lightbulb: Screw your chosen lightbulb (preferably an LED for safety and efficiency) into the assembled socket.
- Secure the Jar: Place the mason jar onto the lid and twist on the screw band, tightening it securely to hold the entire lantern assembly together.
- Install the Hanging Hook: Choose your desired location for the lantern (e.g., ceiling, wall bracket, pergola). Using a drill or by screwing directly into a secure surface, attach a sturdy hanging hook. Ensure the hook is anchored properly to safely support the weight of the lantern.
- Hang and Power On: Carefully hang your newly created mason jar lantern from the installed hook. Finally, plug the cord into an appropriate electrical outlet. Step back and admire the warm, inviting glow of your handmade creation!
Customization Ideas for Your Mason Jar Lanterns
While a simple metallic finish is elegant, the beauty of DIY lies in customization. Here are some ideas to make your mason jar lanterns truly unique:
- Paint Variations: Instead of metallic, try matte black, vibrant colors, or even frosted glass spray for a softer glow. You could also stencil designs onto the jar or lid.
- Decorative Elements: Wrap twine, jute rope, or decorative ribbon around the neck of the jar. Add faux flowers, beads, or small charms for a bohemian or rustic look.
- Etching or Decals: Use glass etching cream to create intricate patterns on the jar, or apply vinyl decals for personalized messages or images.
- Fairy Lights Integration: For a no-wiring alternative or an added sparkle, consider placing battery-operated fairy lights inside the jar alongside the bulb, or for a completely safe, heat-free version, use only fairy lights.
- Different Jar Sizes: Create a cluster of lanterns using various sizes of mason jars for a dynamic and visually interesting display.
Where to Display Your Mason Jar Lanterns
These versatile lanterns can enhance almost any area of your home, both indoors and out:
- Patios and Decks: Hang them from pergolas, eaves, or shepherd’s hooks to create a magical outdoor dining or lounging area.
- Front Porches: Welcome guests with a warm, inviting glow at your home’s entrance.
- Living Rooms: Use them as accent lighting, perhaps in a reading nook or above a side table, adding a cozy touch.
- Bedrooms: Provide soft, ambient lighting for a relaxing atmosphere.
- Kitchens: Hang a series of them over a kitchen island for a rustic farmhouse appeal.
- Event Decor: Perfect for weddings, garden parties, or special gatherings, adding a charming and personal touch to your celebration.
Safety Considerations for Your DIY Lantern
When working with electricity and heat-generating components, safety should always be your top priority. Please keep the following in mind:
- Use LED Bulbs: Always opt for low-wattage LED bulbs. They produce minimal heat, significantly reducing the risk of the glass jar overheating or cracking, and are more energy-efficient.
- Proper Ventilation: Ensure the additional ventilation holes you create in the lid are sufficient to allow heat to escape. Trapped heat can be dangerous.
- Secure Wiring: Double-check all electrical connections within the cord set and socket to ensure they are tight and properly insulated. If you are unsure about wiring, consult a professional.
- Appropriate Cord Set: Use a cord set designed for lighting applications and ensure it is rated for the bulb you’re using. If using outdoors, ensure the cord and components are rated for outdoor use.
- Stable Hanging: Confirm that the hanging hook is securely installed into a stud or appropriate anchoring device and can safely support the lantern’s weight.
- Adult Supervision: If children are assisting, ensure they are closely supervised, especially during steps involving tools or electrical components.
- Regular Inspection: Periodically inspect your lanterns for any signs of wear, frayed wires, or damage, and address them promptly.
Conclusion: Illuminate Your World with Handcrafted Charm
Creating your own DIY mason jar lanterns is a rewarding project that combines creativity, practicality, and personal expression. With just a few basic materials and tools, you can craft beautiful, ambient lighting that enhances the comfort and style of any space. Not only will you save money, but you’ll also gain the satisfaction of knowing you’ve brought a touch of handmade elegance into your home. We extend our sincere thanks to TheSorryGirls via YouTube for their inspiring tutorial and for the images used in this guide. If you enjoyed this project, we highly recommend visiting their channel for more fantastic DIY ideas and creative inspiration. Start crafting today, and let your unique style shine!