
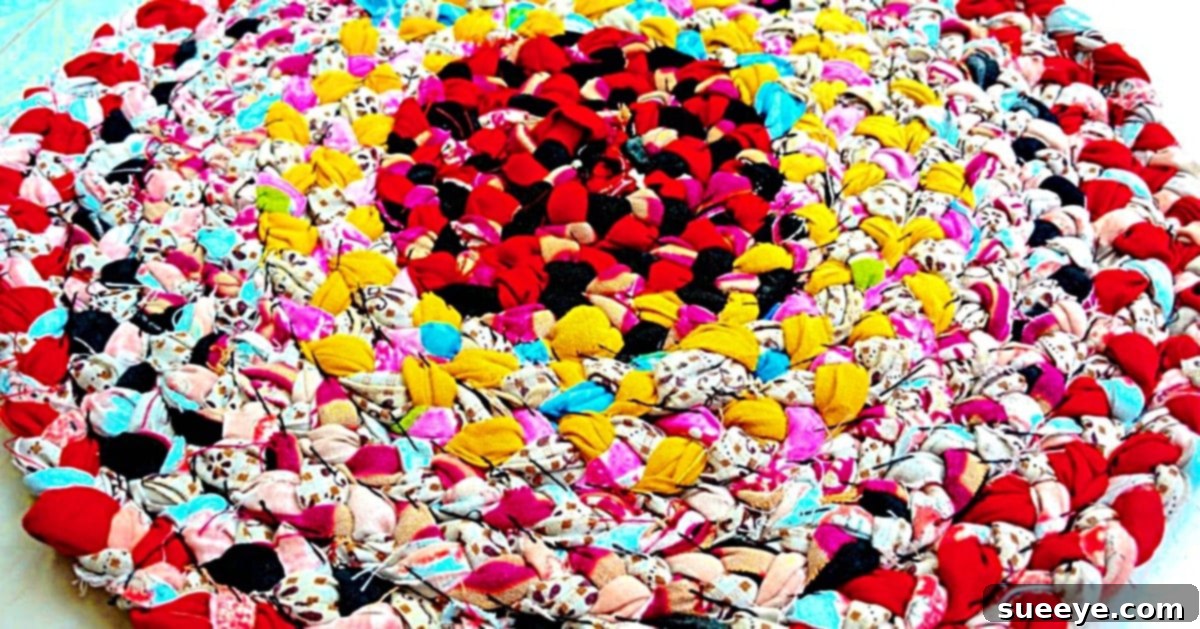
Transform Old Clothes into Beautiful Woven Rag Doormats: A Sustainable DIY Guide
There’s a unique charm in handmade items that mass-produced products simply can’t replicate. Rag doormats, with their rustic appeal and cozy aesthetic, instantly infuse any space with a warm, inviting, and homey feel. If you’ve ever admired these delightful creations, you might be surprised to learn how straightforward it is to craft your own. My journey into DIY doormat making began after discovering a truly inspiring woven doormat tutorial by Handmade Crafts & Tutorials on YouTube. This particular rug pattern isn’t just visually appealing; it’s also remarkably easy to master, making it perfect for crafters of all skill levels.
What makes this project even more appealing is its incredible potential for recycling and sustainability. The entire surface of your doormat is ingeniously constructed from discarded textiles – old clothes, fabric scraps, or even worn-out bedsheets. This means you can breathe new life into items destined for the landfill, transforming them into a functional and decorative piece for your home. Imagine the satisfaction of knowing your charming new doormat started as a pile of forgotten garments!
Why Embrace the Art of DIY Rag Doormats?
Crafting your own woven rag doormat offers a multitude of benefits beyond just having a new floor covering. It’s a rewarding endeavor that aligns perfectly with modern values of sustainability, personalization, and mindful living.
- Unleash Your Creativity: Unlike buying a store-bought mat, making your own allows for complete creative control. You can choose specific colors, textures, and even incorporate sentimental fabrics, resulting in a truly unique piece that reflects your personal style.
- Eco-Friendly Living: This project is a fantastic way to practice upcycling and reduce waste. Instead of contributing to textile landfills, you’re repurposing old clothing and fabric scraps, giving them a new purpose and extending their lifecycle. It’s a small step towards a greener lifestyle.
- Budget-Friendly Decor: With materials readily available in your closet or at thrift stores, this DIY project is incredibly cost-effective. You’re essentially creating a beautiful, durable doormat for little to no monetary expense, saving money on home decor.
- A Sense of Accomplishment: There’s immense satisfaction in creating something beautiful and functional with your own hands. The process can be meditative and the finished product brings a profound sense of accomplishment and pride.
- Unique Home Accent: A handmade rag doormat adds warmth, character, and a touch of bohemian charm to any room. It’s a conversation starter and a testament to your crafting prowess, making your home feel even more inviting.
Essential Materials for Your Woven Doormat Project
Before diving into the creative process, gathering your materials is key. The beauty of this project lies in its simplicity and the use of readily available items.
- Old Clothing, Fabric Scraps, or Bed Sheets: This is your primary material. Think t-shirts, jeans, flannel shirts, cotton dresses, old sheets, or even towels. The key is to use fabrics that are relatively soft and easy to cut into strips. Consider the colors and textures – a mix can create a vibrant, eclectic look, or you can stick to a specific color palette for a more cohesive design. For a standard-sized doormat (approx. 24×36 inches), you might need 5-10 large adult t-shirts or a couple of old bedsheets. The more fabric you have, the larger and thicker your rug can be.
- Sharp Scissors or a Rotary Cutter with Mat: A good pair of fabric scissors will make cutting strips much easier and prevent hand fatigue. A rotary cutter, especially for those with many strips to cut, can be incredibly efficient and help achieve uniform widths.
- Large-Eyed Needle: If you opt for sewing, a sturdy needle with a large eye is essential to accommodate thicker thread and penetrate multiple layers of braided fabric. Upholstery needles or curved needles can also be very helpful.
- Strong Thread: Upholstery thread, denim thread, or a strong polyester thread is recommended for sewing the braid together. Regular sewing thread might not be strong enough to hold up to the foot traffic a doormat typically endures. Match the thread color to your dominant fabric color, or choose a neutral tone.
- Fabric Glue (Optional, but Highly Recommended for Durability): While sewing provides excellent durability, fabric glue can significantly reinforce your doormat, especially for areas that will see heavy use. Look for a strong, flexible fabric adhesive that dries clear. This offers an alternative or a supplement to sewing, providing extra holding power.
Step-by-Step Directions to Craft Your Rag Doormat
Step 1: Prepare Your Fabric Strips
The foundation of your woven rag doormat lies in well-prepared fabric strips. Begin by washing and drying all your chosen old clothes. This ensures they are clean and pre-shrunk, preventing any surprises after your doormat’s first wash. Once clean, lay them flat and start cutting. The ideal width for your strips is typically between 1 to 2 inches. Consistency in width is important for an even braid, so try to keep your strips as uniform as possible. If you’re using t-shirts, you can often cut around the bottom hem to create long loops, then snip those loops open to form strips. For other fabrics, simply cut straight strips. Don’t worry if your strips aren’t incredibly long; you’ll learn how to seamlessly join them as you braid.
Step 2: Begin Your Continuous Braid
Now for the fun part: braiding! Select three of your prepared fabric strips to start. Align their ends and secure them together. You can do this by sewing them, tying a knot, or even using a safety pin to hold them in place temporarily. Once secured, begin braiding them just as you would braid hair. Maintain a consistent tension as you braid to ensure your rug has an even texture and thickness. As you approach the end of a strip, you’ll need to add a new one. To do this seamlessly, take the end of the expiring strip and the beginning of a new strip, overlap them by an inch or two, and either sew them together, tie a small knot, or make a small slit in each end and loop them through each other. Continue braiding, incorporating new strips as needed to create one long, continuous braid. The longer your braid, the larger your doormat will be.
Step 3: Spiral and Shape Your Doormat
As your braid grows, you’ll begin to shape your doormat. Lay your starting point flat and begin to coil the braid tightly around itself in a spiral. This is where you determine the size and shape of your finished doormat. Periodically pause your braiding to gauge the size and ensure the spiral lies flat. You can create a perfect circle by maintaining even coils, or a slightly oval shape by elongating the coils at the ends. Continuously press the coils together as you form the spiral to get a sense of how the finished doormat will look and feel. The goal is to keep the braid flat and tight, ensuring your doormat will lay evenly on the floor.
Step 4: Secure Your Woven Doormat (Sewing or Gluing)
Once your braid has reached the desired size and shape for your doormat, it’s time to secure it. This is a crucial step to ensure your doormat is durable and holds its form. You have two primary options, or you can even combine them for extra sturdiness.
- Option A: Hand Sewing: Using your large-eyed needle and strong thread, begin to sew the coils of your braid together. Work from the center outwards, carefully stitching through adjacent coils. A simple running stitch or a whip stitch works well. Aim for small, tight stitches that are as invisible as possible from the top surface. Ensure you’re catching enough fabric from each coil to create a strong bond. This method is incredibly durable and traditional for rag rugs.
- Option B: Fabric Gluing: If you prefer a no-sew method or want to add extra reinforcement, fabric glue is an excellent choice. Apply a thin, even bead of fabric glue between adjacent coils as you spiral your braid. Press the coils together firmly to ensure good adhesion. Work in small sections to prevent the glue from drying before you’ve pressed the coils together. Allow ample drying time, as specified by your glue’s instructions, before handling or using the doormat. Gluing can be a faster alternative, but ensure you use a high-quality fabric glue designed for flexibility and durability.
Many crafters find that a combination of both sewing and gluing provides the best results, offering the robust strength of stitches with the seamless finish of glue.
Tips for a Successful Rag Doormat Project
To ensure your crafting experience is as enjoyable and successful as possible, consider these helpful tips:
- Be Patient and Enjoy the Process: Crafting a rag doormat is a meditative and relaxing activity. Don’t rush it! Enjoy the rhythm of braiding and the satisfaction of seeing your creation take shape.
- Plan Your Colors: Before you start cutting, lay out your old clothes and visualize your color scheme. Do you want a vibrant, multi-colored boho look, or a more subtle, monochromatic design? Planning ahead can make a big difference in the final aesthetic.
- Experiment with Fabric Textures: Don’t be afraid to mix different types of fabric. The combination of cotton t-shirts, denim, and even some softer flannel can add wonderful texture and visual interest to your doormat.
- Consider the End Use: If your doormat is for a high-traffic area, prioritize durable fabrics like denim or canvas. For a decorative mat in a bedroom, softer fabrics might be perfectly suitable.
- Non-Slip Backing: For safety, especially on hard floors, consider adding a non-slip rug pad underneath your finished doormat or applying a liquid non-slip coating to the back.
Care and Maintenance of Your Handmade Rag Doormat
A handmade rag doormat is not only beautiful but also surprisingly durable and easy to care for. For most fabric types, you can simply machine wash your doormat on a gentle cycle with cold water. Avoid harsh detergents or bleach, which can degrade fabric fibers and colors. It’s best to air dry your doormat by laying it flat or hanging it to prevent shrinking or warping. For minor spills or dirt, spot cleaning with a damp cloth and mild soap is usually sufficient. Regularly shaking out your doormat will also help remove loose dirt and dust, keeping it fresh and clean.
Unleash Your Creativity: Variations and Beyond Doormats
The continuous braid technique isn’t limited to just doormats! Once you’ve mastered the basic process, you can explore various creative avenues:
- Larger Area Rugs: Simply continue braiding and coiling to create a substantial area rug for your living room, bedroom, or entryway. This requires more fabric and patience but results in a stunning, personalized floor covering.
- Different Shapes: Experiment with rectangular or square shapes by braiding in straight lines and then joining them, rather than spiraling.
- Colorful Patterns: Alternate colors of fabric strips strategically in your braid to create stripes, concentric circles, or other patterns within your doormat.
- Other Home Decor: This braiding technique can also be adapted to create trivets, placemats, coiled baskets, or even seat cushions.
The joy of crafting something with your own hands is truly immeasurable. I initially found immense satisfaction in making a couple of doormats for my home, and then a larger rug for my kitchen. The vibrant mish-mosh of colors perfectly encapsulated the bohemian flavor that is so dear to my heart, adding a cheerful, eclectic touch to my living space. Just when I thought my rug-making days were over, my mom visited and showered my creations with such extreme compliments that I couldn’t resist making one for her back porch. She absolutely adored it, and there’s nothing quite like the feeling of creating something beautiful and practical for the people you love. So gather your old clothes, unleash your inner crafter, and embark on your own journey to create stunning, sustainable woven rag doormats!