
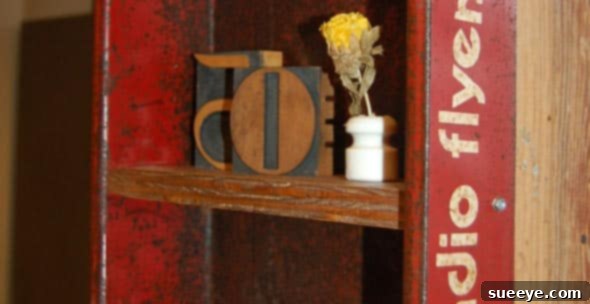
Transform an Iconic Red Wagon into a Charming DIY Vintage Shelf
Do you adore the timeless appeal of vintage home decor? If so, prepare to be inspired by a delightful DIY shelving project that’s not only incredibly charming but also wonderfully nostalgic. We’re talking about repurposing a classic red wagon – specifically, the beloved Radio Flyer – into a functional and eye-catching shelf. This isn’t just a trend; it’s a creative way to infuse your living space with character, history, and a touch of childhood whimsy. I discovered this brilliant idea recently, and like many, I was instantly captivated. My mind immediately started planning weekend excursions to local flea markets and garage sales, eager to scout out the perfect little red wagon to kickstart this exciting project.
The allure of vintage items in home styling is undeniable. They bring a story, a sense of warmth, and an inimitable charm that modern, mass-produced items often lack. However, acquiring authentic vintage pieces, especially custom-made decor, can often come with a hefty price tag. Last summer, I stumbled upon similar wagon shelves at a flea market, priced at a staggering $220. A quick online search reveals that buying a pre-made Radio Flyer shelf on platforms like Etsy can range anywhere from $100 to a prohibitive $300. While the aesthetic is appealing, such prices can be a significant barrier for many who wish to decorate their homes on a budget. This is precisely why embracing the do-it-yourself ethos for this project is such a compelling option. Why pay a premium when you can create something equally beautiful, if not more personal, with your own hands?
The Undeniable Charm of the DIY Radio Flyer Shelf
The concept of taking an everyday object and giving it a new purpose through upcycling is both environmentally conscious and incredibly rewarding. A Radio Flyer wagon is more than just a toy; it’s an American icon, steeped in generations of memories. Its sturdy metal frame and vibrant red hue make it an ideal candidate for transformation. When converted into a shelf, it instantly becomes a focal point, drawing attention and sparking conversation. This isn’t just about saving money; it’s about crafting a unique piece of furniture that reflects your personality and appreciation for creative reuse.
What truly solidified my enthusiasm for this project was stumbling upon a fantastic tutorial video. A particularly sweet grandfather generously documented his process of creating one of these charming shelves as a heartfelt gift for his daughter and baby granddaughter. His results were genuinely impressive, showcasing a polished and professional-looking finished product. Crucially, his tutorial made the entire process seem approachable and entirely achievable, even for those who might not consider themselves expert craftsmen or seasoned woodworkers. This detailed guidance removes much of the guesswork, making it a perfect project for DIY enthusiasts of all skill levels.
Finding Your Perfect Red Wagon: Tips for the Hunt
Embarking on this DIY journey begins with finding the right raw material: a little red wagon. While a brand-new Radio Flyer could certainly work, there’s something extra special about giving an older, pre-loved wagon a new lease on life. The hunt itself can be part of the fun!
- Flea Markets & Garage Sales: These are prime hunting grounds for vintage treasures. Keep an eye out for wagons that are structurally sound, even if they have some cosmetic wear and tear. A little rust or faded paint can often add to the “vintage” appeal.
- Online Marketplaces: Websites like Etsy, eBay, Facebook Marketplace, and local classifieds often feature used Radio Flyers. Be sure to check seller ratings and ask for clear photos of the wagon’s condition.
- Antique Shops & Estate Sales: While potentially more expensive, these venues can sometimes yield wagons in excellent condition, or with unique historical variations.
- Community Recycling Centers or Buy Nothing Groups: You might be surprised what hidden gems can be found through community networks focused on reuse.
When selecting your wagon, consider its size and condition. A smaller wagon might be perfect for a bathroom or entryway, while a larger one could make a statement in a kitchen or living room. Don’t be deterred by surface imperfections; these can often be cleaned, sanded, or embraced as part of the rustic charm. Remember, you’re looking for potential, not perfection.
Unleashing Creativity: Versatile Decor Ideas for Your Wagon Shelf
Once your DIY Radio Flyer shelf is complete, the real fun begins: styling it! Its inherent vintage and rustic appeal makes it incredibly versatile, suitable for almost any room in your home. Here are just a few ideas to get your imagination flowing:
In the Kitchen:
- Showcase vintage kitchen utensils, antique cookbooks, or quaint spice jars.
- Hold small potted herbs, adding a touch of greenery.
- Display charming tea towels folded neatly or colorful mugs.
- Organize small kitchen gadgets or unique culinary finds.
In the Bathroom:
- Store rustic toiletries, rolled towels, or decorative soaps.
- Display old pharmacy jars, vintage perfume bottles, or small botanical prints.
- Perfect for holding extra toilet paper rolls in a stylish way.
- Add a small succulent or air plant for a refreshing touch.
In a Nursery or Kid’s Room:
- A delightful spot for baby books, small stuffed animals, or tiny trinkets.
- Organize art supplies or small blocks in an accessible way.
- It adds a playful, nostalgic element to the room’s decor.
In the Living Room or Entryway:
- Display cherished photographs, small decorative sculptures, or collectible items.
- A charming drop-zone for keys, mail, or sunglasses in an entryway.
- Accent with small faux plants or unique curios that reflect your personal style.
The possibilities are truly endless. The unique structure of the wagon, with its existing frame, provides a fantastic base for adding custom-cut wooden shelves, which can be painted, stained, or left natural to complement your decor. I can already envision mine in my kitchen, overflowing with vintage kitchenware, and another in my bathroom, neatly organizing rustic items and antique apothecary jars. See? I already need more than one wagon to make all my decorating dreams come true!
A Glimpse into the DIY Process: What to Expect
While the detailed instructions are best gleaned directly from the provided video tutorial, it’s helpful to understand the general flow of this DIY project. The process typically involves several key stages, each contributing to the transformation of a simple wagon into a functional, beautiful shelf.
- Wagon Preparation: This usually involves thoroughly cleaning the wagon, removing any rust, and perhaps sanding down rough areas. You might decide to repaint the wagon to refresh its color or distress it further for a more aged look.
- Measuring and Cutting Shelves: This is a crucial step where precise measurements are taken to ensure your internal wooden shelves fit snugly within the wagon’s frame. Wood can be chosen to match your desired aesthetic – reclaimed wood for a rustic feel, or smooth, finished wood for a cleaner look.
- Securing the Shelves: Once cut, the wooden shelves are carefully attached to the wagon’s interior frame using screws or other appropriate fasteners, ensuring they are level and secure.
- Finishing Touches: Depending on your preference, the newly installed shelves can be painted, stained, varnished, or waxed. This protects the wood and integrates it seamlessly with the wagon’s character.
- Mounting Hardware: Finally, appropriate mounting hardware will need to be attached to the back of the wagon to securely hang it on a wall. It’s essential to choose hardware that can support the weight of the wagon and whatever items you plan to display.
The beauty of such a well-explained tutorial is that it breaks down each of these steps, making them manageable even for beginners. You don’t need a professional workshop; basic power tools and a bit of patience are usually sufficient to achieve impressive results.
Embrace the Journey: Tips for a Successful Project
Taking on any DIY project is a journey, and with a few pointers, yours can be smooth and enjoyable:
- Watch the Tutorial Thoroughly: Before you even pick up a tool, watch the entire YouTube tutorial a few times. Understand each step and gather all necessary materials and tools beforehand.
- Safety First: Always wear appropriate safety gear, including eye protection, gloves, and hearing protection if using loud tools.
- Measure Twice, Cut Once: Precision is key, especially when cutting wood for the shelves. Double-check your measurements to avoid waste.
- Personalize It: Don’t be afraid to add your unique touch. Perhaps a stencil, a unique paint color for the shelves, or even adding casters if you prefer it on the floor.
- Enjoy the Process: DIY is about the experience as much as the outcome. Savor the satisfaction of transforming something ordinary into something extraordinary.
I am genuinely excited to embark on this project myself, and I encourage you to do the same. If you decide to make one of these fantastic Radio Flyer shelves, please do keep me posted on your progress and share photos of your finished masterpiece! I will certainly update you with my own creation once it’s complete. This is more than just a shelf; it’s a piece of functional art, a testament to creativity, and a heartwarming nod to simpler times.
Ready to Start Your Own DIY Radio Flyer Shelf Project?
The path to owning a unique, custom-made vintage shelf made from an iconic red wagon is just a click away. Head over to the step-by-step YouTube tutorial to learn exactly how to craft your very own DIY Radio Flyer shelf. You’ll gain invaluable insights from an experienced maker, transforming what might seem like a daunting project into an accessible and enjoyable endeavor. Say goodbye to overpriced decor and hello to the immense satisfaction of creating something truly special for your home. This is your chance to add a truly bespoke, conversation-starting piece to your living space while celebrating the charm of upcycling and vintage design.