
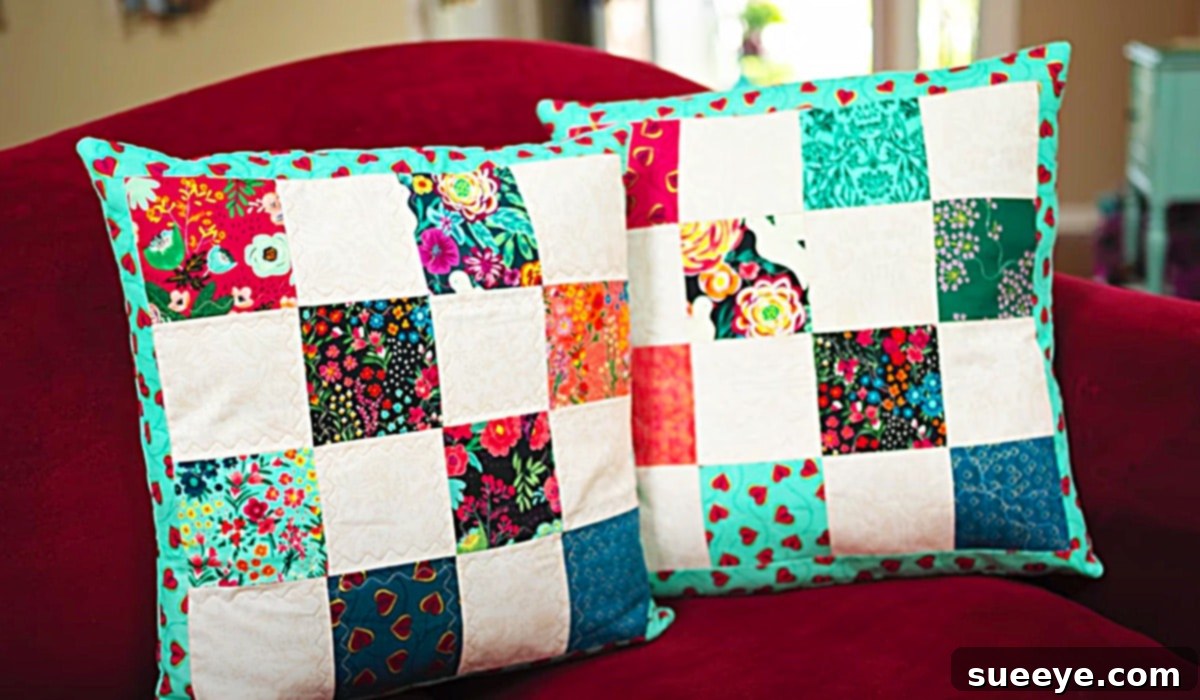
Patchwork Pillow for Beginners: Craft a Cozy Home Accent
There’s something incredibly satisfying about transforming simple pieces of fabric into a beautiful, functional item for your home. Among the myriad of DIY sewing projects, the patchwork pillow stands out as a true gem, especially for those new to the world of quilting and sewing. Its charm lies not only in its aesthetic appeal but also in the joyful process of creation. This guide delves into an accessible patchwork pattern idea that promises to make your finished project look truly special, even if you’re just starting your sewing journey.
Our inspiration for this delightful project comes from an excellent video tutorial by Pattymac Makes on YouTube. When we first discovered her step-by-step instructions for this patchwork pillow, we were instantly captivated by its simplicity and the stunning outcome. The thought of adding such a personalized, handcrafted touch to our living space was irresistible. We encourage you to watch her tutorial for a visual walkthrough, as it beautifully complements the written guidance provided here.
Starting this project is surprisingly straightforward. One of the most wonderful aspects is its versatility, allowing you to utilize materials you might already have on hand. For our own attempt, we gathered a few pieces of remnant fabrics from the clearance section of a local craft store – a testament to how cost-effective and eco-friendly this craft can be. Using fabric scraps is not only budget-friendly but also gives your pillow a unique, eclectic character, telling a story with every stitch. This project is a fantastic way to breathe new life into leftover fabrics that might otherwise go unused.
The sewing instructions are designed for ease, making them perfect for beginners. The core of the design involves cutting out fabric strips and sewing them together to form the patchwork front. If you have jelly roll strips, they are an absolute dream for this pattern, as their pre-cut nature streamlines the process even further. You could even combine jelly roll strips to create larger side pieces, offering more design flexibility. Remember, the beauty of DIY lies in its boundless creativity. These ideas are merely a starting point; feel empowered to infuse your unique personal touches wherever you wish. There’s no rigid “right or wrong” in crafting; this is your creative rodeo, so ride it with confidence and joy!
Why Choose a Patchwork Pillow for Your Next Project?
Patchwork pillows are more than just decorative items; they are a celebration of color, texture, and creativity. Their distinct appeal makes them a popular choice for home decorators and crafters alike. Here’s why a patchwork pillow should be high on your DIY list:
- Unique Home Decor: Unlike mass-produced items, a handmade patchwork pillow instantly adds character and a personalized touch to any room. Each fabric scrap tells a part of its story, making your pillow truly one-of-a-kind.
- Eco-Friendly Crafting: This project is an excellent way to repurpose fabric scraps, remnants, or even old clothes, reducing waste and giving materials a second life. It’s a sustainable choice for conscious crafters.
- Skill Development for Beginners: The repetitive nature of cutting and sewing strips is ideal for developing fundamental sewing machine skills, practicing consistent seam allowances, and learning how to press seams correctly – all crucial techniques for future projects.
- Budget-Friendly: By using fabric scraps, you can create a beautiful, high-quality decorative pillow without significant expense, making it an accessible craft for everyone.
- Creative Expression: From choosing your fabric palette to deciding on the layout of your patches, every step offers an opportunity for creative expression. You can experiment with different color combinations, patterns, and textures to match your personal style or home decor.
- A Thoughtful Gift: A handmade patchwork pillow makes a heartfelt and cherished gift for friends and family, demonstrating the time, effort, and love you’ve poured into creating something special.
Essential Materials For Your Beginner’s Patchwork Pillow:
Before diving into the actual sewing, gathering all your materials is crucial for a smooth and enjoyable crafting experience. Here’s a comprehensive list of what you’ll need, along with some tips for selection:
- Fabric:
- Scraps are truly perfect for this project! Look for remnants, fat quarters, or even upcycle old garments. Aim for a variety of patterns and colors that complement each other. Quilting cottons are generally recommended for their ease of use and durability, but feel free to experiment with other non-stretch fabrics. Ensure your chosen fabrics are pre-washed and pressed to prevent future shrinking and ensure accurate cuts.
- Pillow Insert: You’ll need a pillow insert in your desired size to fill the finished cover. Standard sizes like 18×18 inches or 20×20 inches are common, but you can customize your cover to fit any insert.
- Batting (Optional but Recommended): A thin layer of quilt batting adds structure, softness, and a traditional quilted look to your pillow front.
- A Sewing Machine: Any basic sewing machine capable of a straight stitch will work wonderfully. Ensure it’s threaded correctly and has a fresh needle.
- A Pair of Fabric Scissors: Sharp scissors are essential for clean, accurate cuts, especially for smaller pieces.
- A Rotary Cutter: While optional, a rotary cutter dramatically speeds up cutting fabric strips and ensures perfectly straight edges, which is vital for precise patchwork.
- A Cutting Mat: If using a rotary cutter, a self-healing cutting mat is indispensable to protect your work surface and provide measurement grids.
- An Iron: Pressing your seams flat at each stage is critical for crisp, professional-looking patchwork.
- An Ironing Board: Provides a stable surface for effective pressing.
- Coordinating Thread: Choose a good quality polyester or cotton thread that matches or subtly blends with your fabric choices.
- Pins or Fabric Clips: To hold fabric pieces together securely before sewing.
- Seam Ripper: Every crafter’s best friend – for those inevitable moments when a stitch needs to be undone!
- Measuring Tape or Ruler: For accurate measurements and marking.
Directions: Crafting Your Patchwork Pillow
This project is wonderfully structured and simplified by the visual guidance available. The full, detailed step-by-step process is expertly demonstrated in the video tutorial by Pattymac Makes on YouTube. We highly recommend watching it to visualize each stage. Below, we provide a general overview of the key steps you’ll follow to create this gorgeous patchwork pillow in just a few easy stages.
1. Preparation: Gathering and Cutting Your Fabrics
The first step involves preparing your chosen fabrics. Ensure all your fabric scraps are pre-washed, dried, and thoroughly ironed to remove any wrinkles or creases. This pre-treatment prevents shrinkage after your pillow is made and ensures your cuts are precise. Once prepared, you’ll need to accurately cut your outer fabric strips according to the pattern’s specifications. The tutorial will guide you on the exact dimensions. For precise cutting, especially with multiple strips, a rotary cutter and cutting mat are invaluable tools, allowing for clean, consistent edges that align perfectly during sewing. If you’re using jelly roll strips, much of this cutting work is already done for you, making the process even quicker and easier.
2. Constructing the Patchwork Top
With your fabric strips cut, the next exciting phase is assembling the patchwork front. This involves systematically sewing your fabric strips together, typically right sides facing, using a consistent seam allowance (e.g., a ¼-inch seam allowance is common in quilting). After each seam is sewn, it’s crucial to press it open or to one side. Proper pressing ensures your patchwork lies flat and helps match seams perfectly when joining subsequent rows or blocks. You’ll continue to add strips, building your unique patchwork design piece by piece, until you achieve the desired size for your pillow front. This repetitive yet meditative process is deeply satisfying as your design comes to life.
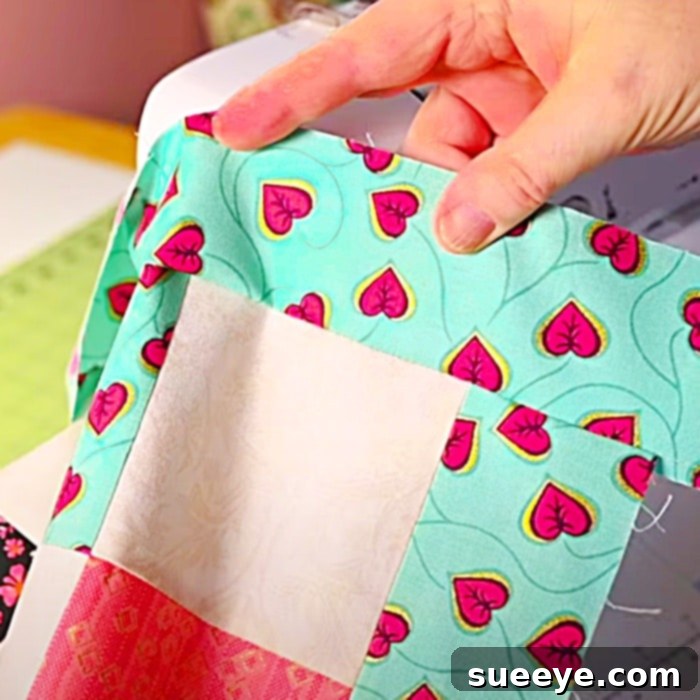
3. Adding Batting and Quilting (Optional but Recommended)
Once your patchwork top is complete, you’ll attach a layer of batting to the wrong side of your patchwork piece. Batting provides loft, insulation, and the classic soft feel of a quilted item. You can then add simple quilting stitches, either by hand or machine, to secure the batting to the patchwork top and enhance its texture. Basic straight lines following the seams or a simple cross-hatch pattern are perfect for beginners. This step gives your pillow front stability and a more professional, finished appearance, truly transforming it into a quilted masterpiece. It also prevents the fabric from shifting and bunching over time.
4. Creating the Envelope Backing
A brilliant feature of this pillow design is the envelope backing. This method is incredibly beginner-friendly because it eliminates the need for zippers or buttons, making the pillow cover easy to remove for washing. The tutorial will guide you on how to cut and hem two separate fabric pieces that will overlap to form the back of your pillow. These pieces are then sewn to the patchwork front, creating an opening through which you can insert and remove your pillow form. This design choice is not only practical but also maintains a clean, seamless look for the pillow.
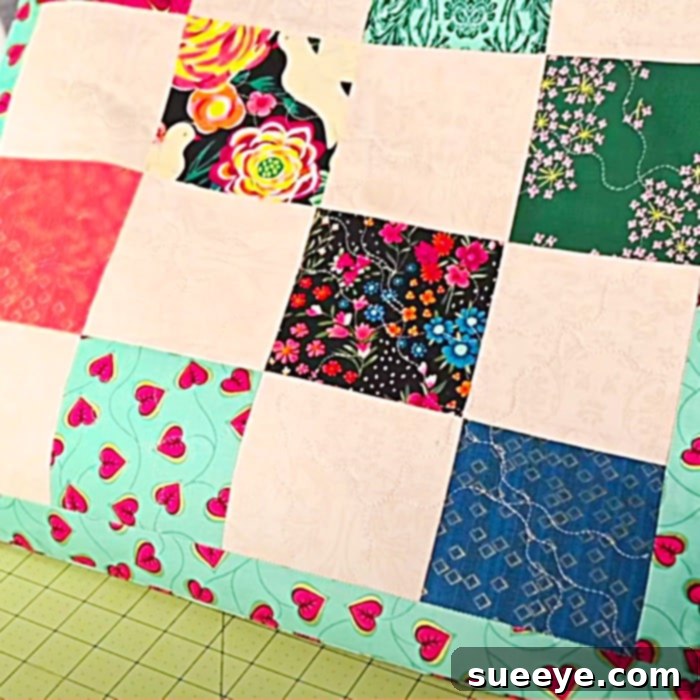
5. Final Assembly
The final stage brings all your hard work together. With the patchwork front (and batting) and the two envelope backing pieces prepared, you will layer them together, right sides facing, aligning all raw edges. Pin them securely in place and sew around the perimeter, leaving the envelope opening unstitched. After trimming the corners and turning the cover right side out, you’ll have a beautifully finished patchwork pillow cover, ready for your pillow insert. This is truly a gorgeous pillow, and the feeling of accomplishment upon completion is immense!
Tips for a Successful Beginner Patchwork Pillow Project:
To ensure your first patchwork pillow is a resounding success, consider these helpful tips:
- Pre-Wash Your Fabrics: Always pre-wash and dry your fabrics before cutting and sewing. This prevents any potential shrinkage after your pillow is complete and ensures all fabrics react uniformly.
- Accurate Cutting is Key: In patchwork, precision is paramount. Take your time when cutting strips and squares. Even a slight inaccuracy can throw off your entire design. Using a rotary cutter and mat significantly helps in achieving consistent cuts.
- Press, Don’t Iron: While often used interchangeably, there’s a difference in sewing. “Pressing” involves lifting and placing the iron down, rather than sliding it, to avoid distorting your fabric. Press seams after every step for crisp, flat results.
- Use a Consistent Seam Allowance: Maintaining a precise seam allowance (e.g., ¼ inch) throughout your project is crucial for your pieces to fit together correctly. Use a seam guide on your sewing machine if available.
- Pin Generously: Don’t shy away from using plenty of pins or fabric clips to hold your fabric pieces together, especially when joining longer strips or multiple layers. This prevents shifting and ensures accurate alignment.
- Watch the Tutorial Multiple Times: If anything is unclear, rewatch the Pattymac Makes video tutorial. Visual instruction can clarify steps that might seem complex in writing.
- Don’t Fear the Seam Ripper: Mistakes happen to everyone, even seasoned sewers. The seam ripper is your friend! It’s better to undo a few stitches and redo them correctly than to proceed with an error that will be visible in your final project.
- Start Simple: This particular pattern is ideal for beginners because it uses straightforward strip piecing. Resist the urge to tackle overly complex patterns until you’ve mastered the basics.
Personalizing Your Patchwork Pillow: Endless Possibilities
The true joy of DIY lies in customization. While the Pattymac Makes tutorial provides a fantastic foundation, feel free to let your creativity soar and make this patchwork pillow uniquely yours. Here are some ideas for personalization:
- Color Palettes: Experiment with different color schemes. Opt for a vibrant, eclectic mix of bright colors, a calming array of pastels, or a sophisticated monochromatic look. The choice of colors dramatically impacts the pillow’s mood and how it complements your existing decor.
- Fabric Textures: While quilting cotton is easy to work with, consider incorporating different fabric textures for visual interest, such as linen, denim scraps, or even small pieces of velvet (if you’re comfortable with different fabric handling). Ensure all fabrics have similar care instructions and weight for the best results.
- Alternate Layouts: Instead of simple strips, once you’re comfortable, you might try cutting squares or rectangles of varying sizes to create a different patchwork arrangement. Play with different block patterns like half-square triangles or flying geese if you’re feeling adventurous.
- Embellishments: Add small decorative touches like hand-stitched details, a strip of lace, or even small fabric yo-yos to one of the patches for an extra dimension.
- Size and Shape: Adjust the dimensions of your patchwork top to create pillows in different sizes – from small accent pillows to large floor cushions. You could even adapt the pattern for a rectangular pillow.
- Backing Fabric: Choose a backing fabric that either complements the patchwork front or offers a subtle contrast. A solid color from your patchwork palette works beautifully.
Caring for Your Handmade Quilted Pillow
Once you’ve invested time and creativity into making your beautiful patchwork pillow, proper care will ensure it remains a cherished item for years to come. Since the pillow cover is typically removable (thanks to the envelope backing!), cleaning is straightforward:
- Remove the Insert: Always take out the pillow insert before washing the cover.
- Gentle Cycle Wash: Most quilting cottons can be machine washed. Use a gentle cycle with cold water and a mild detergent. This helps preserve the fabric colors and the integrity of your stitches.
- Air Dry or Low Heat: Tumble dry on a low heat setting, or even better, air dry the pillow cover by laying it flat or hanging it. High heat can cause shrinkage or fading. Once dry, you may give it a light press with an iron to smooth out any wrinkles.
- Spot Clean When Possible: For small spills or stains, try to spot clean with a damp cloth and mild soap to avoid a full wash, which can extend the life of your pillow.
- Avoid Harsh Chemicals: Do not use bleach or harsh cleaning agents, as these can damage the fabric and cause colors to bleed or fade.
This easy patchwork pillow project is a fantastic introduction to sewing and quilting, offering both a rewarding creative experience and a beautiful addition to your home. With clear instructions, a few basic materials, and a little patience, you can create a truly special item. Whether you’re looking to add a pop of color to your sofa, a cozy touch to your armchair, or a unique gift for a loved one, this beginner-friendly quilted pillow project is an absolute winner. So, gather your fabric scraps, fire up your sewing machine, and get ready to stitch some magic into your home decor!