
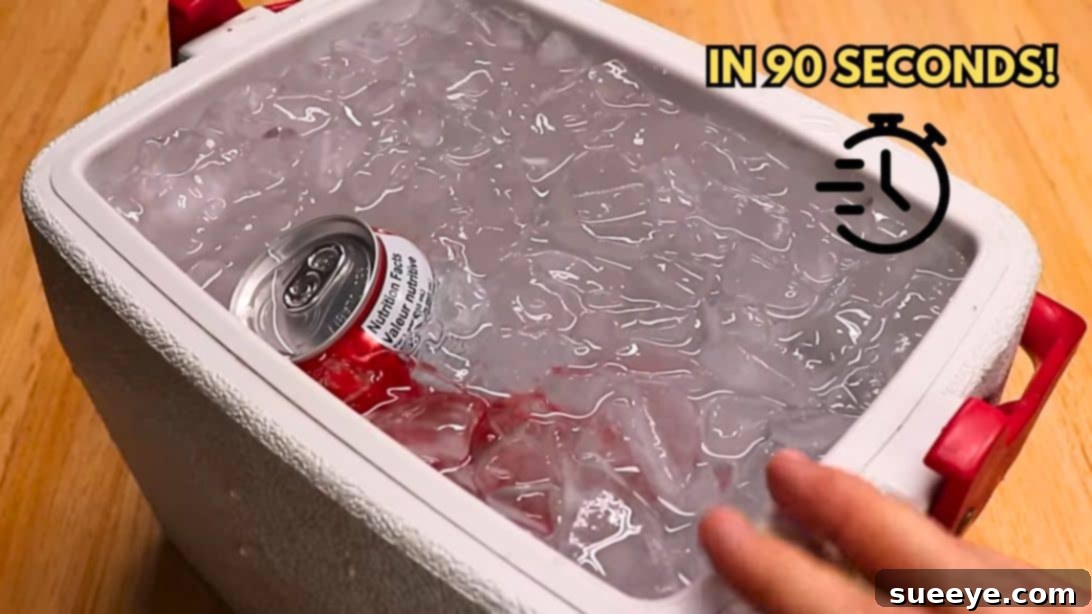
Chill Drinks in 90 Seconds: The Ultimate DIY Beverage Cooling Hack
Imagine this scenario: Guests are arriving in mere minutes, the sun is blazing, and you suddenly realize your beverages are disappointingly warm. Panic sets in, but what if there was a secret weapon, a game-changing hack to rescue your party? Look no further! This article will introduce you to a revolutionary method to chill any canned beverage in an astonishing 90 seconds, a technique popularized by the ingenious DIY expert, Chris Notap.
For many, the idea of chilling a drink from room temperature to perfectly crisp in less than two minutes sounds like science fiction. Initially, skepticism is a natural reaction. However, once you witness this method in action and understand the simple science behind it, you’ll be an instant convert. This isn’t just a party saver; it’s a fundamental shift in how you’ll approach last-minute beverage preparation, ensuring you’re always ready to serve refreshingly cold drinks, even when you’ve completely forgotten to chill them hours beforehand.
RELATED: How to Chill Wine with Frozen Grapes
The Science Behind the 90-Second Chill
So, how does this seemingly impossible feat work? The magic lies in a principle of physics: convection, coupled with increased heat transfer efficiency. When you place a warm can in a bath of ice water, heat naturally begins to transfer from the warmer can to the colder water and ice. However, this process is relatively slow if the can is stationary.
By rapidly spinning the can within the ice water, you dramatically accelerate this heat transfer. The spinning motion constantly forces the warmer liquid inside the can into contact with the colder inner surface of the can. Simultaneously, on the outside, it continuously brings fresh, cold ice water into contact with the can’s exterior. This continuous mixing (convection) both inside and outside the can ensures that temperature gradients are quickly minimized, allowing heat to escape the beverage at an incredibly rapid rate. The result? A perfectly chilled drink in a fraction of the time it would take in a refrigerator or a static ice bath.
What You Need: Simple Tools for an Extraordinary Hack
One of the most appealing aspects of this hack is that you don’t need any specialized, expensive equipment. In fact, the primary tool might surprise you: a common household drill! Yes, you read that correctly. But fear not, you won’t be drilling holes into your precious beverages. Instead, the drill will be ingeniously repurposed to provide the rapid rotation necessary for quick cooling. This innovative setup is not only highly effective but also an excellent conversation starter at any gathering.
Here’s another essential tip for keeping things cool: How to Make Ice Last Longer in Your Cooler
Gathering Your Materials:
To construct your very own 90-second beverage chiller, you’ll need a few readily available items. The precise specifications are crucial for optimal performance, so pay close attention:
- Powerade Bottle (approx. 7 3/4″ tall): The specific design of a Powerade bottle, particularly its height and the presence of three small bumps on its side, along with a flat bottle cap, is ideal for creating a stable and effective spinning mechanism. Its dimensions perfectly accommodate a standard beverage can.
- 1/4″ x 1 1/2″ Bolt: This bolt will serve as the axle for spinning your beverage. Its length and diameter are important for fitting securely into the drill chuck and allowing space for the washers and nut.
- Two Washers: Washers provide a smooth surface for the bolt against the bottle cap, preventing friction and ensuring a secure, tight fit that won’t compromise the spinning mechanism.
- Nut: The nut will secure the bolt and washers onto the bottle cap, creating a fixed attachment point for the drill.
- Blade/Utility Knife: Essential for precisely cutting the plastic bottle to create the container for your beverage can.
- Ice: The colder, the better! Plenty of ice is crucial for absorbing the heat from your beverage.
- Cooler: A container large enough to hold your ice and water, allowing for full immersion of the beverage can and the spinning apparatus.
- Drill (Cordless or Corded): A standard power drill is required. Ensure it has a variable speed trigger or multiple speed settings, as you’ll need to control the rotation.
Note: The bottle choice is specific. Look for a bottle that is approximately 7 3/4 inches tall, typically features three small bumps on its side, and most importantly, has a flat bottle cap. These characteristics contribute to the stability and functionality of the chilling device.
Step-by-Step Guide: How to Construct and Use Your 90-Second Beverage Chiller
Building this device is straightforward and requires minimal DIY experience. Follow these steps carefully to ensure a safe and effective chiller.
Step 1: Prepare the Bottle Cap
Begin by taking the flat bottle cap from your Powerade bottle. Using a drill, carefully create a 1/4″ hole directly in the center of the cap. Precision here is key; a centered hole will ensure balanced spinning and prevent wobbling when the drill is activated.
Step 2: Assemble the Bolt Mechanism
Once the hole is drilled, insert one washer onto the 1/4″ x 1 1/2″ bolt. Then, push the bolt (with the washer) through the drilled hole in the bottle cap from the inside. On the exterior side of the cap, attach the second washer, and finally, secure everything tightly with the nut. This assembly creates a stable spindle that your drill will grip.
Step 3: Cut the Bottle
Take the Powerade bottle and, using a sharp blade or utility knife, carefully cut it horizontally all the way around. The ideal cutting point is between the letters “D” and “E” of the “POWERADE” label on the bottle. This cut will separate the top half of the bottle, which will serve as the housing for your beverage can.
Step 4: Create Drainage Holes
With the top half of the bottle now cut, drill two large holes on opposite sides near the base of this cut section. These holes are crucial for allowing water to flow freely around the beverage can, maximizing the efficiency of the chilling process and facilitating easy drainage later.
Step 5: Attach to the Drill
Now, take your power drill. Insert the head of the bolt (the part extending from the bottle cap assembly) into the chuck of your drill. Tighten the chuck securely around the bolt head. Ensure it’s firmly attached and centered to prevent any wobbling during operation.
Step 6: Insert the Beverage Can
Carefully push the beverage can you wish to chill into the inverted Powerade bottle piece (the top half you cut earlier). Make sure the can’s tab is facing downwards. This orientation helps to secure the can and provides better stability for spinning.
Step 7: Prepare the Cooler
Fill your cooler with a generous amount of ice. The more ice, the colder the water bath will be, leading to faster chilling. Once the ice is in place, add enough cold water to the cooler to create an ice-water slush. This mixture ensures maximum contact and heat transfer.
Step 8: The 90-Second Chill!
Before you begin, ensure your drill is set to a low speed, or be prepared to use a gentle trigger pull initially. This is important for smooth immersion. Carefully dip the entire can (still housed in the plastic bottle) into the ice water. Once fully submerged, steadily increase the drill speed to full power on its low-speed setting. Keep the can spinning in the ice water for precisely 90 seconds. Maintain a firm grip on the drill.
Step 9: Retrieve Your Perfectly Chilled Beverage
After 90 seconds, turn off the drill and carefully lift the entire apparatus from the cooler. Tilt the bottle to drain any water that might have entered the cut-off section. Then, simply remove your beverage can from the plastic housing. You will be amazed to find it perfectly chilled and ready to enjoy! No mess, no fuss, just an incredibly cold drink.
Safety First: Important Considerations
While this hack is simple and effective, safety should always be your top priority. You are working with a power tool and water, so caution is advised:
- Eye Protection: Always wear safety glasses when drilling plastic. Small shards can fly, and protecting your eyes is paramount.
- Secure Connections: Ensure the bolt is tightly secured in the bottle cap and the drill chuck. Any looseness can lead to instability, splashing, or even parts flying off.
- Electrical Safety: If using a corded drill, be extremely careful around water. Ensure your hands are dry and that the power cord is clear of any water. Ideally, use a cordless drill to minimize electrical risks.
- Stable Grip: Maintain a firm and controlled grip on the drill during the entire 90-second chilling process.
- Blade Safety: Exercise extreme caution when cutting the plastic bottle with a utility knife or blade. Always cut away from your body and use a stable surface.
- Beverage Integrity: Rest assured, the spinning will not cause your carbonated beverages to explode or become excessively foamy when opened. The can is sealed, and the rotation primarily facilitates heat exchange, not internal pressure changes.
Why This Method Stands Out
In a world of quick fixes, Chris Notap’s 90-second beverage chiller truly shines. Unlike other methods that might involve salt baths (which can get messy), specialized chilling sleeves (which require pre-cooling), or simply waiting (which defeats the purpose of “quick”), this drill-powered hack offers an unparalleled combination of speed, simplicity, and effectiveness. It transforms a common household tool into a powerful cooling device, making you the hero of any unexpected gathering or impromptu refreshment need.
This technique is not just about convenience; it’s about empowerment. It gives you the ability to effortlessly overcome one of the most common party dilemmas. So, the next time you find yourself in need of an ice-cold drink, remember this ingenious hack. It’s a testament to creative problem-solving and a surefire way to impress your friends and family with your DIY prowess.
Go ahead, give it a try! You’ll wonder how you ever managed without this incredible 90-second chilling solution.