
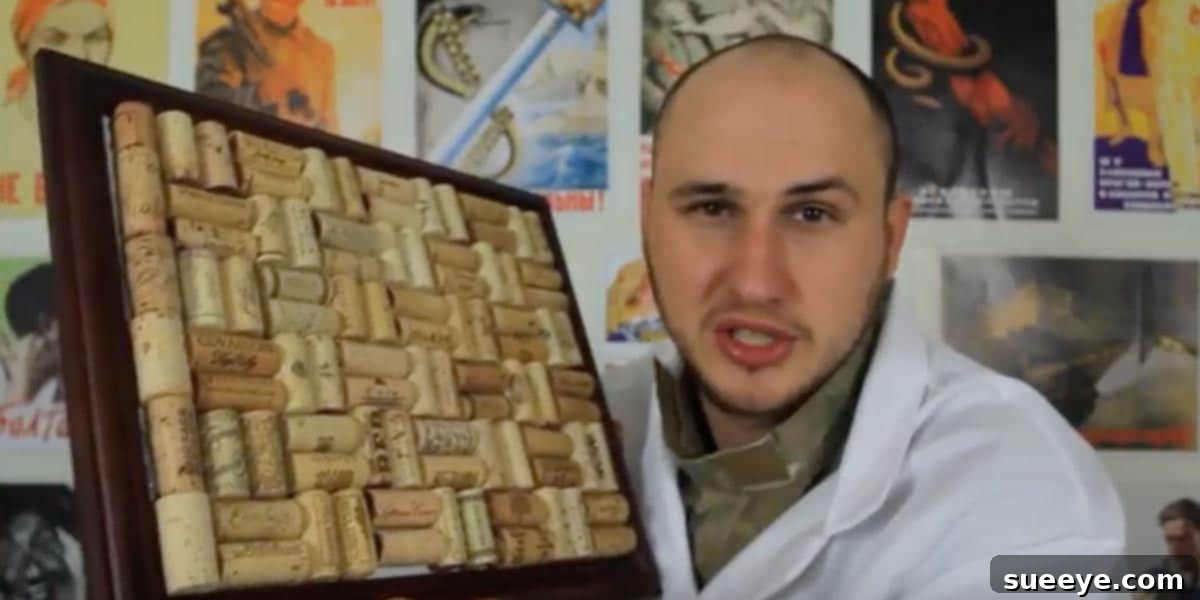
Craft Your Own Unique Wine Cork Board: An Eco-Friendly & Stylish DIY Project
Are you searching for a creative, budget-friendly, and eco-conscious way to organize your notes, display cherished memories, or simply add a touch of rustic charm to your home? Look no further than the remarkable DIY wine cork board project! Inspired by ingenious creators and a passion for upcycling, this craft transforms discarded wine corks into a highly functional and visually appealing home accessory. It’s an ideal project for wine lovers, craft enthusiasts, or anyone seeking a unique alternative to generic cork boards that often lack personality.
Why a DIY Wine Cork Board is a Must-Have for Your Home
Beyond its charming aesthetic, a handmade wine cork board offers a multitude of benefits, making it an excellent addition to any living space, kitchen, or office:
- Sustainable & Eco-Friendly: By repurposing wine corks, you’re actively contributing to environmental sustainability. You’re giving new life to materials that would otherwise end up in landfills, transforming waste into a beautiful and useful object. This small act of upcycling makes a positive impact on our planet.
- Incredibly Affordable: The primary materials – wine corks and a frame – can often be acquired for free or very little cost. If you’re a wine drinker, you’re already collecting the main component! Otherwise, friends, family, local restaurants, or even online communities are great sources for collecting corks. Frames can be found for mere dollars at thrift stores, dollar stores, or garage sales, or simply repurposed from old picture frames you already own. This project proves that stunning home decor doesn’t have to break the bank.
- Uniquely Yours: Unlike mass-produced items, your wine cork board will possess a distinct character. The inherent variety in cork colors, sizes, and even original winery stamps ensures that no two boards are exactly alike. This allows for immense personalization, reflecting your individual style, creativity, and even your wine preferences!
- Versatile Functionality: While perfect for pinning up important notes, receipts, and those indispensable Post-it reminders (a lifesaver for those of us who tend to forget things!), its utility extends far beyond. Use it to display postcards, small photos, greeting cards, lightweight jewelry, or even small craft samples. It can serve as a practical memo center in the kitchen, an inspirational mood board in your home office, or a stylish piece of wall art in your living room. Its robust surface holds pins securely, making it superior to many flimsy traditional cork boards.
- Adds Rustic Elegance: The natural texture, warm tones, and unique markings of cork bring an organic, sophisticated, and earthy touch to any décor scheme. Whether your home style is rustic farmhouse, modern minimalist, or bohemian chic, a wine cork board seamlessly integrates and elevates the aesthetic.
- Perfect Handmade Gift: A DIY wine cork board makes a thoughtful and personal gift for housewarmings, birthdays, or holidays. It shows care, creativity, and a touch of environmental consciousness, making it far more special than a store-bought item.
Gathering Your Essential Materials for This Rewarding Project
Embarking on your wine cork board journey requires just a few key items. The beauty of this project lies in its simplicity and the readily available nature of its components. Here’s what you’ll need to get started:
1. Wine Corks: The Star of the Show
This is where the magic truly begins! You’ll need a collection of real, natural corks. Why natural? They offer the perfect texture for pins to penetrate easily and provide that authentic, rustic look that makes these boards so appealing. Avoid plastic or synthetic corks, even though they might come in interesting colors or designs. While these might have their own craft potential, they are not suitable for a functional pin board as pins simply won’t stick effectively or will bend. Start saving your corks, ask wine-loving friends, or even inquire at local wineries or restaurants; many are happy to offload their used corks, giving you a plentiful and free supply!
How Many Corks Will You Need? The number of corks required depends entirely on the size of your chosen frame and how tightly packed you want your board to be. A good rule of thumb is to collect more than you think you’ll need. It’s always better to have extra corks for selection and fitting, rather than running short mid-project. For a standard 8×10 inch frame, you might need approximately 50-70 corks, while a larger 16×20 inch frame could easily require 200-300 or more. Laying them out dry in your frame beforehand can give you a more accurate count and help you plan your design.
2. A Suitable Frame: Your Creative Canvas
The frame provides the essential structure and defines the dimensions of your cork board. The possibilities here are endless, allowing for great personalization:
- Dollar Stores & Thrift Shops: These are fantastic treasure troves for inexpensive frames in various sizes and styles. Look for sturdy frames that can comfortably hold the weight of the corks once they are glued in.
- Garage Sales & Flea Markets: Often offer unique, vintage frames that can add significant character and a story to your project, giving it a charming, aged look.
- Repurpose Old Frames: Do you have an old picture frame lying around that you no longer use? Give it a new life and a fresh purpose!
- Types of Frames: Wooden frames are generally easiest to work with and modify, but metal or sturdy plastic frames can also be adapted. The key is to ensure the frame has a sufficient lip or depth to contain the corks, preventing them from protruding too far or falling out.
Before you begin gluing, remember to remove any existing glass, backing, or matting from the frame. You’ll likely need a piece of sturdy cardboard, foam core, or thin plywood to serve as a new, solid backing for the corks, which can be cut to fit the frame opening perfectly.
3. Hot Glue Gun & Glue Sticks: The Adhesive Powerhouse
A hot glue gun is your absolute best friend for this project. It provides a quick, strong, and reliable bond that holds the corks securely in place without much waiting time. Ensure you have plenty of hot glue sticks on hand, as you’ll be doing a lot of gluing to cover the entire surface! If you don’t already own one, hot glue guns are relatively inexpensive and an essential, versatile tool for a multitude of DIY crafts.
4. Optional Tools & Materials: For Finesse and Customization
- Craft Knife or Utility Blade: Extremely useful for cutting corks to fit snugly, especially along the frame edges or in awkward gaps. Always use a cutting mat underneath for safety and to protect your work surface.
- Ruler & Pencil: For measuring and marking, particularly if you plan a precise pattern or need to cut your backing material accurately.
- Paint & Brushes: If you wish to paint or distress your frame to match your decor or achieve a specific aesthetic.
- Fabric or Decorative Paper: To line the back of the frame before gluing corks. This can add an extra pop of color or a subtle pattern that peeks through any tiny gaps between the corks.
- Sandpaper: To smooth any rough edges on a wooden frame, creating a polished finish.
- Hanging Hardware: If your chosen frame doesn’t already have suitable hardware for wall mounting, you’ll need picture wire, D-rings, or sawtooth hangers.
Step-by-Step Guide to Crafting Your Personalized Wine Cork Board
The process of assembling your wine cork board is incredibly satisfying. While it may seem daunting at first glance, the steps are straightforward and allow for plenty of creative freedom and personal touches.
Step 1: Prepare Your Frame and Workspace
Begin by thoroughly cleaning your chosen frame. If you plan to paint it, now is the ideal time to do so. Ensure it’s completely dry before proceeding with the next steps. Remove all existing components such as glass, the original backing, and any hanging hardware that might get in the way. Cut a piece of sturdy cardboard, foam core, or thin plywood to fit snugly inside the frame opening. This piece will serve as the base for your corks and provide crucial structural integrity to your finished board. If you desire a colored background to subtly show through any small gaps between corks, you can cover this backing with a piece of fabric or decorative paper before securing it into the frame.
Step 2: Dry-Fit Your Corks – Planning Your Layout (The Creative Heart)
This is arguably the most crucial and creative step in the entire process. Before applying any glue, arrange your corks within the frame. This “dry run” allows you to experiment with different patterns, observe how the varying cork sizes interact, and ensures you have enough corks to fill the space effectively. Some popular layout options to consider include:
- Horizontal/Vertical Rows: A classic, organized look. You can alternate the orientation of corks in each row (e.g., all horizontal in one row, all vertical in the next) for added visual interest.
- Herringbone Pattern: Creates a sophisticated, dynamic design. This pattern might require carefully cutting some corks to fit the precise angles, but the result is stunning.
- Random/Organic: A more free-flowing and natural approach, simply filling the space as you go. This often works exceptionally well when you have a wide variety of cork sizes and shapes, embracing their unique irregularities.
- Framing the Edge: A common and highly recommended starting point is to lay a single row of corks all the way around the inside perimeter of the frame. This creates a neat, professional-looking border and provides a solid foundation for the inner corks.
As you arrange, you’ll inevitably notice that corks vary in size, length, and shape. Try to group corks of similar dimensions together when working in blocks or rows for a more uniform appearance. Don’t be afraid to use your craft knife to cut some corks (lengthwise or crosswise) to fill awkward gaps, especially along the edges or in corners. Precision in fitting will result in a denser, more professional-looking board with minimal gaps.
Step 3: Secure Your Corks with Hot Glue
Once you’re completely satisfied with your dry-fit arrangement, it’s time to make it permanent with glue! Work in small sections to prevent the hot glue from drying before you can place the corks. For each individual cork:
- Apply a generous amount of hot glue to the flat back of the cork, where it will meet your backing board.
- Immediately press the cork firmly into its pre-planned position.
- For added security and stability, also apply a bead of hot glue along the sides of the corks where they touch neighboring corks. This crucial step creates a strong, interlocking structure, ensuring that your corks remain firmly in place even after repeated pinning.
Continue this process systematically, gluing your corks into position, following your pre-planned layout from your dry-fit. Be patient and exercise caution, as hot glue can be very hot and cause burns. Ensure each cork is firmly set and bonded before moving on to the next one. The ultimate goal is to create a solid, stable surface where pins can be inserted without dislodging the corks or causing the board to flex.
Step 4: Finishing Touches and Display
Once all your corks are securely glued in place, allow the entire board to cool completely and the glue to fully set – this typically takes about 30 minutes to an hour, depending on the amount of glue used and ambient temperature. Inspect your creation for any loose corks (though if you glued well, there shouldn’t be any!) or visible hot glue strings; these can be carefully peeled away for a cleaner finish. If your frame didn’t come with suitable hanging hardware, now is the time to attach it securely to the back of the frame, ensuring it can support the weight of the finished board. Choose a prominent and practical location in your home or office to display your new, unique wine cork board. Pin up your first Post-it note, a favorite photo, or an inspiring quote, and take a moment to admire your ingenious handiwork!
Creative Variations & Personalization Ideas for Your Cork Board
Your finished wine cork board is a blank canvas for further creativity and personalization. Here are some ideas to make it even more uniquely yours:
- Mixed Media: Incorporate other small natural elements like carefully cleaned bottle caps (not for pinning, but for decorative accents), pebbles, or small wooden beads into your cork arrangement for varied textures.
- Champagne Corks: Use a few larger champagne corks for a varied texture, perhaps strategically placed in the corners or as a central focal point to break up the pattern.
- Painted Corks: For a pop of color or a thematic touch, paint some of the corks in an accent color or a gradient before gluing them down. This can create a specific pattern, monogram, or visual interest.
- Themed Boards: If the board is intended for a specific room, consider painting the frame or adding elements that tie into that room’s theme. For a kitchen, you might add small coffee beans or dried spices (ensure they are sealed to prevent pests) among the corks for a sensory element.
- Monograms or Shapes: If you have an abundant supply of corks, you could try arranging them to form a specific letter (like a family initial) or a simple shape in the center of the board.
- Fabric Backing: As mentioned, covering the backing board with a vibrant fabric or textured paper can add depth and a subtle background color that peeks through the corks.
Caring for Your Handmade Wine Cork Board
Maintaining your beautiful wine cork board is simple, ensuring it remains a functional and attractive piece for years to come. For routine dust, a light dusting with a soft brush, a quick pass with a handheld vacuum cleaner, or a gentle wipe with a microfiber cloth will suffice. If any corks ever come loose over time (which is rare with proper gluing), a quick reapplication of hot glue will secure them back into place. Avoid placing your board in direct, intense sunlight for extended periods, as this can, over many years, cause the corks to fade or become excessively dry, though cork is naturally quite resilient.
Embrace the Joy of DIY & Upcycling
Creating your own wine cork board is more than just a craft project; it’s a rewarding opportunity to embrace sustainable living, unleash your creativity, and make a truly personal statement in your home. The immense satisfaction of transforming simple, discarded items into something beautiful, functional, and environmentally friendly is unparalleled. So, start collecting those corks, find that perfect frame, and embark on this incredibly rewarding DIY journey. You’ll not only gain a practical and stylish memo board but also a unique conversation piece that tells a story of ingenuity, resourcefulness, and environmental consciousness. Happy crafting!