
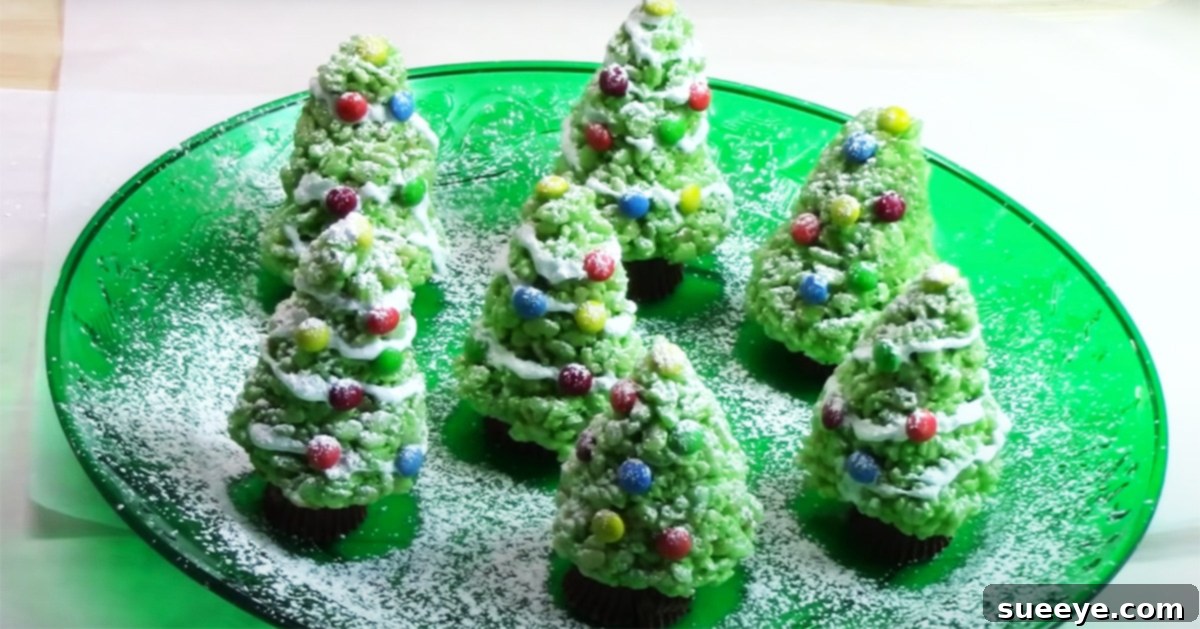
As the festive season approaches, the quest for delightful, easy-to-make treats intensifies. Forget complicated baking projects; this year, let’s rediscover the joy of simplicity with a magical twist. We’re talking about transforming the classic Rice Krispies treat into enchanting Christmas Trees – a holiday dessert that’s not just delicious but also a joy to create. These aren’t just any Rice Krispies treats; they are festive, fun, and designed to bring smiles, making them absolutely perfect for gathering family and friends to usher in the holiday spirit.
Inspired by the brilliant creativity of Catherine’s Plates on YouTube, this recipe takes a beloved childhood favorite and infuses it with irresistible holiday charm. Imagine the delightful crunch of Rice Krispies combined with the sweet gooeyness of marshmallows, all shaped into miniature Christmas trees and adorned with your favorite candies. It’s a brilliant deviation from traditional gingerbread houses, offering an equally engaging and far simpler decorating experience. Plus, the clever “tree trunk” concept adds an extra layer of charm that will impress your holiday guests.
Whether you’re looking for a quick dessert for a holiday party, a fun activity for the kids, or a unique edible gift, these Rice Krispies Christmas Trees tick all the boxes. They are no-bake, require minimal ingredients, and offer endless possibilities for personalization. Let’s dive into creating these irresistible festive treats that are sure to become a cherished part of your holiday traditions.
Ingredients: Crafting Your Festive Forest
Gathering the right ingredients is the first step towards creating these adorable and delicious holiday treats. The beauty of this recipe lies in its simplicity, requiring just a handful of staple items that come together to form a festive masterpiece. Here’s what you’ll need to create your batch of Rice Krispies Christmas Trees:
- 3 tbsp unsalted butter
- 10 oz mini marshmallows (approximately 5 ½ cups)
- 6 cups Rice Krispies cereal
- 2-3 tbsp green food coloring (gel food coloring provides a more vibrant hue)
- Mini M&Ms (for colorful ornaments)
- Mini Reese’s peanut butter cups (for edible tree trunks)
- 2 tbsp powdered sugar (for dusting/shaping assistance)
- 1 tube white icing (for decorative snow or garland)
Each ingredient plays a crucial role: the butter and marshmallows create the sticky, sweet base; the Rice Krispies provide that signature satisfying crunch; and the food coloring, candies, and icing transform them into recognizable holiday icons. Feel free to adjust the amount of food coloring to achieve your desired shade of green, from a subtle mint to a deep forest green, reflecting the diverse beauty of nature’s evergreens.
Directions: Bringing Your Christmas Trees to Life
The process of making these Rice Krispies Christmas Trees is as enjoyable as eating them. It’s a straightforward, no-bake method that is perfect for involving everyone in the kitchen. Follow these detailed steps to ensure your festive treats turn out perfectly:
Step 1: Melt the Butter and Marshmallows
Begin by melting 3 tablespoons of butter in a large, sturdy pot over medium heat. Once the butter has fully melted and is bubbling slightly, reduce the heat to low. This is crucial for preventing the marshmallows from burning and sticking to the pot. Add the entire 10-ounce bag of mini marshmallows to the pot. Stir continuously and gently with a spatula or wooden spoon until the marshmallows are completely melted and smooth. This constant stirring ensures even melting and prevents scorching. Once a smooth, gooey mixture forms, immediately remove the pot from the heat.
Step 2: Incorporate the Green Food Coloring
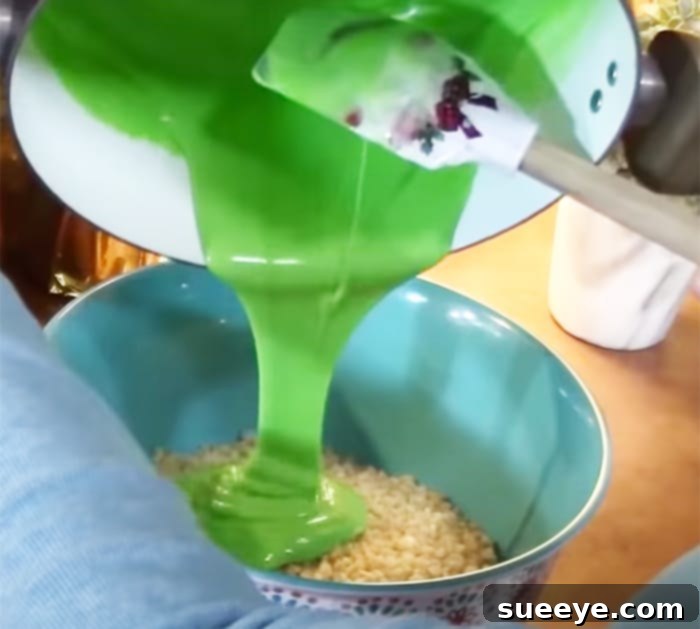
While the marshmallow mixture is still warm and pliable, add 2 to 3 tablespoons of green food coloring. Gel food coloring is highly recommended here, as it provides a richer, more vibrant green without adding excessive liquid, which can alter the texture of your treats. Stir the food coloring thoroughly into the melted marshmallow mixture until the color is consistent throughout. If you desire a deeper green, add more coloring a little at a time until you achieve your preferred festive shade. Work quickly, as the mixture will begin to cool and set.
Step 3: Combine with Rice Krispies Cereal
In a very large bowl, pour the 6 cups of Rice Krispies cereal. Then, carefully pour the warm, green marshmallow mixture over the cereal. Using a well-greased spatula or spoon, gently fold and stir the mixture until all the Rice Krispies are evenly coated with the sticky green marshmallow. It’s important to mix thoroughly but gently to avoid crushing the cereal. Ensure there are no dry spots left in the bowl, as this will affect the texture and ability to shape the treats.
Step 4: Shape Your Christmas Trees
Now comes the fun, hands-on part! Lightly butter your hands or spray them with non-stick cooking spray to prevent the sticky mixture from adhering. You can also lightly dust your hands with powdered sugar for the same effect. Take a handful of the Rice Krispies mixture and begin to form it into a cone shape, mimicking a Christmas tree. Ensure you create a flat, stable bottom so the trees can stand upright, and gently taper the top to a point. Place each shaped tree onto a baking sheet lined with parchment paper. It’s crucial to work relatively quickly during this step, as the mixture will become harder to mold as it cools and sets.
Step 5: Decorate Your Festive Creations
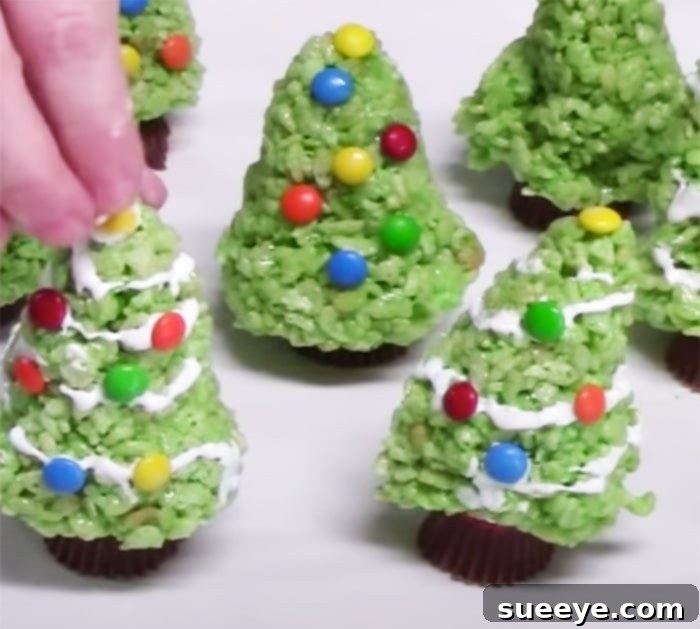
The decorating phase is where your creativity truly shines! Before the Rice Krispies mixture fully solidifies, start adding your chosen decorations. Press mini M&Ms gently into the green ‘tree’ as colorful ornaments. For the “tree trunk,” carefully press a mini Reese’s peanut butter cup into the flat base of each Rice Krispies tree. This not only adds a delicious peanut butter surprise but also provides a stable base and charming aesthetic. For additional flair, use the tube of white icing to create delicate garlands, snowy accents, or even a star on top. You can also sprinkle edible glitter or festive sprinkles for extra sparkle. Remember, there’s no right or wrong way to decorate; let your imagination be your guide!
For a comprehensive visual guide and additional insights, be sure to watch Catherine’s Plates full tutorial on YouTube. Her detailed instructions and tips will help you perfect your technique and ensure your Christmas trees are truly spectacular.
Why These Christmas Tree Treats Are a Must-Make This Holiday Season
These festive Rice Krispies Christmas Trees are more than just a dessert; they are an experience, a memory in the making, and a beacon of holiday cheer. There are numerous reasons why this recipe should be at the top of your holiday baking (or rather, no-baking) list:
- Effortlessly Festive: They instantly evoke the spirit of Christmas with their iconic shape and vibrant green color, transforming a simple treat into a show-stopping holiday centerpiece.
- No-Bake Wonder: For those who dread turning on the oven during busy holiday preparations, these treats are a dream come true. No baking means less fuss and more time for festive fun.
- Kid-Friendly Activity: The simple steps, especially the shaping and decorating, make this an ideal activity for children of all ages. It’s a wonderful way to engage them in holiday preparations and foster their creativity.
- Customizable Delights: The decorating possibilities are endless. Beyond M&Ms and Reese’s, you can use sprinkles, edible glitter, mini candy canes, or even small edible stars to personalize each tree.
- Perfect for Parties & Gifting: These treats are robust enough to transport to holiday gatherings and make charming homemade gifts for teachers, neighbors, and friends.
- Quick to Prepare: From start to finish, the entire process is relatively quick, allowing you to whip up a batch in under an hour, making them ideal for last-minute holiday dessert needs.
Essential Tips for Flawless Rice Krispies Christmas Trees
While the recipe is straightforward, a few insider tips can elevate your Rice Krispies Christmas Trees from good to absolutely perfect:
- Work Quickly: The marshmallow mixture sets relatively fast as it cools. Have all your ingredients measured and decorations ready before you start mixing to ensure you have enough time for shaping and decorating.
- Grease Your Hands (or Tools): This is perhaps the most important tip! Whether using butter, cooking spray, or powdered sugar, greasing your hands or spatulas will prevent the incredibly sticky mixture from turning into a frustrating mess.
- Even Melting: When melting marshmallows, keep the heat low and stir constantly to achieve a smooth, uniform consistency. Overheating can make them tough and less pliable.
- Vibrant Color: For the best green, opt for gel food coloring over liquid drops. Gel colors are more concentrated, producing a richer hue without thinning the mixture.
- Press Firmly (but Gently): When shaping, press the mixture firmly enough to hold its shape but gently enough not to crush the cereal. A delicate touch creates a more appealing texture.
- Cool Before Serving: Allow your decorated trees to cool completely at room temperature before handling or serving. This ensures they are fully set and hold their shape beautifully.
A Festive Family Activity for All Ages
One of the most heartwarming aspects of these Rice Krispies Christmas Trees is their potential to become a cherished family tradition. Involving everyone, from the youngest children to the grandparents, creates lasting memories and strengthens bonds. Young children can help by pressing on the M&Ms, while older kids can assist with shaping and more intricate icing designs. Adults can manage the melting and mixing, ensuring safety and precision. This collaborative effort transforms a simple recipe into a joyful, communal experience, embodying the true spirit of the holidays. It’s a wonderful opportunity to laugh, create, and share in the excitement of the season.
Serving and Storage for Maximum Enjoyment
Once your beautiful Rice Krispies Christmas Trees are complete, how do you best enjoy and preserve them? For serving, arrange them on a festive platter, perhaps with a dusting of extra powdered sugar to mimic snow. They make an excellent addition to any dessert table, bringing a pop of color and whimsy. For gifting, place individual trees in clear cellophane bags tied with a festive ribbon.
To store, place the completely cooled treats in an airtight container at room temperature. Layer them with parchment paper to prevent sticking. They will remain fresh and delicious for up to 3-4 days. While they can be refrigerated, Rice Krispies treats tend to harden when cold, so bringing them back to room temperature before serving is recommended for the best texture. Freezing is generally not advised as it can alter the texture and make them a bit crumbly upon thawing.
The Magic of Homemade Holiday Treats
There’s an undeniable magic that comes with homemade holiday treats. They carry the warmth of your kitchen, the care of your hands, and the love poured into their creation. These Rice Krispies Christmas Trees perfectly embody that magic. They are simple yet spectacular, offering a delightful crunch, a sweet chew, and a visual feast that perfectly captures the wonder of Christmas. They are not just food; they are an invitation to celebrate, to share, and to create joy during the most wonderful time of the year.
This Rice Krispies recipe is absolutely something I need to add to my Christmas party repertoire. It’s a fantastic way to bond with loved ones, working together to create something both beautiful and delicious. The overall look of these treats truly screams holiday cheer, and they are as delightful to taste as they are to behold. Get ready to spread some festive joy, one delicious Rice Krispies Christmas Tree at a time!