
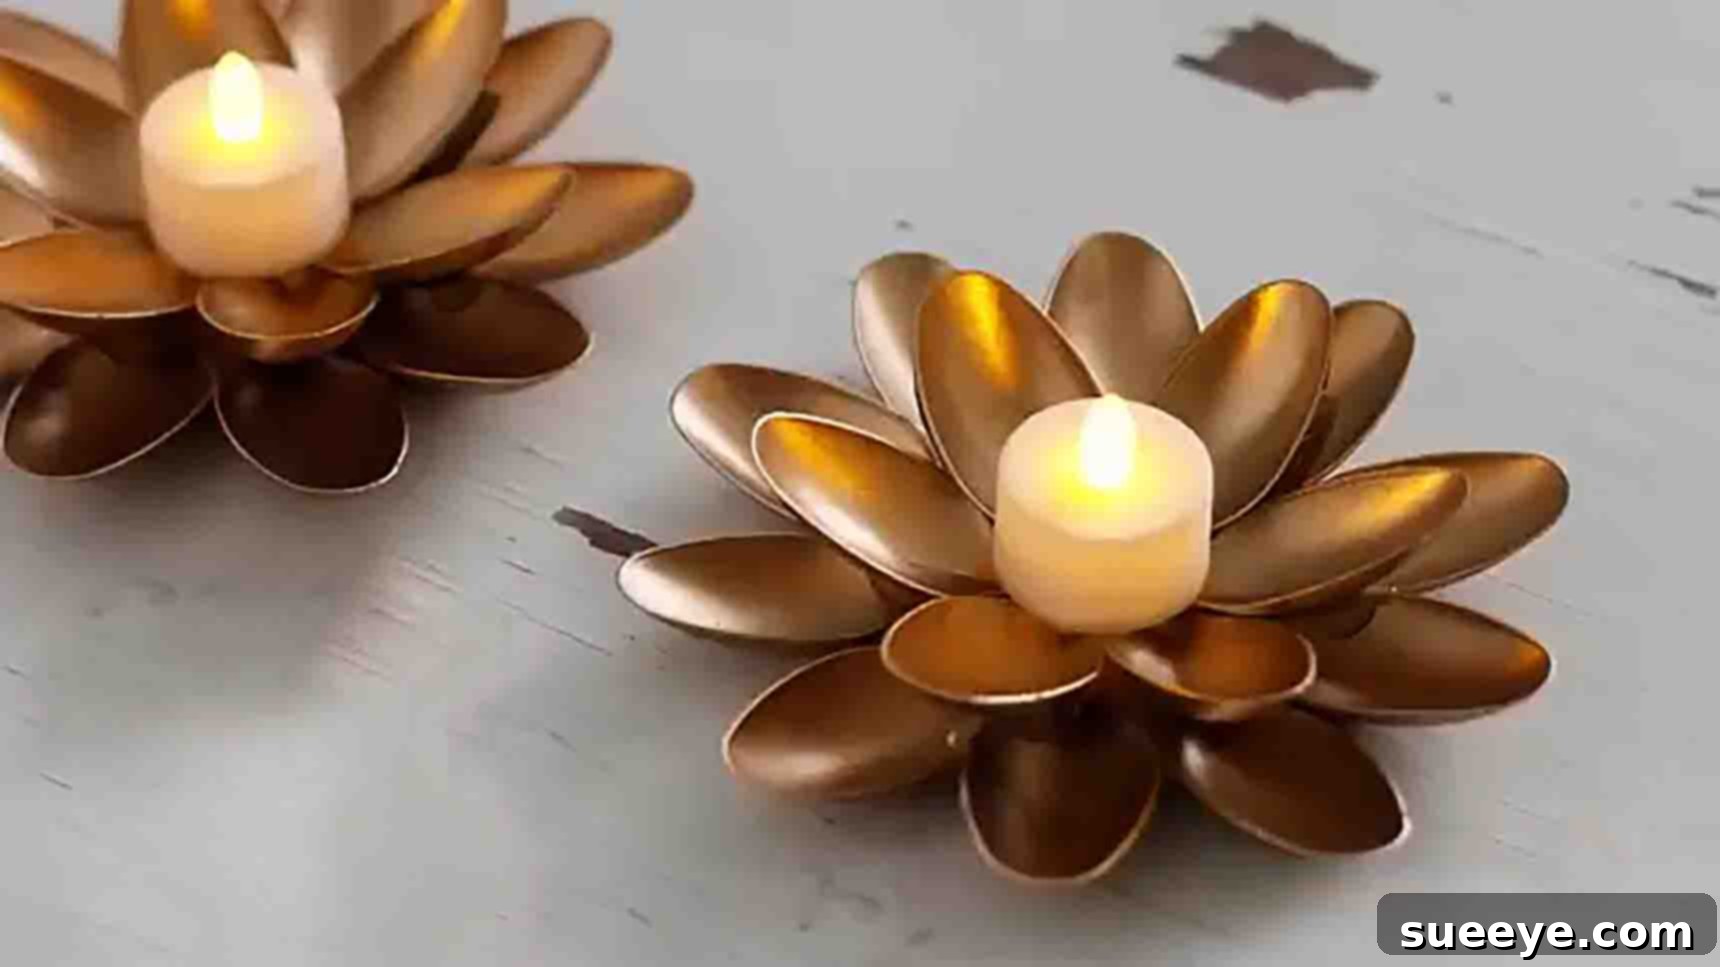
Transform Plastic Spoons into Stunning DIY Candle Holders: An Eco-Friendly Craft Tutorial
As an avid collector of candles, I’m always searching for unique and beautiful ways to display them. When I first discovered the brilliant concept of a DIY candle holder crafted from recycled plastic spoons, shared by Ventuno Art on YouTube, I knew I had to try it immediately. This project quickly became one of my absolute favorites, blending simplicity with incredible charm. Not only is it incredibly easy to execute, but it also offers a fantastic opportunity to repurpose those plastic spoons that might otherwise end up in a landfill. All you need are a handful of plastic spoons and some basic crafting supplies, and you’re well on your way to creating something truly special.
I’ve crafted numerous versions of these delightful candle holders, strategically placing them around my home to accentuate my candle collection. The soft glow of a tea light nestled within these spoon-petal designs creates a warm, inviting ambiance that truly elevates any space. Beyond personal decor, these handmade candle holders make exceptional, thoughtful gifts for friends and family. Each one is a testament to creativity and conscious recycling, making them even more meaningful. If you’re looking for an engaging weekend activity, a personalized present, or simply a rewarding recycling project, this DIY spoon candle holder is an absolute must-try. Join me as we dive into the simple steps to create these captivating pieces. A special thank you to Ventuno Art for inspiring this wonderful craft; be sure to explore their channel for more innovative DIY ideas.
Why This Eco-Friendly DIY Project is a Must-Try
In an age where sustainability is more important than ever, finding creative ways to reduce waste is incredibly rewarding. This DIY plastic spoon candle holder project stands out for several compelling reasons. Firstly, it champions the concept of upcycling, transforming discarded plastic spoons into functional and beautiful home decor. This not only diverts plastic from landfills but also encourages a mindful approach to consumption and waste. Secondly, the project is remarkably budget-friendly. Plastic spoons are often readily available, either as leftovers from parties or purchased at a minimal cost. Coupled with basic craft supplies like spray paint and hot glue, the total investment is very low, making it accessible to almost anyone.
Beyond its environmental and economic benefits, this craft offers immense personal satisfaction. It’s a therapeutic activity that allows for creative expression, letting you choose colors and finishes that perfectly match your personal style or home decor. The process is straightforward enough for beginners, yet the results are impressive, looking far more complex than the effort required. Whether you’re a seasoned crafter or just starting, the joy of creating something beautiful with your own hands, especially from repurposed materials, is unparalleled. This project isn’t just about making a candle holder; it’s about embracing creativity, sustainability, and the simple pleasure of crafting.
Materials You’ll Need:
Gathering your materials before you begin will ensure a smooth and enjoyable crafting experience. Most of these items are likely already in your home or can be easily found at any craft store or even a dollar store.
- Plastic Spoons: The star of our project! You’ll need a good number of these, depending on the size of your desired candle holder. Standard dinner-sized spoons work best, but you can experiment with smaller ones for a different texture. Aim for around 50-100 spoons for a medium-sized holder.
- Spray Paint (in any color you prefer): This is where you infuse your personality into the project. Choose a color that complements your home decor, or go bold with a vibrant hue. Metallic finishes, pastels, or classic white and black all create stunning effects. Ensure you choose a paint suitable for plastic.
- Pair of Scissors: A sturdy pair of crafting scissors will make quick work of cutting off the spoon heads. Safety first – ensure your scissors are sharp enough to cut plastic cleanly.
- Circle Board (or sturdy cardboard): This will serve as the base for your candle holder. You can use a pre-cut wooden circle, a thick piece of cardboard, or even the lid of a plastic container. The size of your board will determine the overall diameter of your finished holder.
- Hot Glue Gun and Glue Sticks: An essential tool for quickly and securely attaching the spoon heads. Always use a hot glue gun with caution, keeping fingers clear of the hot tip and melted glue.
- Tea Light Candles: The perfect companion for your finished holder. Tea lights are small, self-contained candles that fit perfectly in the center, providing a soft, ambient glow. Battery-operated LED tea lights are a safe alternative, especially if you have children or pets.
Step-by-Step Directions to Craft Your Spoon Candle Holder:
Follow these detailed instructions to transform simple plastic spoons into a beautiful, decorative candle holder.
Step 1: Preparation and Painting Your Spoon Heads
Begin by carefully cutting off just the heads of all your plastic spoons. Hold the spoon firmly and snip just below the bowl, leaving a small stem if you prefer, or cutting as close to the head as possible for a cleaner edge. Take your time to ensure clean cuts, as this will affect the overall look of your finished piece. Once all your spoon heads are detached, it’s time to add some color. Lay the spoon heads out on a protected surface in a well-ventilated area, preferably outdoors. Spray paint the front and back of each spoon head with your chosen color. Apply several light, even coats rather than one thick coat to prevent drips and ensure full coverage. Allow each coat to dry completely before applying the next, and let the spoon heads dry thoroughly before moving to the next step. This usually takes a few hours, or even overnight, depending on the paint and humidity.
Step 2: Constructing the Outer Layer
With your painted spoon heads fully dry, it’s time for assembly. Heat up your hot glue gun. Take your circle board and begin attaching the spoon heads around its outer edge. Apply a small dab of hot glue to the underside of each spoon head’s cut edge and press it firmly onto the perimeter of the board. Position the spoon heads so they are slightly overlapping, creating a beautiful, petal-like effect. Ensure the spoons are facing outwards, creating a textured rim. Work your way around the entire circumference of the board, maintaining an even spacing and consistent angle for a polished look. This first layer establishes the foundational shape and volume of your candle holder.
Step 3: Building the Inner Layers and Completing the Coverage
Once the outer layer is complete, continue attaching spoon heads in concentric circles towards the center of the board. For each subsequent layer, glue the spoon heads slightly higher and closer to the center, overlapping the previous row. This layering technique is crucial for creating the beautiful, three-dimensional, floral-like appearance that defines this candle holder. Continue this process, filling the entire circle board until no part of the base is visible. The goal is to create a dense, continuous texture that mimics a blooming flower. Pay attention to how the spoons overlap to ensure a seamless and appealing aesthetic. Once the board is entirely covered, allow the hot glue to cool and set completely, ensuring all spoon heads are securely fastened.
Step 4: The Finishing Touch – Adding Your Tea Light
Once your DIY spoon candle holder is fully constructed and the glue has dried, it’s ready to be illuminated. Gently place a tea light candle in the very center of your newly crafted holder. Ensure the tea light sits securely and is stable. If you prefer, consider using battery-operated LED tea lights, especially for safety, as they eliminate the risk of open flames. You can make several of these candle holders in various colors or sizes to create a stunning display. Your personalized, eco-friendly DIY spoon candle holder is now finished and ready to cast a beautiful glow in your home. This project serves as a fantastic weekend activity, a unique gift, or a charming addition to your home decor, showcasing the beauty of upcycled materials.
Tips for Success and Creative Variations
To ensure your DIY spoon candle holder turns out perfectly, here are a few tips and ideas for customization:
- Safety First: When using a hot glue gun, always be mindful of the hot tip and melted glue. Supervise children closely if they are participating. If using real flame tea lights, never leave them unattended and place the holder on a heat-resistant surface away from flammable materials.
- Paint Application: For a truly professional finish, use painter’s tape to create patterns or sections on your spoon heads before spray painting. Consider using different colors for each layer of spoons to create an ombre effect or a vibrant multi-colored design.
- Spoon Size and Type: While standard plastic spoons are common, don’t hesitate to experiment with different sizes or even clear plastic spoons for a unique look. Clear spoons can be left unpainted or tinted with translucent spray paint for a stained-glass effect.
- Embellishments: Elevate your candle holder by adding extra decorative elements. You could glue small beads, glitter, or even tiny faux pearls to the tips of the spoon heads. A ribbon tied around the base or a felt pad underneath can add a nice touch.
- Base Alternatives: If a circular board isn’t available, consider using a sturdy CD or DVD for a smaller holder, or a square piece of cardboard for a geometric design. Just ensure the base is stable and strong enough to hold the spoons.
- Theme Customization: Adapt your candle holder for various seasons or holidays. Use gold or silver spoons for a festive look, red and green for Christmas, or pastels for Easter. The possibilities for personalization are endless!
Displaying Your Beautifully Upcycled Creation
Once your DIY spoon candle holder is complete, the fun continues with finding the perfect spot to display its unique charm. These versatile pieces can enhance almost any area of your home, adding a touch of handmade elegance and a warm, inviting glow. Place them as a stunning centerpiece on your dining table for special dinners or everyday meals, instantly elevating the ambiance. On a coffee table or side table in your living room, they serve as an intriguing conversation starter and a cozy focal point. Imagine the soft flicker of candlelight dancing off the painted spoon petals, creating beautiful patterns on nearby surfaces.
Beyond the main living spaces, consider placing your candle holders in a bedroom for a relaxing evening atmosphere, or in a bathroom to create a spa-like retreat. They can also add a welcoming touch to an entryway console table or even brighten up a bookshelf. For outdoor gatherings, if weather permits, these holders can beautifully adorn a patio table, though remember to use LED tea lights or ensure real flames are protected from wind and safely monitored. The beauty of this craft lies not only in its creation but also in its ability to transform and illuminate your personal spaces with a handmade, eco-conscious touch.
Embrace the Joy of Creative Recycling!
This DIY plastic spoon candle holder project is more than just a craft; it’s an invitation to explore your creativity while making a positive impact on the environment. By transforming everyday discarded items into something truly beautiful and functional, you’re embracing the spirit of upcycling and contributing to a more sustainable lifestyle. The process is simple, enjoyable, and yields a stunning piece of decor that you can proudly say you made yourself. Whether you’re looking to add a personalized touch to your home, create thoughtful gifts, or simply indulge in a relaxing and rewarding crafting session, this project offers it all. So, gather your spoons, unleash your imagination, and get ready to illuminate your world with these enchanting, handmade candle holders!